Home | Pics | Christine | Riding the Bullet | Data | History | Links | Wallpaper | Mailing List | '57 Resto | Email me | AIM me
|
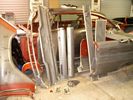
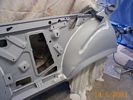
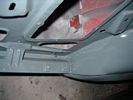
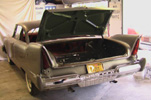
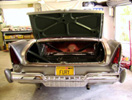
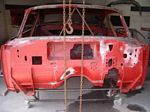
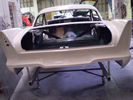
Progress of New Zealand's prize Plymouth '57 resto cont'd. With the beating of the panels completed, and weeks of panel alignment and door, hood, fender and trunk-lid gapping finished, it's time to remove all of the panels, and paint the reverse sides as a protection against future rust, prior to thoe panels being welded back onto the body forever. This includes both front fenders (de-seamed back to separate components, even bracing de-seamed, so that there are no cavities unpainted behind), the wiper screen panel, rocker panels, rear quarters, trunk floor, rear panel between tail-lights, rear panel below rear screen before trunk-lid, trunk floor outer panels where the trunk floor meets the rear quarters, rear panel reinforcement panel below panel between tail-lights, fuel filler tube outer, and trunk catch support panel. Everywhere these panels meet and cover the body, I took special care in preparing for paint, as if it were to be show quality paint, even though it will never be seen. First I killed any surface rust, then wire wheeled the bare metal back to shiny steel, wax and grease removed the entire area, then a quick Scotch-brite then on with the first coat of PPG DP 40 2 pack etch primer. This was allowed to dry and then I sanded this back. Next came the sealing of all the body joins/seams with a top quality seam sealer. This prevents water or moisture getting into all those little seams and causing future rust. Also it encourages the water to flow down to where it belongs-down the drain hole and out onto the road. It must have some effect on rattles too I guess. Through the inner rocker I installed a drain pipe so that the water can exit via a factory drain hole, instead of trickling along the inside of the rocker. Once the seam sealing was complete it was time for 2 coats of shiny 2 pack enamel, of the color that is found in the trunk area of these cars. I figured it would be a good time to also paint inside the trunk area, wheel-housings, trunk hinges/supports etc. Of course eventually most of this visible paint will be covered in under-seal. Where these panels meet the body, a strip of about an inch of bare metal was masked off prior to paint, so that the welding is successful metal to metal. To combat the problem of no paint in these small areas, a weldable copper paint is sprayed onto the bare metal first. (Welding is not successful where a heavy build-up of paint exists.)
All glass including screens and side windows are installed to test for fit. The stainless is installed in the screen rubbers to ensure good fit. The holes for the stainless, where metal was replaced, are re-drilled, then the side stainless is installed temporarily also. Even the door handles, locks and catches are installed to check for fit, as a safety measure.
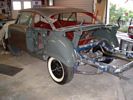
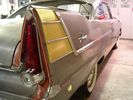
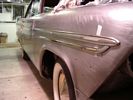
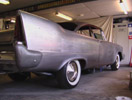
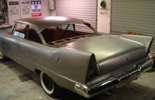
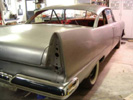
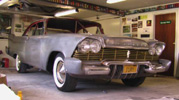
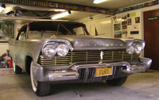
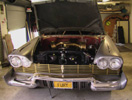
With all the panel repair work completed, and the panels completely painted on the reverse side as an aid against future rust, the car can finally be assembled and welded back together. A rust preventative copper paint is also sprayed onto all the exposed bare metal seams prior to assembly and welding. This paint keeps the moisture away from the bare metal seams, while allowing welding to take place. Amazingly, the car was reassembled in double quick time, and did not seem to suffer any ill effects from the heat of welding on the panels. The longest part of the job was in fitting up the front bumper correctly, so that all of the gaps looked mint, and everything lined up correctly. The product (Jenolite) that I had been wiping on the bare steel for the past 3 years was starting to wear thin in places, so I physically removed it, using grades of sandpaper ranging from 120 through to 320, and then finally scotchbrite, until the metal looked like shiny stainless steel. Again I assembled almost the entire car prior to paint, to make sure everything still fit correctly. If you think it is a shame to paint this car, when it looks so darn fine in bare metal- you are not the only one, but the show must go on.
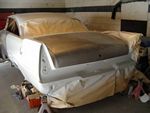
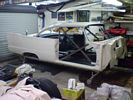
On January 29th 2005 the Fury was delivered to the car painter. A custom made trolley/cradle was fabricated so that the body could be worked on easily. One Saturday morning I went down to the painter's workshop and a bunch of us lifted the body off the frame, slid the chassis out from underneath and dropped the body back down onto the cradle. The chassis was then transported back home to the safety of my garage, away from the dust and overspray of a paint workshop. Each panel is prepared extensively and primed one panel at a time. The reason for this is that it takes so long for the preparation, that if you were to do the whole body preparation at once, then the first panel you worked on would need preparation again. All traces of any paint are removed, including all the red primer which had found it's way into the seams and tiny pits. Every spec must be removed, and the metal wire wheeled up to a highly polished finish. Then a series of stages of sanding, corrosion killer chemicals, and grease remover before a couple of thick coats of high build 2 pack etch primer onto the bare metal, one panel at a time. The reverse side of the panels were heated with a gas heater to bring them up to temperature prior to primer application. These procedures are the most important part of the paint job, and are very labor intensive and expensive.
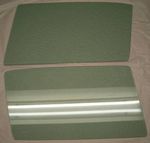
Because my Fury had been restored in the past, all the side glass windows had damage to them. Sanding scratches at the bottom of all 4 pieces where sandpaper had carelessly been rubbed up against the glass, vertical scratches where the glass had been carelessly installed allowing it to rub against the internal mechanism, and even orbital sanding machine circular scratches. A search for some new or even good used original side glass turned up nothing, so the decision was made to accurately reproduce it. The biggest problem with this was the recreation of the Solex Herculite date code stamp/bug located at the bottom of the glass. Michelle photographed the original bug, loaded it into the Mac computer and then spent an entire day manipulating and sharpening up this image, and changing the date codes to suit. The front and rear glass has different date codes, as is typical, depending on the assembly line stock on hand on the day of the car's final assembly. From this image, a set of film was processed, and from this film a screen was produced to enable the bug to be etched onto the new glass. New glass in the correct green tint was cut, the edges are all machine ground, the bugs etched on and then into the furnace for final toughening to industry standards. The end result is nothing short of perfect in every way.
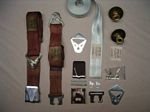
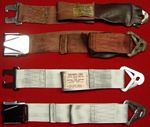
Years ago I had purchased some used red seatbelts of the correct Forward Look design. Check an accessories catalog of the era and you will see these rare seldom seen belts. The main buckle has a sort of Forward Look design inspired horizontal boomerang pattern to them. The old belts were in very poor condition. The metal parts were quite rusty and the chrome was quite pitted. I hand unpicked the old stitching and carefully took the old belts apart and had the metal parts re-zinc-plated and chrome plated as necessary. The original "BrownLine" manufacturers tag was scanned, a screen made and screen printed onto the correct colored silk ribbon. I sourced some silver webbing and the floor anchor eye bolts from Andover. Silver webbing used to be all that was available for seat belts for many years. A journey around town turned up many upholsterers who did not want to sew seatbelts up, but eventually I found a friendly old guy who did the job for me on the spot, using the correct silver thread, including sewing on the new manufacturer's tags.
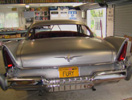
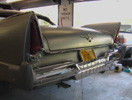
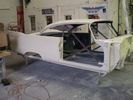
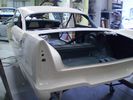
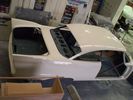
In November of 2004, I began searching for a suitably qualified car painter to take on the enviable task of putting their name to the paint on the magnificent glass like bodywork completed by bodyman Mike Wood. A painter who had been painting for 22 years was recommended to me, and he came round to my house and inspected the Fury in shiny bare steel, all gaps perfect, fully assembled by myself with glass in, door hardware on, bumpers and all trim installed. There was nothing to hide, just a complete car less the paint. He gave me a verbal quote to paint the car, and I gave him the job, on the strict understanding that I did not want my Fury to be one of those cars that sits in the back of a paint shop gathering dust while the painter works on the easy day to day insurance work. The price was discussed, the time it would take to complete was discussed, the quality was discussed, but most importantly, that if he took the job on, then he would work on it until completion and without delay. He turned out to be a halfwit who proceeded to ruin the bodywork. After he had the body for over a year, I removed it and took it to another paint shop. There, in my own time, I removed all of the first painters work, back down to bare steel again, and had to employ Mike to come down to that paint shop and repair damage to the panels caused by the first painter, to get them mint again. There it sat in THAT paint shop for a further 9 months, with little progress. It was third time lucky for the Fury, when Steve Levine of Imagin-airing took on the job of painting the Fury. Itís third trip on the back of a truck to a painter was successful. Steve, Aaron, Don and the team appreciated what I was trying to achieve, and delivered the right results. The Fury was painted completely disassembled as a shell and a whole bunch of separate panels. (The lighting on the day has made a yellow tint, which it is not in the flesh.) The color is Sand Dune White and PPG paint was used. Steve has an interesting website, found here. This year alone, he was selected to be the best paint judge at the SEMA show in USA, was flown to China on car-painting business, and was selected to paint the hulls of New Zealandís Americaís Cup Challenge boats, among many other award winning paint projects.
 
Can you help me locate any of the following parts that I am missing, so that my restoration will proceed through to completion unhindered? You can count on this being current-if a part is on the list then I need it, and you could get to see the part that you supply appear on this page installed onto this very 57 Fury! Fair prices paid for good parts. Any help appreciated. Contact me here. PARTS WANTED For 1957 Plymouth, Fury. Parts colored in green have been found with your help! Shaft to carb linkage, with stud, w/auto 3sp, Fury, Part# 1827-691. (Supplied by Johnny P, Auckland, NZ) Shaft to carb linkage, with slot, w/auto 3sp, Fury, Part# 1822-008. (Missing part turned up) Accelerator pedal lever (what the rubber pedal attaches to) w/auto 3sp, Part# 1734-024. (Supplied by Wendy at glnos@iserv.net) Clips for retaining narrow side stainless mouldings. (Supplied by Ed Sitek, Tolland, Ct.06084) Clips for retaining roof rail stainless mouldings-original-used OK. (supplied by Tim Ridl.) Clips for retaining chrome fin cap mouldings (Supplied by Florida Auto Fastener. 67cayne@gtcom.net. Tony and John.) Clips for retaining stainless moulding that goes directly under trunk lid (Supplied by Florida Auto Fastener. 67cayne@gtcom.net. Tony and John.) Clip that holds windshield washer hose to underside of hood-used OK. (Supplied by John Garofalo, Florida) 6 inch wheel rims (5 needed). Transmission front & lower inspection covers. (2). (Supplied by Tim Ridl, Dickinson, ND 58601) Highway Hi-fi mounting brackets(1957). Highway Hi-fi records. Radiator support to hood bumpers x 2. (Rubber stops with threaded steel). (Supplied by John Garofalo, Florida) Identification tags for carburettors, brass triangular, to suit carbs 2631S & 2632S. (Supplied by Ebay user "Mztercarb.") Fuel pump-Stamped M2501S. (Supplied by Greg Pickens, Ebay user purepony) Ballast resistor, ceramic thing that mounts on coil, want correct one as shown in manual, not later model. Muffler support package-muffler end-dual exhaust, Part # 1843-009 (2) Muffler support & clamp-muffler end-dual exhaust, Part # 1843-008 (2) Exhaust support & clamp-exhaust end-dual exhaust, Part #1843-010 (2) Tail pipe extensions, Part # Clips for retaining chrome hood letters. (Kindly supplied by Louis Guzman from Freeport, New York.) and any NOS parts.  
|
Furyworld v5.0 - Plymouth Run is copyright Lion's Gate Web Services 1999-2004.
