Home | Pics | Christine | Riding the Bullet | Data | History | Links | Wallpaper | Mailing List | '57 Resto | Email me | AIM me
|
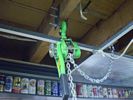
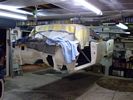
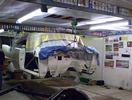
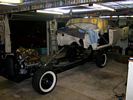
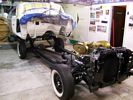
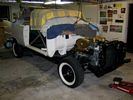
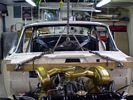
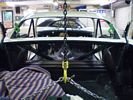
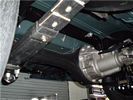
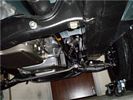
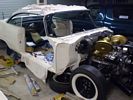
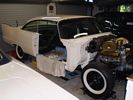
Progress of New Zealand's prize Plymouth '57 resto cont'd. Following completion of the paint process, I had the Fury body delivered by a local trucking operator on the 18th of September 2007, to the garage under my house. Multiple trips to the painter were made by myself to pick up all the separate panels in the back of my Ram, to prevent damage. The 19th of September was spent running around picking up the necessary lifting gear and preparing the lifting locations on the house and the body. Then on the 20th of September, I arranged for my partner Michelle, and 2 friends Ant and Ertay to assist in raising the body (cranking the ratchets) high enough off the ground to be able to slide the chassis underneath. I used 4 x 1500 pound lifting ratchets for the job, secured through beams of the house above, and on the body in 6 locations; existing hood hinge attaching holes, existing holes located on each shoulder of the rear seat/parcel tray area, and the 2 rearmost body to frame mount holes. With a person on each of the 4 lifting ratchets, the body was raised, itís temporary dolly/cradle was unbolted and removed, and then the chassis was slid underneath. The restored body to frame bolts, washers and new rubbers were installed and torqued down for the final time. The restored body and chassis are now reunited permanently after their 3 year separation.
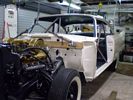
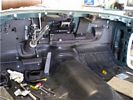
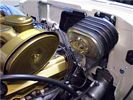
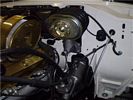
It took an entire weekend to cut and remove the body braces which had been welded into the body to strengthen it during its rebuild. I couldnít use a flame obviously, so I was stuck with grinding the welds down with a fine drill/grinder attachment, and using a saber saw where I could. The welded areas were then ground down and I applied some primer and the same green/blue primer color as the rest of the body, after a LOT of masking. Under dash components were the first to be installed on the bare body. Finding and unwrapping all of those little components that I had restored a few years earlier and forgotten about really make this restoration start to seem worthwhile. The payback. The steering inspection panel is secured to the floor. Plenty of non hardening sealant was used in all joints that needed to be sealed, but serviceable in the future like the inspection panel, vent plenum, tail-lights etc. Next on the list came the brake pedal box and pedal, firewall pad, vent plenum and door, wiper pivots, wiper motor and wiring, heater components, accelerator pedal and linkages, handbrake lever, wiring retainer clips, headlight dimmer switch, windshield washer foot pump. On the other side of the firewall I installed the accelerator bell-crank and linkages, kick-down linkages, brake master cylinder and power brake booster, heater box with fan motor, plenum drain rubber seals. The goal is to get as much under-dash componentry completed prior to the dash going in. I hate working underneath dashes. The view from under the car where the different original colors combine, make for a stunning assembly line original appearance. As under-seal was an option on these cars from the factory, I chose to not apply it to the under-floor area, exactly as some cars left the factory.
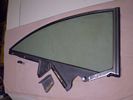
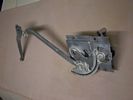
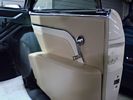
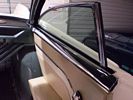
Rear window side glass went in next. There are a lot of parts and a lot of adjustments to be made in this area. Again, every component where necessary is stripped and re-zinc plated, and then lubed with new grease and tested on the bench. A lot of cavity wax is sprayed into the rear quarter inner panel areas first, where these cars are so prone to rust, even though there is no bare metal left to rust. Next time I would do this last, or you end up with this stuff all over your hands and arms during the glass installation process! The interior garnish trim has itís furry cat-whiskers attached with staples at the factory, so to replicate this, I got some lengths of stainless steel welding rod, cut them into short lengths and pushed them through the original staple holes in the garnish and folded the ends over. The end result is an assembly line appearance, which wonít ever rust again. The look of pop rivets holding these weather-seals on is always a disappointment to me at car shows. A trial fit of the rear upholstery panels and arm-rests comes next, as well as the rear wind-lace around the door opening. Front and rear screens went in without a hitch, after many nights cleaning up my original weather-strips which had lots of layers of paint and sanding marks on them. As far as I know, these weather-strips are unavailable new, so never just cut your old ones out to get your glass out. Glass is easier to get than new seals.

Can you help me locate any of the following parts that I am missing, so that my restoration will proceed through to completion unhindered? You can count on this being current-if a part is on the list then I need it, and you could get to see the part that you supply appear on this page installed onto this very 57 Fury! Fair prices paid for good parts. Any help appreciated. Contact me here. PARTS WANTED For 1957 Plymouth, Fury. Parts colored in green have been found with your help! Shaft to carb linkage, with stud, w/auto 3sp, Fury, Part# 1827-691. (Supplied by Johnny P, Auckland, NZ) Shaft to carb linkage, with slot, w/auto 3sp, Fury, Part# 1822-008. (Missing part turned up) Accelerator pedal lever (what the rubber pedal attaches to) w/auto 3sp, Part# 1734-024. (Supplied by Wendy at glnos@iserv.net) Clips for retaining narrow side stainless mouldings. (Supplied by Ed Sitek, Tolland, Ct.06084) Clips for retaining roof rail stainless mouldings-original-used OK. (supplied by Tim Ridl.) Clips for retaining chrome fin cap mouldings (Supplied by Florida Auto Fastener. 67cayne@gtcom.net. Tony and John.) Clips for retaining stainless moulding that goes directly under trunk lid (Supplied by Florida Auto Fastener. 67cayne@gtcom.net. Tony and John.) Clip that holds windshield washer hose to underside of hood-used OK. (Supplied by John Garofalo, Florida) 6 inch wheel rims (5 needed). Transmission front & lower inspection covers. (2). (Supplied by Tim Ridl, Dickinson, ND 58601) Highway Hi-fi mounting brackets(1957). Highway Hi-fi records. Radiator support to hood bumpers x 2. (Rubber stops with threaded steel). (Supplied by John Garofalo, Florida) Identification tags for carburettors, brass triangular, to suit carbs 2631S & 2632S. (Supplied by Ebay user "Mztercarb.") Fuel pump-Stamped M2501S. (Supplied by Greg Pickens, Ebay user purepony) Ballast resistor, ceramic thing that mounts on coil, want correct one as shown in manual, not later model. Muffler support package-muffler end-dual exhaust, Part # 1843-009 (2) Muffler support & clamp-muffler end-dual exhaust, Part # 1843-008 (2) Exhaust support & clamp-exhaust end-dual exhaust, Part #1843-010 (2) Tail pipe extensions, Part # Clips for retaining chrome hood letters. (Kindly supplied by Louis Guzman from Freeport, New York.) and any NOS parts. 
Furyworld v5.0 - Plymouth Run is copyright Lion's Gate Web Services 1999-2004. |
