| The Forward Look Network | ||
| ||
 Wiper Pivots - How to disassemble before re-Plating? Wiper Pivots - How to disassemble before re-Plating?Jump to page : 1 Now viewing page 1 [50 messages per page] | View previous thread :: View next thread |
| Forward Look Technical Discussions -> Body, Glass, Interior and Trim | Message format |
| 56D500boy |
| ||
Exner Expert 10K+ Posts: 10635     Location: Lower Mainland BC | . Found these photos on eBay and it got me thinking about getting my 56 Dodge wiper pivots re-plated. I can see now that getting them off the car isn't (shouldn't be) a big deal. But then the question is how much can I disassemble? Looks like the actuator arm should press out but what about the bushing? I'm sure somebody has done this right? (56DodgeWiperPivot_1.jpg) (56DodgeWiperPivot_2.jpg) Attachments ----------------  56DodgeWiperPivot_1.jpg (114KB - 358 downloads) 56DodgeWiperPivot_2.jpg (132KB - 349 downloads) 56DodgeWiperPivot_1.jpg (114KB - 358 downloads) 56DodgeWiperPivot_2.jpg (132KB - 349 downloads) | ||
| |||
| wizard |
| ||
Board Moderator & Exner Expert 10K+ Posts: 13153   Location: Southern Sweden - Sturkö island | . (56DodgeWiperPivot_1.jpg) Attachments ---------------- 56DodgeWiperPivot_1.jpg (215KB - 373 downloads) | ||
| |||
| 56D500boy |
| ||
Exner Expert 10K+ Posts: 10635 Location: Lower Mainland BC | . Thanks Sven. I'm not capable of doing that. Anybody does this as a business?  | ||
| |||
| GaryS |
| ||
Expert Posts: 1211 Location: Ponder, TX | The pivot shafts on my '56 Plymouth were retained with C-clips' (Wiper Pivots.JPG) Attachments ---------------- Wiper Pivots.JPG (224KB - 351 downloads) | ||
| |||
| GaryS |
| ||
Expert Posts: 1211 Location: Ponder, TX | I ordered and installed new oiled bronze bushings online and replaced the C-clips without any difficulty. Lots of rust on the shaft that hid the slot, but it is there. | ||
| |||
| 56D500boy |
| ||
Exner Expert 10K+ Posts: 10635 Location: Lower Mainland BC | GaryS - 2020-11-05 2:12 PM I ordered and installed new oiled bronze bushings online and replaced the C-clips without any difficulty. Lots of rust on the shaft that hid the slot, but it is there. Now we're talking there Gary. Do you happen to recall where you got the bushings? There are no separate bushing PNs in the Mopar catalog. Just the complete pivot assembly (at least I think so) (??) Maybe here?: https://bearing-solutions.isostatic.com/printitems/sleeve-bearings/m... 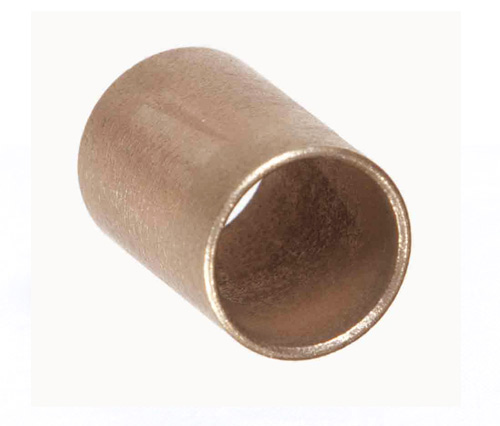 I found your before and after photos and reference to your use of Muggy Weld to fill in the pits. Did you drill the pits out first or just sand them? Before (not so nice): After (very nice): Edited by 56D500boy 2020-11-05 7:57 PM | ||
| |||
| GaryS |
| ||
Expert Posts: 1211 Location: Ponder, TX | I ordered the oiled bronze bushings online, but don't recall the source. I measured the shafts and castings and ordered by size. I think I ordered two longer parts and cut them in two, but it was some time ago and my memory is fading. I drilled out the pits with a Dremel and small bur before sanding and filling with Muggyweld. Yours look much better than mine to start, so you should be able to clean them up much faster. Edited by GaryS 2020-11-05 9:33 PM | ||
| |||
| wizard |
| ||
Board Moderator & Exner Expert 10K+ Posts: 13153 Location: Southern Sweden - Sturkö island | GaryS - 2020-11-05 11:06 PM The pivot shafts on my '56 Plymouth were retained with C-clips' This is the modification I have done with several wiper pivots. I really think that someone has done this modification earlier on those pivots. Normally, they are not serviceable since the sleeve is shrunk on the shaft groove. I didn't have to change any bushings though - the problem was dirt and rust on the shafts. A good cleaning and some fine emery cloth, new grease and they are normally good for many years of service. If you needd spacers, a stainless tube can be cut and then grinded to correct lenght by putting the tube in the mandrel of a drill machine and run it against a file and/or emery cloth. | ||
| |||
| Powerflite |
| ||
Exner Expert 10K+ Posts: 10257 Location: So. Cal | I just checked the pivots on all 5 of my '56 Plymouths and they all have the non-serviceable collar on them. The pivot from the Fury that I parted out didn't move very easily, but it freed up quite well with just a little lubrication on the ends. | ||
| |||
| GaryS |
| ||
Expert Posts: 1211 Location: Ponder, TX | Since I know none of the history of my Plymouth, I have no idea if any modifications were made by previous owners, but I know that the way it's now assembled, I don't have to worry about that problem in my lifetime! | ||
| |||
| 57chizler |
| ||
Expert Posts: 3835 Location: NorCal | If I was doing it, I would grind off the peened area (red arrow), remove the lever and remove the shaft from the top side. Then drill and tap the end of the shaft and use a screw (with Loctite) to reinstall the lever. (Pivot.jpg) Attachments ---------------- Pivot.jpg (224KB - 354 downloads) | ||
| |||
| Powerflite |
| ||
Exner Expert 10K+ Posts: 10257 Location: So. Cal | I agree, that seems like a sensible plan. Much easier than dealing with that collar so close to the pot metal. | ||
| |||
| wizard |
| ||
Board Moderator & Exner Expert 10K+ Posts: 13153 Location: Southern Sweden - Sturkö island | Yes, it's easier, but that is the fulcrum point, so any lash will result in that the shaft will eat up more material until it's loose or broken. | ||
| |||
| Powerflite |
| ||
Exner Expert 10K+ Posts: 10257 Location: So. Cal | That could be fixed by welding it back together. That's what I did to fix my door latch. As long as you aren't likely to need to take it apart too often, that should be a good solution. Another less final solution is to screw it together with some epoxy to prevent any small movements. Burn the epoxy to take it back apart. Edited by Powerflite 2020-11-06 2:28 PM | ||
| |||
| GaryS |
| ||
Expert Posts: 1211 Location: Ponder, TX | I can't see it clearly in the photo, but maybe the collar is meant to be a type of water seal. FWIW, I recall that I first just cleaned and lubricated, but decided that the shafts had what I thought was too much slop in the bushing and since the bezel pitting was really bad, they had to be repaired. Perhaps my car spent its life in Seattle where it rains 300 days a year! | ||
| |||
| wizard |
| ||
Board Moderator & Exner Expert 10K+ Posts: 13153 Location: Southern Sweden - Sturkö island | It's just a collar that covers the gap between shaft and bushing... | ||
| |||
| 56D500boy |
| ||
Exner Expert 10K+ Posts: 10635 Location: Lower Mainland BC | . Just for clarification, my pivots are still on my car. I was just thinking ahead and mentally preparing for what will have to be done to get these plated. So I am appreciating all the comments and options that have been presented in this thread. The bonus will be when I take them off I can repaint the area around them much better than I have so far.   Edited by 56D500boy 2020-11-06 9:03 PM (DaveFs56DodgeLeftWiperPivotBase.jpg) (DaveFs56DodgeRightWiperPivotBase.jpg) Attachments ---------------- DaveFs56DodgeLeftWiperPivotBase.jpg (197KB - 364 downloads) DaveFs56DodgeRightWiperPivotBase.jpg (147KB - 354 downloads) | ||
| |||
| 56D500boy |
| ||
Exner Expert 10K+ Posts: 10635 Location: Lower Mainland BC | . I was under the dash of my 56 Dodge this morning looking at something else and while I was there, I took some photos of the underside of the wiper pivot supports. I was a bit shocked to see bolts, not studs and nuts. I imagine that re-installation without a helper up top might be a challenge. These: (DaveFs56DodgeWiperPivot_Underside_DriversSide.jpg) (DaveFs56DodgeWiperPivot_Underside_PassengerSide.jpg) Attachments ---------------- DaveFs56DodgeWiperPivot_Underside_DriversSide.jpg (130KB - 369 downloads) DaveFs56DodgeWiperPivot_Underside_PassengerSide.jpg (150KB - 356 downloads) | ||
| |||
| wizard |
| ||
Board Moderator & Exner Expert 10K+ Posts: 13153 Location: Southern Sweden - Sturkö island | Just install two studs and put the pivot in Place , remove One stud and install One Bolt .... | ||
| |||
| 56D500boy |
| ||
Exner Expert 10K+ Posts: 10635 Location: Lower Mainland BC | . Thanks for all the hints guys. Much appreciated. I recently found a pair of used 56 Dodge wiper pivots on eBay and they were just delivered today. I have removed the bottom plates and put the components into Rust Check "Rust Wash" so I can get a better view of the threaded end of the pivot and determine how to best disassemble. These "new" (to me) ones are less pitted than the ones on my car but the splines are pretty much non-existant. So I will get the new ones fixed and plated and then swap the wiper arm stuff from mine into the new ones (my splines are good). Not sure about the bushings. Here are some photos of the "new" ones today (the Rust Wash looks dark because I am using a combination of fresh green Rust Wash and some previously partially used up Rust Wash). I will leave them soak at least overnight or maybe for 2 days (??)): Edited by 56D500boy 2022-04-21 4:59 PM (56DodgeWiperPivots_FrontSide_AsReceived.jpg) (56DodgeWiperPivots_BackSide_AsReceived.jpg) (56DodgeWiperPivots_AsReceived_PartiallyDisassembledInPrepForRustWashBath.jpg) (56DodgeWiperPivots_AsReceived_PartiallyDisassembled_ReadyForRustWash.jpg) (56DodgeWiperPivots_AsReceived_PartiallyDisassembled_InSomeNewAndUsedRustWash.jpg) Attachments ---------------- 56DodgeWiperPivots_FrontSide_AsReceived.jpg (140KB - 239 downloads) 56DodgeWiperPivots_BackSide_AsReceived.jpg (115KB - 227 downloads) 56DodgeWiperPivots_AsReceived_PartiallyDisassembledInPrepForRustWashBath.jpg (148KB - 227 downloads) 56DodgeWiperPivots_AsReceived_PartiallyDisassembled_ReadyForRustWash.jpg (138KB - 226 downloads) 56DodgeWiperPivots_AsReceived_PartiallyDisassembled_InSomeNewAndUsedRustWash.jpg (99KB - 234 downloads) | ||
| |||
| 56D500boy |
| ||
Exner Expert 10K+ Posts: 10635 Location: Lower Mainland BC | wizard - 2020-11-06 1:48 AM GaryS - 2020-11-05 11:06 PM The pivot shafts on my '56 Plymouth were retained with C-clips' This is the modification I have done with several wiper pivots. I really think that someone has done this modification earlier on those pivots. Normally, they are not serviceable since the sleeve is shrunk on the shaft groove. If you needed spacers, a stainless tube can be cut and then ground to correct length by putting the tube in the mandrel of a drill machine and run it against a file and/or emery cloth. I was really hoping that GaryS would be right and that there would be C-clips. *BUT* I just pulled on of the wiper pivots out of the Rust Check Rust Wash bath and, after brass wire brushing, I can not see any C-clips, at least at the upper end. What I do see, unfortunately, is a crimped-on collar, like Sven (wizard) suggested was there. Why would I even think of doubting Sven? I might try to "stretch" collar to get it off. Barring failure there, I will use my Dremel and E-Z cut cut-off wheel to carefully (I hope) cut a slot in the collar that will allow me to open it up. A photo of the rust "free" threaded upper end of the pivot (you can see the upper end of the bronze bushing also the very poorly defined splines (rusted away?)): Edited by 56D500boy 2022-04-23 8:36 PM (56DodgeWiperPivots_FrontSide_AfterRustWash_ShowingCrimpedOnCollar.jpg) Attachments ---------------- 56DodgeWiperPivots_FrontSide_AfterRustWash_ShowingCrimpedOnCollar.jpg (140KB - 244 downloads) | ||
| |||
| 56D500boy |
| ||
Exner Expert 10K+ Posts: 10635 Location: Lower Mainland BC | 56D500boy - 2022-04-23 12:06 PM I might try to "stretch" collar to get it off. Barring failure there, I will use my Dremel and E-Z cut cut-off wheel to carefully (I hope) cut a slot in the collar that will allow me to open it up. I tried to open up the collar on both of the pivots but NOPE, not happening.  So out came the Dremel and a few minutes later I had cut the collar enough to pry it off. So out came the Dremel and a few minutes later I had cut the collar enough to pry it off. With the collar off you can see the "C-clip" groove into which the collar was crimped. I think I will try to figure out an actual C-clip and maybe a spacer or fibre washer. The lower, inner end, has a fibre washer for anti-friction and a thin metal spring washer/shim. Edited by 56D500boy 2022-04-23 10:03 PM (56DodgeWiperPivots_FrontSide_AfterRustWash_ShowingCrimpedOnCollar_PriorToRemoval.jpg) (56DodgeWiperPivots_FrontSide_AfterRustWash_ShowingCrimpedOnCollar_AfterRemoval.jpg) (56DodgeWiperPivots_FrontSide_AfterCuttingOffCrimpedCollar.jpg) Attachments ---------------- 56DodgeWiperPivots_FrontSide_AfterRustWash_ShowingCrimpedOnCollar_PriorToRemoval.jpg (123KB - 229 downloads) 56DodgeWiperPivots_FrontSide_AfterRustWash_ShowingCrimpedOnCollar_AfterRemoval.jpg (123KB - 255 downloads) 56DodgeWiperPivots_FrontSide_AfterCuttingOffCrimpedCollar.jpg (193KB - 234 downloads) | ||
| |||
| 56D500boy |
| ||
Exner Expert 10K+ Posts: 10635 Location: Lower Mainland BC | . Found some 5/16" C-clips that work (1/4" was too small). With the width of the groove for the OE crimp-on collar as wide as it is, I was able to slip (force) two of the C-clips into that space. Probably going to need some futzing with washers, etc to take of the rest of the space vacated by the OE collar but I can sort that one way or the other after I get these "new" pivot bases replated. Before: After (with one washer and 2 C-clips): (56DodgeWiperPivots_FrontSide_OECollarRemoved_withTwo5_16_CLips_1.jpg) (56DodgeWiperPivots_FrontSide_OECollarRemoved_withTwo5_16_CLips_2.jpg) Attachments ---------------- 56DodgeWiperPivots_FrontSide_OECollarRemoved_withTwo5_16_CLips_1.jpg (124KB - 234 downloads) 56DodgeWiperPivots_FrontSide_OECollarRemoved_withTwo5_16_CLips_2.jpg (173KB - 230 downloads) | ||
| |||
| 56D500boy |
| ||
Exner Expert 10K+ Posts: 10635 Location: Lower Mainland BC | . Pivots are back from the "Plater". Not impressed at all Still some pits that show (the platers technique is to grind them out, rather than fill with copper, etc). One of the pivots has a "bite" out of it that wasn't there before (I wasn't sure when I picked it up but now that I am home and checked my photos, it WAS NOT there before). Now I will have to put that on the side where the "bite" wont' show or figure out a "hack" fix to camouflage the bite. The other pivot has an edge that is drooping such that the base will not sit flat. I can fix that by removing the excess material with my Dremel. But still, why should I have to do any of that? Time to find another plater. Whoever that will be will be much slower and way more expensive. "You get what you pay for" No kidding. GRRR... Edited by 56D500boy 2022-05-11 8:18 PM (eBay56DodgeWiperPivotsAfterPlating_1.jpg) (eBay56DodgeWiperPivotsAfterPlating_2.jpg) (eBay56DodgeWiperPivotsAfterPlating_3.jpg) (eBay56DodgeWiperPivotsAfterPlating_4.jpg) Attachments ---------------- eBay56DodgeWiperPivotsAfterPlating_1.jpg (116KB - 232 downloads) eBay56DodgeWiperPivotsAfterPlating_2.jpg (95KB - 237 downloads) eBay56DodgeWiperPivotsAfterPlating_3.jpg (97KB - 240 downloads) eBay56DodgeWiperPivotsAfterPlating_4.jpg (83KB - 230 downloads) | ||
| |||
| 60 dart |
| ||
Expert 5K+ Passed away 30th Sept 2024. You will be missed Chuck! Posts: 8954 Location: WHEELING,WV.>>>HOME OF WWVA | some platers aint worth a dammed ---------------------------------later Edited by 60 dart 2022-05-11 11:43 PM | ||
| |||
| dels56 |
| ||
Extreme Veteran Posts: 402 | Hi Dave, I like your approach to the repair. Take a look at a Spiral Retainer Ring. Pic attached. Grainger will also have the "Oilite" or similar bushings. (IMG_7649 (4).PNG) Attachments ---------------- IMG_7649 (4).PNG (69KB - 225 downloads) | ||
| |||
| 56D500boy |
| ||
Exner Expert 10K+ Posts: 10635 Location: Lower Mainland BC | . I finally got around to start reinstalling the wiper pivots after they were re-plated (or selected from one of the second set that I bought off eBay). For the first one (passenger side - through the glove box (box removed for repair)), I used a pivot off eBay that needed no replating. The exposed end was fine and needed no intervention. As I installed the drive lever end into the activation rod, I realized that I did not know where the fine (thin) washer needed to be (on which side of the bushing in the activation rod). All the pivots and arms that I have only had one washer by the retainer clips end, as shown here (from a previous post in this thread): So I decided to check the parts book diagrams. I was shocked to see the diagram show that there should be two thin washers at the retainer end. Hmm....Of all the pivots that I have accumulated, there were only three with those thin washers and even then there was only one of those per pivot. So I have three but should have four (2 x 2). Solution? Make a fourth washer from a pop-rivet reinforcing washer. It took three tries to get it done (the first two both came out of the vice that I was holding them while I drilled out the 1/8" hole to something like 7/32" (just big enough to slip over the groved pin)). Now the trick will be to lube the pin and washers (white lithium grease I think). But that will be tomorrow. Photos: Edited by 56D500boy 2024-10-17 3:05 PM (56DodgeWiperArmPivotArmsWithRetainerClipAndOneWasherOnly.jpg) (WiperPivotAssemblyDiagramFromPartsBook.jpg) (WiperPivotArmWithOneOEWasherOneMadeWasherAndOneOERetainerClip_NotInstalled.jpg) (WiperPivotArmWithOneOEWasherOneMadeWasherAndOneOERetainerClip.jpg) Attachments ---------------- 56DodgeWiperArmPivotArmsWithRetainerClipAndOneWasherOnly.jpg (159KB - 119 downloads) WiperPivotAssemblyDiagramFromPartsBook.jpg (122KB - 118 downloads) WiperPivotArmWithOneOEWasherOneMadeWasherAndOneOERetainerClip_NotInstalled.jpg (199KB - 127 downloads) WiperPivotArmWithOneOEWasherOneMadeWasherAndOneOERetainerClip.jpg (196KB - 130 downloads) | ||
| |||
| 56D500boy |
| ||
Exner Expert 10K+ Posts: 10635 Location: Lower Mainland BC | . Well that (making a homemade washer) was a good idea. Unfortunately, it didn't work (so far). I tried my homemade washer on the grooved pivot pin (with white Lithium grease to hold it in place). Then I got the pin through the activation rod bushing (nylon, I think) and added the thin OE washer on the pin. HOWEVER, I could NOT get the retainer clip on (my homemade washer must be too thick). So I disassembled what I had going and removed my homemade washer and tried assembly with just the one OE washer. I could get the retainer clip on with no problems. So one data point. Then I disassembled things again and reassembled with two thin OE washers (as per the parts catalog diagram). I could get the retainer clip on but it was a tighter fit than with just one OE washer. 2nd data point. So my choices are: 1. Forget the use of two washers and only use one OE thin washer. 2. Make my homemade washer thinner by sanding/grinding it a bit and using it with a thin OE washer. 3. Decrease the over thickness of the OE nylon bushing by sanding/grinding a bit of it off. Somewhere in the middle of all that, while removing the retainer clip, the clip flew off and fell into the area behind the new ABS kick panel that was very difficult to install. As a result, I did not try to remove the kick panel and find the clip. I found another clip instead (but now I am down to just two clips). I think I will try making my homemade washer thinner first. Edited by 56D500boy 2024-10-17 7:59 PM | ||
| |||
| Powerflite |
| ||
Exner Expert 10K+ Posts: 10257 Location: So. Cal | Where did you get an ABS kick panel? | ||
| |||
| 56D500boy |
| ||
Exner Expert 10K+ Posts: 10635 Location: Lower Mainland BC | Powerflite - 2024-10-29 5:16 PM Where did you get an ABS kick panel? I made them in the fall of 2017. Cut, painted, upholstered, trimmed (piece of stainless door trim) and installed (very tight, never been out since installation) ABS kick-panel construction: http://www.forwardlook.net/forums/forums/thread-view.asp?tid=67088&... (Door panel was subsequently fixed) Door panel rehab: http://www.forwardlook.net/forums/forums/thread-view.asp?tid=69390&... | ||
| |||
| Powerflite |
| ||
Exner Expert 10K+ Posts: 10257 Location: So. Cal | Nice. ABS is the only way to go on those if you want them to last. | ||
| |||
| 56D500boy |
| ||
Exner Expert 10K+ Posts: 10635 Location: Lower Mainland BC | 56D500boy - 2024-10-16 11:30 PM I finally got around to start reinstalling the wiper pivots after they were re-plated (or selected from one of the second set that I bought off eBay). Well that was a bit of a lie. I only did the one pivot back in October. I've been putting of the driver's side pivot because I thought it would be difficult. It was  Before I got there today, I had to select which of the three pivot bases I should use. My choices were one of two eBay bases that I had replated and one other OE pivot bases from a separate eBay purchase which was nice (ish) but had fine scratches that were never going to go away. So I selected the better of the two replated bases, the one with the smallest glitch (which is on the inner side, towards the cowl vent and therefore the least likely to be seen). For the pivot arm I had at least three to chose from. I chose the one with the best slotting for the wiper arm attachment. I cleaned up the threads on the external end of the pivot arm with a 1/4-28 die. As it happened, it was the only one of the arms that I have that had the PN stamped into it, 1605 524. I added three thin OE washers between the pivot arm and the pivot base and then one thick washer and two 5/16" C-clips (facing opposite directions) at the external threaded end of the pivot arm. Having had some "fun" installing the passenger side pivot in the fall, I decided to add the gasket to the top of the cowl and then insert the pivot base and arm on the driver's side through the holes in the cowl. In the interest of less cursing, I taped the assembly down to the cowl to make adding the lower plate ("clamp") and the two 1/4-24 (OE) bolts to hold the assembly to the cowl easier. That helped but it stiil was NOT easy. I will spare you the various curse words, grunting and groaning and a bit of blood to get that done, upside down, laying in the front foot well, wondering whether I would have to call the Fire Department and have them use the Jaws of Life to extract me out of there. I got out on my own. But it was work. The installation got done, but I couldn't handle the up-coming frustration of inserting the clip end of the pivot arm through the nylon bushing in the wiper activation arm and then adding that cute little clip (with at least one and maybe two washers). I will save that for tomorrow. Or another day. Or yet another day. This was today: Edited by 56D500boy 2025-03-27 10:52 PM (55-56DodgeWiperPivotShowingPN1605524.jpg) (55-56DodgeWiperPivotArmPN1605524.jpg) (ReplatedPivotBaseWithPivotArmInstalledWith3LargeishThinSpacerWashersAndOneThickWasherAndTwoCliips.jpg) (56DodgePivotBaseWithPivotArmTapedInPlaceToFacilitateOnePersonInstalltionOfLowerPlate.jpg) (56DodgePivotBaseWithPivotArmInstalledWithLowerPlateAndTwoOEbolts.jpg) (56DodgePivotBaseWithPivotArmAfterInstallationOfLowerPlate.jpg) Attachments ---------------- 55-56DodgeWiperPivotShowingPN1605524.jpg (149KB - 64 downloads) 55-56DodgeWiperPivotArmPN1605524.jpg (143KB - 71 downloads) ReplatedPivotBaseWithPivotArmInstalledWith3LargeishThinSpacerWashersAndOneThickWasherAndTwoCliips.jpg (142KB - 67 downloads) 56DodgePivotBaseWithPivotArmTapedInPlaceToFacilitateOnePersonInstalltionOfLowerPlate.jpg (149KB - 66 downloads) 56DodgePivotBaseWithPivotArmInstalledWithLowerPlateAndTwoOEbolts.jpg (149KB - 64 downloads) 56DodgePivotBaseWithPivotArmAfterInstallationOfLowerPlate.jpg (148KB - 68 downloads) | ||
| |||
| Jump to page : 1 Now viewing page 1 [50 messages per page] |
| Search this forum Printer friendly version E-mail a link to this thread |
| (Delete all cookies set by this site) | |


