|
|
Elite Veteran
Posts: 977
  
Location: Sydney, Australia | 1958 Plymouth Strut
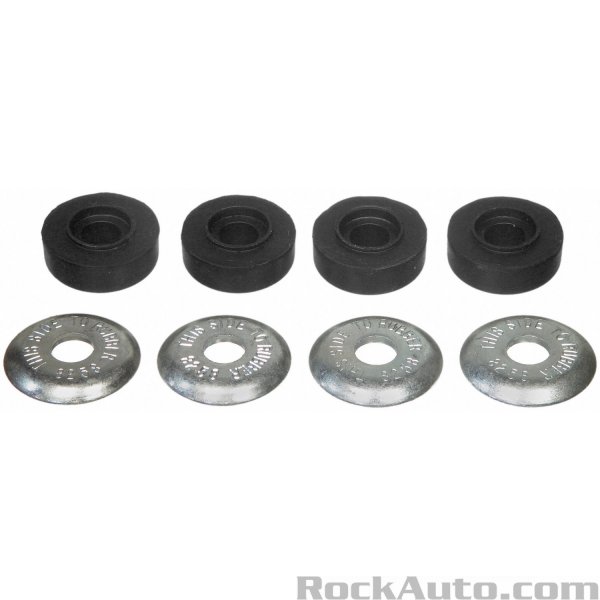
I have bought the MOOG Strut arm bushing and am only doing those bushings as they are the original old ones. What is the procedure to replace just them? I've read on late 60's & 70's Chryslers you have to drop the whole lower control arm. Is the FL cars different?
These are the MOOG Strut bushing
Edited by matte 2017-08-08 2:44 AM
 (AMG_K7039_P04_TOP__ra_p.jpg) (AMG_K7039_P04_TOP__ra_p.jpg)
Attachments
----------------
 AMG_K7039_P04_TOP__ra_p.jpg (29KB - 156 downloads) AMG_K7039_P04_TOP__ra_p.jpg (29KB - 156 downloads)
|
|
| |
|
Expert 5K+
Posts: 5006

| just take off the strut brace. very simple, two big bolts hold it to the lower control arm, take off the nut at the front.
|
|
| |
|
Expert 5K+
Posts: 7400

Location: northern germany | remove the big nut at the front first |
|
| |
|

Expert
Posts: 2196
Location: Muskego, WI | I bought these for my 1960 Plymouth as well, but have yet to tackle the job. I bought all new front suspension and steering components, actually, I was hoping to do it all this winter while the car is in storage for the season. When I get there, I'll document the job in my member's rides thread. |
|
| |
|
Expert 5K+
Posts: 7400
Location: northern germany | while this job is, or can be "very simple" there are as always 2 ways to replace a part/service a car. 1. they way a xy mechanic in a garage installs the part and the correct way. the 1rst way is obvious, bolt it off/on. the correct way to install is, with car weight on front wheels, tighten the big nut up front untill the holes in the strut rod and lca line up and a little further untill the strut rod hole is a about 1/16" (depending on rubber/poly hardness) ahead of the lca bolt holes, that requires a little prying(?) to install the bolts, if neccessarry shorten the inner rubber bushing or shim to rod to achieve that. this will greatly prolong lca bushing live and suspension geometry settings. i recommend 2 piece POLYURETHANE bushings.
this method of course works best with fresh lca bushings.
Edited by 1960fury 2017-08-08 4:37 PM
|
|
| |
|
Elite Veteran
Posts: 977
Location: Sydney, Australia | Thanks for the info guys. I'm having a no joy time with the big nut on the front. I'd say never been removed and a painted thread..
|
|
| |
|
Expert 5K+
Posts: 7400
Location: northern germany | matte - 2017-08-08 3:42 PM
Thanks for the info guys. I'm having a no joy time with the big nut on the front. I'd say never been removed and a painted thread..
never turn only counterclockwise, tighten it again if you feel it binding, back off, etc, etc.... with old cars the "long" and safe way is always the better way and not rarely less time consuming;) |
|
| |
|
Expert
Posts: 2196
Location: Muskego, WI | If you have a painted thread, get a small rag and wet it with lacquer thinner. Rag doesn't have to be soaking wet. Wrap or tie the wet rag around the stud and let it sit a day or two, the paint should then scrape or peel off easily or at least be soft enough that the nut will plow it out of the way when loosening. |
|
| |
|
Elite Veteran
Posts: 977
Location: Sydney, Australia | jboymechanic - 2017-08-08 4:54 PM
If you have a painted thread, get a small rag and wet it with lacquer thinner. Rag doesn't have to be soaking wet. Wrap or tie the wet rag around the stud and let it sit a day or two, the paint should then scrape or peel off easily or at least be soft enough that the nut will plow it out of the way when loosening.
Good idea! I think I'll do that first and then I might have to get some lub unto the thread and nut. I tried turning the nut and the whole strut was twisting with it.. LOL it is anticlockwise right??
|
|
| |
|
Veteran
Posts: 210
Location: Suwanee, GA | Anyone used an induction heat gun? A buddy of mine just bought one. I used it first on an upper ball joint to unscrew it from the control arm. Before I did I couldn't budge it with a 5 ft breaker bar. After 20 seconds of instant heat, I won't say it was like butter, but it backed out reasonably easy. I also used it on the strut rod nuts.
 (IMG_6837a.jpg) (IMG_6837a.jpg)
Attachments
----------------
IMG_6837a.jpg (191KB - 140 downloads)
|
|
| |
|

Expert 5K+
Posts: 9665
Location: So. Cal | I've used them quite a bit at my work for doing custom soldering. They work great and heat things very fast -as long as the metal doesn't conduct heat too well. Last I checked, which was many years ago, they were quite expensive to purchase. |
|
| |
|

Expert 5K+
Posts: 6500

Location: Newark, Texas (Fort Worth) | They can cost $1400. Here is a mid priced one: https://www.walmart.com/ip/Bolt-Buster-Heat-Induction/976028448?wmls...
Of course if you aren't a klutz; an oxygen-acetylene torch/heating tip works well too.
Edited by mstrug 2017-11-22 5:41 PM
|
|
| |
|
Veteran
Posts: 210
Location: Suwanee, GA | Yes, they're quite expensive. He said he paid $600, but that included $150 worth of various size pre-coiled leads. Best to have a friend with one. |
|
| |
|

Extreme Veteran
Posts: 406
Location: Hilltown, PA |
Unfortunately they are. I've been watching prices on them for a couple of years now, and just don't have the constant need to justify the cost. Last I saw even cheap (junk) ones were around $500.
Gregg |
|
| |