|
|
Extreme Veteran
Posts: 451
 
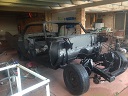
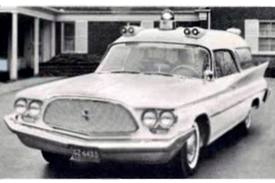
| Well., it's been a nice winter working on this '60 Desoto....today was nice enough to push her outside and clean the garage some....was a bit dusty after 3 months of welding, sanding and body work dust needless to say.
Now have to figure out how to push it down my driveway and back into the garage backwards so I can fit the other fender on the passenger side...
Getting close to paint! Yippee!
 (60.b.jpg) (60.b.jpg)
 (60.c.jpg) (60.c.jpg)
 (60.d.jpg) (60.d.jpg)
Attachments
----------------
 60.b.jpg (82KB - 132 downloads) 60.b.jpg (82KB - 132 downloads)
60.c.jpg (73KB - 139 downloads)
60.d.jpg (61KB - 143 downloads)
|
|
| |
|

Expert
Posts: 2519
 
Location: central Illinois | Looking good! |
|
| |
|
Extreme Veteran
Posts: 451
| Bodywork finally done.....now just gotta take her back apart again!
 (image.jpg) (image.jpg)
 (image.jpg) (image.jpg)
Attachments
----------------
image.jpg (134KB - 135 downloads)
image.jpg (149KB - 127 downloads)
|
|
| |
|

Expert
Posts: 2120
Location: atlanta | Lot's of work evident, great looking car! |
|
| |
|
Extreme Veteran
Posts: 451
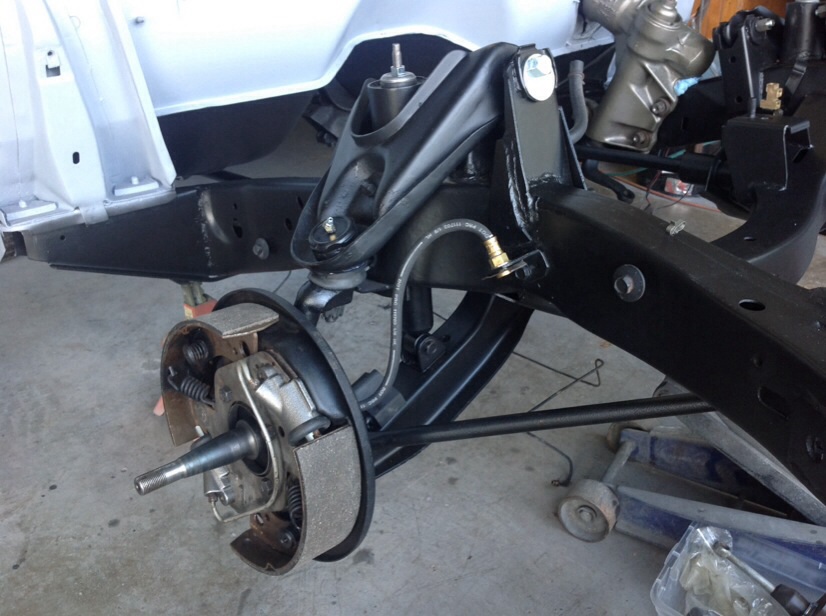
| Just pulled the front end back off., took off all the suspension....and started to "attempt" to take off the strut arms to remove the lower control arms....wholly chit!....those bolts are like 7 inches long, fine thread and took about a two foot long breaker bar to take the passenger side one off (and had to construct a special tool to keep the nut from rotating...the bolts realistically only need to be like maybe 3 inches long. Took about 30/45 minutes just to get that one side off....still have to tackle the other side...then the fun begins on the front end rebuild.
Now I can get down and dirty sanding the frame rails/firewall for painting and start cleaning up the suspension components. Progress! |
|
| |
|
Expert 5K+
Posts: 8443
 
Location: Perth Australia | I would (in hindsight) leave the suspention wish bones on until you get the ball joints off
You thought the strut arms were difficult, wait until you try to get those ball joints off, I had a 6 foot peice of pipe on my 3/4 inch bar to do this and they were really tight all the way and you have to turn them 1/4 of a turn at a go because they are sort of square
Handy to have them still attached so you have something to hold them
With the sub frame removed off the car, it still took the best part of a day to change them, but the sub frame kept getting dragged all over the place doing it
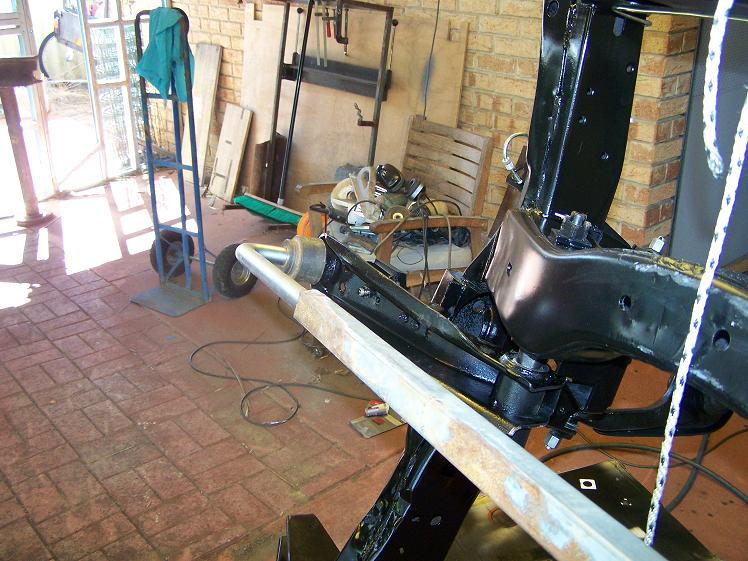 (rebuilt subfame 001s.JPG) (rebuilt subfame 001s.JPG)
Attachments
----------------
rebuilt subfame 001s.JPG (103KB - 148 downloads)
|
|
| |
|
Extreme Veteran
Posts: 451
| Well...a little late....I have the one side off already...and the way the car is sitting...too close to one of my work benches..no way to get a six foot pry bar on it....so will take em off and then try and figure it out.
 (image.jpg) (image.jpg)
Attachments
----------------
image.jpg (62KB - 138 downloads)
|
|
| |
|
Expert 5K+
Posts: 8443
Location: Perth Australia | Good luck
Might not be as bad as mine anyway
The threads arnt cut like normal threads, they sort of make their own way as you wind them in
I did do mine without the sub frame attached, but I stood it up and tied it to the rafters of my garage in the end to try and stop it moving
|
|
| |
|
User has resigned from board
| wow, incredible work , that's goes for all of u, that can rebuild these old mopars , that's a man's car for sure , i like those tires, good looking tires, are those universal tires |
|
| |
|
Extreme Veteran
Posts: 451
| I got the rest of the front end off today...the other strut arm came right off...easy..took like 5 minutes....
Also got the rest of the front end sanded and primered up....firewall sanded and primered etc....now Need some black primer for the front frame assembly..then sand and paint.....started cleaning all the front end parts....upper and lower control arms etc....lots of cleaning to do.
Luckily this project came with a ton of new parts for front end, brakes etc.
the tires came with the car too....not sure the brand, but they do look good...came with a new spare tire too.
|
|
| |
|
Expert
Posts: 2788
Location: USA - KY | 
Congratulations on all of this progress, guyman!
You've obviously been busy this winter!
Yep...pushing our behemoths around is no fun; they're a lot more fun once they get running again. 

Edited by FIN ME 2015-03-28 11:47 AM
|
|
| |
|
Extreme Veteran
Posts: 451
| Got the upper and lower control arms rebuilt today, just used tools laying around....a big adjustable crescent wrench, another crescent wrench and a five foot cheater bar....and a press to press in the upper control arm bushings...took about four hours to get everything taken out and new put in....now will have a nice tight front suspension again.
Front end is painted and ready for all the new suspension to go on. I use a trim black automotive one stage paint, but you gotta primer the metal first or it won't stick....perfect eggshell sheen.
Had to order a new center link cause mine was toast.
Edited by guyman 2015-04-08 2:49 AM
 (image.jpg) (image.jpg)
 (image.jpg) (image.jpg)
Attachments
----------------
image.jpg (147KB - 125 downloads)
image.jpg (146KB - 133 downloads)
|
|
| |
|
Extreme Veteran
Posts: 451
| Got some of the front end installed today...A little confused on how to properly re-install the torsion bars., so stopped for the day., put the passenger side in already., but there is not enough resistance when I pull up on the lower control arm and it bottoms out too easily....assuming I don't have it installed correctly., posted a topic about torsion bars under the brakes/suspension area to get some feedback on the subject.
 (frontend.jpg) (frontend.jpg)
Attachments
----------------
frontend.jpg (108KB - 135 downloads)
|
|
| |
|
Extreme Veteran
Posts: 451
| Front end almost done...waiting on a few parts to finish it up.
 (image.jpg) (image.jpg)
 (image.jpg) (image.jpg)
Attachments
----------------
image.jpg (140KB - 124 downloads)
image.jpg (164KB - 130 downloads)
|
|
| |
|
Extreme Veteran
Posts: 451
| Front end about done....finished and painted firewall today and inner fender panels. Love that black paint...perfect eggshell sheen right out of the can.
 (image.jpg) (image.jpg)
 (image.jpg) (image.jpg)
 (image.jpg) (image.jpg)
Attachments
----------------
image.jpg (181KB - 144 downloads)
image.jpg (159KB - 126 downloads)
image.jpg (161KB - 133 downloads)
|
|
| |
|
Expert 5K+
Posts: 7207
Location: Victoria, BC, on Vancouver Island, Canada | Nice!! What assembly plant was your DeSoto built in? I'm assuming L.A. as the L.A. plant painted the fender wells black. All others, to my knowledge, except Windsor, ON painted them body color. My 60 Saratoga is an L.A. built car with black fender wells. |
|
| |
|
Extreme Veteran
Posts: 451
| Was gonna paint them body color., but liked the black look instead...this car is from the Carolina's, so should be body color....not building a 100% correct car, but close...I also filled the holes in the dash to smooth it out with no dash pad!...so I am adding a few personal touches. |
|
| |
|

Expert 5K+
Posts: 8947
Location: WHEELING,WV.>>>HOME OF WWVA | almost looks like 02 dodge pearl blue ---------------------------------------------later |
|
| |
|
Extreme Veteran
Posts: 451
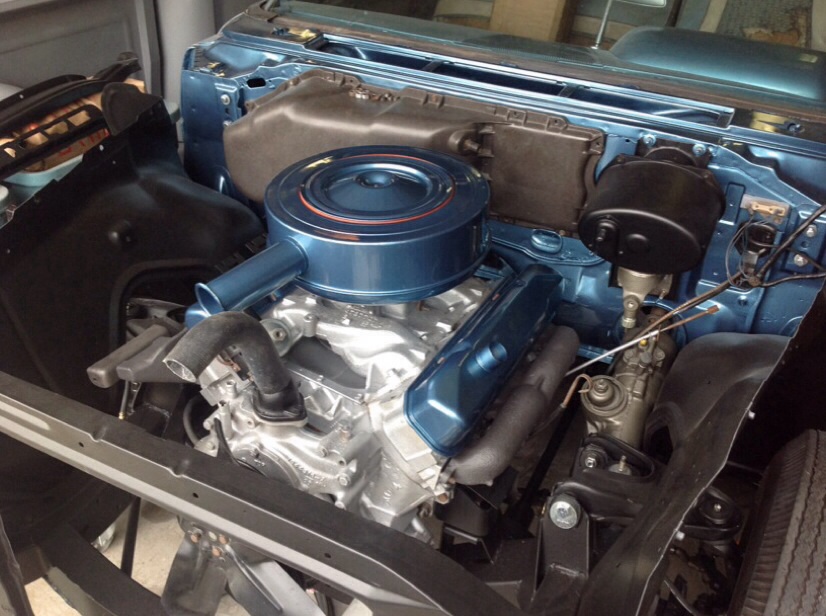
| Got my engine and transmission in today....!!! have to repaint the gold colors..been sitting too long and got dusty...so will freshen them up a bit. Engine and trans rebuilt., front end about done...so moving along!
Edited by guyman 2015-04-17 12:22 AM
 (raw-1.jpg) (raw-1.jpg)
 (raw.jpg) (raw.jpg)
Attachments
----------------
raw-1.jpg (28KB - 129 downloads)
raw.jpg (30KB - 138 downloads)
|
|
| |
|
Exner Expert 19,174 posts. Neil passed away 18 Sep 2015. You will be missed, Neil!
Posts: 19146
Location: bishop, ca | Boyhowdy, that's pretty work!
|
|
| |
|

Expert
Posts: 2596
Location: Upplands Väsby, Sweden | Super nice work you do. |
|
| |
|
Location: North Australia | Looking real good, you are doing that car justice, I bet you cant wait to drive it.
Steve |
|
| |
|
Expert 5K+
Posts: 8443
Location: Perth Australia | Looks good
Looks like you had a little helper there for a bit as well
|
|
| |
|

Board Moderator & Exner Expert 10K+
Posts: 13054
Location: Southern Sweden - Sturkö island | Nice work you're doing on the car - this will be a great ride! |
|
| |
|
Extreme Veteran
Posts: 451
| Thanks for the compliments...just finished painting the rest of the engine bay parts today., some sandblasting...etc....trying to get most of this one done by end of summer....so I can re-focus on my 59 Sport Fury.
Speaking of helpers., I do have a little daughter that loves helping me in the garage......shes gonna be the first NASCAR chief mechanic!>..LOL
 (20150416_155503.jpg) (20150416_155503.jpg)
Attachments
----------------
20150416_155503.jpg (33KB - 134 downloads)
|
|
| |
|
Extreme Veteran
Posts: 451
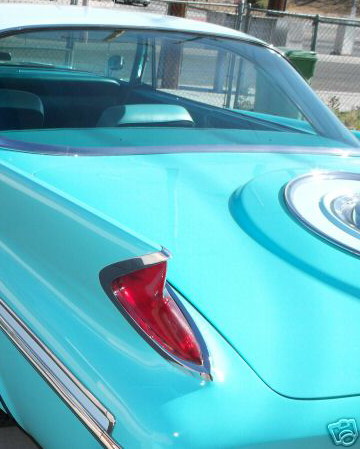
| She's come a long way since beginning of winter...actually was a pretty nice rust free car except some bubbling on the lower quarters., so just replaced them...had to hand make the pieces to fit., turned out good.
 (1.jpg) (1.jpg)
 (2.jpg) (2.jpg)
Attachments
----------------
1.jpg (74KB - 128 downloads)
2.jpg (110KB - 136 downloads)
|
|
| |
|
Expert
Posts: 1886
| Awesome man, love seeing the progress! |
|
| |
|
Veteran
Posts: 113
Location: Washington State, the wet side | Very cool. Nice progress. |
|
| |
|
Veteran
Posts: 113
Location: Washington State, the wet side | Very cool. I wish my -60 was something other than white |
|
| |
|
Extreme Veteran
Posts: 451
| I like your white adventurer....it looks clean...I've had several old white cars and loved the clean look of white! |
|
| |
|
Expert
Posts: 1530
Location: ZH, Switzerland | Guyman, I appreciate your photo story about your wonderful De Soto. It's an astonishing job your doing. I like the color you've chosen. It's my favorite color. Even though I'll keep my Letter white as it was (stock color). The inner fenders by the way are black in my '60 Letter as well, even though there were no '60 Letters built in L.A. as far as I know. It's possible that anybody of the forum knows it better than me. Good luck with your wonderful car! Dieter |
|
| |
|
Extreme Veteran
Posts: 451
| Thanks for the information....the color is the stock color I am using...it may be a shade off, but I like the color I mixed up....it may be a tad more darker blue then it is suppose to be.....I painted the interior pieces like the dash, trim a shade off the exterior color to give it a little contrast. It looks good.
Getting ready to reprint the valve covers and air cleaner.....I am not too fond of the gold...so I may paint them body color also....but not sure the paint can stand up to the heat on the valve covers....
cheers, Guy |
|
| |
|
Extreme Veteran
Posts: 451
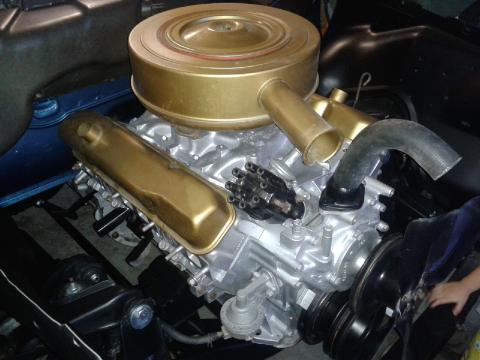
| Got the valve covers and air cleaner painted yesterday....I just hope the paint stays on the valve covers....we'll see soon enough.
 (image.jpg) (image.jpg)
 (image.jpg) (image.jpg)
Attachments
----------------
image.jpg (163KB - 175 downloads)
image.jpg (157KB - 155 downloads)
|
|
| |
|
Expert
Posts: 2788
Location: USA - KY |
Looks good! I really like that shade of blue, and it looks good in that very tidy engine compartment too.
Great job!
|
|
| |
|
Veteran
Posts: 113
Location: Washington State, the wet side | Are the exhaust manifolds painted or natural cast? |
|
| |
|
Veteran
Posts: 113
Location: Washington State, the wet side | Are the exhaust manifolds painted or natural cast? |
|
| |
|
Veteran
Posts: 113
Location: Washington State, the wet side | Are the exhaust manifolds painted or natural cast? |
|
| |
|
Extreme Veteran
Posts: 451
| I used a natural cast high temp paint on them....suppose to work well, but we'll see once I do the motor break in. |
|
| |
|
Extreme Veteran
Posts: 451
| Working on the desoto today..got a lot done....electrical is going back in as well as starter, brackets, gen., exhaust manifolds, brake lines, master cylinder and booster, etc.....front end all done, all new suspension installed, brakes etc....getting there!
Edited by guyman 2015-04-29 3:49 AM
 (image.jpg) (image.jpg)
 (image.jpg) (image.jpg)
Attachments
----------------
image.jpg (190KB - 137 downloads)
image.jpg (167KB - 131 downloads)
|
|
| |
|
Board Moderator & Exner Expert 10K+
Posts: 13054
Location: Southern Sweden - Sturkö island | Looks good Guy, keep us posted about the progress |
|
| |
|
Expert
Posts: 1530
Location: ZH, Switzerland | Thanks for posting your informations and pictures of the progress of your wonderful De Soto hardtop. I'm always interested in watching the progress of 1960 full size hardtops (DeS, Chry) and convertibles. They all are from the body very similar to my Letter. Please keep us informed about your further progress. Thank you. Happy Motoring! Dieter |
|
| |
|
Extreme Veteran
Posts: 451
| It's coming together...had a few problems today., but figured out I had the radiator support on backwards (smooth part outwards)...I know, sounds silly., but I thought the smooth part goes to the outside...and well., nothing was fitting right... it's the opposite!..haha, smooth goes in.....didn't think something was right cause I had a big gap between the battery trey and the rad. support and had to use long bolts to install the radiator!...Douh!...LOL My first Desoto full restore...so it's a learning curve for sure!....you can actually bolt the support in backwards and it works...for the most part!>. You can see how I installed it in the photos above!!!!! So tomorow have to unbolt everything and re-install the radiator and rad. support...What an idiot!...haha...Everything should fit then I hope.!
Edited by guyman 2015-05-03 3:11 AM
|
|
| |
|
Expert 5K+
Posts: 8443
Location: Perth Australia | Whats funny is that no one else picked it up either lmao
I didnt notice
What a bunch of gurus we are
|
|
| |
|
Extreme Veteran
Posts: 451
| I know..I figured some "senior" user would have noticed that one and saved me a lot of time and head scratchn'....that's like a big typo! Haha
Edited by guyman 2015-05-03 5:15 AM
|
|
| |
|
Extreme Veteran
Posts: 451
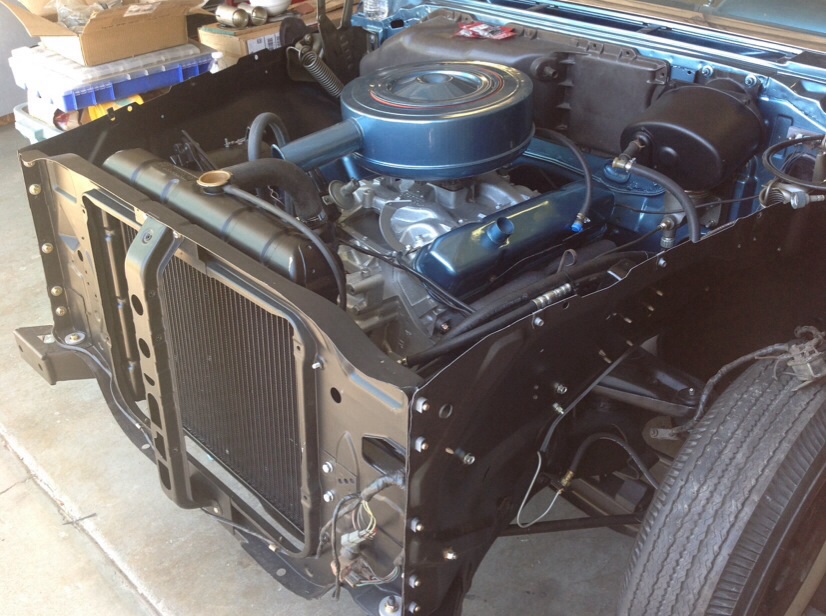
| OK, that's much better, everything fits now...LOL
Edited by guyman 2015-05-03 6:53 PM
 (image.jpg) (image.jpg)
 (image.jpg) (image.jpg)
 (image.jpg) (image.jpg)
Attachments
----------------
image.jpg (181KB - 127 downloads)
image.jpg (183KB - 133 downloads)
image.jpg (175KB - 120 downloads)
|
|
| |
|
Expert 5K+
Posts: 8443
Location: Perth Australia | It does look good, but you will have to undo most of it again though
I think you will find the fenders slip (get sandwiched) between the radiator support and the inner guards
I think we will have to keep an eye on you now
|
|
| |
|
Extreme Veteran
Posts: 451
| A ha.....good thing I had it together at one point to do body work and back apart again...lol...I just hand tightened the bolts for now...thanks for the heads up...I am going to jam paint everything before I put it together finally andddd..I wanna start and break in the motor before I put the car together in case the breakin doesn't go well and I have to pull the motor again. Appreciate the tips! |
|
| |
|
Veteran
Posts: 113
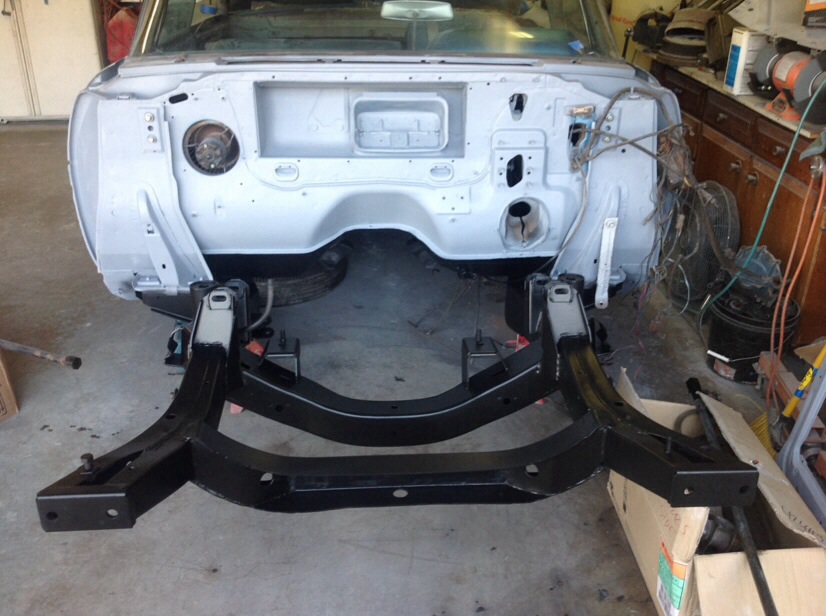
Location: Washington State, the wet side | Looking at your car I am thinking about painting my sheet metal black rather than body colour. Did they come either way? Black would look good in contrast to the white firewall.
 (image.jpg) (image.jpg)
Attachments
----------------
image.jpg (109KB - 127 downloads)
|
|
| |
|
Location: Parts Unknown | My 60 Fireflite coupe was all black, so ALL the sheetmetal was black !
On 57's, the Detroit-built cars got light grey inner fenders, but L.A.-built
cars got P&A Black. My 58 has all black inner sheetmetal. Judging by the
rusted bolts, etc., it is all original. It is a Detroit-built car. Don't know a
dammed thing about how they did it in 59, and my 60 wasn't any help. I
am afriad my brain is too fuzzy on the parts car 60's I owned to remember. 
|
|
| |
|
Extreme Veteran
Posts: 451
| Picked up a rebuilt carb off ebay, nice rebuilt unit for my 383 2bbl., numbers were the same., so I bought it., the only difference is this one I just bought has a big vacuum port on the back of the carb...so wondering if I can just cap it and be on my way?
Edited by guyman 2015-05-11 8:02 PM
 (carb1.jpg) (carb1.jpg)
 (carb2.jpg) (carb2.jpg)
Attachments
----------------
carb1.jpg (159KB - 130 downloads)
carb2.jpg (80KB - 165 downloads)
|
|
| |
|
Extreme Veteran
Posts: 451
| Getting close to firing up the desoto....
 (image.jpg) (image.jpg)
 (image.jpg) (image.jpg)
Attachments
----------------
image.jpg (164KB - 183 downloads)
image.jpg (179KB - 169 downloads)
|
|
| |
|
Extreme Veteran
Posts: 451
| Pulling this beast in and out if the garage has become a big chore....not to mention a big pain in my lower back..my garage sits on a small hill...so pushing it in and out has become a family affair....Literally...every time I wanna move it, have to call in the troops to help push it.........so I went and bought an electric winch and bolted it to the floor of my garage!!!...and by the push of a button..can now take my old FL cars that are not running yet, in and out of the garage with ease!...Man what a difference a couple hundred bucks makes. Runs off any car battery and has plenty of pulling power to get them 'ol FL heavy cars like my 60 Desoto up and down the driveway...and the best part is I don't have to call my family out to move the darn thing when I need it moved!!!!at 2 in the morning!!!! yes..love it when a plan comes together.
Will post some pictures soon! |
|
| |
|
Location: North Australia | Cool, great idea. Make sure you check out your rigging thoroughly, use shackles for a positive connection, or use some kind of safety connection, don;t want that Desoto spearing across the street!
Steve. |
|
| |
|
Extreme Veteran
Posts: 451
| LOL!....I chock the tires every couple of feet till I get it out/in of the garage. I have already thought of that scenario... Thanks for the safety tip. |
|
| |
|
Extreme Veteran
Posts: 340
Location: Tacoma, WA | Thanks for posting the updates, the photos are a big help. How challenging was it to break free and remove the subframe, then reinstall/align? Sounds like the way to go and tempting, but I've already let to scope of the rebuild on my my 60 Windsor creep too far. |
|
| |
|
Extreme Veteran
Posts: 451
| A couple photos of the winch system in my garage...what a help that thing is...WOW. got the whole garage cleaned out today with NO help!...sweeeeet.
 (car1.jpg) (car1.jpg)
 (car2.jpg) (car2.jpg)
Attachments
----------------
car1.jpg (122KB - 169 downloads)
car2.jpg (138KB - 162 downloads)
|
|
| |
|
Expert 5K+
Posts: 8443
Location: Perth Australia | Why isnt your work bench 3 or 4 layers deep in assorted things
Its just not right to not have to dig for stuff thats been there for ages
If you have put everything away, that means its lost forever as everyone knows that the proper place to store anything is on the bench and anything that you would do on a work bench must be done on the floor
|
|
| |
|
Extreme Veteran
Posts: 451
| Well my friend., that is EXACTLY why I just spent three full days in 105 degree heat cleaning up...because I COULD NOT find a darn thing! I had five years of dust on the top of that work bench, kept getting metal shavings in my hands...got tired of that, so had to clean it up..haha |
|
| |
|
Extreme Veteran
Posts: 313
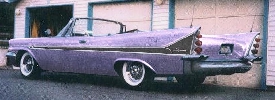
Location: New Jersey | Guy---Great work on the DeSoto. Your work seems meticulous. Love your winch! Fred Jr. went nuts when he spied that Fox convertible in image 60.c. (Stick?) He's already bugging me two years before he gets his license. If you want to sell let me know. Keep the thread going on the DeSoto progress.---Fred |
|
| |
|
Expert
Posts: 2312
Location: Arizona | Love the Fox bodies. I had a 88 notchback 5.0 LX stick shift I bought at auction from the Highway Patrol. It was one of my all time favorite cars. Gave it to my daughter who also loved it. Unfortunately she had an accident and it got totaled. Replaced it with 90 vert with automatic. The auto sucked a lot of the performance from it. She sold that to get a 2001 GT with a stick. I've got a 99 GT but I actually think that in many ways the Fox was a better car although the 99 and 01 are a lot faster. |
|
| |
|
Extreme Veteran
Posts: 451
| Well., truth be told., the Mustangs are close to my heart too., I have owned at least 60 and counting!
I had two 84 1/2 GT 350 4spd Convertibles., One had a 400 hp built balanced 302 in it...I pulled that motor for my 68 GT (on the docket for restore) and sold the body...I still have the other GT350/4spd/convertible, restored...but when my brother showed up one day recently he fell in love with it...so I think it's gonna be heading to Phoenix. The other is a 92 LX convertible (green car in the photo)...my wife's daily driver. She wanted horsepower to get on the busy highway to go to work., so that fit the bill...and its a convertible to boot...
|
|
| |
|
Extreme Veteran
Posts: 451
| Getting really close to starting the painting process. Just finished up all the entry jams and gutted and sanded/primed the doors today....my daughter is not shy to pose for photos!....LOL
Also updated my winch system in the garage to a 9000 lb unit., the 5500 lb unit was just too small....the 9000 lb unit has no troubles pulling the Desoto back into the garage from the slanted driveway I have.
Edited by guyman 2015-07-10 12:48 AM
 (sierra.desoto2.jpg) (sierra.desoto2.jpg)
 (sierra.desoto.jpg) (sierra.desoto.jpg)
 (desoto.primer2.jpg) (desoto.primer2.jpg)
 (desoto.primer3.jpg) (desoto.primer3.jpg)
Attachments
----------------
sierra.desoto2.jpg (101KB - 177 downloads)
sierra.desoto.jpg (88KB - 192 downloads)
desoto.primer2.jpg (90KB - 179 downloads)
desoto.primer3.jpg (72KB - 171 downloads)
|
|
| |
|
Extreme Veteran
Posts: 451
| Sound deadener/heat sheild is mostly installed....just waiting on my "cushion" deadener to do the floors.
This stuff is awesome., first time I have used it, and man., was missing out...I always use the glue in stuff., this is pressure sensitive., just cut, peel the backing off and install..uses a small roller to make it stick good. I bought one roll ($80) and it was a perfect amount to do what I wanted to do...I will use a jute backing padded heat sheild product for the bottom of the floorboards for more cushion when installing the carpet.
Cheers.
 (sound.dead.jpg) (sound.dead.jpg)
 (sound.dead2.jpg) (sound.dead2.jpg)
Attachments
----------------
sound.dead.jpg (122KB - 178 downloads)
sound.dead2.jpg (126KB - 201 downloads)
|
|
| |
|
Extreme Veteran
Posts: 451
| Finally slinging some paint! (Would post some photos but having a hard time uploading for some reason)., lately been having problems...
Edited by guyman 2015-07-29 1:15 AM
|
|
| |
|
Expert 5K+
Posts: 8443
Location: Perth Australia | I think we have to wait for Dave to get time to sort the picture problem out
Always good to get paint happening
|
|
| |
|
Extreme Veteran
Posts: 451
| Movin' along., finished all the jam painting this weekend., so the car is back together again. Top is done too....painted it off white, cream color.
 (IMG_3750.JPG) (IMG_3750.JPG)
 (IMG_3749.JPG) (IMG_3749.JPG)
 (IMG_3751.JPG) (IMG_3751.JPG)
Attachments
----------------
IMG_3750.JPG (169KB - 163 downloads)
IMG_3749.JPG (142KB - 231 downloads)
IMG_3751.JPG (214KB - 188 downloads)
|
|
| |
|
Extreme Veteran
Posts: 451
| Starting to look like an Adventurer...been restoring and buffing stainless trim past week....I think there are around 40 pieces of exterior stainless to do. I only have maybe close to half of it done...very time consuming , but what a difference...WOW....worth the time and energy....
 (stainless.jpg) (stainless.jpg)
 (stainless2.jpg) (stainless2.jpg)
Attachments
----------------
stainless.jpg (113KB - 183 downloads)
stainless2.jpg (115KB - 200 downloads)
|
|
| |
|

Elite Veteran
Posts: 827
Location: tailFinland | Polishing all stainless properly is really worth of the effort when its done. I am plannig to do it next winter weekend evenings in my garage, listening rock and roll, taking some beers and polishing stainless
What kind of prosess you have? do you sand scratcehs, hammer dings and dents, do wet sanding and different grind abrasive papers and waxes - or just polish them.
|
|
| |
|
Extreme Veteran
Posts: 451
| Well, as you know, over the past 60 years, these pieces take some abuse, so I am fixing every piece....dings, dents etc....hard to find perfect ones, so I learned how to fix them and polish. Depending on how bad the scratches are will depend on which grit you have to use to sand out the scratches....in general, I have been starting with a 240 grit, then 400, then 600 wet, 800 wet... All by hand..then an air orbital with 1,000 and 1,500 grit...then it's on the the polishing wheels, first with black rouge on a stitched wheel, then brown rouge...then the final polish with green rouge on a soft buff wheel....then after all that is done....may have to hit some areas and start the whole process over on the areas that need help.
The dents require a lot if time to get them out....I spent about three hours working on one of my rock guards...then with that process...have to start with a file...and file down the high spots etc.....sounds harsh but you have to do it., then start with the sanding process....they turned out great.... |
|
| |
|
Expert 5K+
Posts: 8443
Location: Perth Australia | Be careful with the beers polishing stainless
The polishing wheels can be pretty savage
|
|
| |
|
Extreme Veteran
Posts: 451
| Been there already..haha....easy to catch an edge while polishing....already had to fix two pcs. But., it's for sure worth doing the polishing....man, what a difference. |
|
| |
|
Extreme Veteran
Posts: 451
| Stainless is ALMOST done, one long pc left for the rear quarter..
I had a couple pretty bad pieces and with a little hard work., got them fixed....one of my rock guards was squished flat....took me three days to rebuild it., came out really nice!
It's been an experience restoring all these pcs....but well worth all the hours invested. It's gonna make the car shine like a diamond!
Guy
 (stainless.jpg) (stainless.jpg)
Attachments
----------------
stainless.jpg (92KB - 157 downloads)
|
|
| |
|
Elite Veteran
Posts: 827
Location: tailFinland | ttotired - 2015-08-14 6:25 PM
Be careful with the beers polishing stainless
The polishing wheels can be pretty savage
I will for sure Few years ago, I was working with my rat rod saturday night. After few hours of work I started welding but something was wrong all the time, machine did'nt work like it used to work, adjusted it many times and did testing welds. When finally welded a seam into a car it looked quite ok but wtf it was in a wrong place.
I figured out there were only 3 empty cans on the floor... But i also have a Jägermeister bottle in a medicine cabinet, how many times I opened that door??? uups.
I do not keep liquers in my garage any more, but beer is ok |
|
| |
|
Elite Veteran
Posts: 827
Location: tailFinland | Nice work guyman! Iam going to do it quite similar way you did. I got a 300G and lot less stainless thank god. |
|
| |
|
Member
Posts: 33
| What incredible work!! Absolutely gorgeous. |
|
| |
|
Extreme Veteran
Posts: 451
| It's a process with this stainless....if you have light scratches....you may be able to start sanding them with 800 wet....heavier scratches may take a heavier grit like 600 wet....or you may have to go down to 240 even to start with to get rid of heavy scratches.I learned after doing these that usually the light scratches come out with the 800 wet..then 1000,1200 and 1500... All wet....then buff buff..starting with a spiral pad with black and brown rouge..then a a soft buff wheel with green rouge.
If you have dents it's a different story....those require a lot more work...and require a file to start after the dents have been worked out to get rid of the high spots, then 120 grit on up to 1500.... May take 3,4,5 hours to do one piece if there are dents in the trim piece. If the dent is on a concave surface...you can't use a file I have learned....so I used a drimmel tool and that takes a lot of trial and error...if it's a small dent in a curved area..be prepared to spend a lot of time getting those dents out and sanded, polished.
If anyone is afraid to try fixing them...try to fix an extra piece you don't care if you mess up until you get the process right...it's really rewarding seeing the final pieces done...it's very expensive to hire someone to do this kind of work!
Try try again!!! |
|
| |
|
Expert
Posts: 2788
Location: USA - KY |
The stainless drip rail trim that I found for my car arrived crammed full of what remained of a rusted car roof wedged firmly into the back channel of the trim. And to make matters worse, it seemed as though someone had glued the drip rails onto the donor car's roof, many years ago.
After many hours of work, I managed to grind out all of the glue and old rusted metal from the back side of the drip rails so that I could have them installed onto my car. It made me very nervous as one false move could have damaged these unobtainium pieces of trim which I had searched for, for soooooooooo long.
So now I have to say that after all of that work, I am very impressed with anyone who can polish and restore stainless trim, such as guyman. Yikes, what a job.
After clearing out the back channels of the drip rails, I couldn't work up enough nerve to attempt the stainless polishing myself, so I sent all of my car's stainless off to a pro to have it polished (luckily it had no really big dents to remove) and the pro did an amazing job. But guyman is right...cha-CHING!, it's not inexpensive work to have done by a pro.
Best of luck with the stainless - and the work you're performing on your car is GREAT!
 |
|
| |
|
Extreme Veteran
Posts: 451
| Thought I was done with the stainless for this beast...haha....just found a couple more pieces that I forgot about
that go along the drip rails and the inner window areas...UGGGGG...time to break out the buffer again...LOL |
|
| |
|
Extreme Veteran
Posts: 451
| Got the Desoto outside today to clean out the garage...it's a mess!
 (desoto.jpg) (desoto.jpg)
Attachments
----------------
desoto.jpg (275KB - 182 downloads)
|
|
| |
|
Veteran
Posts: 164
Location: Alvin, Texas | You are doing an awesome job! What are the names of the colors you are using? Where did you get the paints from? |
|
| |
|
Extreme Veteran
Posts: 451
| Actually., I get all my colors from a local paint store. I am using the stock colors that are used in the original color catalogs from back in the day...usually you can buy those off of ebay., or some members up here may have them. |
|
| |
|
| Looking good, and for taking the ball joints in and out of the control arms, the better way to do them is to take them to a heavy duty shop that has a 3/4" impact gun-buzzes them in and out easy. I built a socket for them. |
|
| |
|
Extreme Veteran
Posts: 451
| I like busting my knuckles and doing things the hard way.  |
|
| |
|
Veteran
Posts: 295
Location: Tallapoosa, GA | FINALLY!!! Someone who put some real leaf springs in the rear and got that A$$ end UP!!
NICE JOB!!! |
|
| |
|

Expert 5K+
Posts: 9681
Location: So. Cal | Resurrector - 2015-11-15 7:18 AM
Looking good, and for taking the ball joints in and out of the control arms, the better way to do them is to take them to a heavy duty shop that has a 3/4" impact gun-buzzes them in and out easy. I built a socket for them.
Taking them out with air power works great, but I wouldn't put them in with air. You risk stripping the tiny threads and ruining the control arm. They strip pretty easily.
The car looks great. I love the color of your '59. I have thought of mounting a winch to my garage too, but I never did. I try to keep my vehicles running while I work on them so that most of the time I don't need it.
Edited by Powerflite 2015-11-24 10:39 AM
|
|
| |
|
Extreme Veteran
Posts: 451
| cbrayinga - 2015-11-24 7:05 AM
FINALLY!!! Someone who put some real leaf springs in the rear and got that A$$ end UP!!
NICE JOB!!! :cool:
I think it's up a bit high...and it's on a slanted driveway..so looks higher...I still need to adjust my torsion bars cause the front end is sitting low and the rear shocks are not mounted on the car yet...so that rear end will sit lower...sorry...LOL |
|
| |
|
Extreme Veteran
Posts: 451
| Too darn cold to work on the Desoto!....come on Spring time!...
|
|
| |