|
|
Expert
Posts: 2524
 
Location: Houston |
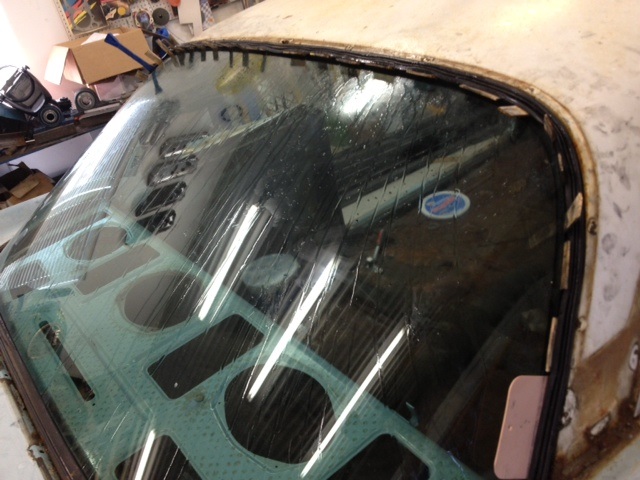
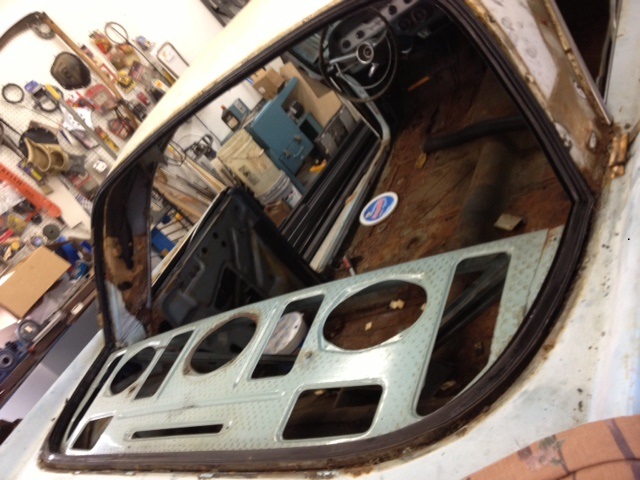
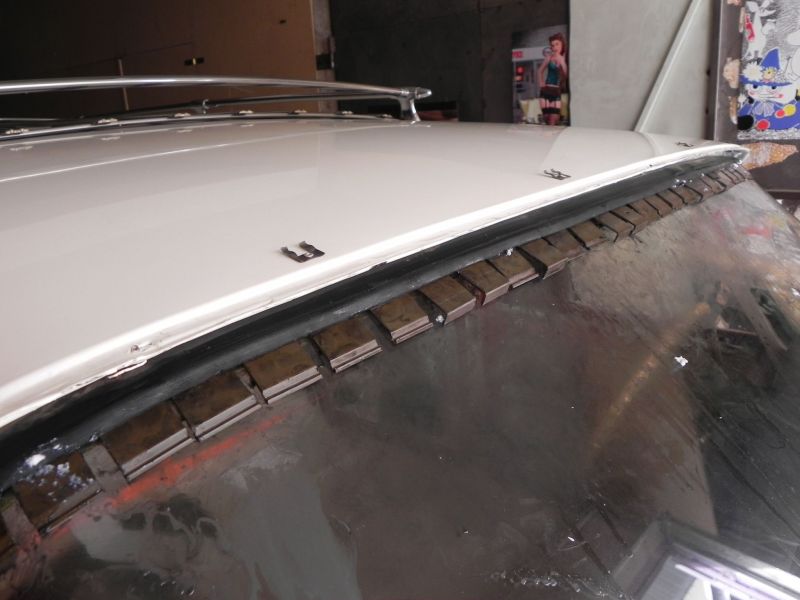
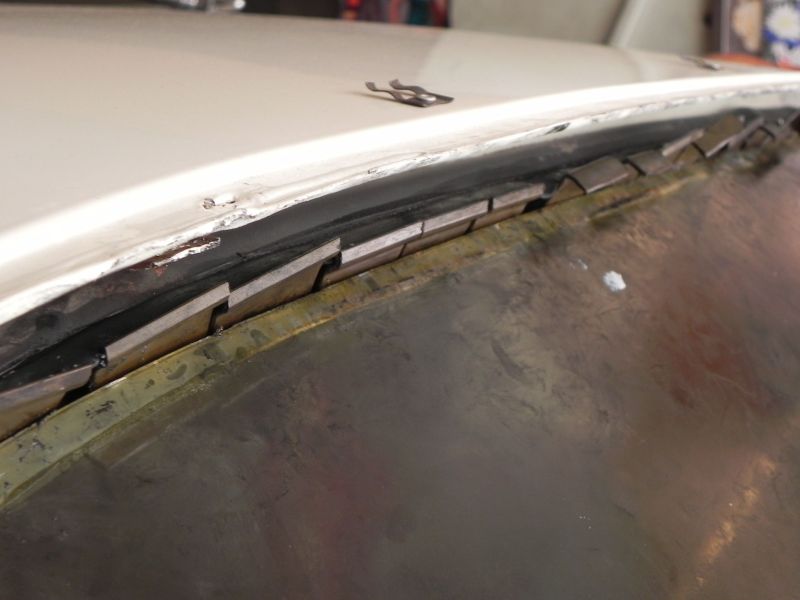
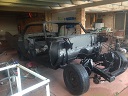
I don't see a lot of posts about 'how to' remove front and rear glass in FL cars. This is an easy job if you don't care about either the glass or the gasket, but a lot more tricky when you need to save both the glass and the gasket.
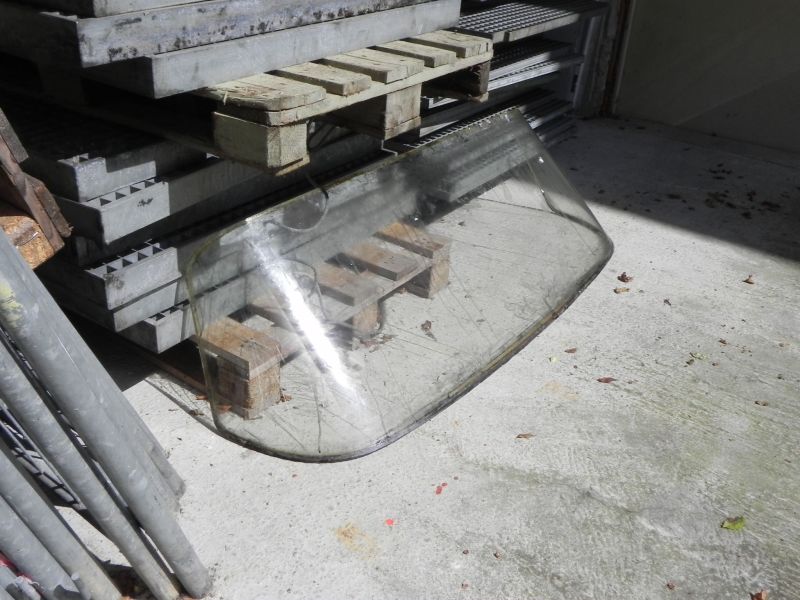
I pulled the rear 'high glass' out of the Desoto and thought I'd post a couple pics. This is a couple hour project....moving slowly is key. It would go more quickly if I had a couple good helpers but I don't.....as with most work I do on my cars it is a one man operation.
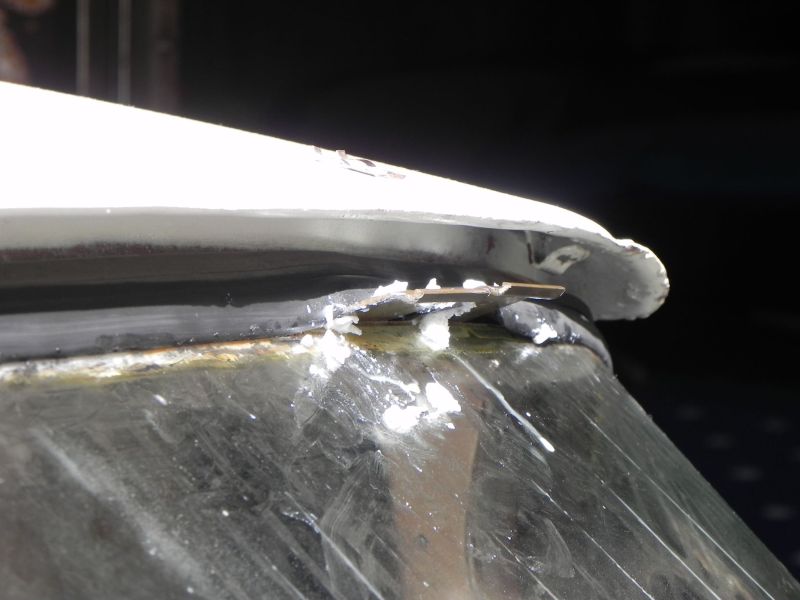
I first went around the perimeter of the glass, inside and out, with a nylon putty knife to loosen the gasket from the glass. I also sprayed a bunch of rubber lube (Ru-Glide or similar) to help the two pieces from sticking back. The rubber lube is what is commonly used when mounting new tires.
Then, I use a bunch of small pieces of paint stirring stick to help hold the gasket lip back - kind of a reverse shoe horn. If I had a bunch of nylon putty knives, like 50, I would use those instead. The point here is to minimize the amount of force needed to push out the glass.
Once all the sticks are in place, and more lube, it becomes fairly easy to push out the glass (at the top first).
This job would be aided by parking the car is the sun for a few hours to heat the rubber, but since it is not July yet I did it indoors.
I used no metal tools of any sort - you can use metal, if you like glass with cracks!
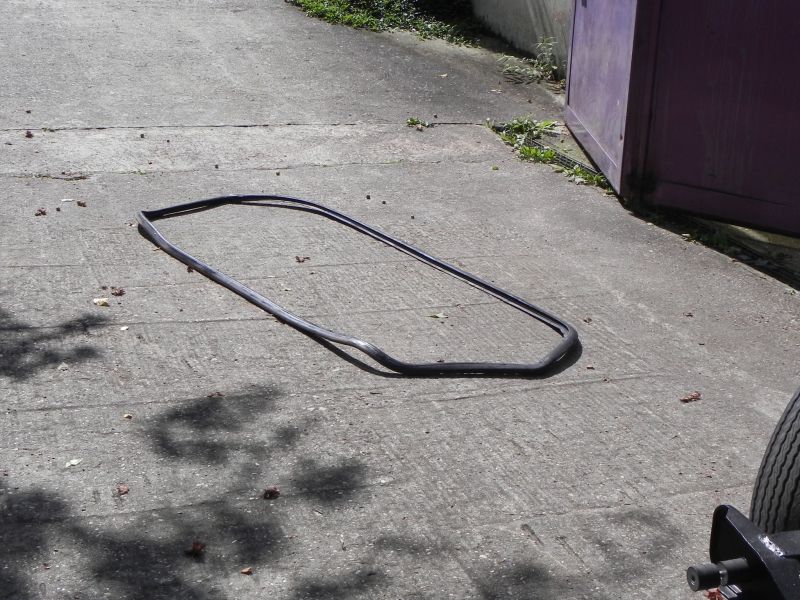
The glass will be stored until it's time to go back in. The gasket gets scrubbed clean with a brush and strong soap and hung up on a wall to help keep its shape. It's impressive that a 57 year old piece of rubber is still good enough to use, but luckily it is!
 (rear glass out.jpg) (rear glass out.jpg)
 (rearglass out 2.jpg) (rearglass out 2.jpg)
Attachments
----------------
 rear glass out.jpg (108KB - 248 downloads) rear glass out.jpg (108KB - 248 downloads)
rearglass out 2.jpg (115KB - 246 downloads)
|
|
| |
|

Expert 5K+
Posts: 7807
 
Location: Williams California | Great How-to photos on the subject, Greg.
I find Mopar glass the easiest to install and remove because of the locking strips on the gaskets. Most manufacturers do not offer this, therefore making the job 50% tougher, unless you cut the gasket.
---John |
|
| |
|

Expert 5K+
Posts: 8947
 
Location: WHEELING,WV.>>>HOME OF WWVA | in and out the same way ----------------------------------------------------------later
http://forwardlook.net/forums/forums/thread-view.asp?tid=24066&post... |
|
| |
|

Expert
Posts: 1493
Location: Jamaica Plain, MA | Indeed. Probably obvious, but you don't want to knick the edges of back glass. But, it's tempered and not particularly fragile. Windshield safety glass on the other hand, is precious and fragile. |
|
| |
|

Expert
Posts: 2519
Location: central Illinois | My body guy wants to simply cut the gaskets and remove the glass but I'd like to save the original gaskets and try to reuse them. I'll be using the info you posted Greg, but will wait till it's warmer and the sun can heat it a little or may try a heat gun for the same effect. Thanks for sharing. |
|
| |
|
Expert
Posts: 4042
Location: Connecticut | The book recommends pushing the glass out from about 2/3 of the way down, positioning your hands at the 9 and 3 o'clock positions on the curve. This is the strongest part of the glass. This is how I successfully removed one of these monsters from a 58 NYer a number of years ago. I've also removed a number of windshields and rear windows from parts cars without incident. The top of the glass is not that strong and you risk cracking it in half if the glass binds at either of the lowest corners. The gasket folds into itself and locks in place. Be sure the gasket is unlocked before starting. When removing, it is critical that the gasket be lubricated with WD40 or similar and that it be completely loose from the glass. Equal pressure with both hands on the locations described above will eventually get the glass to release from the gasket. Note this applies to 1957 and later windshields and back glass. 55-6 are different. To install, slip the upper portion of the glass into the rubber gasket, then work the glass into the gasket on the sides and finally into the lower part. A sharpened paint mixing stick or nylon drift will work for this. Also note that this is a two-person job. Ron |
|
| |
|
Expert
Posts: 4042
Location: Connecticut | b5rt - 2014-03-15 9:23 AM My body guy wants to simply cut the gaskets and remove the glass but I'd like to save the original gaskets and try to reuse them. I'll be using the info you posted Greg, but will wait till it's warmer and the sun can heat it a little or may try a heat gun for the same effect. Thanks for sharing. Don't cut the existing gasket. If your body guy doesn't have the skills to remove the glass correctly, then get a glass guy to help you. None of the current repros are as good as original. Ron |
|
| |
|
Extreme Veteran
Posts: 489
Location: London, England | On my '57 the locking strip was almost invisible. Once I found it, it came out with a big flat blade screwdriver and some patience. Both front and rear screens came out easily. Sadly, the "expert" glass guys wouldn't listen to me and destroyed the front screen, so I managed to get a repro. Luckily they didn't cut the rubber, so I could reuse it. |
|
| |
|
Extreme Veteran
Posts: 537
Location: Upstate NY | Here comes a dumb question.(?) Since there is a chance of breaking the glass, if your gasket and windshield are in good shape can't you just protect it during blasting and painting? There are really flexible durable products that would protect the glass and gasket. In other words is there an advantage to taking them out? The times I have removed them the metal under the gasket is in like new original shiny paint shape. I really don't want to chance breaking mine. Just asking. |
|
| |
|
Expert
Posts: 4042
Location: Connecticut | Bob - You won't break it if you do it correctly. Many reasons to remove the original windshield: -Leaks (you want to clean everything out and not just shoot a ton of silicon into the channel to try to stop the leak) -Changing the windshield due to wiper scratch or crack. -Changing from clear to solex glass. -Removing a cracked or damaged gasket. Ron
Edited by ronbo97 2014-03-15 11:36 AM
|
|
| |
|
Expert 5K+
Posts: 8947
Location: WHEELING,WV.>>>HOME OF WWVA | it's real easy to do , just keep metal objects away from it and kinda be gentle with it but also keep in mind , it's not an egg shell . probably the biggest thing
is to keep it centered -------------------------------------------------later |
|
| |
|
Expert
Posts: 2524
Location: Houston | You really can't leave the glass in during blasting.
1) You are unlikely to truly protect it and you'll get sand damage.
2) The metal under the gasket has seen 50+ years of water, maybe, and will need cleaning and fresh paint just like the rest of the car. It's this type of thing that separates a good
restoration from a shoddy one that will be a problem later for the next guy.
In the case of my car, there was rust beginning to form...but luckily it will be OK after blasting.
The whole purpose of saving the gasket is that you can't buy new ones...or if you can (?) they won't fit as well.
In an aside, while the rear glass took a couple hours to get out - the front glass practically fell out in about 15 minutes. The difference is that is fit slightly looser in the gasket in the vertical direction.
|
|
| |
|
Extreme Veteran
Posts: 537
Location: Upstate NY | Ok, convinced. Thanks guys, the next question is to get it out in one piece just pull the gasket back on both sides lube it up good and there is a pull strip to pull out and then get some help and push it out from the 9 and three positions on the curve and pray? |
|
| |
|
Elite Veteran
Posts: 1159
Location: D-70199 Heslach | GregCon - 2014-03-12 7:59 PM
......., but a lot more tricky when you need to save both the glass and the gasket......
I like to do the glass job like Greg, because most work you could solve by an one man operation.
But how do I get the sticks that they push up the seal by itself and thus perpendicular to the windscreen and will not back down from the pressed seal. Because I will do the job alone, without 50 helping hands.
Will they hold by itself when they plugged down deep enough.
big m - 2014-03-13 1:34 AM
.....because of the locking strips on the gaskets...........
---John
John, where are this strips located, Inside, or outside of car, upper or lower side?
ronbo97 - 2014-03-15 3:23 PM
......positioning your hands at the 9 and 3 o'clock positions on the curve. This is the strongest part of the glass.
Which book, where is the center of this "clock".
|
|
| |
|

Expert
Posts: 1740
Location: Alaska | Someone mentioned doing it outside on a warm day to warm the rubber but this also helps to warm the glass, the warmer it is the more flexible it is.
|
|
| |
|
Expert
Posts: 2519
Location: central Illinois | The day of pulling my windshields is rapidly approaching. About a month ago I liberally applied an entire bottle of Meguiar's rubber lube to the gaskets. Then about 2 weeks ago I took my heat gun around the perimeter and worked a hard vinyl wedge around the rubber and got the lip to pull back after a good minute or two of slow heating the rubber. I went out tonight and the rubber is once again as hard as a rock. That's no exaggeration either, I can't believe it's right back to being rock hard. I really thought the heating process would've left it soften a little bit. I'm really questioning if they're worth saving at all. I've got a set of Goer's repop gaskets that look like they'll work but without an empty hole to put them in, it's really hard to tell.
My question is, if I save them, how would I possibly get them softened up enough to reuse? There's no way in hell my worn out hands are going to spend hours working rubber lube into them to soften them up. |
|
| |
|
Expert
Posts: 1740
Location: Alaska | I have not tried it yet but is there anything you can soak the old rubber in to soften it up such as kerosine or diesel? Any one tried this? |
|
| |
|
Expert
Posts: 4042
Location: Connecticut | After unlocking the rubber gasket, spray lots of WD-40 on the gasket. When it's flexible again, you can start to remove the glass. If that doesn't do the trick, you may have to consider cutting. Maybe one slit in each corner ? Do this as a last resort, however. Ron |
|
| |
|
Veteran
Posts: 174
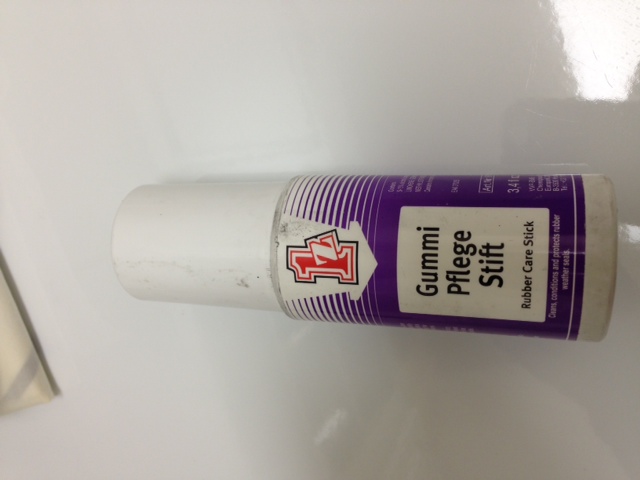
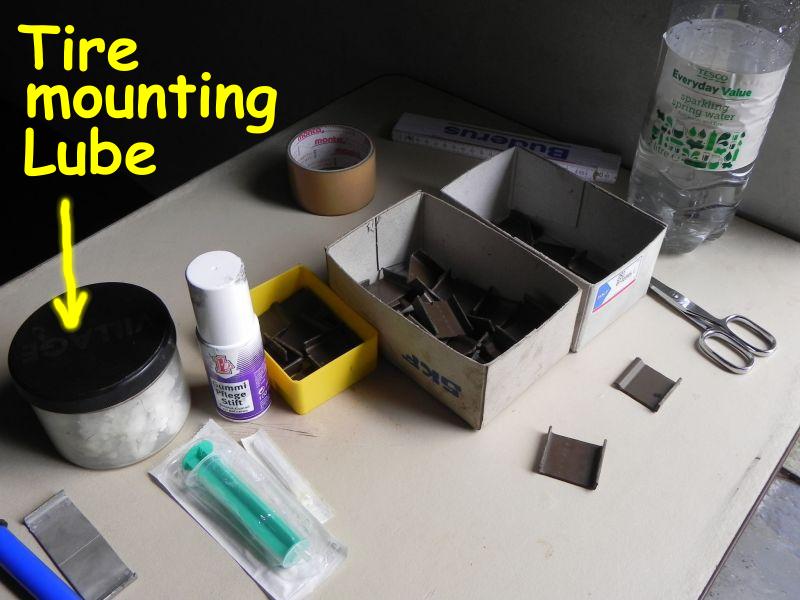
Location: Phoenix, AZ | This is the best rubber restorer I have found over the years. Gummi Pflege Stift. (It is almost worth buying just for the name!) There are many posts about it on the internet, especially for restoration of old BMW and Porsche rubber. I purchased this one bottle on Amazon and it was more than enough to do both the front and rear window rubber on my 59 Plymouth. After I revoved the rubber and cleaned it well with soap and water I applied lots of this stuff to the rubber and it seemed to make it look almost new and be more flexible. It should be much better for the rubber than a petroleum product.
 (photo-39 copy.JPG) (photo-39 copy.JPG)
 (photo-39 copy.JPG) (photo-39 copy.JPG)
Attachments
----------------
photo-39 copy.JPG (64KB - 233 downloads)
photo-39 copy.JPG (64KB - 238 downloads)
|
|
| |
|
Extreme Veteran
Posts: 537
Location: Upstate NY | Greg,
Really good thread regarding glass removal. I just removed the windshield in my 57 Fireflite and I didn't use any popsickle sticks. I did lube it up good with some WD40 after unlocking the gasket but I took a 49 cent plastic putty knife and went around the inside and outside of the gasket, prying slightly. I found the most success running my finger between the glass and the gasket inside and out. The tightest areas were on the edges. The middle loosened nicely. i got to the point where I could pull the outside rubber by rubbing my finger between the glass and the inside rubber and reverse so I knew it was loose. I tried pushing slightly on the curves on both sides and Incould see it was loose in the gasket. Finally with someone on the outside I pushed the curves from the inside and the glass came out of the top but wouldn't go further than the metal roof. I then cam outside with my helper and we grabbed the bottom of the curve and lifted up and the windshield came out. In one piece!!! I'm glad I did it because as people said the metal under the gasket was rusty! Thanks for all the advice and encouragement. |
|
| |
|
Veteran
Posts: 234
Location: Dallas,Ga. | Speaking of rubbers, who has good ones, besides Trojans? Just kidding. I know that Bernbaum has windshield, and back glass gaskets listed on his site, but has anyone seen/ purchased them? My Gaskets are dried out, shrunken, and split. I am just wondering about the quality and fitment of them. I have a '58 Firesweep four door. Luckily, my glass is good. |
|
| |
|
Expert 5K+
Posts: 8947
Location: WHEELING,WV.>>>HOME OF WWVA | I have not tried it yet but is there anything you can soak the old rubber in to soften it up such as kerosine or diesel? Any one tried this? go-jo or anything like it will work . smear it up , put it
in a garbage bag for a day or 2 and you'll be amazed by the results . now why does it work , lanolin ! --------------------------------------------------later |
|
| |
|
Extreme Veteran
Posts: 489
Location: London, England | A friend of mine once had a chroming company put rubber parts in the stripping tank. Apparently they came out like new! I haven't tried this though.
Also, I have a pair of the Bernbaum windshield rubbers. The profile is fine, and they look like the originals except the corners aren't moulded like the factory ones. Not a huge deal. Since I restored my original ones though I need to sell my repro ones if anyone wants them. |
|
| |
|
Elite Veteran
Posts: 1159
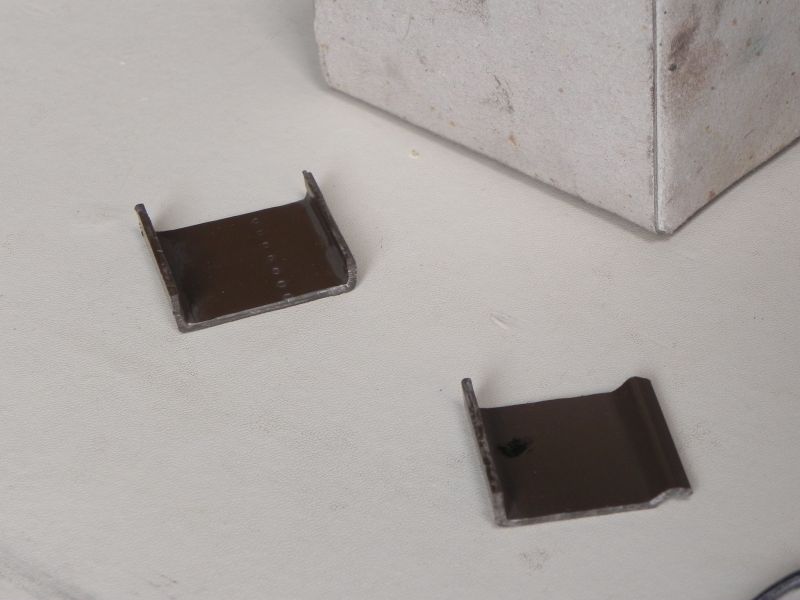
Location: D-70199 Heslach | I have the same suggestion as Greg,-> .....as with most work I do on my cars it is a one man operation.
First I tried to loose the rubber with plastic kitchen knife, but the most practical are cable channel, which I first sawed into little parts.

Be careful when push the plastic into the seal, I first was not paying attention and put the rubber broke at vulcanized location, but that can be later easily repaired with sealant or vulcanization.
I prepared 50+ sawed pieces, lubricate the seal with "Gummi Pflege Stift" that I inject with the syringe into the seal.
After all the plastic pieces in place, then part for part pushing until all pieces are perpendicular to the windscreen.
The Rest of the job is easy, just press from the inside, and finalize the removal job!!
 (140830_1828.jpg) (140830_1828.jpg)
 (140707_0536.jpg) (140707_0536.jpg)
 (140707_0534.jpg) (140707_0534.jpg)
 (140830_1830.jpg) (140830_1830.jpg)
 (140830_1832.jpg) (140830_1832.jpg)
 (140830_1834.jpg) (140830_1834.jpg)
 (140830_1836.jpg) (140830_1836.jpg)
 (140830_1845.jpg) (140830_1845.jpg)
 (140830_1844.jpg) (140830_1844.jpg)
Attachments
----------------
140830_1828.jpg (97KB - 226 downloads)
140707_0536.jpg (100KB - 223 downloads)
140707_0534.jpg (33KB - 245 downloads)
140830_1830.jpg (58KB - 234 downloads)
140830_1832.jpg (106KB - 235 downloads)
140830_1834.jpg (110KB - 238 downloads)
140830_1836.jpg (100KB - 230 downloads)
140830_1845.jpg (169KB - 227 downloads)
140830_1844.jpg (141KB - 229 downloads)
|
|
| |
|
Expert 5K+
Posts: 8443
Location: Perth Australia | Good work
Bit brave sitting that glass on the concrete though
|
|
| |
|
Expert 5K+
Posts: 5006
| where is this gasket lock and how do you unlock it? |
|
| |
|
Expert
Posts: 4042
Location: Connecticut | mikes2nd - 2015-05-27 7:53 AM where is this gasket lock and how do you unlock it? If you own a FSM, it's explained in there. Basically, it unlocks from the center of the weatherstrip. Use a nylon or plastic drift. Never use a metal object, especially a screwdriver. Ron |
|
| |
|
Expert 5K+
Posts: 5006
| What is a FSM?, center on the bottom gasket right? from underneath? or from outside? |
|
| |
|
Expert
Posts: 1740
Location: Alaska | FSM=factory service manual. If you look carefully at the outside of your windshield rubber (or backglass) you will see a seam that runs completely around it, actually two seams, in the center of these seams is a smaller piece of rubber wedged in place, if you look, somewhere there will be a break in this strip, pry one end out with a plastic bar and pull this out all the way around. This is the lock strip. |
|
| |
|
Expert 5K+
Posts: 8443
Location: Perth Australia | Not all window gaskets have a locking strip that comes out
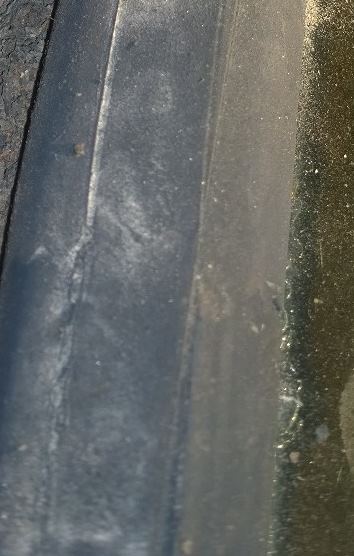
If you look closely at Tomopars pics above, you will see the rubber looks to have split along its length, thats the locking seam, its a part of the gaskets construction
I think (from memory) you start to release it from the top centre and work your way around evenly (bit on the right, then a bit on the left), but make sure whichever type of lock it has, that you fully release it first, it allows the rubber to flex open the channel the glass is in
I use dish washing liquid as a lube for glass removal, mostly because its less likely to stain the interior if it gets on something, but special care needs to be given for the roof lining as it will normally stain the second you look away from it 
Best to have helpers, but like most of the other guys here, when I have been messing with the glass, I have been by myself (kind of better that way, if it breaks, theres no one but you to blame)
|
|
| |
|
Expert
Posts: 1740
Location: Alaska | ttotired is correct, some rubbers have a single seam and lock into itself, still has to be pried open. Gojo hand cleaner always seems to best for me.
Edited by 58coupe 2015-05-28 10:06 AM
|
|
| |
|
Expert
Posts: 4042
Location: Connecticut | 58coupe - 2015-05-27 3:54 PM in the center of these seams is a smaller piece of rubber wedged in place, if you look, somewhere there will be a break in this strip, pry one end out with a plastic bar and pull this out all the way around. This is the lock strip. What years had this kind of gasket ? I've only pulled 57-9 windshields, so I'm used to the one piece setup, where you dig out the center to unlock, then push down the inner portion of the gasket to gain clearance for the windshield to be removed. I use healthy amounts of WD40 to allow the windshield to slip out easily. Also, you must verify that the gasket is completely separated from the windshield so it doesn't stick when you attempt to press out the windshield. Ron |
|
| |
|
Expert 5K+
Posts: 5006
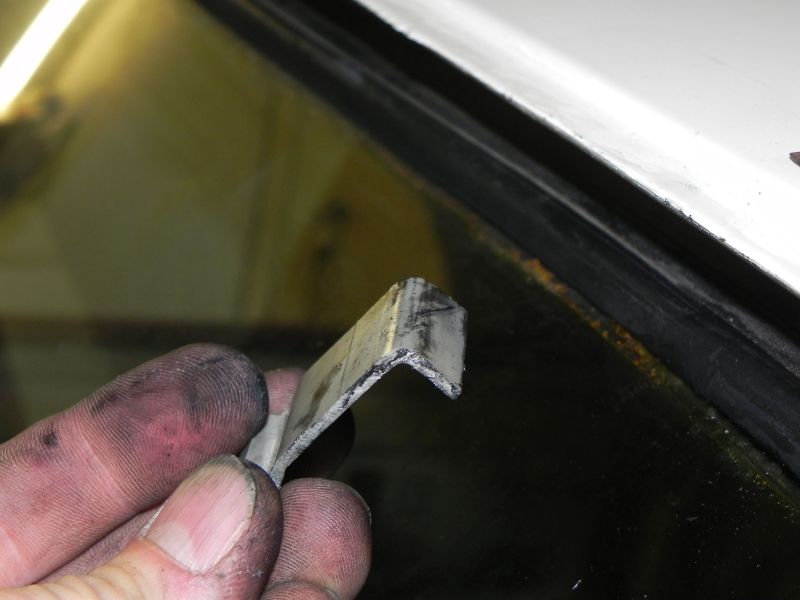
| This shows a locking strip...
Its on the "outside? Its not on the inside?
https://www.youtube.com/watch?v=PxcrQvJlcTM |
|
| |
|
Extreme Veteran
Posts: 580
|
Looks like these two guys are using metal tools plus they seem to be struggling to get it in with two people.
Is this typical for a installation on 1957-58 cars?
I need to replace my windshield on my 1958 Dodge Coronet and would like to know how to remove the chrome around it after you remove the screws.
It would be great if somebody had a picture of the clips or whatever holds the chrome on so I know what I'm dealing with before I start.
Thanks. |
|
| |
|
Expert
Posts: 4042
Location: Connecticut | local2Ed - 2015-05-28 7:07 PM Looks like these two guys are using metal tools plus they seem to be struggling to get it in with two people. Is this typical for a installation on 1957-58 cars? I need to replace my windshield on my 1958 Dodge Coronet and would like to know how to remove the chrome around it after you remove the screws. It would be great if somebody had a picture of the clips or whatever holds the chrome on so I know what I'm dealing with before I start. Thanks. IMHO, this is not a good video. Never use metal tools around glass. This is not how to remove/install a late 50s windshield. Best bet is to buy a shop manual and look at the photos. There are other threads on this site that have discussed this. The moulding clips have screw posts that are accessible from under the dash. There are a couple that need to be removed inside the cowl vent as well. Again the shop manual has complete instructions. I have both the 58 Dodge and the 57-8 Plymouth shop manuals. IMHO, the Plymouth manual is a lot more readable and 'user friendly'. Same procedure though. Ron |
|
| |
|
Expert 5K+
Posts: 5006
| 3 of the nuts are underneath the cowl stainless cover on a 58 dodge, that cowl cover pops off and you get to them from "outside".
the other 4 nuts? or two are inside under the dash, you can get it off but you will bend the heck out of it, there is two more you should undo underneath for the lower front side trims.
The upper roof piece must be worked off.
I just took off my window trim today the hard way. I have a lot of repairs but not too bad
Yes I agree NO metal near the glass... this glass chips and cracks like a cracker... that is much more modern glass.
Also it looks like this 58 Dodge does not have a locking seal. I looked at other seals I have(I have like 10) and found locking seals and I couldn't fit anything in this seal.
Edited by mikes2nd 2015-05-28 11:41 PM
 (seal.jpg) (seal.jpg)
Attachments
----------------
seal.jpg (33KB - 220 downloads)
|
|
| |
|
Expert 5K+
Posts: 8443
Location: Perth Australia | That line in the middle of your rubber opens up
It has an internal ridge that sits in a recess
When your taking the glass out or putting it back in, it will ride over the top of the outer edge
Just a side note, when removing or installing the glass, you have to leave the rubber on the steel channel, so, taking the glass out, you come away with the glass in your hand and the rubber is still on the car and the opposite for putting it back in
All the other vehicles I have ever done works the opposite, you fit the glass to the rubber and then use a string (cord) to rope the rubber in
Mopar seem to do it backwards and its a pain in the ....
Dont forget to use a mastic type of sealant when your putting it back in otherwise it will leak like seive
Once you get a bit of it open, it will become clear as mud |
|
| |
|
Expert 5K+
Posts: 8947
Location: WHEELING,WV.>>>HOME OF WWVA | i used this on replacing my heater box . easy to work with and would only need one bead all the way around the glass . seems to have the same texture as the oem glass channel
sealer . i like the way the glass rubber works on my dart . to me it's way simple---------------------------------------------------later
http://www.ebay.com/itm/64-79-GM-Firewall-Kick-Panel-Heater-Box-Sea... |
|
| |
|
Expert 5K+
Posts: 5006
| Yeah it looks like its the "left side" seam, I couldn't do anything with the right side seam unless its is glued? |
|
| |
|

Expert 5K+
Posts: 9672
Location: So. Cal | ToMopar - 2014-09-24 12:42 PM
I have the same suggestion as Greg,-> .....as with most work I do on my cars it is a one man operation.
First I tried to loose the rubber with plastic kitchen knife, but the most practical are cable channel, which I first sawed into little parts.
Be careful when push the plastic into the seal, I first was not paying attention and put the rubber broke at vulcanized location, but that can be later easily repaired with sealant or vulcanization.
I prepared 50+ sawed pieces, lubricate the seal with "Gummi Pflege Stift" that I inject with the syringe into the seal.
After all the plastic pieces in place, then part for part pushing until all pieces are perpendicular to the windscreen.
The Rest of the job is easy, just press from the inside, and finalize the removal job!!
Tom, could you tell me what size cable channel you used? I am looking to do the same and trying to get one from McMaster.com, but not sure what size works best for this. Thanks. |
|
| |
|
Elite Veteran
Posts: 1159
Location: D-70199 Heslach | Hi Nathan,
"the" size is not important. The length what goes under the seal should be approx 1/4" long. I used a channel with approx 1x1 inch, but be careful to order flexible plastic, NOT metal
I could recommend all of that https://www.mcmaster.com/#wire-channels/=1bcafw9
The secret is the lenght of 1/4 inch what goes under the rubber, the thickness of these pvc, I would say 0,04 inch is the best thickness and it should be flexible enought that it only bend an not break |
|
| |
|
Expert 5K+
Posts: 9672
Location: So. Cal | Thanks Tom! |
|
| |
|
Expert 5K+
Posts: 8947
Location: WHEELING,WV.>>>HOME OF WWVA | i couldn't find the seam on bertha til i started pokin around with a small , small phillips screwdriver ---------------------------------------------------------later |
|
| |
|
Extreme Veteran
Posts: 537
Location: Upstate NY | It's difficult working with a 60 year old gasket. The more you lube it and work it the more pliable it got. I remember this great info from Greg and used it to take my windshield and rear window out of my 57 Fireflite. My question is how to preserve and rejuvenate my original gaskets. I saw 60 Dart suggesting to use Go-Jo, is this the best product? I have to be careful bending it because it seems to be brittle or a little dry rotted??? |
|
| |
|
| I've used paintsticks before as well but I have found the most foolproof way to be popsicle sticks. If it's your first time pulling one, you know if you have placed too much pressure on any single point because they will snap in two. A box of 1000 is only a few dollars, and if you're a chronic cheapskate like me they can be reused, unless they snap.
Lestoil/white spirits will work wonders when brushed on rubber. |
|
| |
|
Expert 5K+
Posts: 8947
Location: WHEELING,WV.>>>HOME OF WWVA | 3 inch paint sticks with the nose curved with a dull chisel shape . about a dozen works ------------------------------------------------later |
|
| |