|
|

Expert
Posts: 1316
 
Location: Belgium, 40 miles south of Brussels | Rather than posting from time to time on the "What did you do on your FL car today" topic, I choose to dedicate a topic to my restoration. It's in its last lengths, after a whooping 12 years of very slow progress (for different reasons).
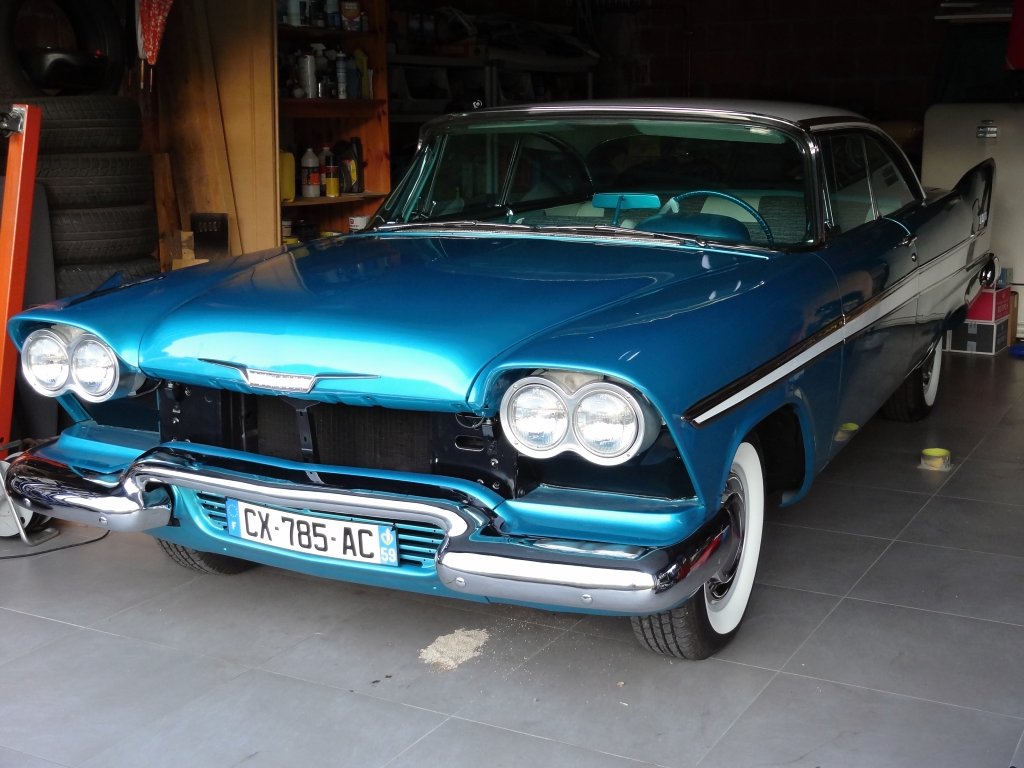
The basics : I'm restoring a '58 Plymouth Belvedere 2 door coupe hardtop. It has a 318 V8, Torqueflite, power steering, power brakes. The upgrades I decided : 2x4 bbl carburetion (Dual Fury V800 engine) and power windows.
For those who missed the last episodes :
http://www.forwardlook.net/forums/forums/thread-view.asp?tid=24680&...
http://www.forwardlook.net/forums/forums/thread-view.asp?tid=24680&...
http://www.forwardlook.net/forums/forums/thread-view.asp?tid=24680&... |
|
| |
|
Expert
Posts: 1316
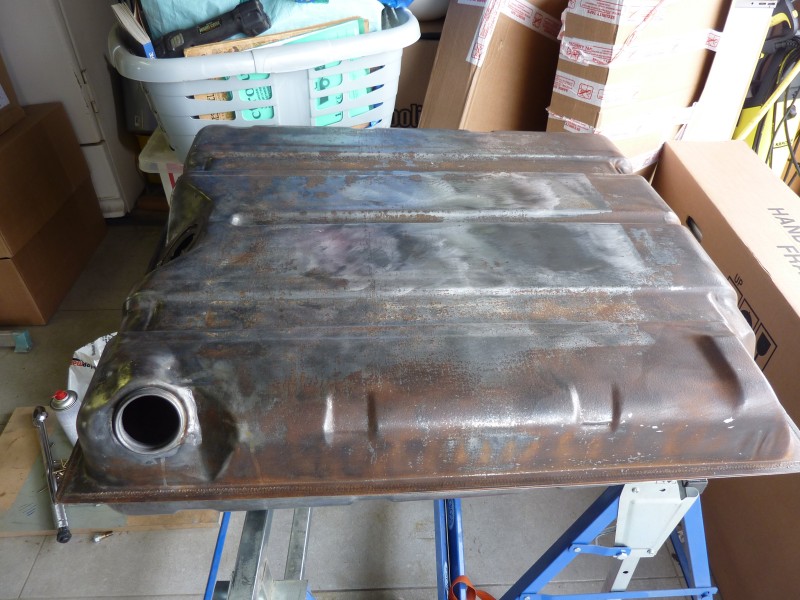
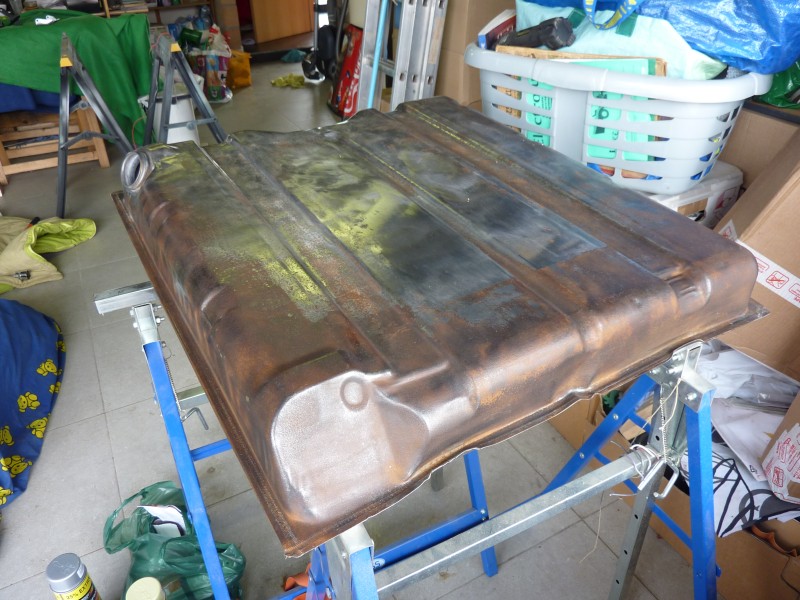
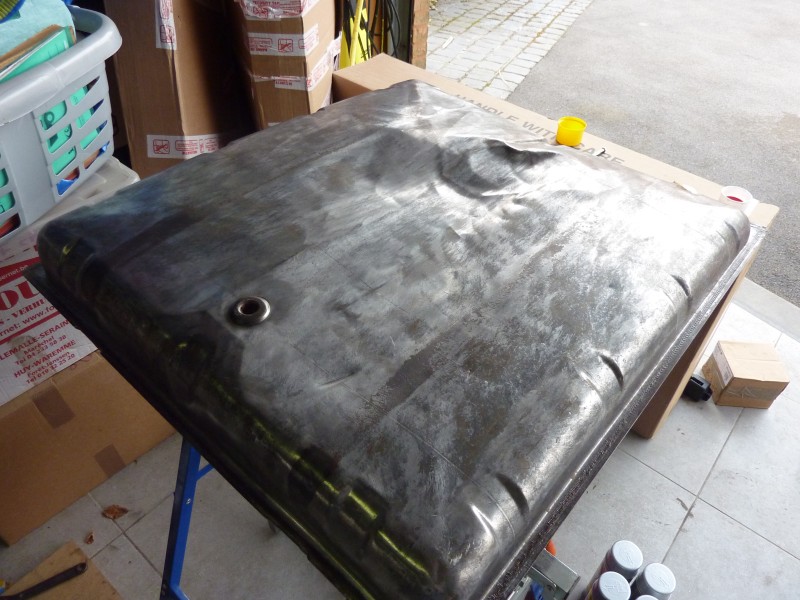
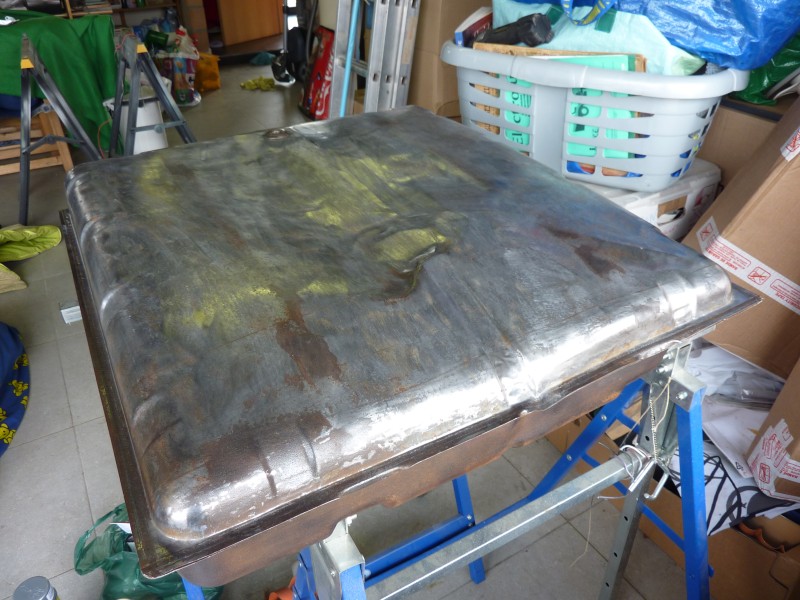
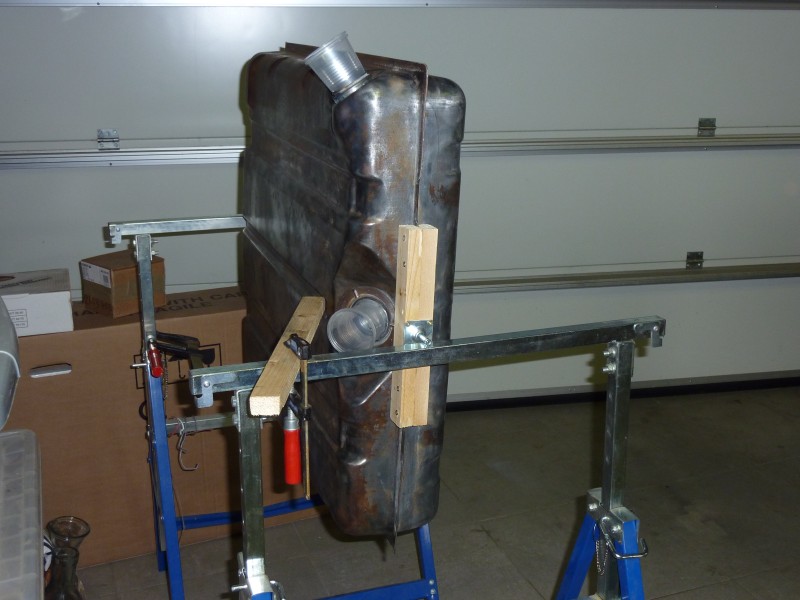
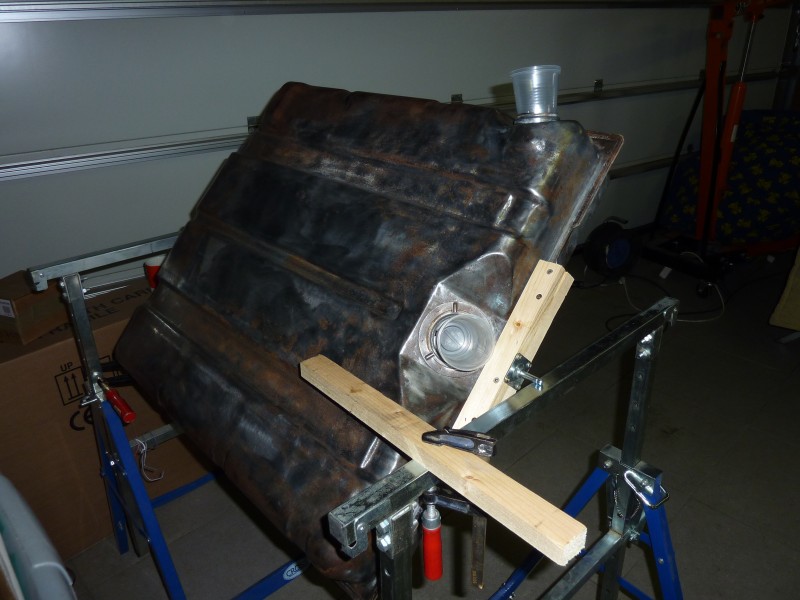
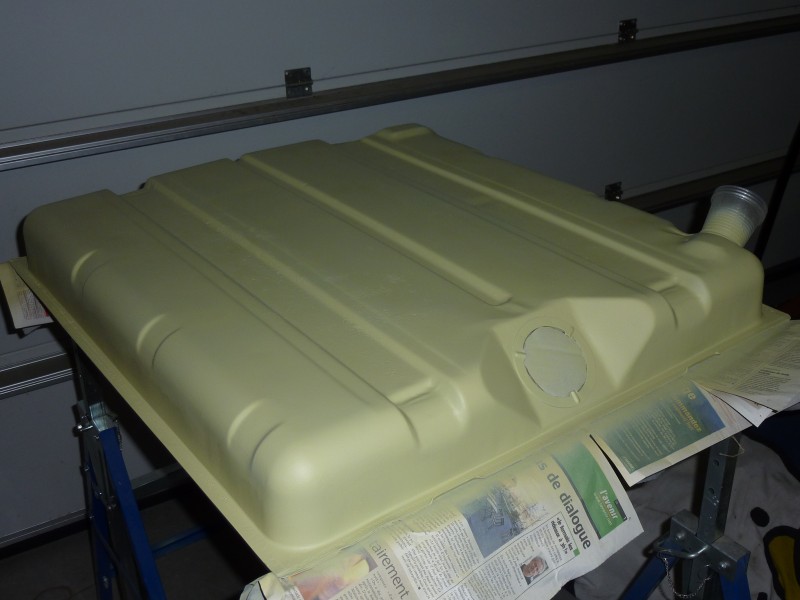
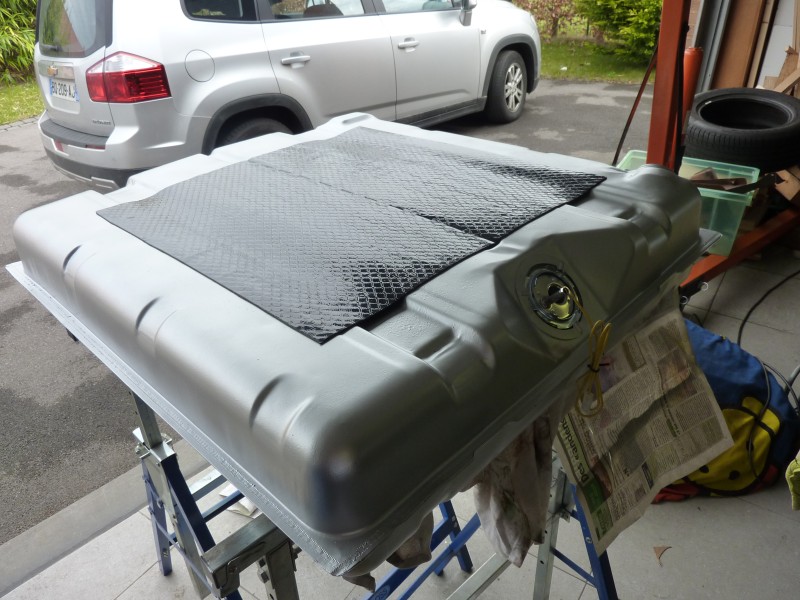
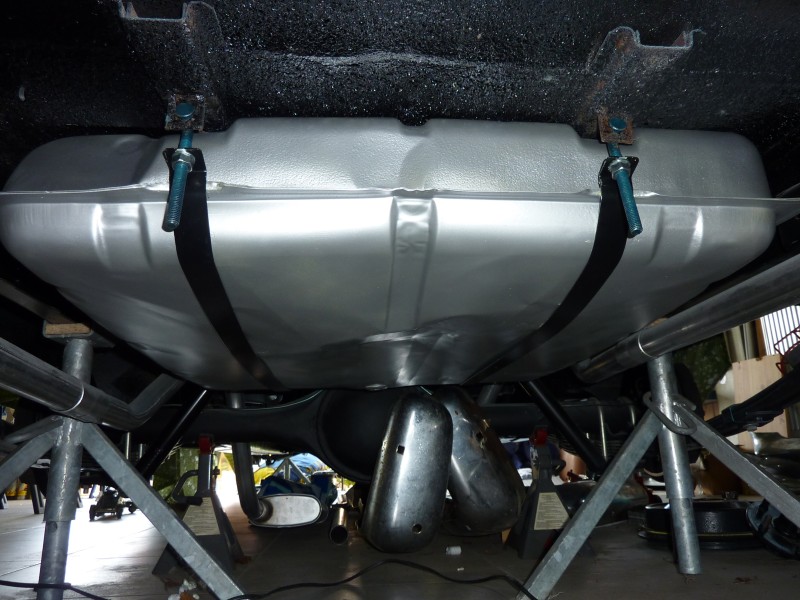
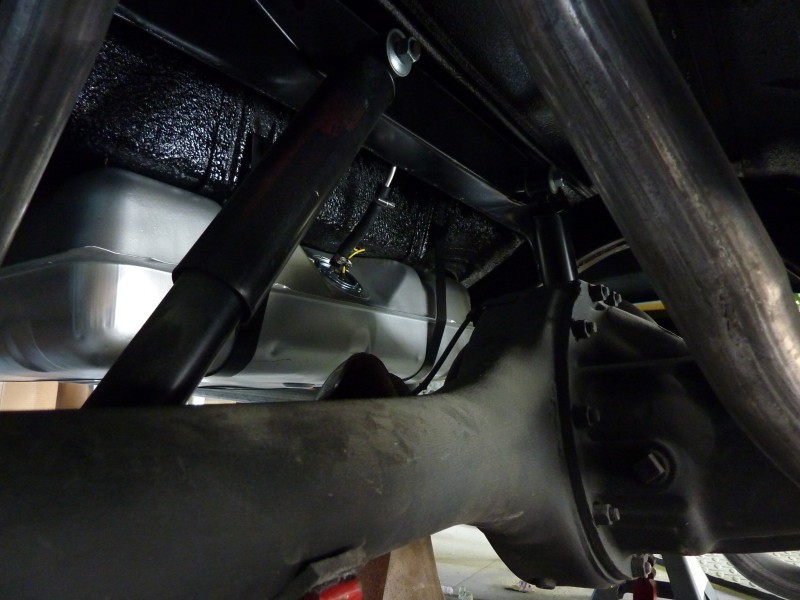
Location: Belgium, 40 miles south of Brussels | OK, so the two last jobs I did were the restoration of the gas tank and the axle shaft.
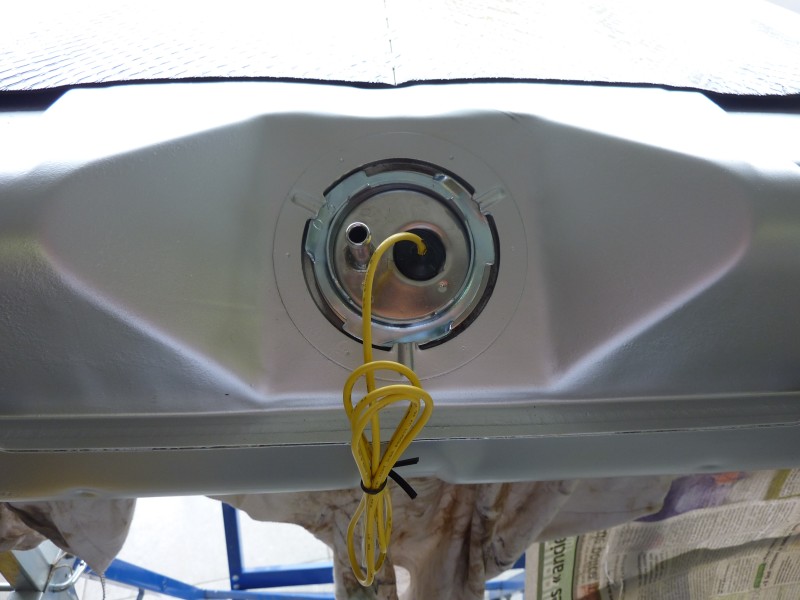
For the gas tank, I derusted it the best I could, than procedeed to treat the inside with a special resin to prevent any leakage. That process needed to slowly rotate the tank on its axis over the course of 2 hours, before letting it set.
Then I painted it, and put the new fuel sender, along with the correct rubber rings. I had a big problem : due to the fact that my gas tank has a big dent on the bottom, it was impossible to put in place the fuel sender. I had to bent it a little (than a little bit more) to be able to install it.
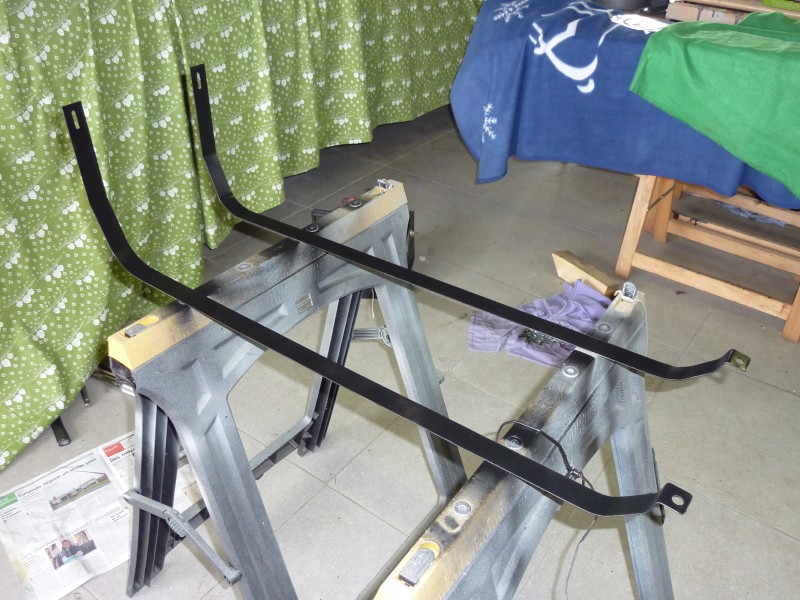
Someone at my job reproduced the tank straps from scratch.
He did a formidable job ...
 (Tank1.jpg) (Tank1.jpg)
 (Tank2.jpg) (Tank2.jpg)
 (Tank3.jpg) (Tank3.jpg)
 (Tank4.jpg) (Tank4.jpg)
 (Tank5.jpg) (Tank5.jpg)
 (Tank6.jpg) (Tank6.jpg)
 (Tank7.jpg) (Tank7.jpg)
 (Tank8.jpg) (Tank8.jpg)
 (Tank9.jpg) (Tank9.jpg)
 (Tank10.jpg) (Tank10.jpg)
 (Tank11.jpg) (Tank11.jpg)
 (Tank12.jpg) (Tank12.jpg)
 (Tank13.jpg) (Tank13.jpg)
Attachments
----------------
 Tank1.jpg (139KB - 208 downloads) Tank1.jpg (139KB - 208 downloads)
Tank2.jpg (153KB - 203 downloads)
Tank3.jpg (136KB - 204 downloads)
Tank4.jpg (146KB - 195 downloads)
Tank5.jpg (97KB - 227 downloads)
Tank6.jpg (103KB - 210 downloads)
Tank7.jpg (82KB - 211 downloads)
Tank8.jpg (139KB - 216 downloads)
Tank9.jpg (89KB - 216 downloads)
Tank10.jpg (162KB - 229 downloads)
Tank11.jpg (132KB - 211 downloads)
Tank12.jpg (189KB - 223 downloads)
Tank13.jpg (106KB - 209 downloads)
|
|
| |
|
Expert
Posts: 1316
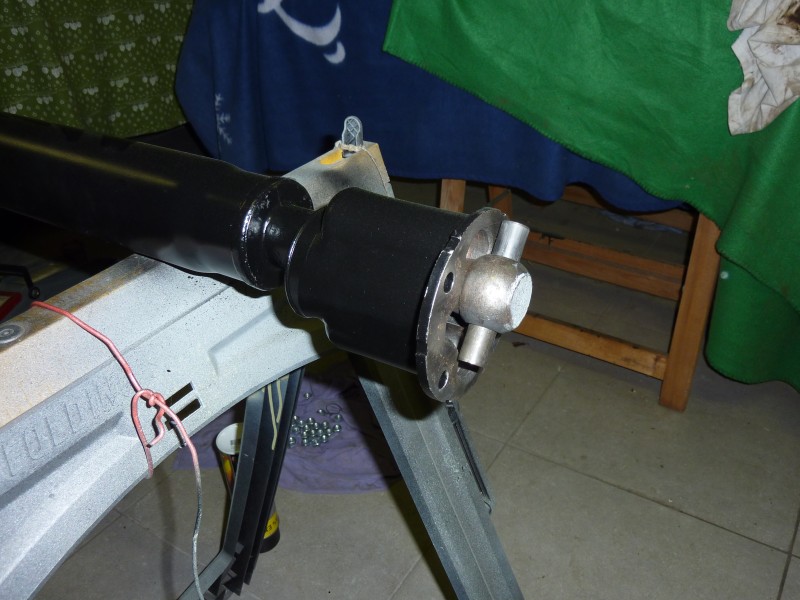
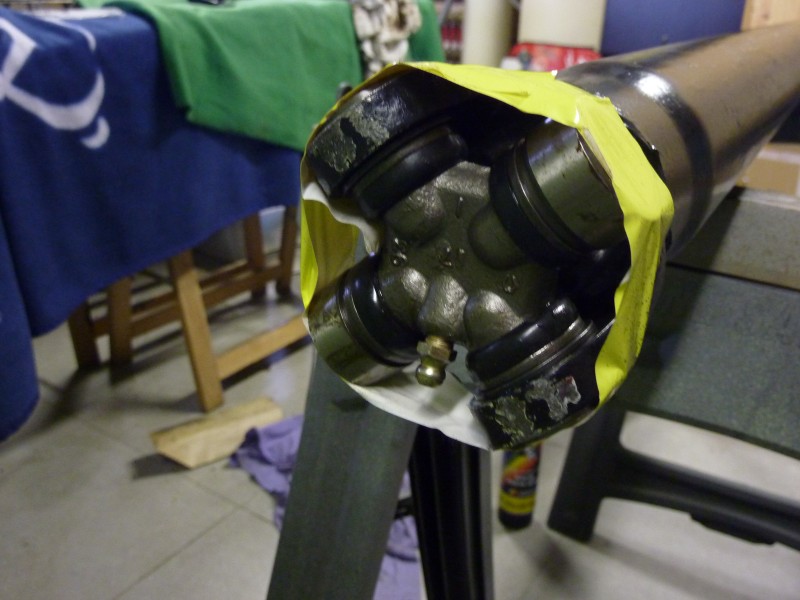
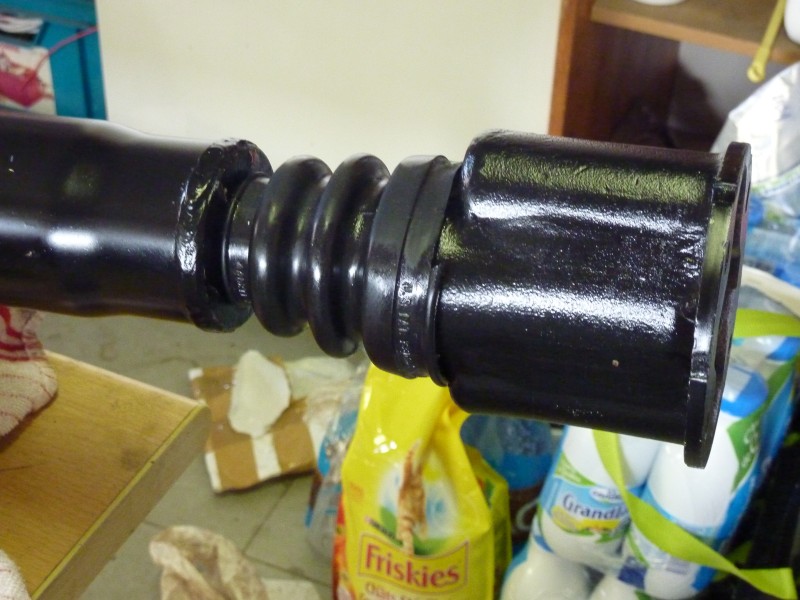
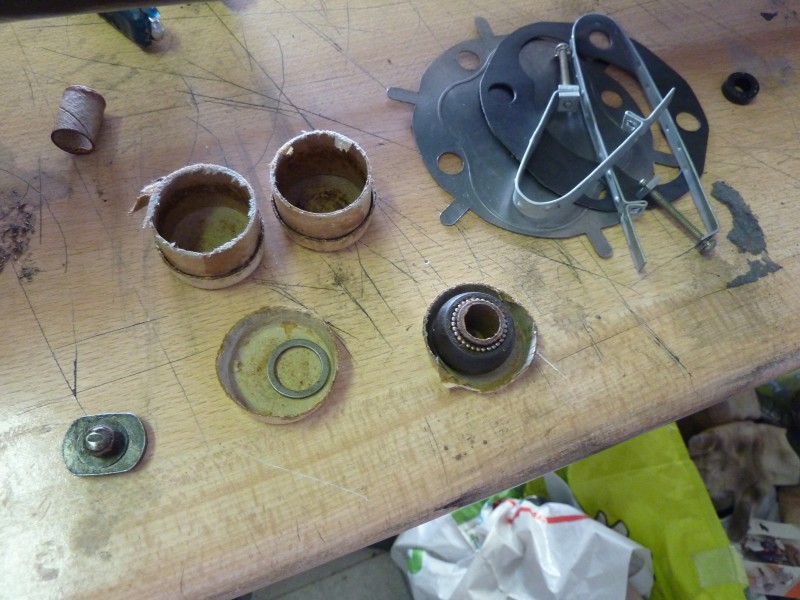
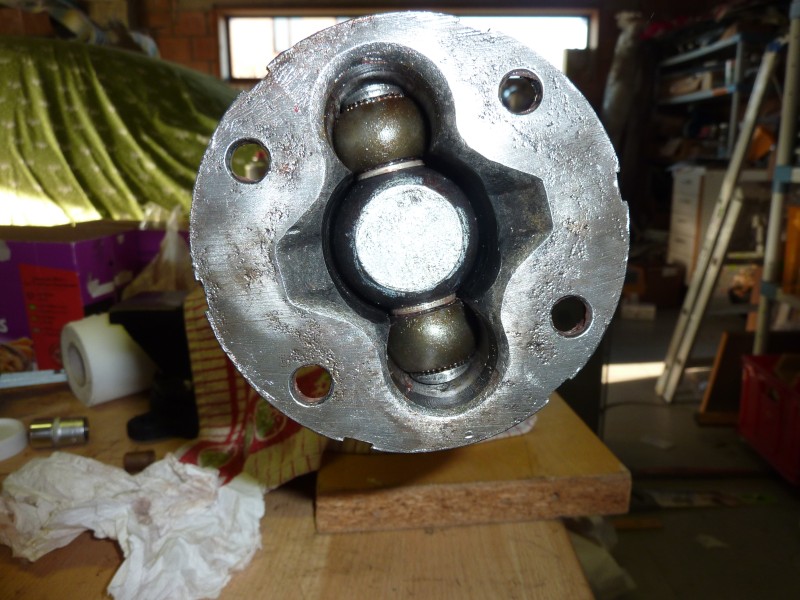
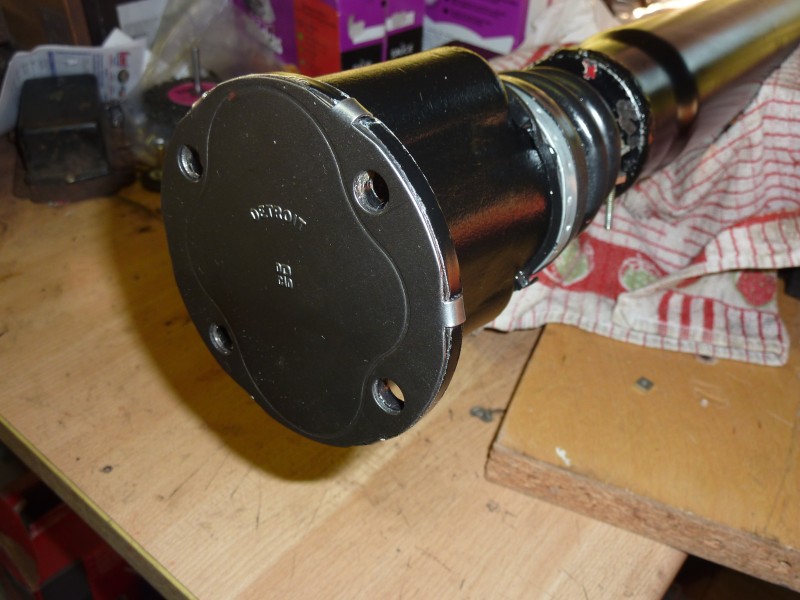
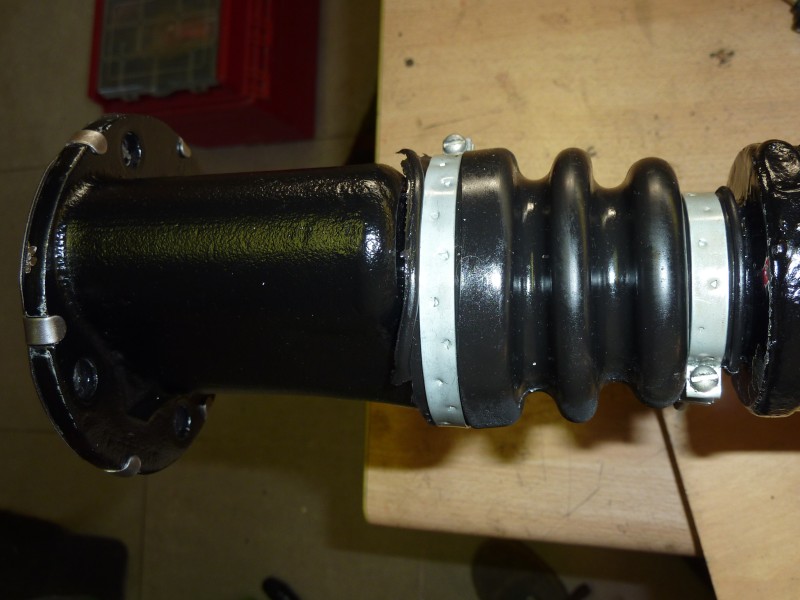
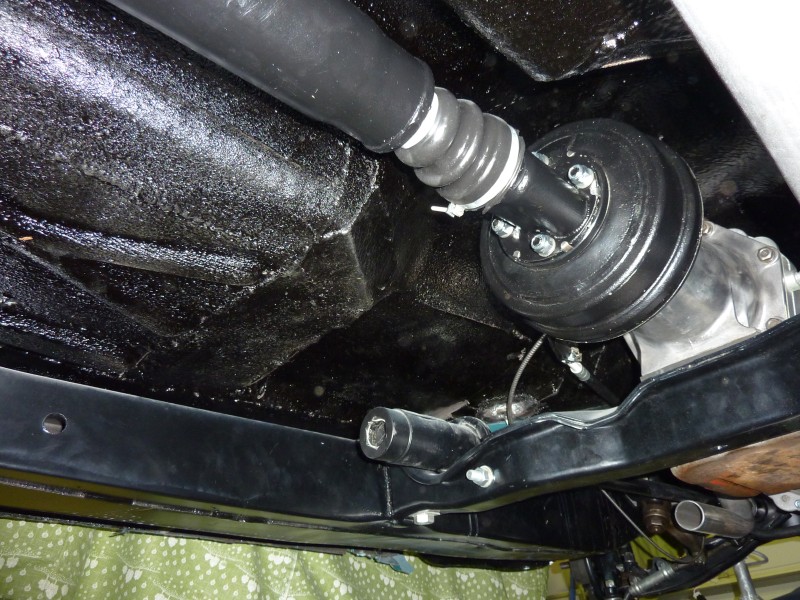
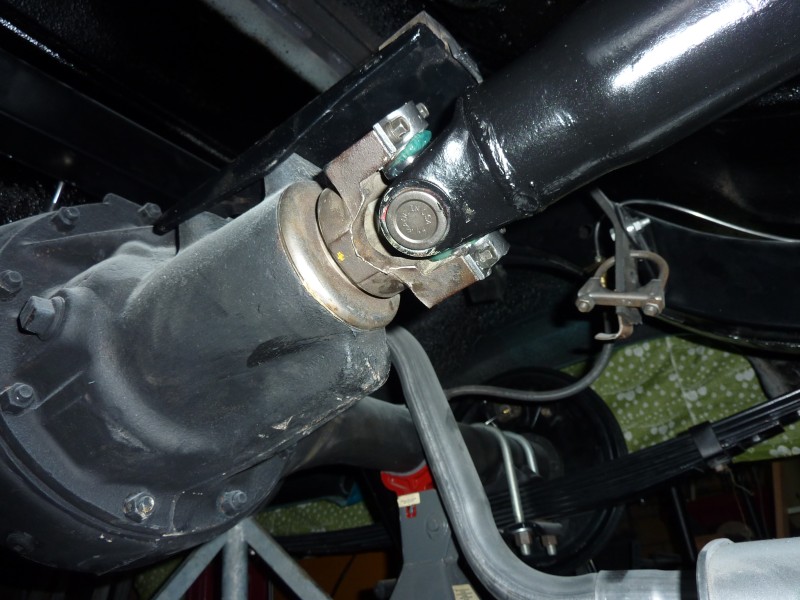
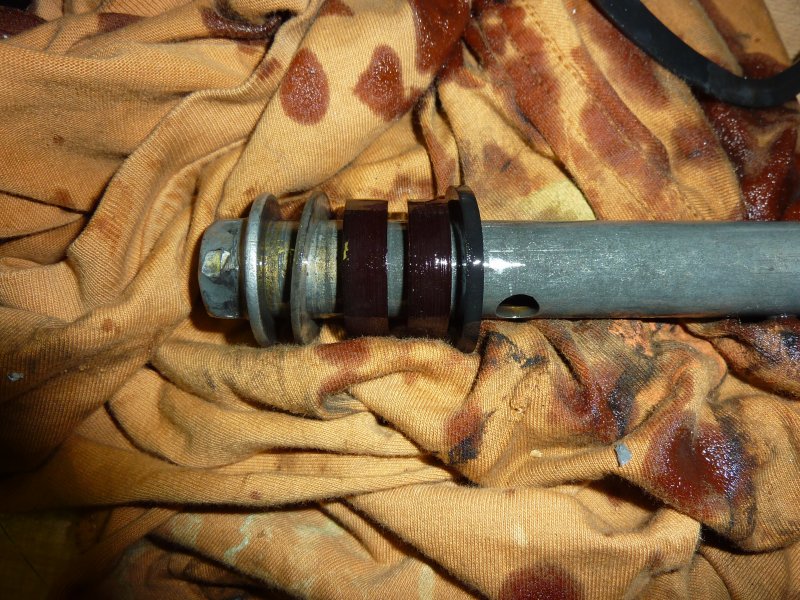
Location: Belgium, 40 miles south of Brussels | For the axle shaft, a guy with a hydraulic press helped me put the new pin in place (in the ball and trunion assembly). We double checked to see that both sides were equal within 1/10th of a millimeter (0,004"). I then procedeed to put the dust cover in place using the method in the FSM ... A real pain to do !!! You have to grease the body inside and out, the dust cover as well, and glide the cover within the body, hoping to see it pop on the other side ! It took me a full hour and aching hands to do the job. I was always afraid of tearing up the cover ... But everything went well.
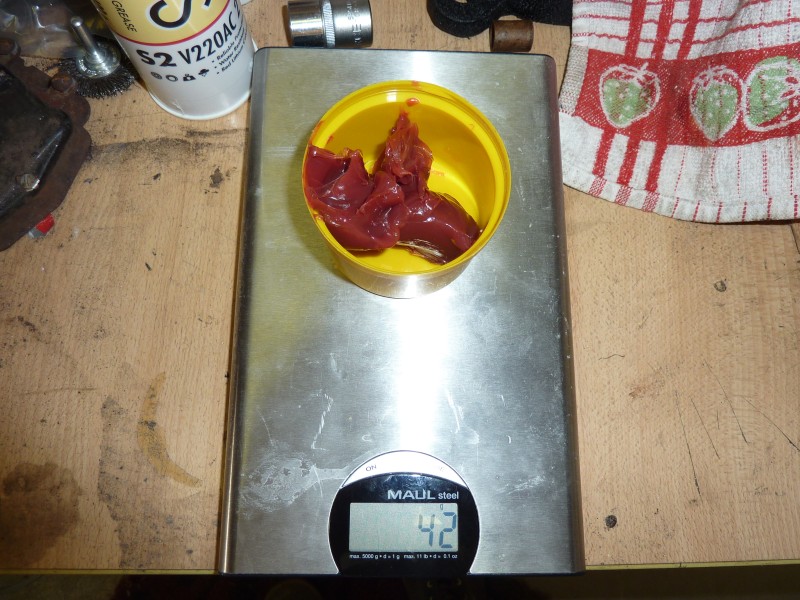
I then put the new rollers, added 1 1/2 ounces of grease and closed the body.
The installation of the axle shaft was simple, but I had to do the cross joint 2 times, due to the fact that I had wrongly installed the grease nipple. Duh !
 (Axle1.jpg) (Axle1.jpg)
 (Axle2.jpg) (Axle2.jpg)
 (Axle3.jpg) (Axle3.jpg)
 (Axle4.jpg) (Axle4.jpg)
 (Axle5.jpg) (Axle5.jpg)
 (Axle6.jpg) (Axle6.jpg)
 (Axle7.jpg) (Axle7.jpg)
 (Axle8.jpg) (Axle8.jpg)
 (Axle9.jpg) (Axle9.jpg)
 (Axle10.jpg) (Axle10.jpg)
Attachments
----------------
Axle1.jpg (115KB - 215 downloads)
Axle2.jpg (103KB - 217 downloads)
Axle3.jpg (119KB - 208 downloads)
Axle4.jpg (136KB - 211 downloads)
Axle5.jpg (138KB - 219 downloads)
Axle6.jpg (155KB - 198 downloads)
Axle7.jpg (108KB - 193 downloads)
Axle8.jpg (94KB - 194 downloads)
Axle9.jpg (179KB - 281 downloads)
Axle10.jpg (121KB - 207 downloads)
|
|
| |
|
Expert
Posts: 3575
  
Location: Netherlands | Nice work.
Don't forget the grounding strap over the fuel sender and metal fuelline.
|
|
| |
|
Expert
Posts: 1316
Location: Belgium, 40 miles south of Brussels | BigBlockMopar - 2013-04-15 11:42 AM
Nice work.
Don't forget the grounding strap over the fuel sender and metal fuelline.
Thanks and thanks for the remark ... I completely forgot about that.
I'm not sure I even know what it looks like ... Or where it mounts for that matter.
 |
|
| |
|
Expert
Posts: 3575
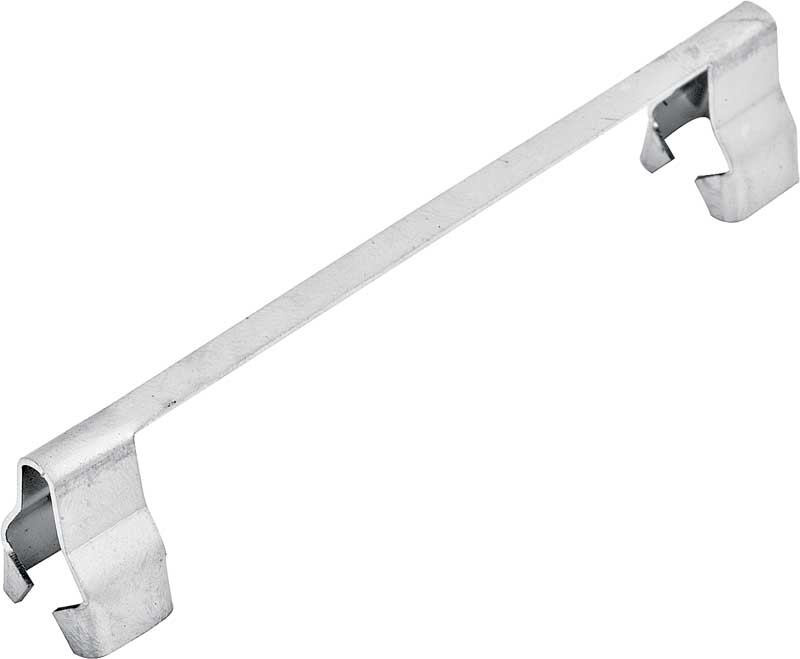
Location: Netherlands | I'm not sure how the FWLK-cars look like, but the late '60s Mopars have a simple strap that clamps over both metal fuellines, bridging the rubber fuelline.
With all the paint on the fueltank, it will not be grounded to the car and the sendor will probably give a false reading, or not show anything at all.
Here's a pic of the groundstrap that I know later Mopars use;
 (GroundStrap.jpg) (GroundStrap.jpg)
Attachments
----------------
GroundStrap.jpg (13KB - 190 downloads)
|
|
| |
|
Expert
Posts: 1316
Location: Belgium, 40 miles south of Brussels | Thanks, I'll look for it on eBay.
|
|
| |
|

Veteran
Posts: 117
Location: Kättilstorp Sweden | Very nice job.
Magnus |
|
| |
|
| That rotisserrie for the fuel tank is one heck of a good idea...great work! |
|
| |
|
Location: St George Queensland Australia |
Great work on your car ! I have just put new uni joint covers on the tailshaft of my 55' dodge, I pressed the drive pins out ,disassembled cleaned then fitted the rubber boot, then the drive housing , then I fitted the cross pin ,greased and finished assembly. It was an easier option and less greasy! Cheers Glen |
|
| |
|

Elite Veteran
Posts: 827
Location: tailFinland | Nice work! |
|
| |
|
Expert
Posts: 1316
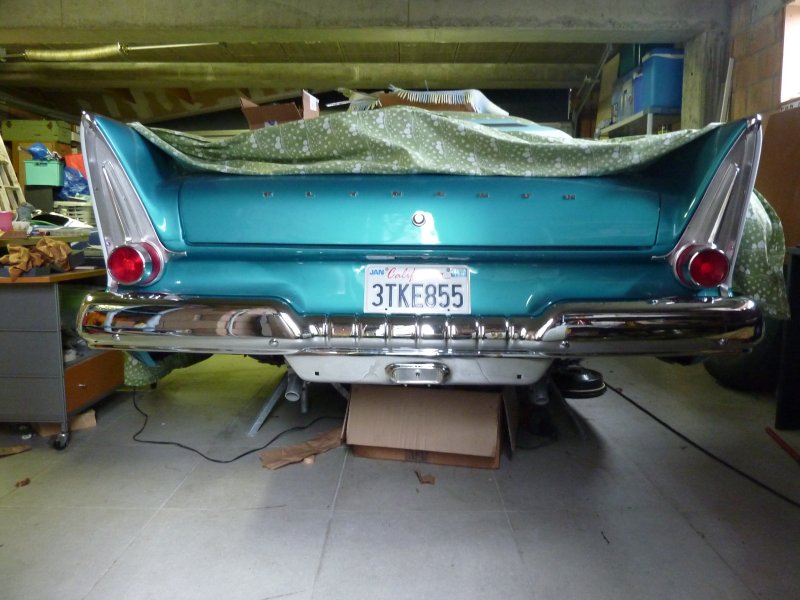
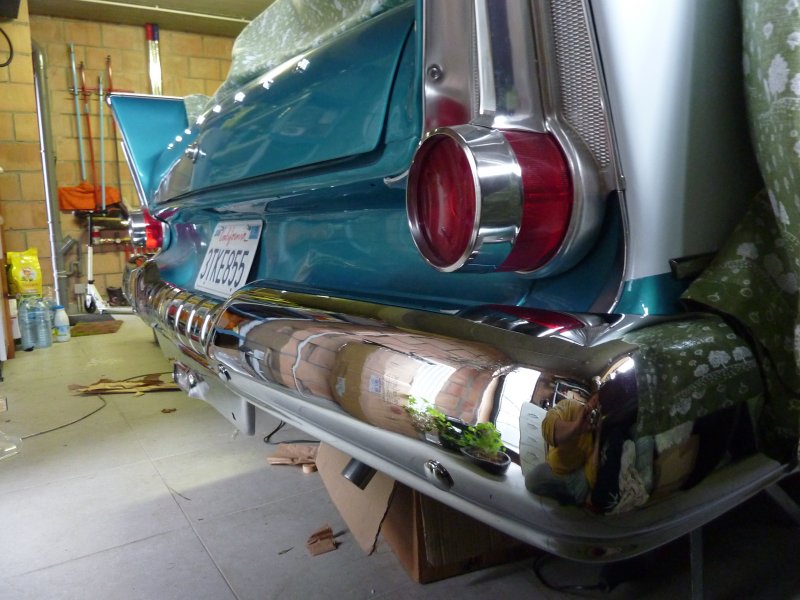
Location: Belgium, 40 miles south of Brussels | Today, I felt like putting some chrome on my car, at last ...
So I put the rear bumper and its extension.
It feels nice to look at it ... Sure does.
PS : I've got the bumper wings, but they need to be reworked and rechromed, so I'll put them on later.
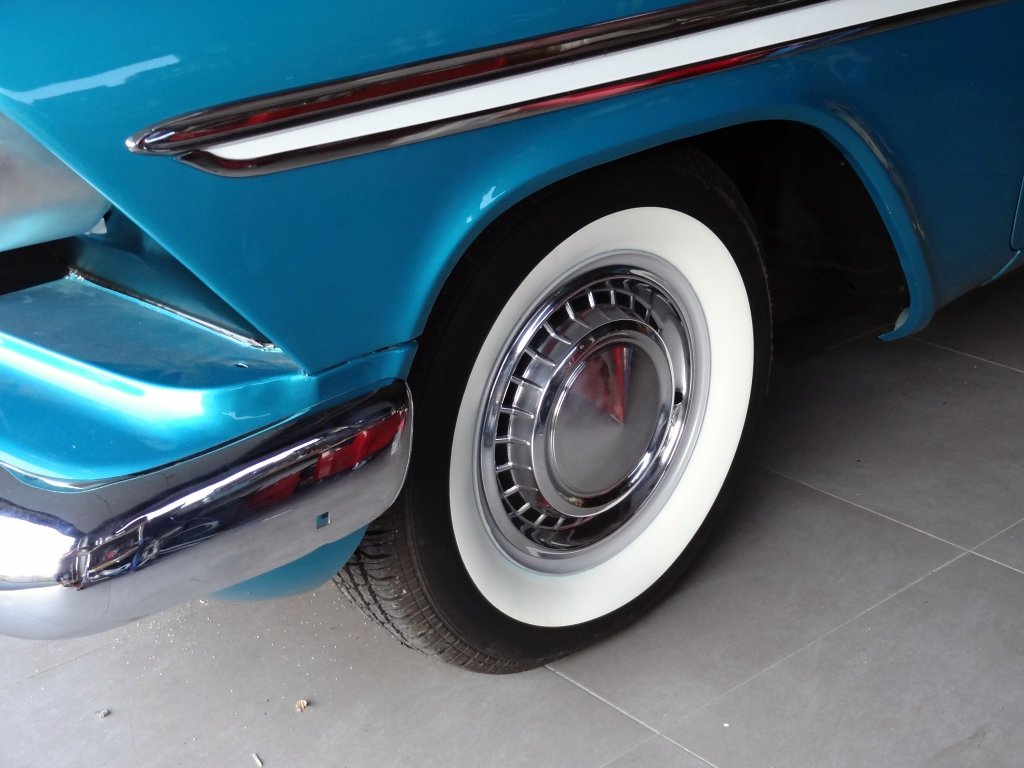
 (Bumpers1.jpg) (Bumpers1.jpg)
 (Bumpers2.jpg) (Bumpers2.jpg)
Attachments
----------------
Bumpers1.jpg (102KB - 197 downloads)
Bumpers2.jpg (108KB - 199 downloads)
|
|
| |
|
Expert
Posts: 4042
Location: Connecticut | Vincent - If you're going to add bumper wings, you will need to drill an additional hole on each side of the bumper to accomodate the bumper wing's inner bolt. I don't see that in your photos. Ron |
|
| |
|
Expert
Posts: 1316
Location: Belgium, 40 miles south of Brussels | Yes, I know. I discovered that when I bought those rechromed bumpers (it was cheaper than reworking and rechroming mines here in France). They do lack that hole, and I will need to drill it. But I'm in a rush now, as my car need to be running and licensed no later than the first week of July (long story). So I've postponed the bumper wings for later (perhaps next winter).
|
|
| |
|
Expert
Posts: 1316
Location: Belgium, 40 miles south of Brussels | I've been working a lot on the car lately (every day in fact), because I have a deadline in 6 weeks. To make a long story short, I'm moving to a new house, and a new country as well, which means I HAVE to have it licensed before.
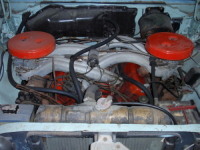
Anyway, yesterday I've worked on the engine and it begins to look nice !

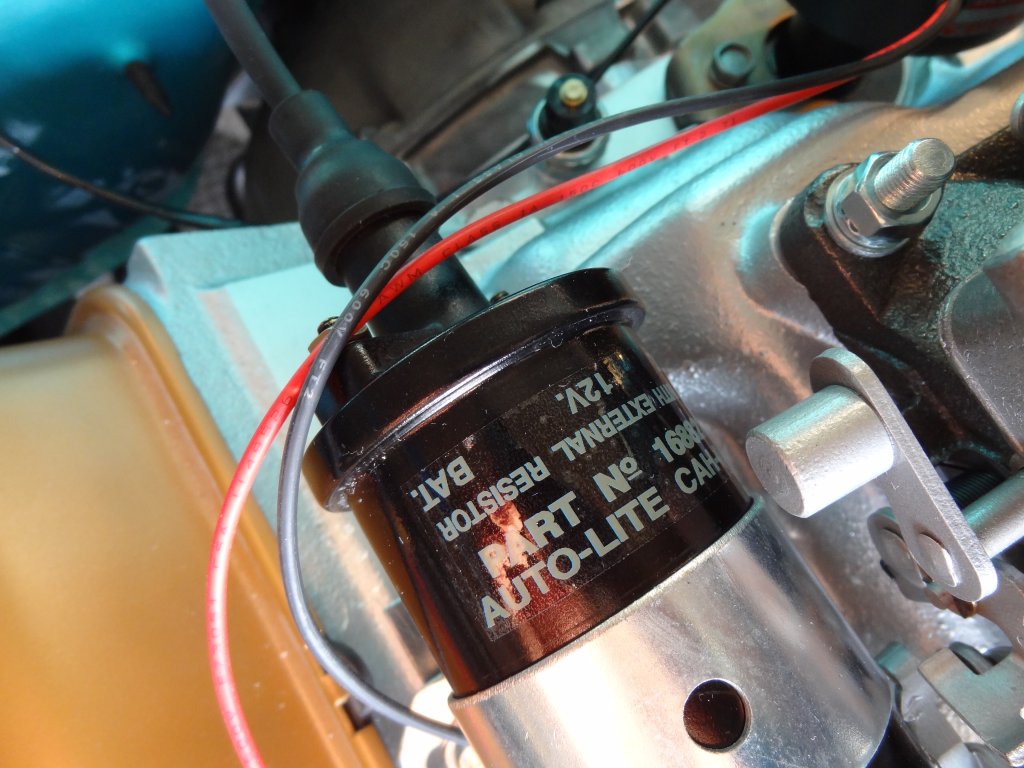 (Coil4.jpg) (Coil4.jpg)
 (Engine3.jpg) (Engine3.jpg)
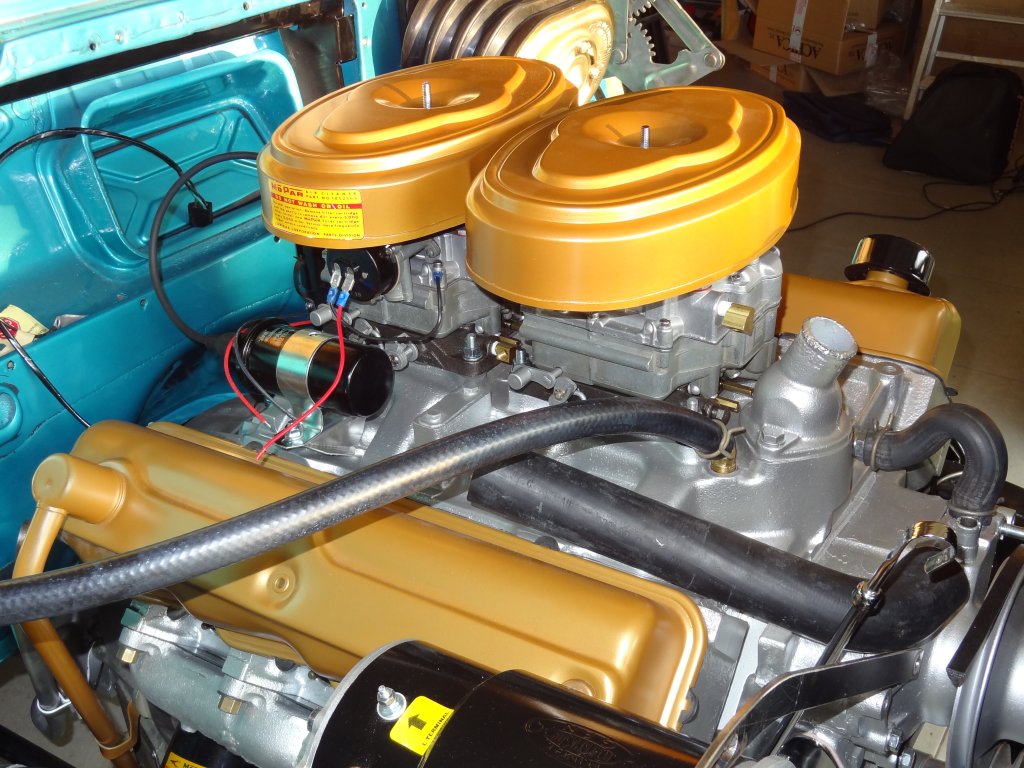 (Engine1.jpg) (Engine1.jpg)
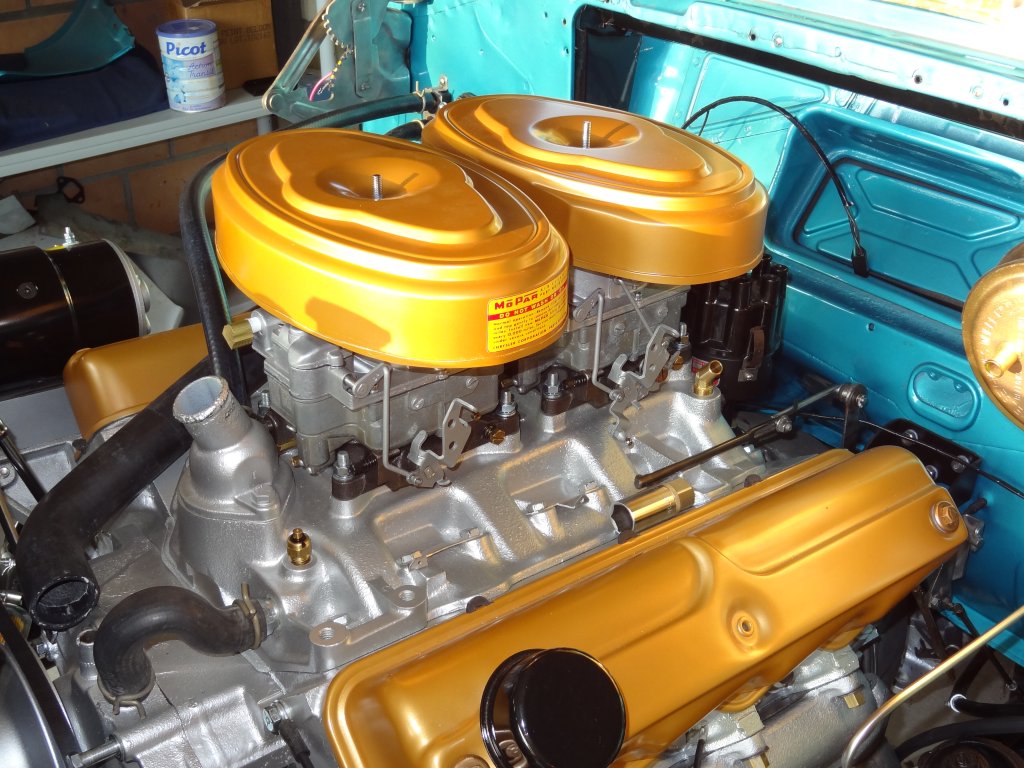 (Engine2.jpg) (Engine2.jpg)
Attachments
----------------
Coil4.jpg (156KB - 192 downloads)
Engine3.jpg (177KB - 262 downloads)
Engine1.jpg (196KB - 195 downloads)
Engine2.jpg (195KB - 204 downloads)
|
|
| |
|

Location: Parts Unknown | Is that 2nd carb to ensure you can suck down all that extra fuel at 42 euros a litre ?
|
|
| |
|
Expert
Posts: 1316
Location: Belgium, 40 miles south of Brussels | Doctor DeSoto - 2013-06-06 10:53 AM
Is that 2nd carb to ensure you can suck down all that extra fuel at 42 euros a litre ?
Yesssssssss !
 |
|
| |
|
Location: Parts Unknown | Roger that !
|
|
| |
|
Expert
Posts: 1316
Location: Belgium, 40 miles south of Brussels | The big moment is almost there ...
I will try to start the engine today 
I'll let you know how it did go ... And I'll try to post a movie.
|
|
| |
|

Expert 5K+
Posts: 9673
Location: So. Cal | Great progress! Sometimes I have to tell myself to "git 'er done" and it all comes together somehow. |
|
| |
|
Expert 5K+
Posts: 8443
Location: Perth Australia | I wish you the very best of luck getting it started
The engine looks very nice
I wound mine over without the coil conected until I had oil pressure, then it fired first kick
|
|
| |
|
Expert
Posts: 1488
Location: New Castle PA | As everyone has said, EXCELLENT work! |
|
| |
|
Expert
Posts: 1316
Location: Belgium, 40 miles south of Brussels | Well the engine did start !
But I have got a load of problems to solve now :
1. A minor electrical problem (seems that the wire to the coil is incorrectly wired)
2. A major oil leakage at the oil filter canister (lost all the 6 quarts inside the engine through that leak when pressure came ...)
3. A cooling liquid leakage at the intake manifold gasket, probably due to my exhaust bypass blockage trial with home made caps ...
But it did start
|
|
| |
|
Expert
Posts: 1316
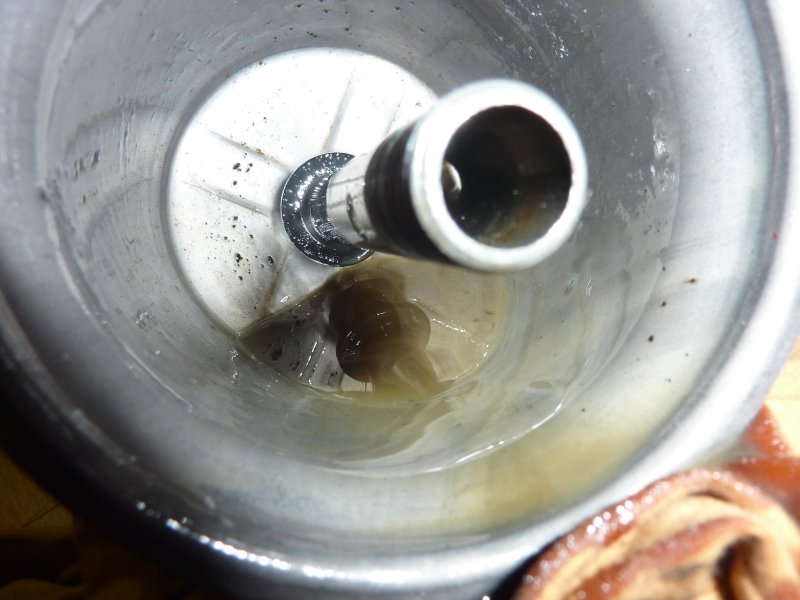
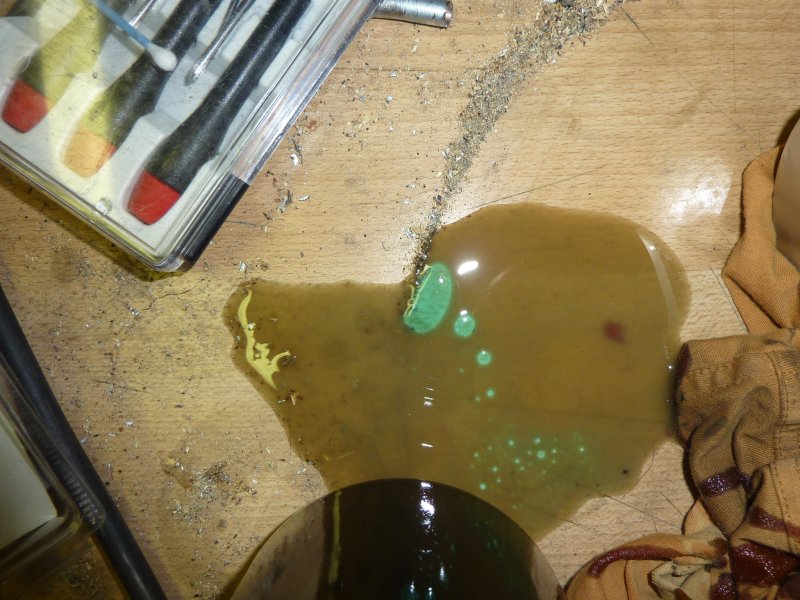
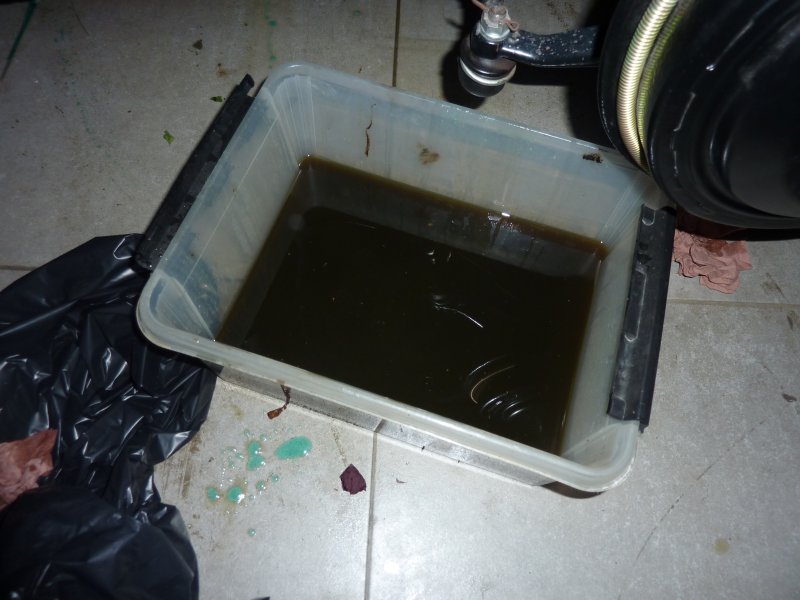
Location: Belgium, 40 miles south of Brussels | OK, the oil leak at the oil filter canister was my wrong doing : I had put the rubber gasket between the filter and the two spacers (which I'm not sure are originals), instead of between the canister and the spacers ! The big rubber gasket (that goes between the canister and the engine block) was also a bit deformed, so I'm not sure it was correctly seated.
The bad news is that I have cooling liquid traces in my oil, certainly coming from my leakage at the intake manifold gasket. Finally it's a good thing I had that oil leakage or I would never have seen that cooling liquid inside my oil. Looks like I'm good for a full oil purge of the engine 
 (Filtre1.jpg) (Filtre1.jpg)
 (Filtre5.jpg) (Filtre5.jpg)
 (Filtre3.jpg) (Filtre3.jpg)
 (Filtre4.jpg) (Filtre4.jpg)
 (Filtre6.jpg) (Filtre6.jpg)
Attachments
----------------
Filtre1.jpg (117KB - 199 downloads)
Filtre5.jpg (165KB - 186 downloads)
Filtre3.jpg (81KB - 191 downloads)
Filtre4.jpg (120KB - 200 downloads)
Filtre6.jpg (85KB - 177 downloads)
|
|
| |
|
Expert 5K+
Posts: 8443
Location: Perth Australia | Was your intake cracked as well?
I ended up haveing mine welded up (the ports I mean) and then the faces re machined
So far so good
|
|
| |
|
Expert
Posts: 1316
Location: Belgium, 40 miles south of Brussels | 3 years later ... And in another country as well
https://www.youtube.com/watch?v=7w1_yODrKSw
https://www.youtube.com/watch?v=dxapQSgzGww
https://www.youtube.com/watch?v=_xVxka8aXPY
https://www.youtube.com/watch?v=FzELcusFRv4
 |
|
| |
|
Extreme Veteran
Posts: 481
Location: The Netherlands | Fantastic work Vincent!
Need to get all the cars together at a show in Belgium someday |
|
| |
|

Expert 5K+
Posts: 7807
Location: Williams California | Thanks for the update, Vincent, I've been wondering how you were doing.
The car came out great!!!
---John |
|
| |
|
Expert
Posts: 1316
Location: Belgium, 40 miles south of Brussels | After extensive mechanical work, a little bit of "beautifying" ...
 (DSC02197b.JPG) (DSC02197b.JPG)
 (DSC02199b.JPG) (DSC02199b.JPG)
 (DSC02200b.JPG) (DSC02200b.JPG)
Attachments
----------------
DSC02197b.JPG (146KB - 129 downloads)
DSC02199b.JPG (125KB - 134 downloads)
DSC02200b.JPG (105KB - 120 downloads)
|
|
| |
|
Location: The Mile High City | looking great!  |
|
| |
|

Member
Posts: 24
Location: belgium | Qu'est ce qu'elle est Belle! |
|
| |
|
Extreme Veteran
Posts: 481
Location: The Netherlands | Where in Belgium are you located now?
Still would love to see your 58 and park a 59 next to it |
|
| |
|
Expert
Posts: 1316
Location: Belgium, 40 miles south of Brussels | Lancer Mike - 2016-09-12 9:01 PM
looking great! :inlove:
Thanks !
blocrybou - 2016-09-14 8:29 PM
Qu'est ce qu'elle est Belle!
Merci !
Matthew Keij - 2016-09-15 5:40 PM
Where in Belgium are you located now?
Still would love to see your 58 and park a 59 next to it
I'm in Mons, near the french border. |
|
| |
|
Expert
Posts: 1316
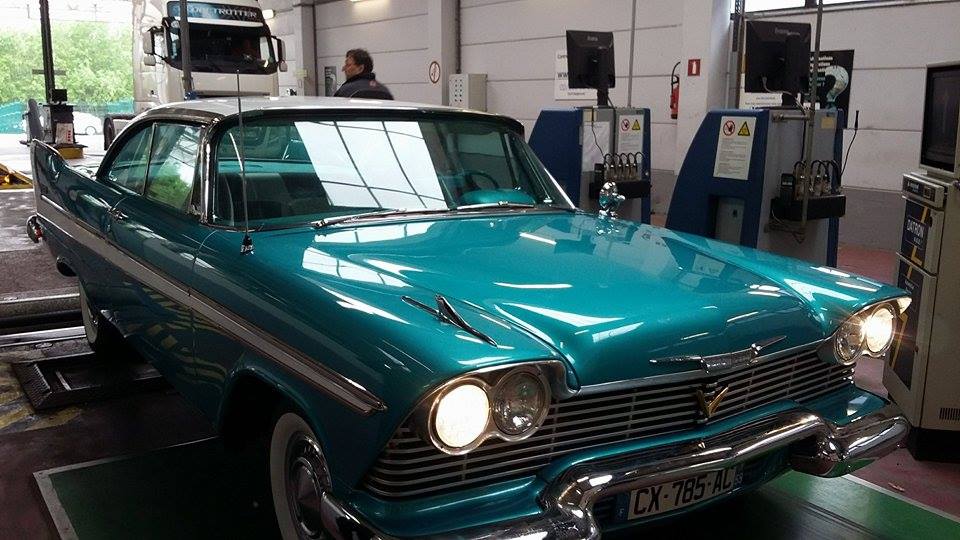
Location: Belgium, 40 miles south of Brussels | A picture of my car, almost ready for vehicle inspection to finally get my license.
I'm beneath the car, with my favorite assistant, both in the garage and in my daily life
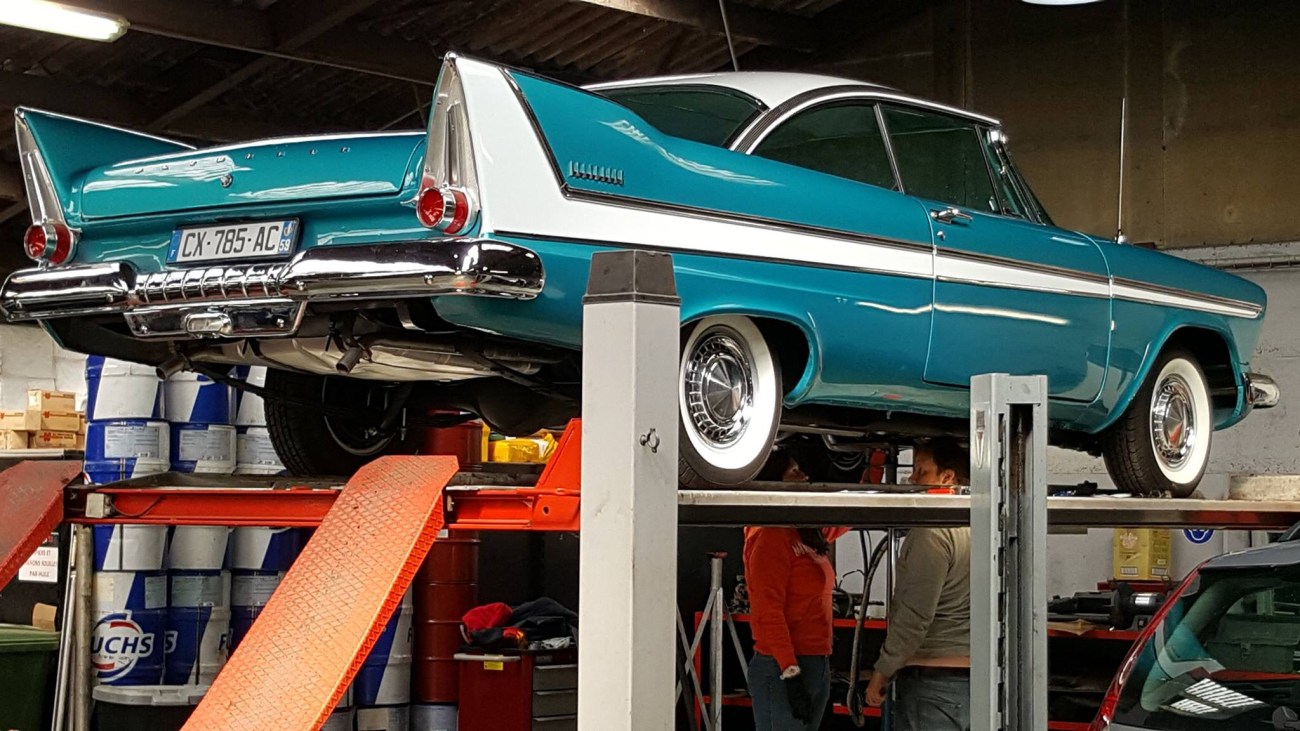 (G51bb.jpg) (G51bb.jpg)
Attachments
----------------
G51bb.jpg (237KB - 98 downloads)
|
|
| |
|
Expert
Posts: 3480
Location: Montreal, Canada | Wow, that's a nice Plymouth! |
|
| |
|

Board Moderator & Exner Expert 10K+
Posts: 13050
Location: Southern Sweden - Sturkö island | Sweeet ride Vincent! Very beautiful restoration |
|
| |
|
Expert 5K+
Posts: 9673
Location: So. Cal | Very impressive. That's a keeper for sure. |
|
| |
|
Veteran
Posts: 143
Location: Malmberget, Sweden | Nice car you got there. |
|
| |
|
Expert
Posts: 1208
Location: SWITZERLAND | After so many years - what a feeling. And everything is there, all perfect in details. Congratulation! - SERGE - |
|
| |
|
Expert
Posts: 1906
Location: Ontario, Canada | Beautiful car. Great workmanship! Time to enjoy after so many years!
Congratulations,
Greg |
|
| |
|
Expert 5K+
Posts: 7807
Location: Williams California | Good to see that you're just about road-ready, Vincent!! |
|
| |
|
Expert
Posts: 1918
Location: Hell's Outhouse - a.k.a. Buckeye, Arizona | Wow.
I don't know what kind of blue that is or what it's named, but *man* - I *love* it and it looks made for that car!
Bo Malefors told me something when showing me a few factory suspension welds on a '57 Chrysler New Yorker frame in 1993: "*WE* can do a hell of a lot better job putting these cars together than the factory *ever did!" - and, brother, it shows on this car. The craftmanship that shows the fit on that '58, from where I sit, is exceptional.
Man - what eye candy...... |
|
| |
|
Expert
Posts: 2003
Location: Branson, MO | Oops - just noticed the rear bumper valance(s) are missing. I'll bet they're probably on by now though.
I may be the only person on this forum that prefers the plain standard bumpers without the wings - but that's just me. I love this car and the color is super!
|
|
| |
|
Expert
Posts: 1316
Location: Belgium, 40 miles south of Brussels | Thanks everyone for your kind words.
The car is now ready for the vehicle inspection tomorrow morning.
I'm hoping everything will go fine !
Viper Guy - 2017-05-05 5:57 AM
Oops - just noticed the rear bumper valance(s) are missing. I'll bet they're probably on by now though.
Yes, the rear valance is missing, but the ones I have were too deformed to be restored by the bodyman on their own.
So he told me that it was preferable to wait until the car was finished so that he could work with better references.
I may be the only person on this forum that prefers the plain standard bumpers without the wings - but that's just me.
Well, maybe you're not alone. I love the car as it looks right now, and I'm asking myself a lot of questions about the bumper wings.
I do have a set, but they need to be straightened up and rechromed, a hefty budget.
|
|
| |
|

Expert 5K+
Posts: 6500
Location: Newark, Texas (Fort Worth) | Really nice car! We have got to find you some rear valances. Marc in Newark...TX. |
|
| |
|
Elite Veteran
Posts: 836
Location: Layton, Utah | Sure nice looking in Teal & White. |
|
| |
|
Expert
Posts: 1316
Location: Belgium, 40 miles south of Brussels | The vehicle inspection went fine.
I should have my license plate before the end of this week ... AT LAST !
 (CT.jpg) (CT.jpg)
Attachments
----------------
CT.jpg (92KB - 97 downloads)
|
|
| |
|
Expert
Posts: 3480
Location: Montreal, Canada | Excellent news! Great job! |
|
| |
|
Member
Posts: 24
Location: belgium | Bonjour, félicitations certainement une des plus belle que j'ai jamais vu. Quel travail! Si un jour vous faites un meeting en Belgique je vous demanderais de me le signaler que je puis admirer la bête et mettre la mienne à coté pour des photos. Je vous félicite encore elle est magnifique dans ces couleurs. Laurent |
|
| |
|
Expert
Posts: 1316
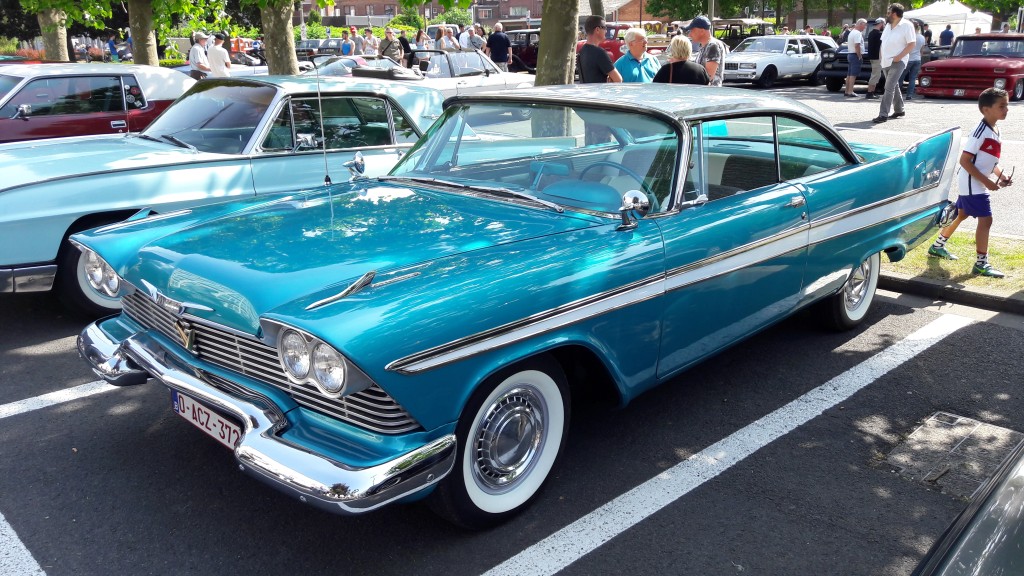
Location: Belgium, 40 miles south of Brussels | First meeting ever last sunday !
Edited by Chrome58 2017-05-31 5:40 AM
 (20170528_105955b.jpg) (20170528_105955b.jpg)
Attachments
----------------
20170528_105955b.jpg (244KB - 97 downloads)
|
|
| |
|

Veteran
Posts: 236
Location: Morgan Hill, CA | Wow that car is awesome. You've done great work there. |
|
| |