|
|

Expert 5K+
Posts: 7808
   
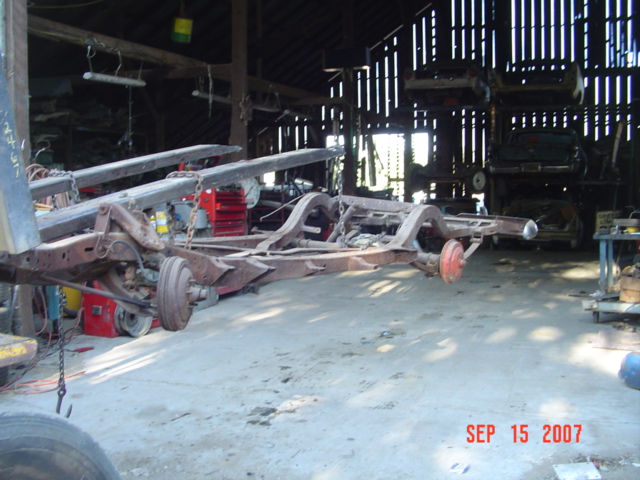
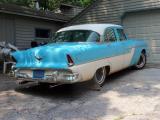
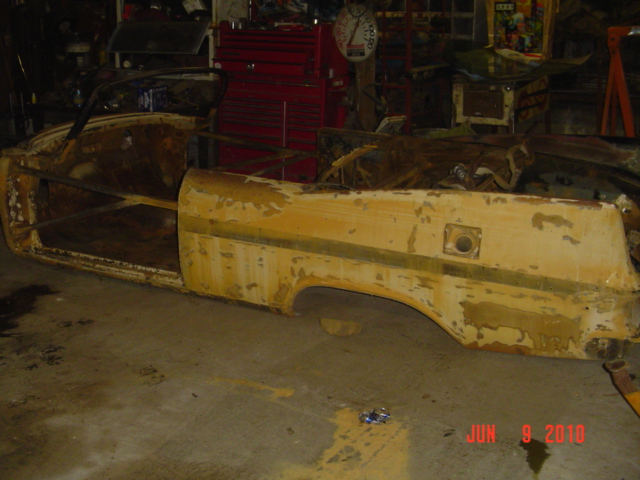
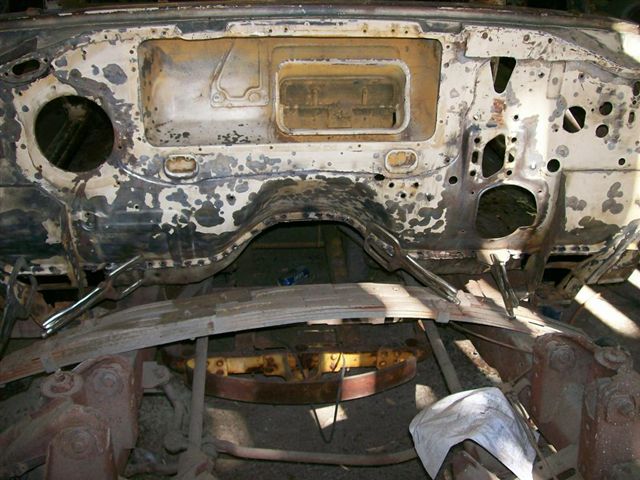
Location: Williams California | This has been a while in the works, originally I had bought a '59 Sport Fury fifteen years ago, that was a drivable car. I knew it had some bodywork issues, and wanted to restore it to a better degree. I removed the body from the chassis, disassembled the chassis and running gear, overhauled the trans and engine, stripped, painted and reassembled the entire chassis.
Next, I hauled the body, fenders, doors, etc. to a well known media blaster, and they did an excellent job of getting down to bare metal, also showing some extremely amateurish gas welding repairs done years ago, literally thousands of holes drilled nearly everywhere to use a slide hammer to pull dents out, also hopelessly stretching the metal. I bought over $1000 worth of older repro sheetmetal sections, as I could not find usable factory sheetmetal anywhere, not a piece was even close to fitting, and I ended up throwing the towel in for the time being. Some years passed, I was also too busy to bother with the project, so it sat and sat. A customer offered me close to what I paid for the repop sheetmetal just for the roof, so I sold it, the trunk floor, doors, and everything else that was still good. Now I was left with a chassis, and no body parts.
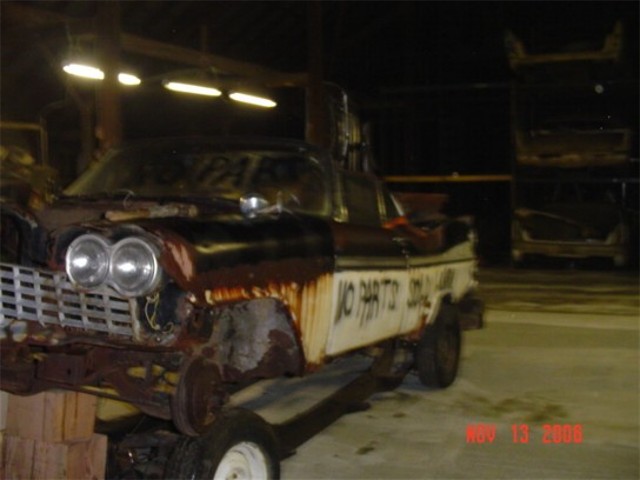
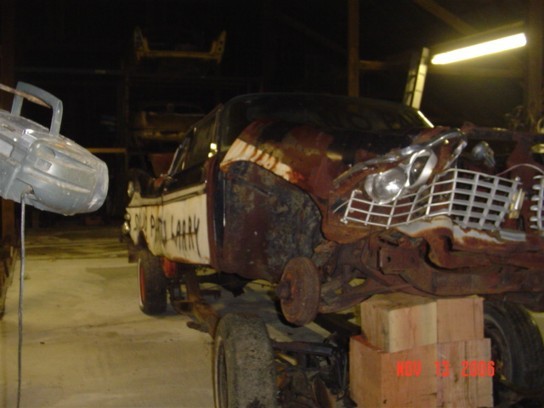
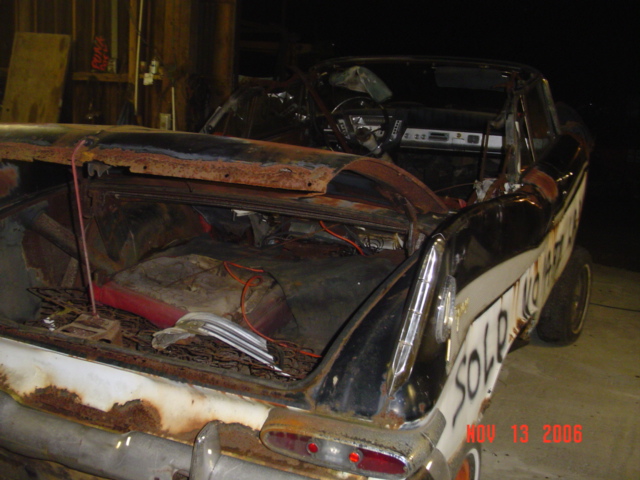
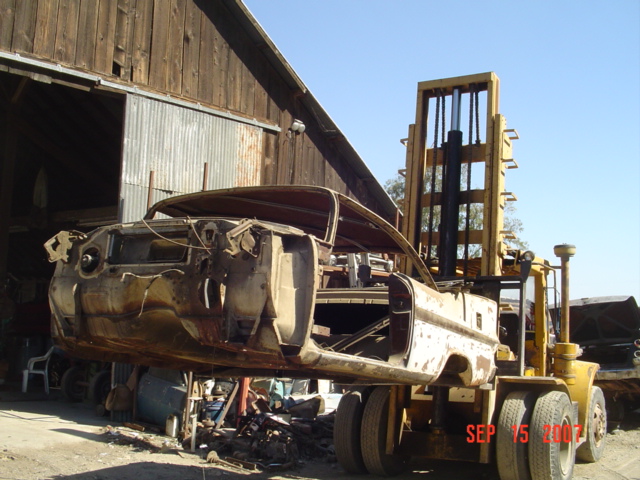
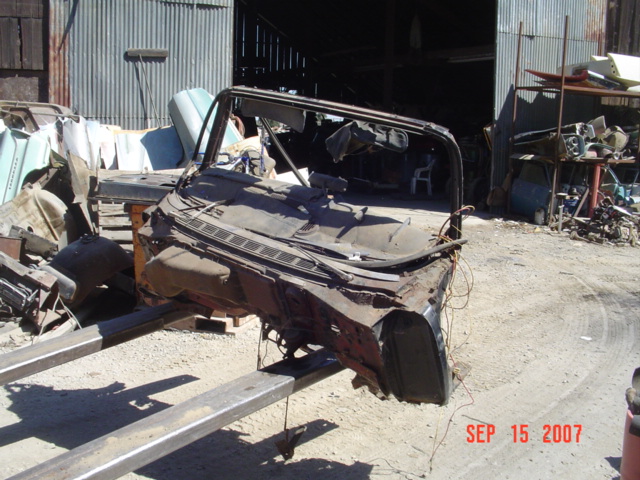
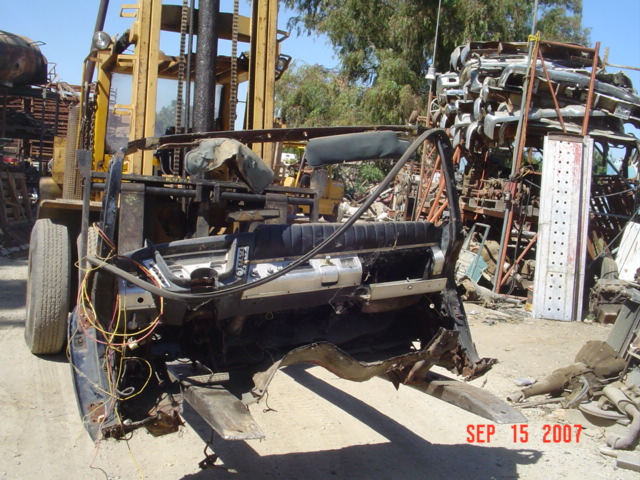
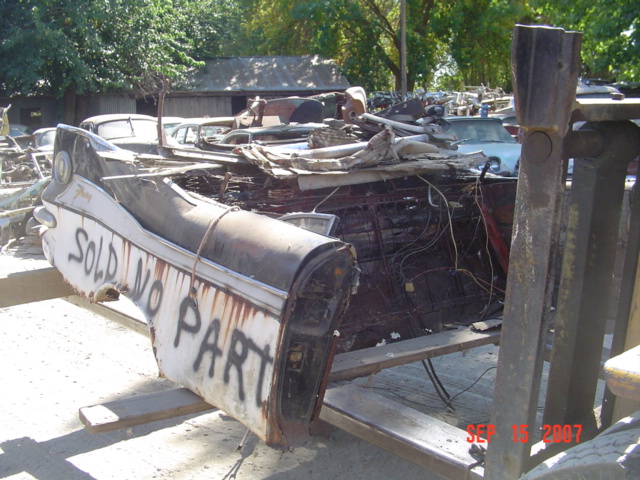
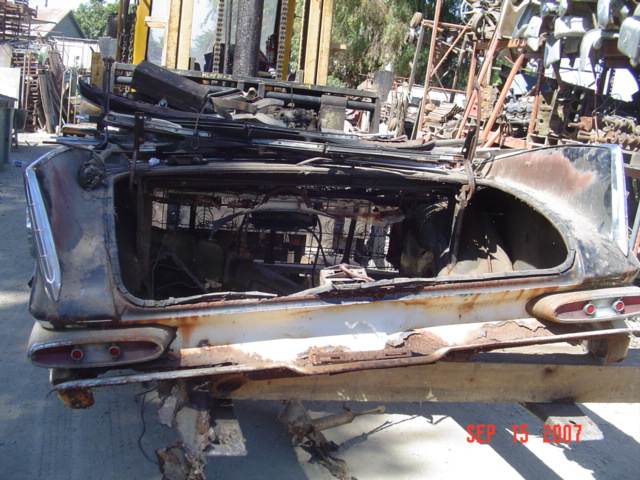
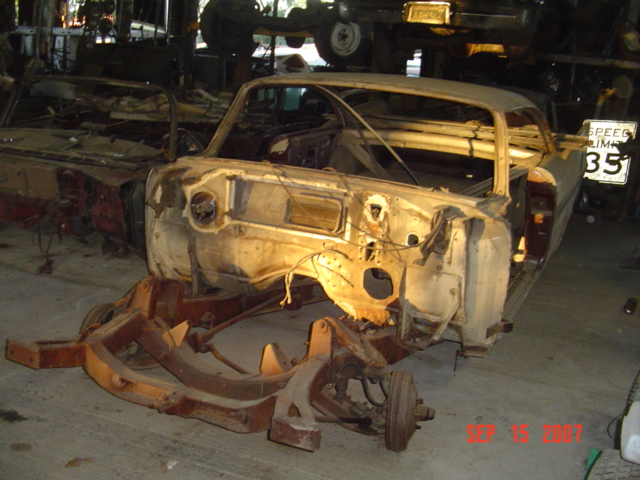
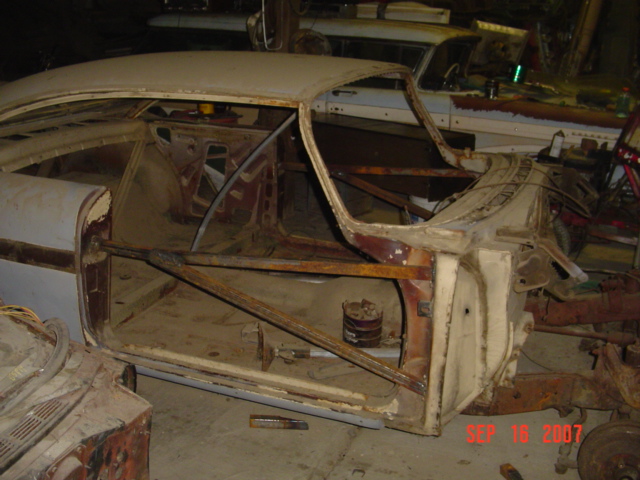
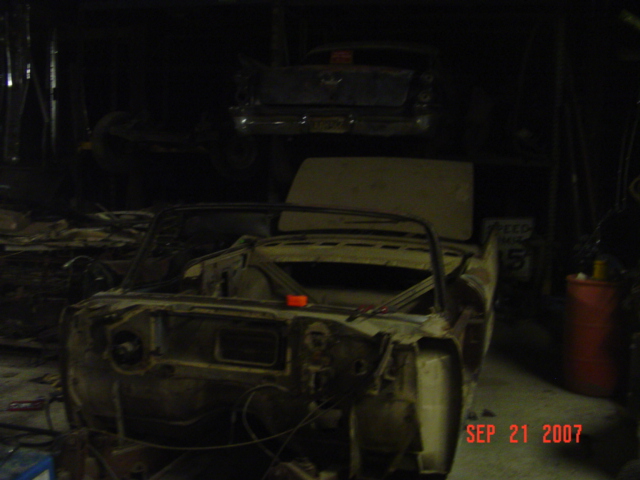
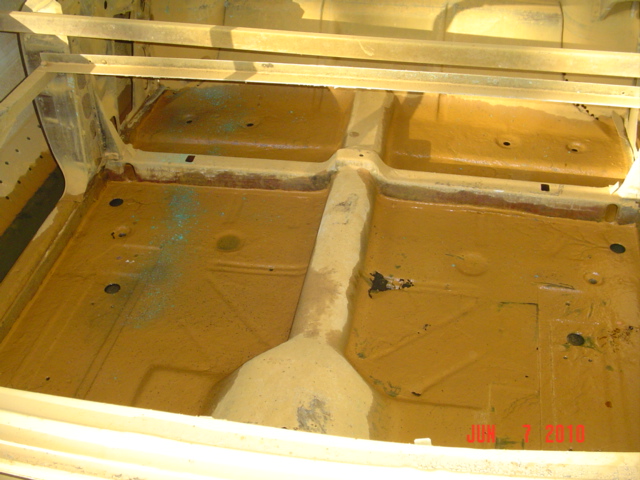
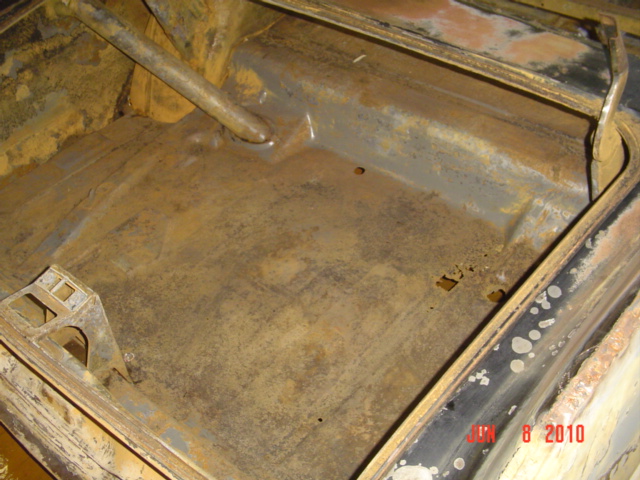
About four years ago, a good friend of mine [the late Jim Paul] called me from an abandoned wrecking yard in upstate New York, asking if I wanted a '59 Fury convertible for $800 dollars. He sent me some photos, and it turned out to be a Sport Fury, but it suffered the usual rust damage from the New England climate. He shipped the car out to me free of charge, which helped. The car barely made it out here on the trailer, the remaining metal in the frame and lower body was either weak, or gone. The car broke apart into three large pieces once I cut the body mount bolts on the frame. A month after getting 'Rusty' here, a customer called me and said he had a '59 Fury coupe and was wanting to trade for a Chevelle. I had no such critters here, but asked if he'd sell the Fury outright. He didn't want much for it at all.
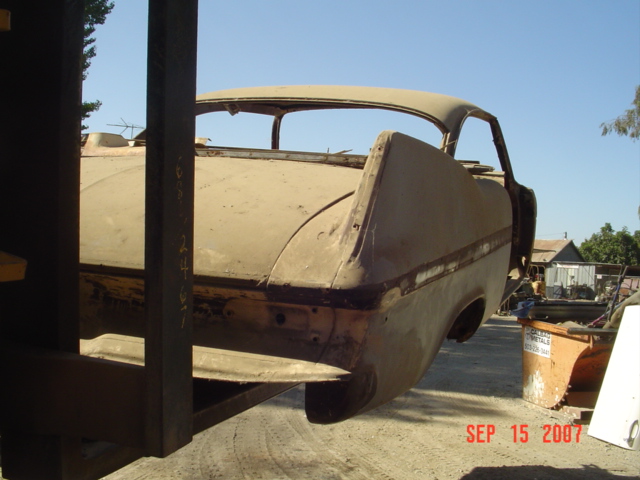
The car had been stored in an area where goats were kept, they had climbed all over the top of the car for years, every window was scratched badly from their hooves, the roof, decklid, hood and fenders were all dented on the top surfaces. The moldings had been removed some years ago, most were missing. The lower body was relatively sound, however, although the floors had a few weak spots. Yep. the perfect donor car for the convertible.
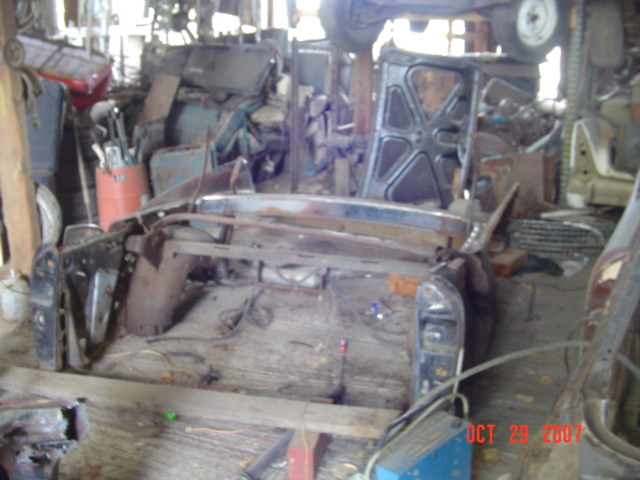
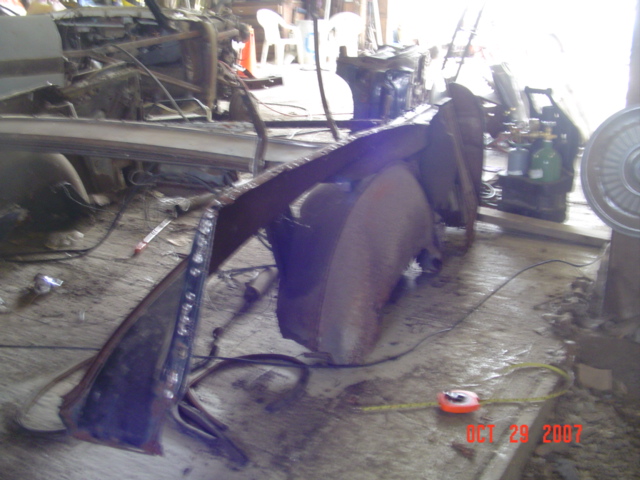
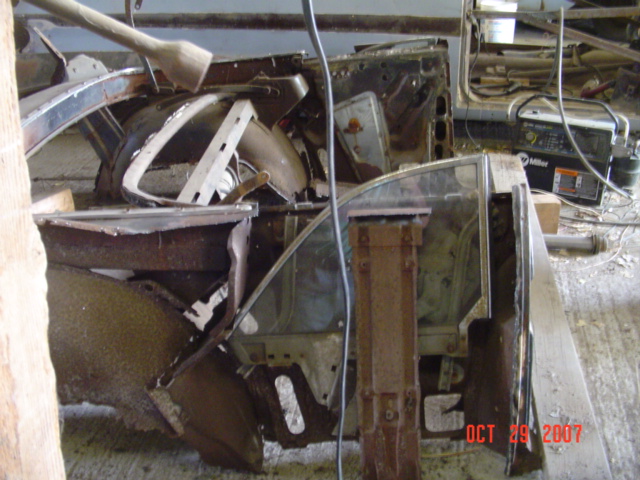
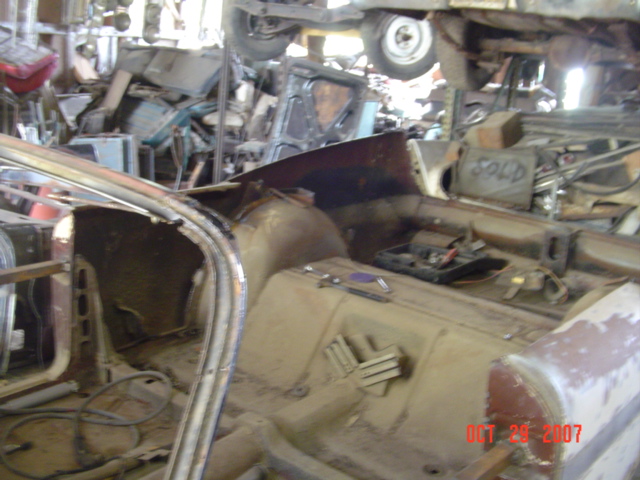
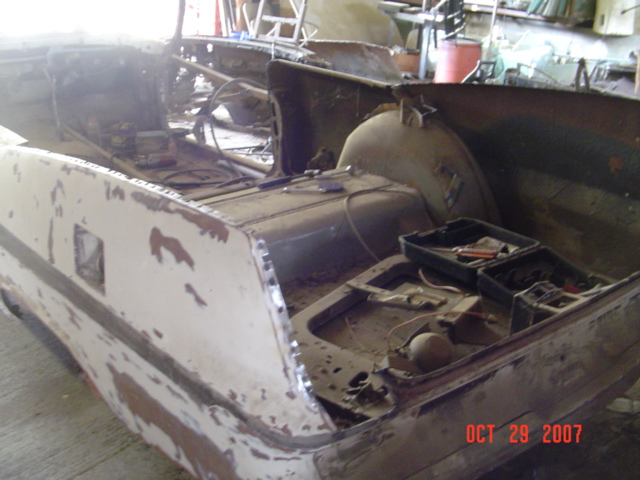
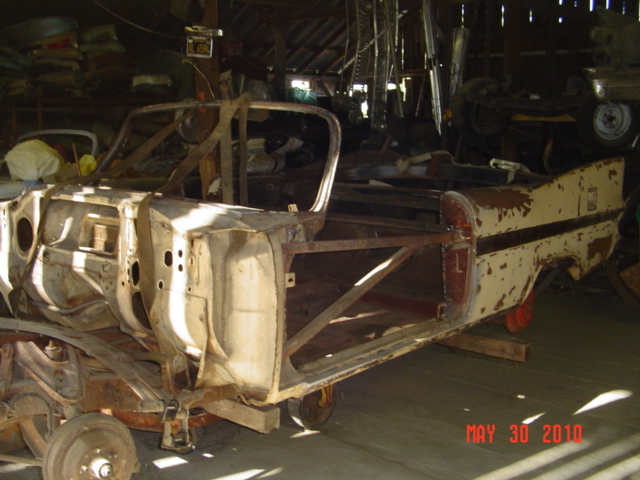
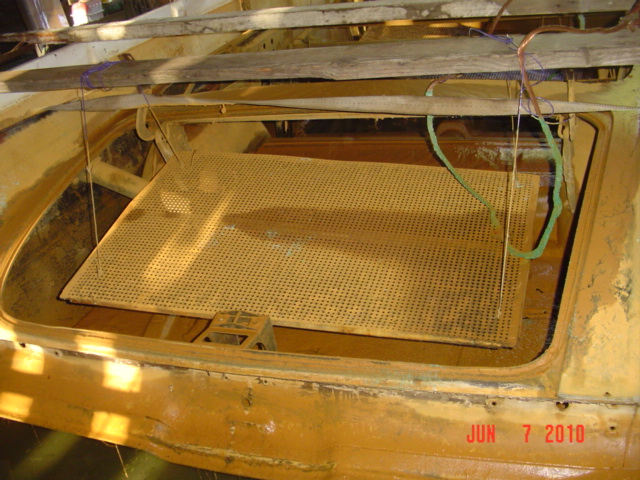
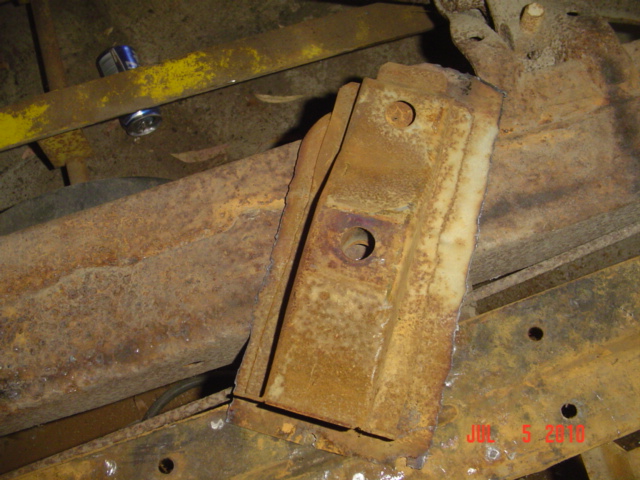
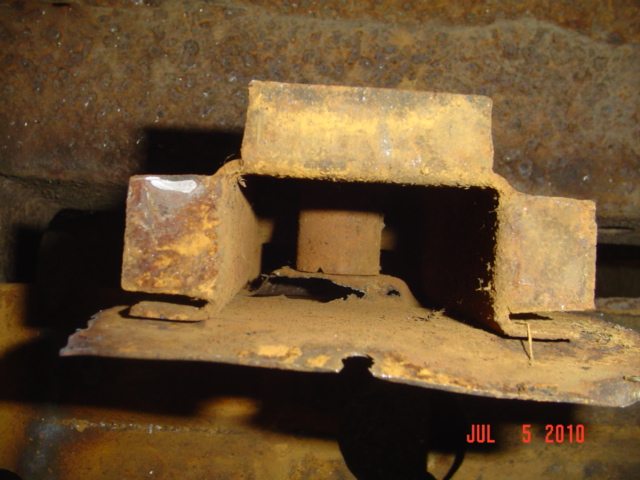
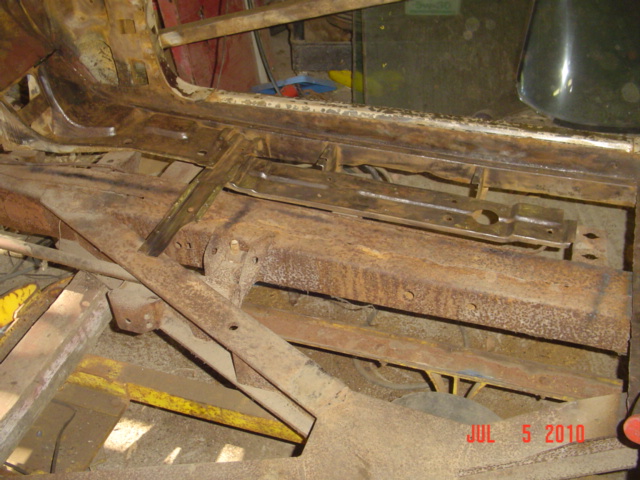
Photos are of the lonely chassis setting in the corner of the shop where it has for years, The convertible, and the donor body. Progress pics will be updated regularly.
---John
 ('59 SF chassis.jpg) ('59 SF chassis.jpg)
 ('59 SF convertible 002.jpg) ('59 SF convertible 002.jpg)
 ('59 SF convertible 003.jpg) ('59 SF convertible 003.jpg)
 ('59 SF convertible 005.jpg) ('59 SF convertible 005.jpg)
 ('59 S.F. convertible 005.jpg) ('59 S.F. convertible 005.jpg)
 ('59 S.F. convertible 006.jpg) ('59 S.F. convertible 006.jpg)
Attachments
----------------
 '59 SF chassis.jpg (64KB - 668 downloads) '59 SF chassis.jpg (64KB - 668 downloads)
'59 SF convertible 002.jpg (51KB - 622 downloads)
'59 SF convertible 003.jpg (48KB - 593 downloads)
'59 SF convertible 005.jpg (142KB - 541 downloads)
'59 S.F. convertible 005.jpg (158KB - 618 downloads)
'59 S.F. convertible 006.jpg (138KB - 611 downloads)
|
|
| |
|
Expert
Posts: 3480
 
Location: Montreal, Canada | I'm really looking forward to witness the progress you make on this. That's some project! |
|
| |
|
Expert
Posts: 2612
Location: Parts Unknown | WOW ! That's a LOT of work !!!!  |
|
| |
|
Expert
Posts: 1508
Location: new york | John ! Your a better man than me! GOOD LUCK! Thats some taking on. HAPPY RESTORING! Victor.. |
|
| |
|
Expert
Posts: 1530
Location: ZH, Switzerland | John - I wish you good luck and happy restoring!
Dieter |
|
| |
|
Expert
Posts: 1812
Location: Slidell La. | Can t wait to see more pics, thats going to be one BITCHIN ride when your done , not many people like 59 Plymouths , you buildin it cause you like or all the parts came together at the right time ? |
|
| |
|
Expert 5K+
Posts: 7808
Location: Williams California | narleycharlie - 2010-06-04 5:14 AM
Can t wait to see more pics, thats going to be one BITCHIN ride when your done , not many people like 59 Plymouths , you buildin it cause you like or all the parts came together at the right time ?
I happen to be one of the select few that likes the '59's as much as the prior years. I guess I'd have to in order to consider doing this project!
---John |
|
| |
|
Expert 5K+
Posts: 7808
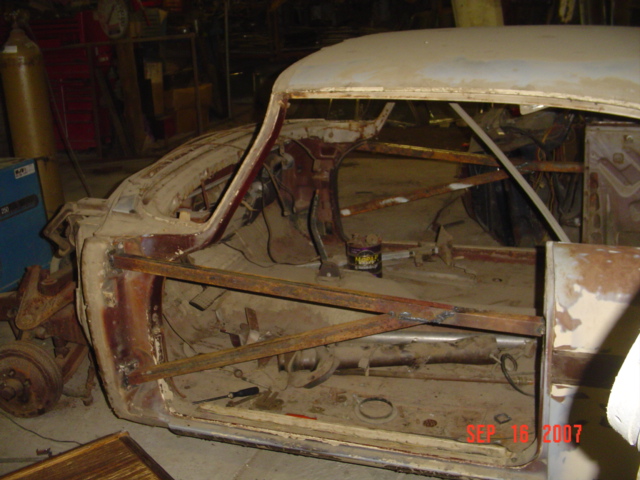
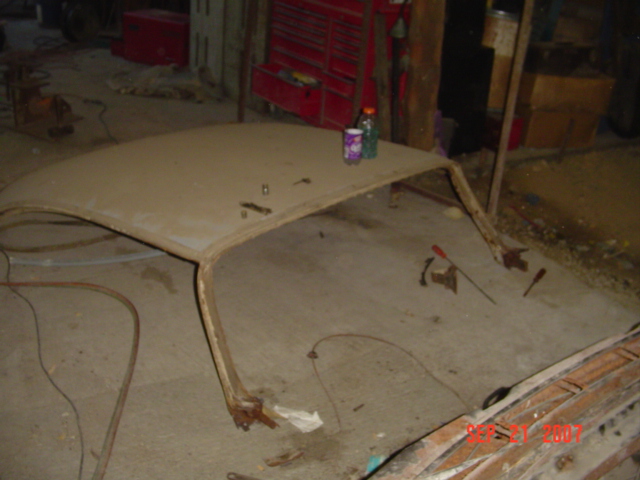
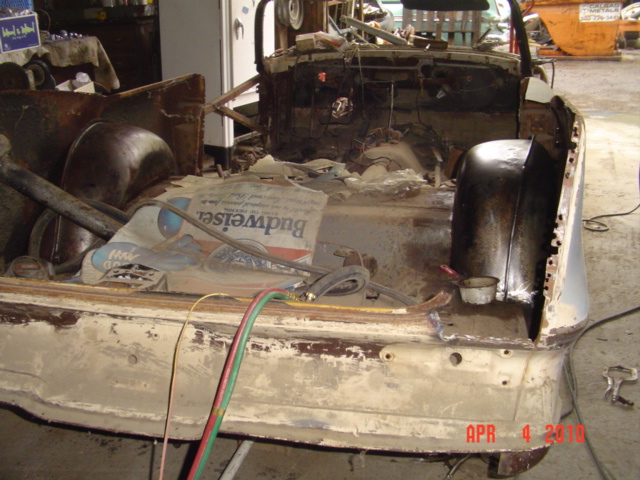
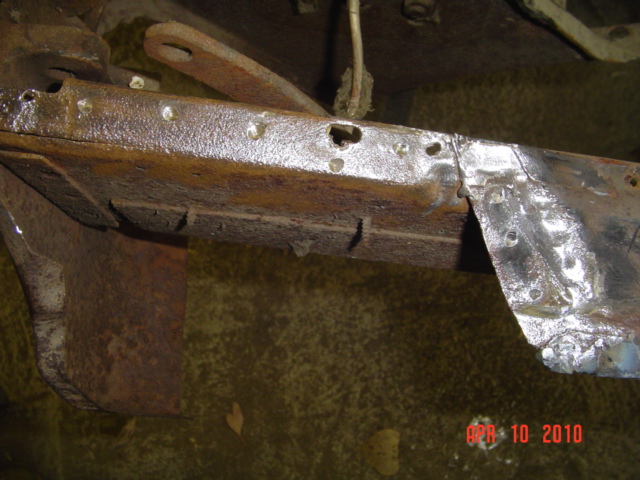
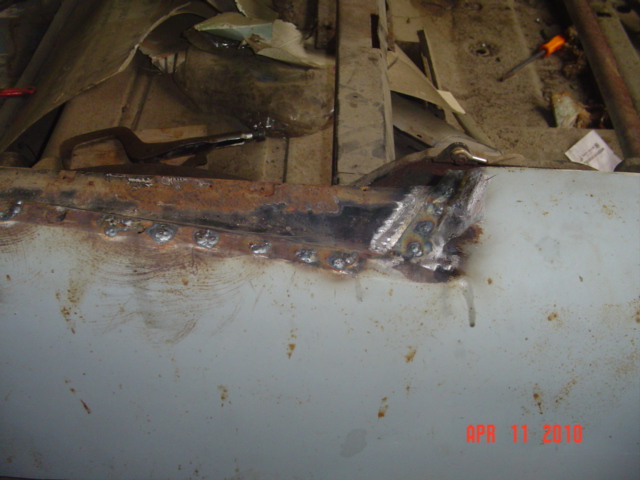
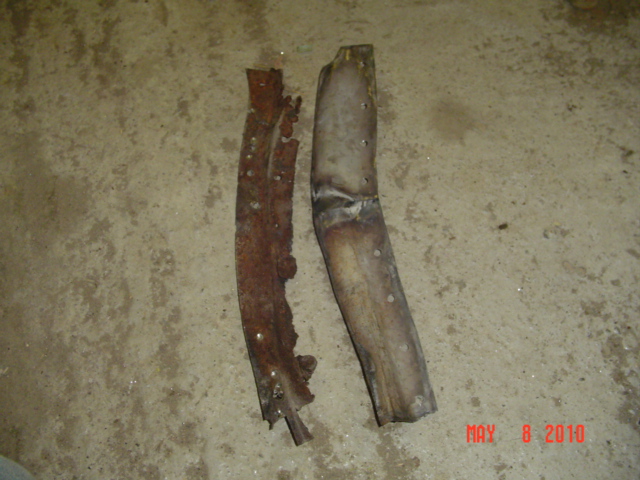
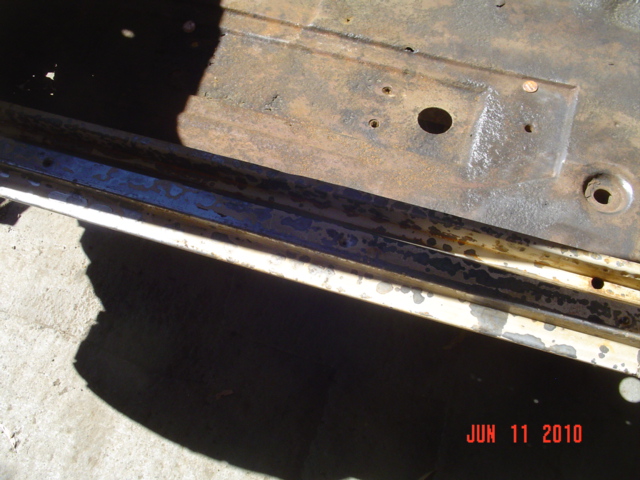
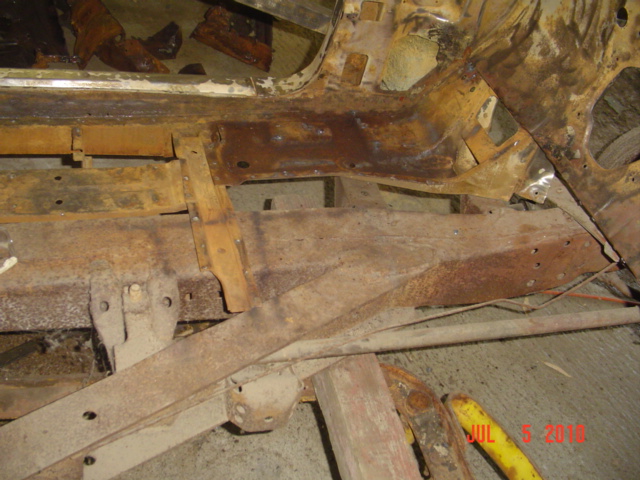
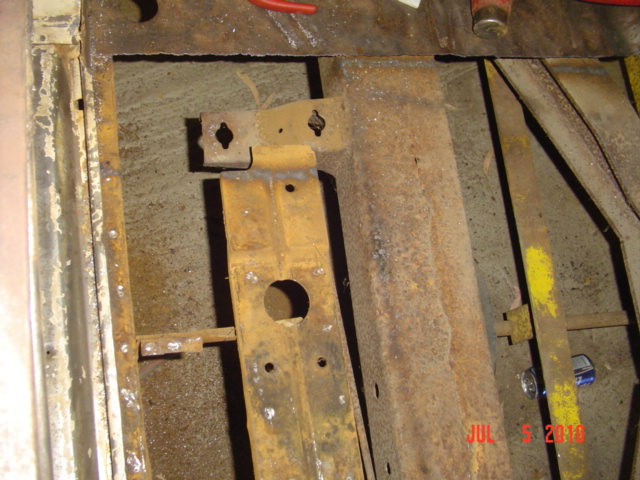
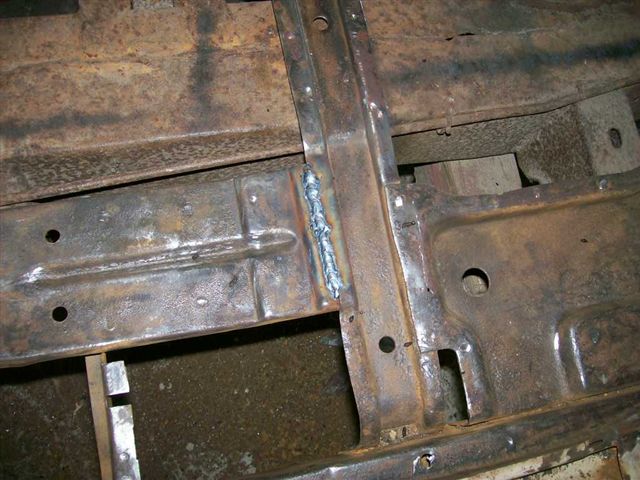
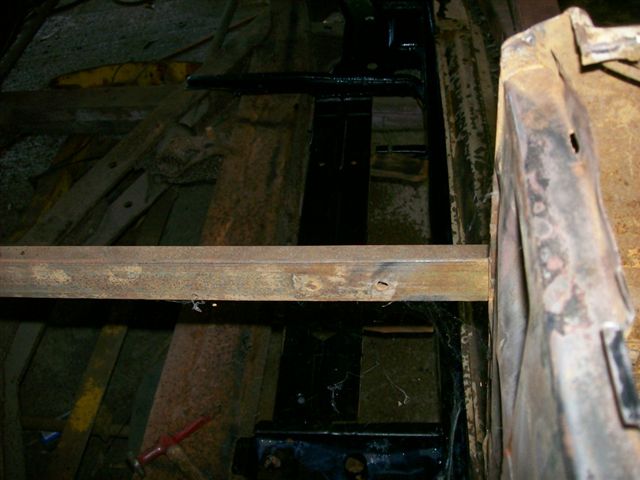
Location: Williams California | There was not much work involved in removing what wasz left of the body from the frame, just a lot of rust. Unless convertible specific, the lower body pieces were cut off and removed. The frame had major rust issues, so the hardtop frame will end up being used after all. The two extra body mounts and X-reinforcement were still good, and those will be added into the hardtop chassis later. For now, the frame will be positioned to hold the hardtop body in order to brace it up to prepare for removal of the roof.
---John
 ('59 S.F. convertible 001.jpg) ('59 S.F. convertible 001.jpg)
 ('59 S.F. convertible 002.jpg) ('59 S.F. convertible 002.jpg)
 ('59 S.F. convertible 003.jpg) ('59 S.F. convertible 003.jpg)
 ('59 S.F. convertible 004.jpg) ('59 S.F. convertible 004.jpg)
 ('59 S.F. convertible 007.jpg) ('59 S.F. convertible 007.jpg)
 ('59 S.F. convertible 008.jpg) ('59 S.F. convertible 008.jpg)
 ('59 S.F. convertible 009.jpg) ('59 S.F. convertible 009.jpg)
 ('59 S.F. convertible 010.jpg) ('59 S.F. convertible 010.jpg)
 ('59 S.F. convertible 011.jpg) ('59 S.F. convertible 011.jpg)
Attachments
----------------
'59 S.F. convertible 001.jpg (150KB - 557 downloads)
'59 S.F. convertible 002.jpg (153KB - 542 downloads)
'59 S.F. convertible 003.jpg (152KB - 542 downloads)
'59 S.F. convertible 004.jpg (148KB - 556 downloads)
'59 S.F. convertible 007.jpg (151KB - 535 downloads)
'59 S.F. convertible 008.jpg (144KB - 540 downloads)
'59 S.F. convertible 009.jpg (153KB - 566 downloads)
'59 S.F. convertible 010.jpg (147KB - 544 downloads)
'59 S.F. convertible 011.jpg (148KB - 538 downloads)
|
|
| |
|
Expert 5K+
Posts: 7808
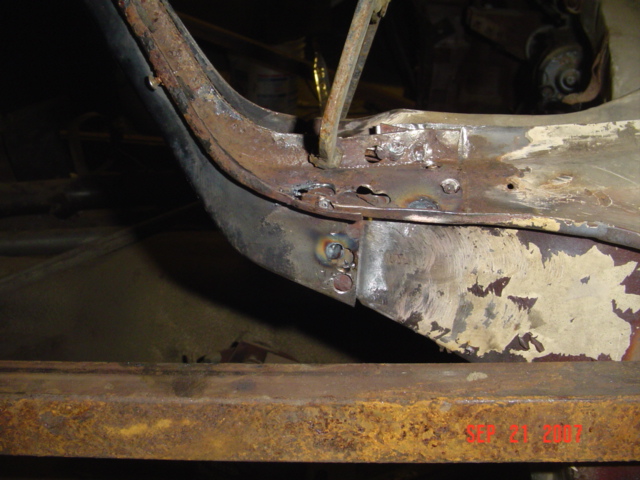
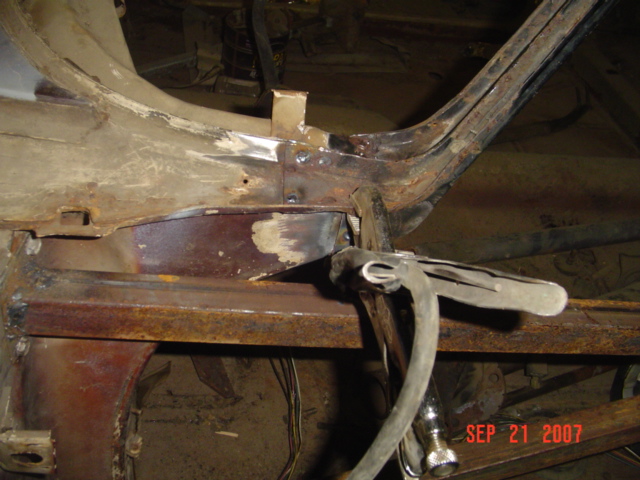
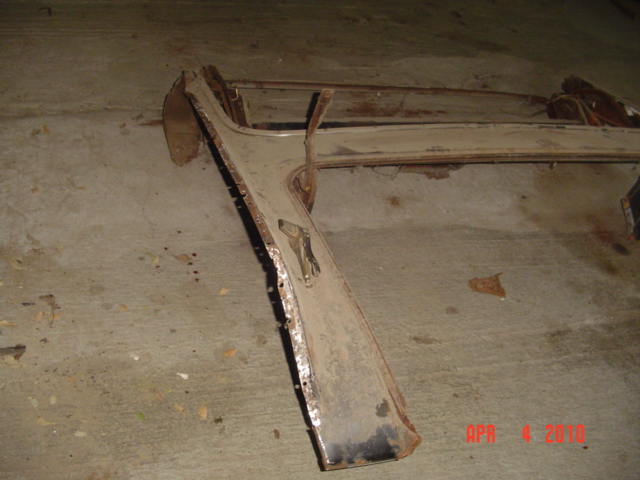
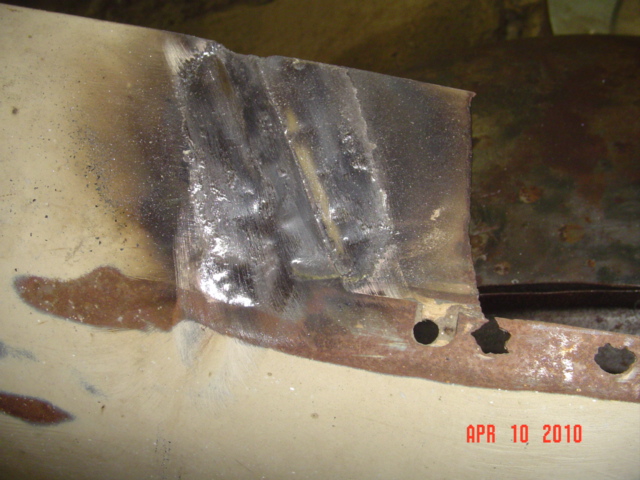
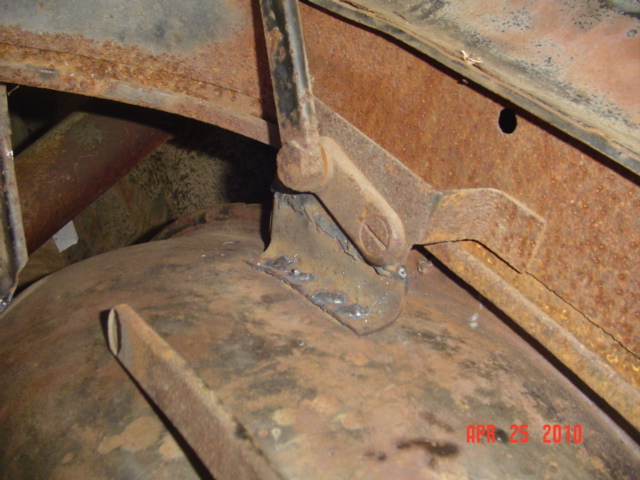
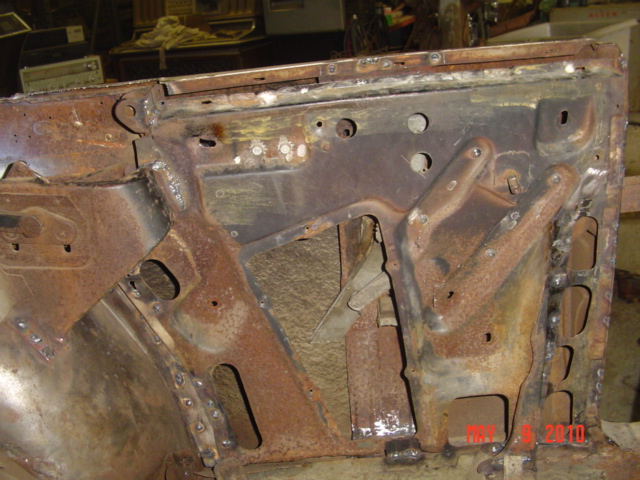
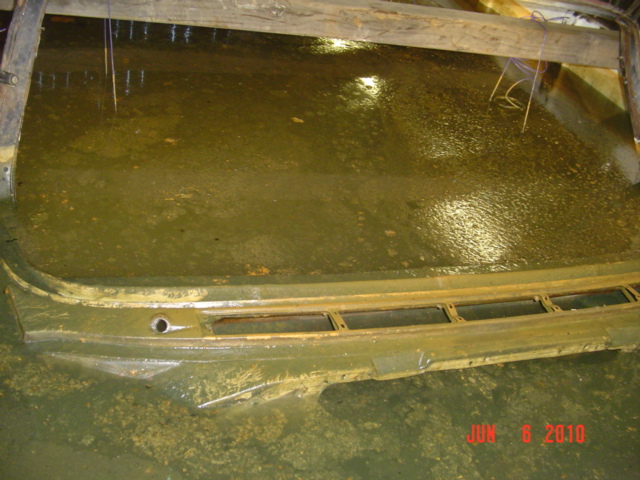
Location: Williams California | With the body braced up to keep it from folding, the spot welds holding the A-pillar to the cowl were drilled out. The rear of the roof was cut at the base of the C-pillar to allow removal.
The windshield frame was also removed from the convertible cowl by the same means.
---John
 ('59 SF windshield frame 001.jpg) ('59 SF windshield frame 001.jpg)
 ('59 SF windshield frame 002.jpg) ('59 SF windshield frame 002.jpg)
 ('59 SF windshield frame 005.jpg) ('59 SF windshield frame 005.jpg)
 ('59 SF windshield frame 007.jpg) ('59 SF windshield frame 007.jpg)
 ('59 SF windshield frame 009.jpg) ('59 SF windshield frame 009.jpg)
 ('59 SF windshield frame 008.jpg) ('59 SF windshield frame 008.jpg)
Attachments
----------------
'59 SF windshield frame 001.jpg (143KB - 547 downloads)
'59 SF windshield frame 002.jpg (147KB - 530 downloads)
'59 SF windshield frame 005.jpg (158KB - 537 downloads)
'59 SF windshield frame 007.jpg (146KB - 529 downloads)
'59 SF windshield frame 009.jpg (153KB - 538 downloads)
'59 SF windshield frame 008.jpg (140KB - 530 downloads)
|
|
| |
|
Expert 5K+
Posts: 7808
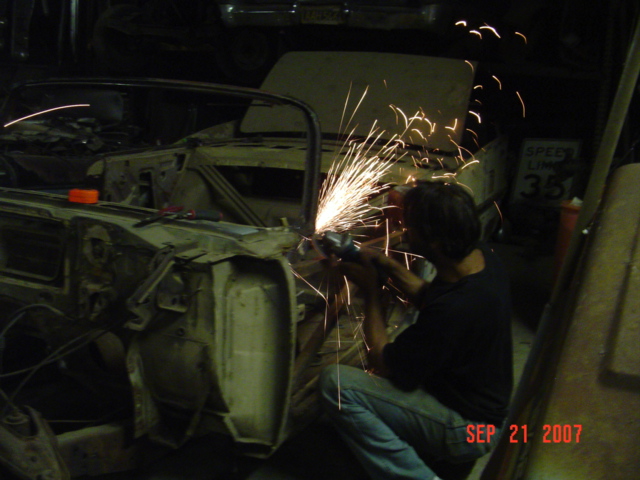
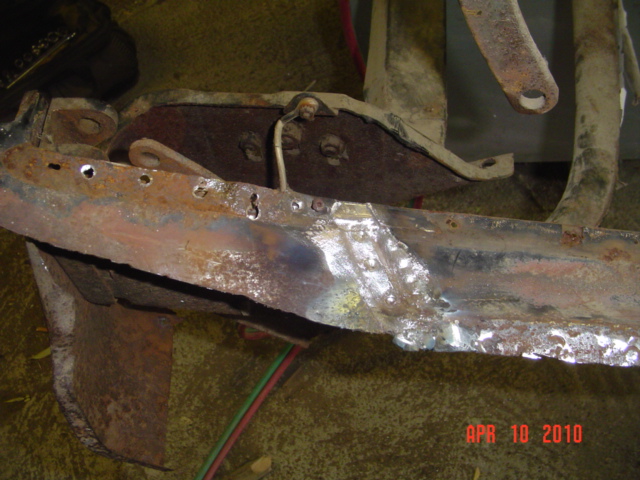
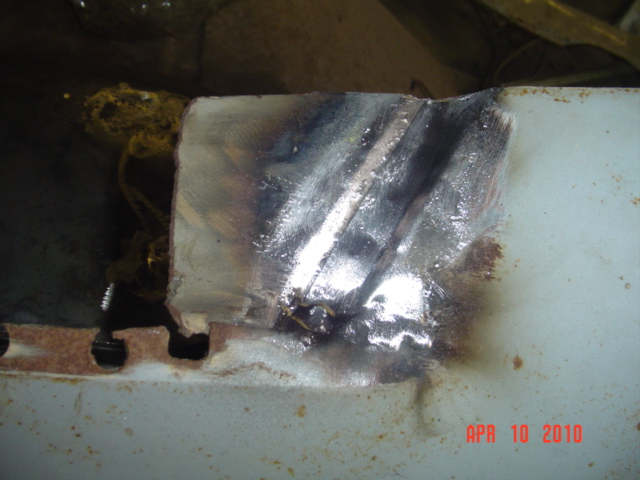
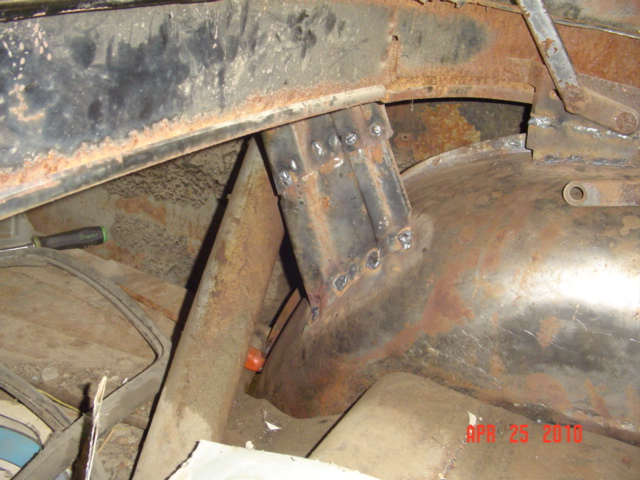
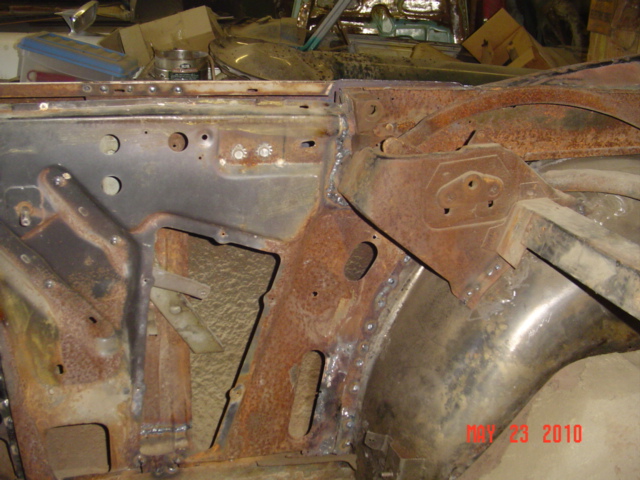
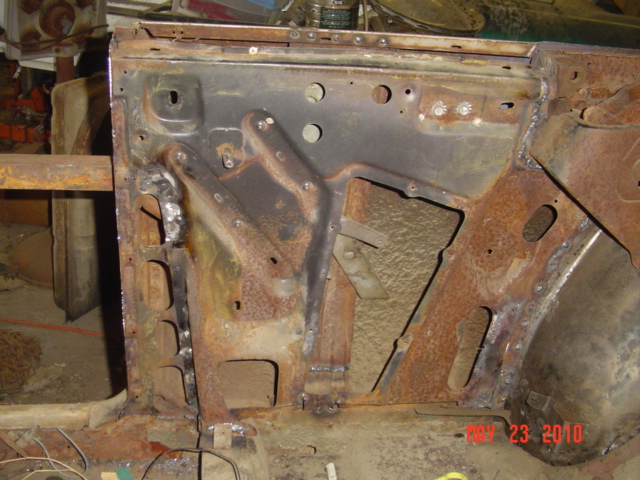
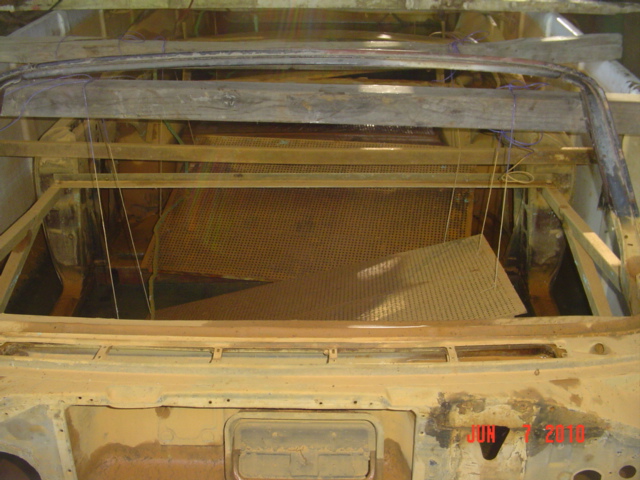
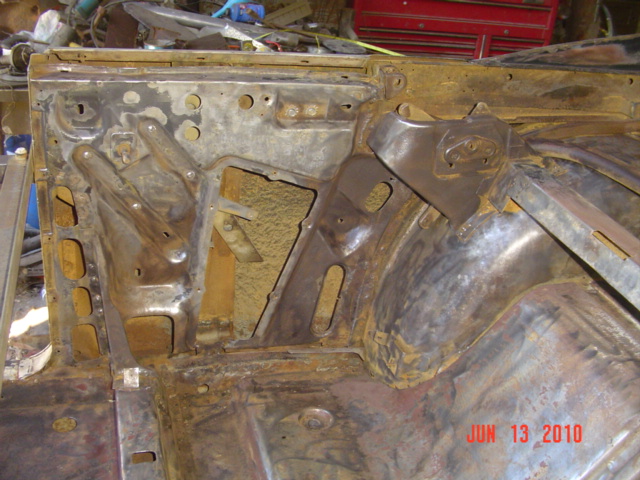
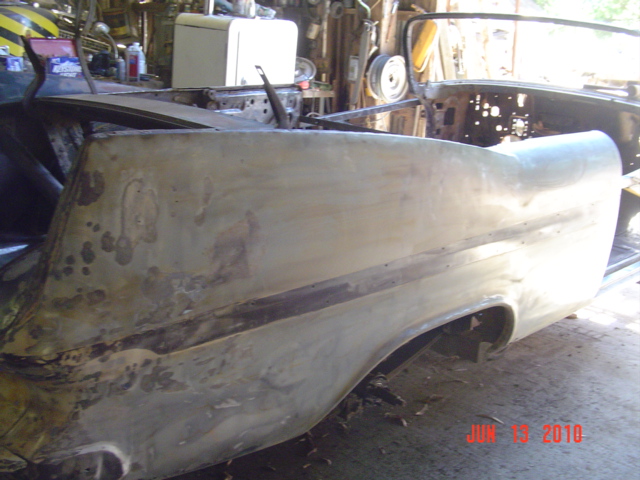
Location: Williams California | Now that the windshield frame is fitted and completed, sans for the leadwork over the seams, it's on to the rear tub of the car. More drilling out spotwelds and trimming on the convertible assembly, as well as removing the unnecessary hardtop sheetmetal in the main body-I have limited time to work on this, mostly evenings and once in awhile a weekend. Other projects take priority as wel sometimes.
 ('59 SF 007.jpg) ('59 SF 007.jpg)
 ('59 SF 008.jpg) ('59 SF 008.jpg)
 ('59 SF 009.jpg) ('59 SF 009.jpg)
 ('59 SF 010.jpg) ('59 SF 010.jpg)
 ('59 SF 011.jpg) ('59 SF 011.jpg)
 ('59 SF 012.jpg) ('59 SF 012.jpg)
Attachments
----------------
'59 SF 007.jpg (154KB - 524 downloads)
'59 SF 008.jpg (139KB - 518 downloads)
'59 SF 009.jpg (149KB - 518 downloads)
'59 SF 010.jpg (152KB - 521 downloads)
'59 SF 011.jpg (149KB - 532 downloads)
'59 SF 012.jpg (141KB - 533 downloads)
|
|
| |
|
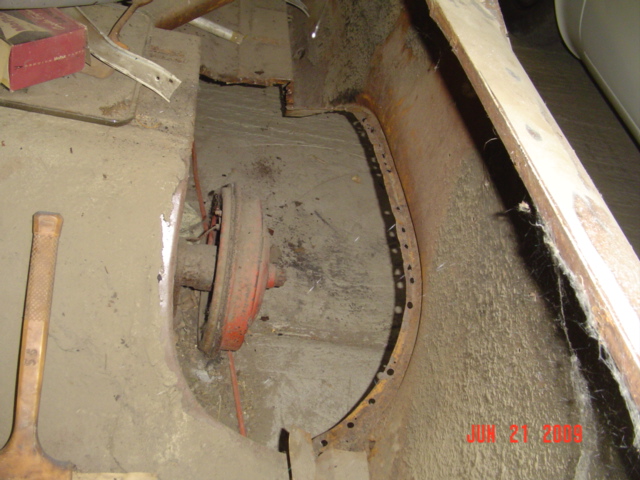
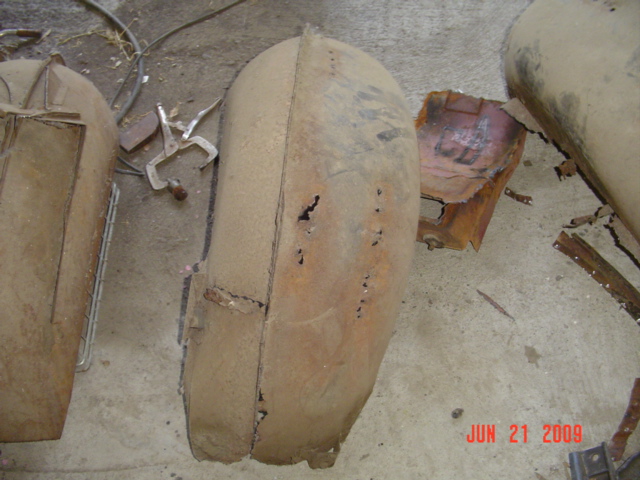
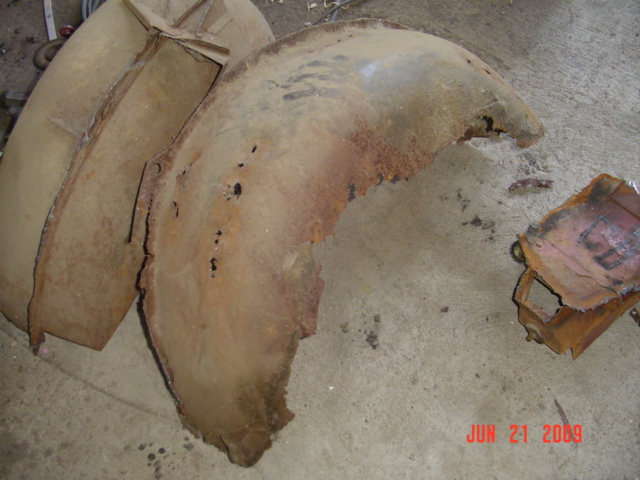
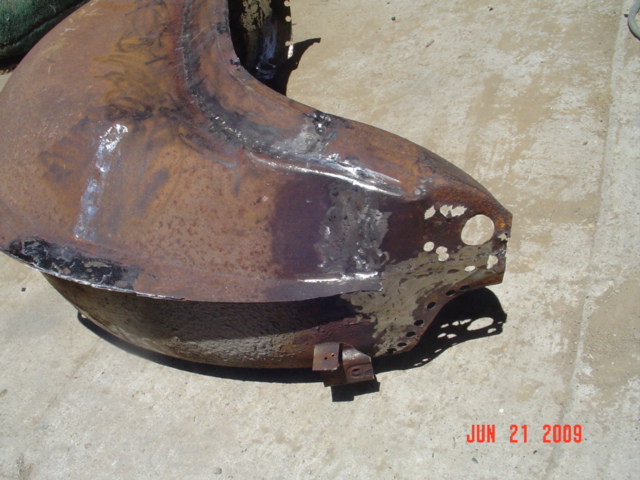
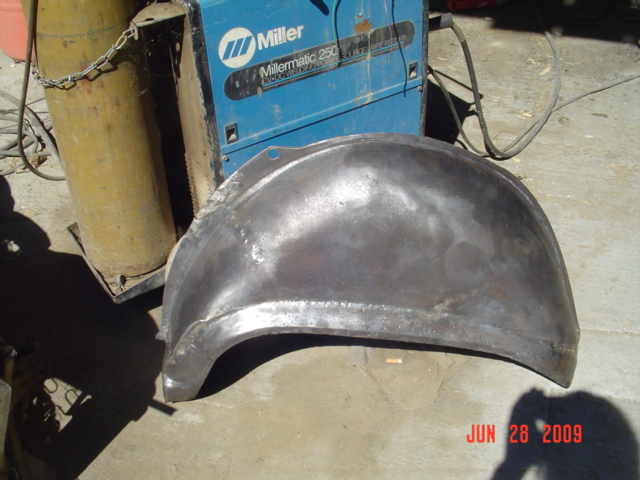
Expert 5K+
Posts: 7808
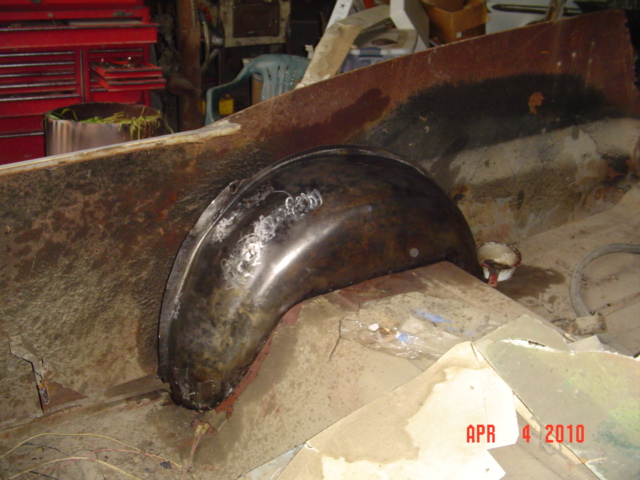
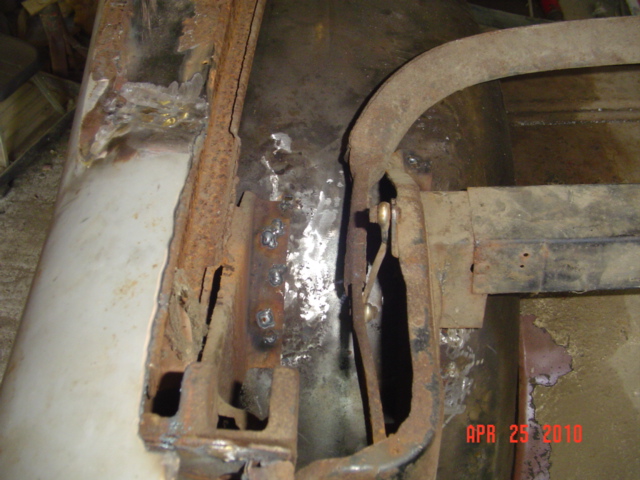
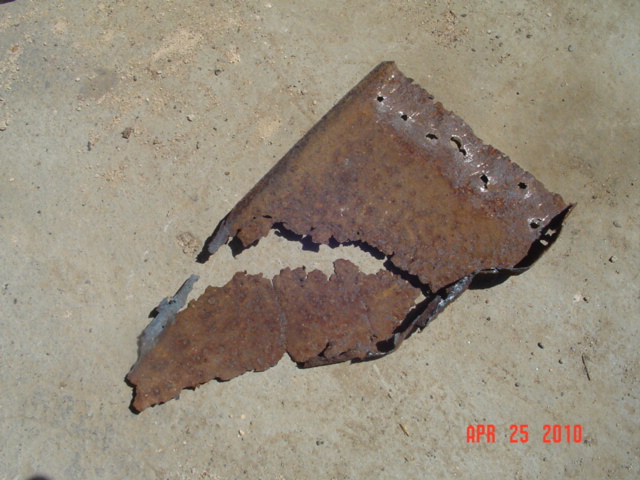
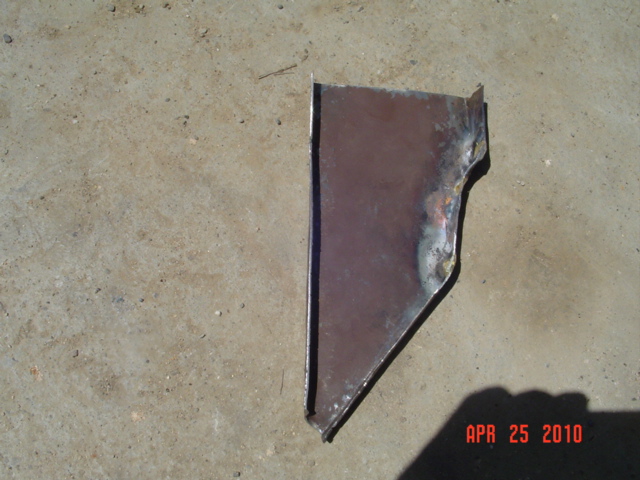
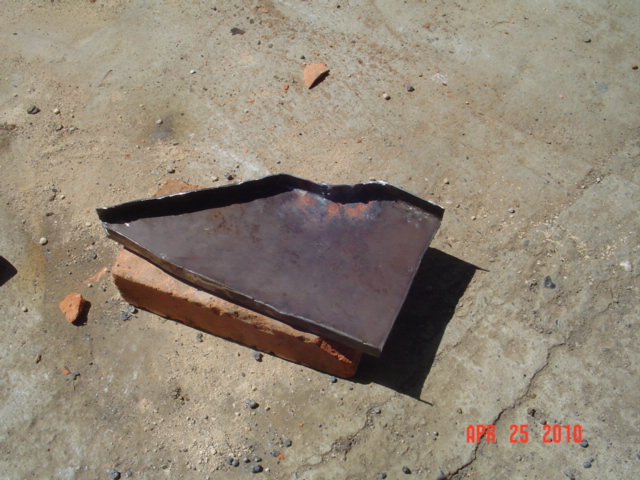
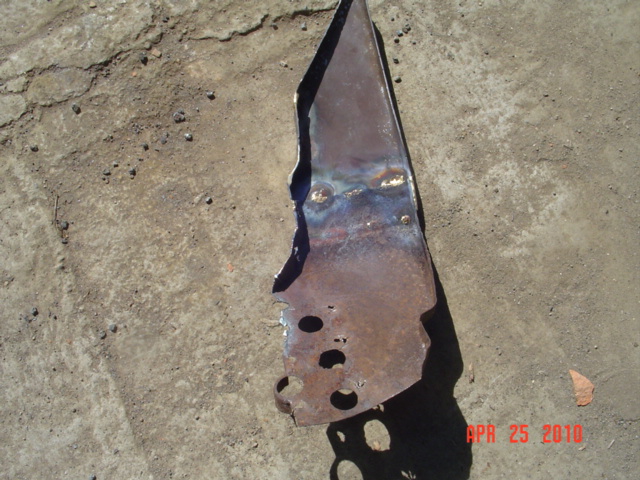
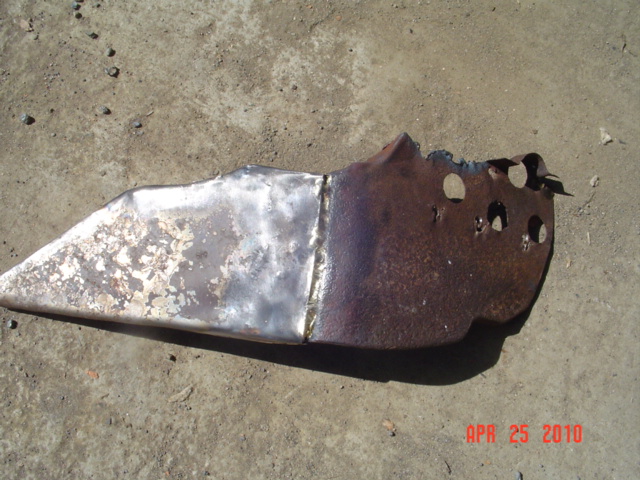
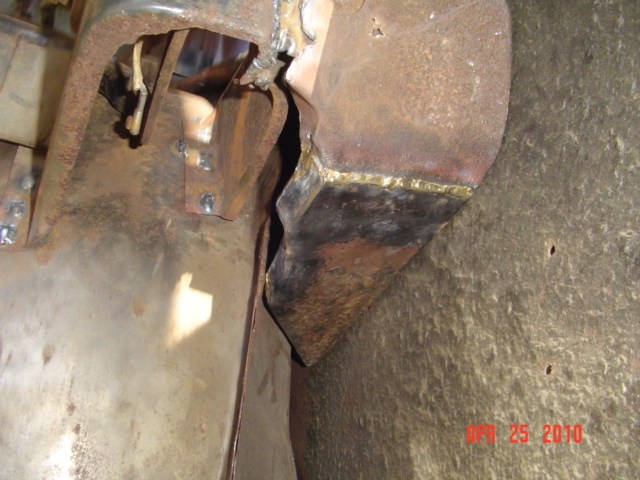
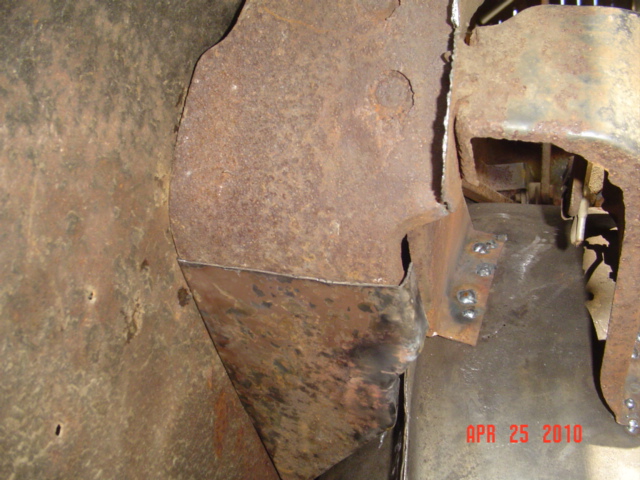
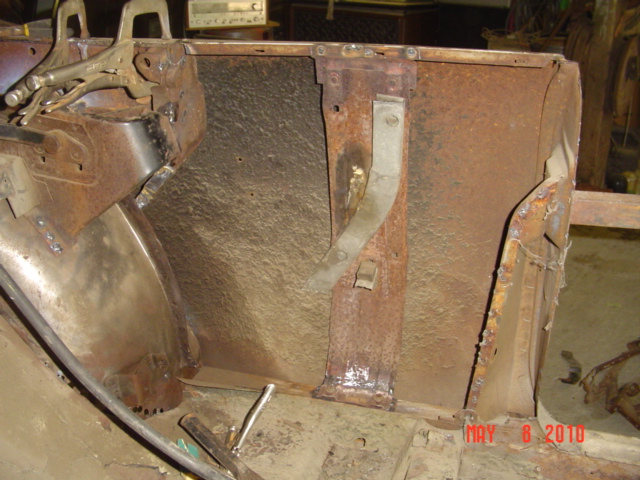
Location: Williams California | Convertible rear wheelwells are completely different than those on other models, and what was left of these was not enough to build on. The top of the original wheelwells were even rusted through. George McKovich had a pair that the top portion was better on, so I bought those to work with. Basically, the bottom couple inches were gone, so I used the bottoms of the hardtop's wheelwells and grafted the tops of the convertible ones on. Butt welding was used so there would be no noticeable overlap seam. I probably had 40 hours or better into each wheelwell to get them close to what was needed.
---John
 ('59 SF convertible 010.jpg) ('59 SF convertible 010.jpg)
 ('59 SF convertible 008.jpg) ('59 SF convertible 008.jpg)
 ('59 SF convertible 007.jpg) ('59 SF convertible 007.jpg)
 ('59 SF convertible 009.jpg) ('59 SF convertible 009.jpg)
 ('59 SF convertible 011.jpg) ('59 SF convertible 011.jpg)
 ('59 SF convertible 012.jpg) ('59 SF convertible 012.jpg)
 ('59 SF convertible 013.jpg) ('59 SF convertible 013.jpg)
Attachments
----------------
'59 SF convertible 010.jpg (152KB - 516 downloads)
'59 SF convertible 008.jpg (150KB - 511 downloads)
'59 SF convertible 007.jpg (143KB - 524 downloads)
'59 SF convertible 009.jpg (147KB - 516 downloads)
'59 SF convertible 011.jpg (149KB - 531 downloads)
'59 SF convertible 012.jpg (150KB - 517 downloads)
'59 SF convertible 013.jpg (147KB - 521 downloads)
|
|
| |
|
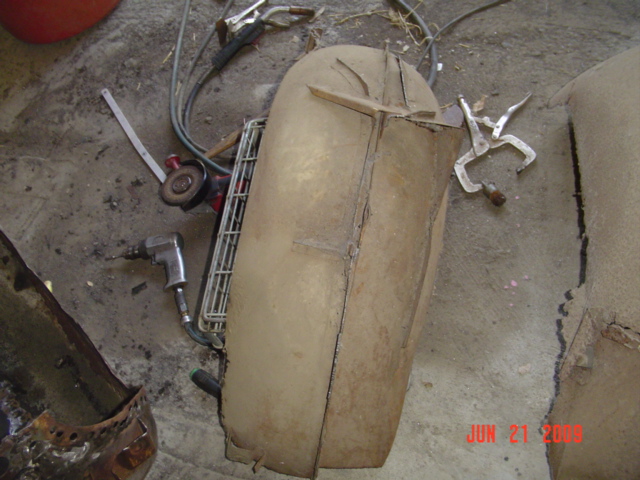
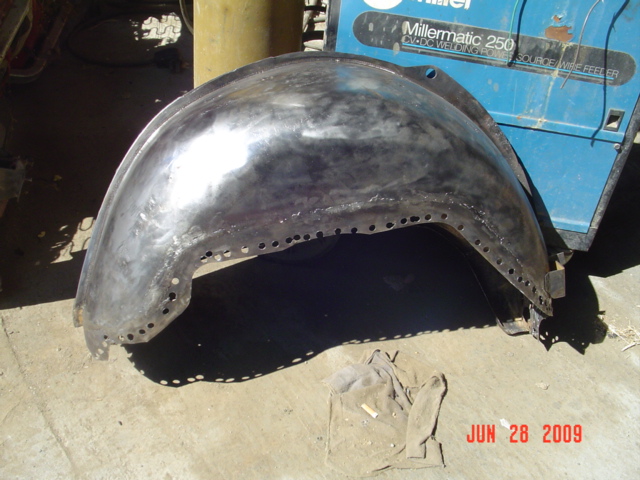
Expert 5K+
Posts: 7808
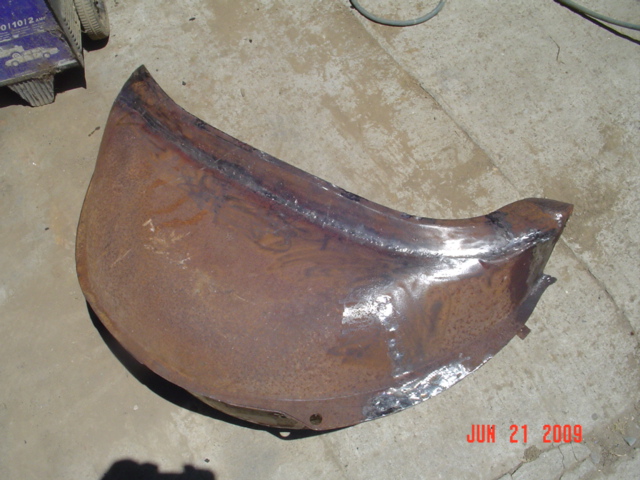
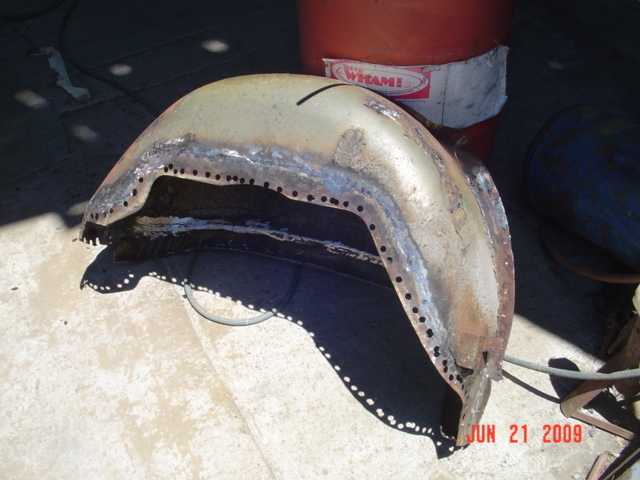
Location: Williams California | There will be a need for clean metal on these wheelwells, as many pieces will need to be welded to them. I elected to use reverse electrolysis on these parts, as it does not remove metal like blasting does, and will remove the rust between two layers of sheetmetal. An old motel laundry tub suited this purpose, as it is non- conductive. A mixture of baking soda and washing soda with water provided the electrolyte. A battery charger positive lead was run to a series of re-bar pieces connected together with a conductive wire, and the negative lead was placed on the wheelwell.
Several days of running 5 amps through the liquid, and a nasty brown soup formed in the tub. I then flipped the part over to get everything a chance at the action. After removing, the wheelwells were covered with a black residue and light surface rust from the water. A wire brush was used to reveal the shiny metal beneath.
---John
 ('59 SF convertible 014.jpg) ('59 SF convertible 014.jpg)
 ('59 SF convertible 006.jpg) ('59 SF convertible 006.jpg)
 ('59 SF convertible 016.jpg) ('59 SF convertible 016.jpg)
 ('59 SF convertible 017.jpg) ('59 SF convertible 017.jpg)
 ('59 SF convertible 018.jpg) ('59 SF convertible 018.jpg)
Attachments
----------------
'59 SF convertible 014.jpg (145KB - 504 downloads)
'59 SF convertible 006.jpg (152KB - 493 downloads)
'59 SF convertible 016.jpg (148KB - 557 downloads)
'59 SF convertible 017.jpg (150KB - 508 downloads)
'59 SF convertible 018.jpg (147KB - 500 downloads)
|
|
| |
|

Elite Veteran
Posts: 755
Location: Big M Automotive's Yard | Who's that short haired guy working on this car? |
|
| |
|
Extreme Veteran
Posts: 314
Location: San Antonio Tx | You sir are an artist
Alright John...were is road trip to this time?
Last time you did one of these it was for Mlisa "Excellent Adventure"
|
|
| |
|

Regular
Posts: 75
Location: SWEDEN (Town of strängnäs) | John You are a true inspiration for all of us forwardlook suckers, with what we think is rusted out wrecks! You are the god in my new religion!  Sigge!
|
|
| |
|
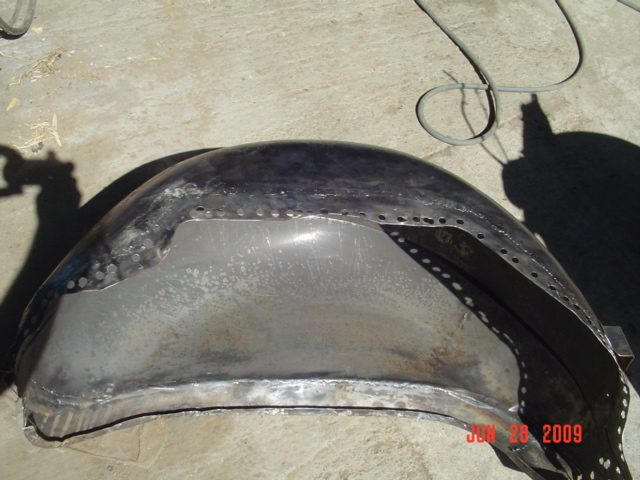
Expert 5K+
Posts: 7808
Location: Williams California | The wheelwells are now tacked into place. Final welding and grinding will be done later, after everything is fitted.
Next bit of work will be to ready the rear section for installation, welding up some small holes, etc.
---John
 ('59 SF convertible 001.JPG) ('59 SF convertible 001.JPG)
 ('59 SF convertible 002.JPG) ('59 SF convertible 002.JPG)
 ('59 SF convertible 003.JPG) ('59 SF convertible 003.JPG)
 ('59 SF convertible 004.JPG) ('59 SF convertible 004.JPG)
Attachments
----------------
'59 SF convertible 001.JPG (159KB - 519 downloads)
'59 SF convertible 002.JPG (160KB - 479 downloads)
'59 SF convertible 003.JPG (160KB - 473 downloads)
'59 SF convertible 004.JPG (152KB - 514 downloads)
|
|
| |
|
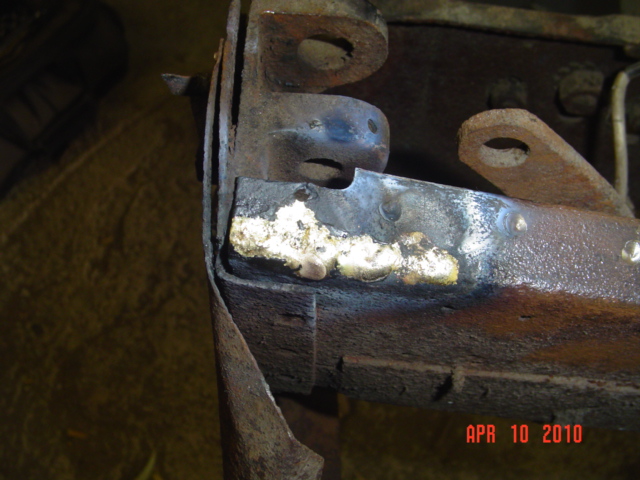
Expert 5K+
Posts: 7808
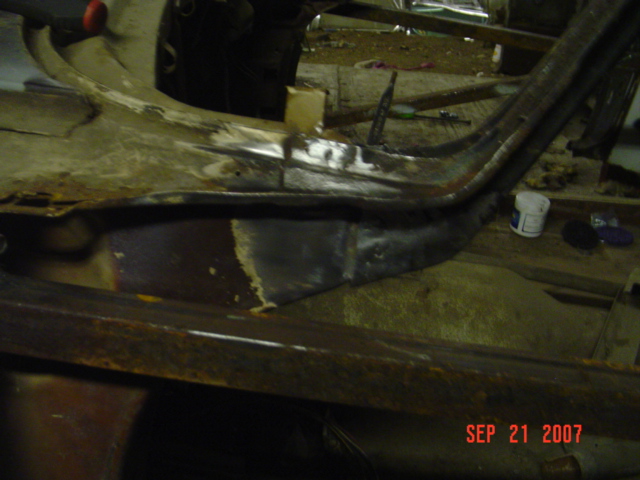
Location: Williams California | I located the factory seam, and heated the solder with a brazing tip until it flowed from the junction. The spotwelds were then drilled out. I found a small stress crack beneath that I brazed back together. I did the same on the donor body, no surprises were found.
---John
 ('59 SF convertible 005.JPG) ('59 SF convertible 005.JPG)
 ('59 SF convertible 006.JPG) ('59 SF convertible 006.JPG)
 ('59 SF convertible 007.JPG) ('59 SF convertible 007.JPG)
 ('59 SF convertible 008.JPG) ('59 SF convertible 008.JPG)
 ('59 SF convertible 009.JPG) ('59 SF convertible 009.JPG)
Attachments
----------------
'59 SF convertible 005.JPG (159KB - 488 downloads)
'59 SF convertible 006.JPG (154KB - 494 downloads)
'59 SF convertible 007.JPG (158KB - 486 downloads)
'59 SF convertible 008.JPG (152KB - 486 downloads)
'59 SF convertible 009.JPG (154KB - 486 downloads)
|
|
| |
|
Expert 5K+
Posts: 7808
Location: Williams California | Going together- This took two people to position onto the body. One of the employees,Rodger, was a big help here. The rear corners were brazed [as per factory] and a series of clamps kept the body alignment in check.
Mig welding the drilled out spotwelds, these will later be ground off flush. One problem I ran into was that the driver's side quarter panel wanted to oilcan inwards when the top seam was pinched together, after much consideration, I remembered the RH quarter on the original convertible had taken a hit at one time, and was tweaked. I found a bit of secondary damage on the deck panel, where the metal was pushed upwards. A bit of hammer and dolly work allowed it to settle back into place, and the left quarter panel no longer wanted to contract. Thank goodness!
---John
 ('59 SF convertible 010.JPG) ('59 SF convertible 010.JPG)
 ('59 SF convertible 011.JPG) ('59 SF convertible 011.JPG)
 ('59 SF convertible 012.JPG) ('59 SF convertible 012.JPG)
 ('59 SF convertible 013.JPG) ('59 SF convertible 013.JPG)
Attachments
----------------
'59 SF convertible 010.JPG (165KB - 482 downloads)
'59 SF convertible 011.JPG (153KB - 488 downloads)
'59 SF convertible 012.JPG (150KB - 488 downloads)
'59 SF convertible 013.JPG (157KB - 489 downloads)
|
|
| |
|
Expert 5K+
Posts: 7808
Location: Williams California | I finished positioning and welding the stands and braces, these will just need a final grinding, to be done once the body is assembled and on a rotisserie. Looks like things are lining up the way they should, so it will be on to the next step.
---John
 ('59 SF convertible 002.JPG) ('59 SF convertible 002.JPG)
 ('59 SF convertible 003.JPG) ('59 SF convertible 003.JPG)
 ('59 SF convertible 004.JPG) ('59 SF convertible 004.JPG)
 ('59 SF convertible 005.JPG) ('59 SF convertible 005.JPG)
 ('59 SF convertible 006.JPG) ('59 SF convertible 006.JPG)
Attachments
----------------
'59 SF convertible 002.JPG (158KB - 523 downloads)
'59 SF convertible 003.JPG (163KB - 494 downloads)
'59 SF convertible 004.JPG (158KB - 490 downloads)
'59 SF convertible 005.JPG (155KB - 496 downloads)
'59 SF convertible 006.JPG (160KB - 504 downloads)
|
|
| |
|
Expert 5K+
Posts: 7808
Location: Williams California | This is what I had to replicate for both sides. These are drains for the convertible top well, they channel the water away from the upholstered surfaces in the rear seat area. The one shown here is from the driver's side. The passenger side one was non-existent.
I made a mirror image of the first one for the passenger side, and brazerd them onto the convertible assembly.
---John
 ('59 SF convertible 001.JPG) ('59 SF convertible 001.JPG)
 ('59 SF convertible 007.JPG) ('59 SF convertible 007.JPG)
 ('59 SF convertible 008.JPG) ('59 SF convertible 008.JPG)
 ('59 SF convertible 009.JPG) ('59 SF convertible 009.JPG)
 ('59 SF convertible 010.JPG) ('59 SF convertible 010.JPG)
 ('59 SF convertible 011.JPG) ('59 SF convertible 011.JPG)
 ('59 SF convertible 012.JPG) ('59 SF convertible 012.JPG)
Attachments
----------------
'59 SF convertible 001.JPG (154KB - 503 downloads)
'59 SF convertible 007.JPG (148KB - 504 downloads)
'59 SF convertible 008.JPG (146KB - 525 downloads)
'59 SF convertible 009.JPG (155KB - 508 downloads)
'59 SF convertible 010.JPG (150KB - 505 downloads)
'59 SF convertible 011.JPG (163KB - 491 downloads)
'59 SF convertible 012.JPG (166KB - 650 downloads)
|
|
| |
|
Exner Expert 19,174 posts. Neil passed away 18 Sep 2015. You will be missed, Neil!
Posts: 19146
Location: bishop, ca | John, can you IMAGINE what fun you'd have, if you could have received all these pieces, to assemble,
in individual NEW condition???
BTW, in 1957, Dodge prepared TSB showing (kinda) its dealers how they could construct/create your 59's
water drain 'trough", to channel water from the cars' interiors.
Those troughs were apparently put into production, but they certainly were 'sacrificial' constructions!
Edited by d500neil 2010-06-07 5:27 PM
|
|
| |
|
Elite Veteran
Posts: 1150
Location: Southern California | John you are a mad man, wow keep up the good work. I look forward to the next progress pics |
|
| |
|
Exner Expert 19,174 posts. Neil passed away 18 Sep 2015. You will be missed, Neil!
Posts: 19146
Location: bishop, ca | It will take a while to media-blast the entire body, when he's done assembling it!
|
|
| |
|
Extreme Veteran
Posts: 530
Location: Wake Forest, NC | Great thread John you make it look easy. |
|
| |
|
Inactive by user's request
Location: Las Vegas, Nevada | big m - 2010-06-04 3:09 PM
The top of the original wheelwells were even rusted through. George McKovich had a pair that the top portion was better on, so I bought those to work with.
---John
I don't know where George comes up with some of the rare stuff that he does, John, but it's amazing, He's one of the really great people here! 
K.
P.S.- I am still gonna convince you to put a stick in that '59!  |
|
| |
|
Expert 5K+
Posts: 7808
Location: Williams California | d500neil - 2010-06-07 4:03 PM
It will take a while to media-blast the entire body, when he's done assembling it!
Neil, there will be no heavy rust to deal with, nothing a light soda blast won't take care of. Keep your eyes on this thread!
---John |
|
| |
|
Inactive by user's request
Location: Las Vegas, Nevada | It has occurred to me, John, that you could have sent the car and parts to Northern Europe, along with a steamer trunk full of cash and received a complete, better-than-new '59 Plymouth convertible twenty four months later.
But what fun would that be?
K. |
|
| |
|
Expert 5K+
Posts: 7808
Location: Williams California | Kenny J. - 2010-06-07 4:59 PM
big m - 2010-06-04 3:09 PM
The top of the original wheelwells were even rusted through. George McKovich had a pair that the top portion was better on, so I bought those to work with.
---John
I don't know where George comes up with some of the rare stuff that he does, John, but it's amazing, He's one of the really great people here!
K.
P.S.- I am still gonna convince you to put a stick in that '59! :laugh:
LMAO Kenny!
I did just find another V-8 stick tranny in the building here, if you'd like, I'll hang on to it for you!
And yes- George is a great guy!!
---John |
|
| |
|
Inactive by user's request
Location: Las Vegas, Nevada | big m - 2010-06-04 11:53 AM
narleycharlie - 2010-06-04 5:14 AM
............not many people like 59 Plymouths , you buildin it cause you like or all the parts came together at the right time ?
I happen to be one of the select few that likes the '59's as much as the prior years. I guess I'd have to in order to consider doing this project!
---John
So let's see.....there's Charlie, you, Roger, Tom and me........too bad we can't find a sixth person. That would be a WHOLE half dozen.
K. |
|
| |
|
Expert 5K+
Posts: 7808
Location: Williams California | Rebuilding the quarter window frames- I salvaged what I could from the original convertible, although portions had to be made and fitted onto the good parts. The vertical braces and mounts for the quarter windows had to have rusty sections cut off and fabricated, as the photos will show.
---John
 ('59 SF convertible 001.JPG) ('59 SF convertible 001.JPG)
 ('59 SF convertible 002.JPG) ('59 SF convertible 002.JPG)
 ('59 SF convertible 003.JPG) ('59 SF convertible 003.JPG)
 ('59 SF convertible 004.JPG) ('59 SF convertible 004.JPG)
 ('59 SF convertible 005.JPG) ('59 SF convertible 005.JPG)
 ('59 SF convertible 006.JPG) ('59 SF convertible 006.JPG)
Attachments
----------------
'59 SF convertible 001.JPG (158KB - 487 downloads)
'59 SF convertible 002.JPG (161KB - 495 downloads)
'59 SF convertible 003.JPG (156KB - 490 downloads)
'59 SF convertible 004.JPG (165KB - 488 downloads)
'59 SF convertible 005.JPG (148KB - 498 downloads)
'59 SF convertible 006.JPG (158KB - 509 downloads)
|
|
| |
|
Expert 5K+
Posts: 7808
Location: Williams California | Next was to make the necessary pieces to mount the quarter window housing, the rearward piece had a strange compound curve that was a hard thing to recreate, but with a torch [heating] and hammer and dolly [beating] I got one real close to the original. The brace towards the front needed to be removed to gain access to some spotwelds, and rejoined later.
---John
 ('59 SF convertible 007.JPG) ('59 SF convertible 007.JPG)
 ('59 SF convertible 008.JPG) ('59 SF convertible 008.JPG)
 ('59 SF convertible 009.JPG) ('59 SF convertible 009.JPG)
 ('59 SF convertible 010.JPG) ('59 SF convertible 010.JPG)
 ('59 SF convertible 011.JPG) ('59 SF convertible 011.JPG)
 ('59 SF convertible 012.JPG) ('59 SF convertible 012.JPG)
 ('59 SF convertible 013.JPG) ('59 SF convertible 013.JPG)
 ('59 SF convertible 014.JPG) ('59 SF convertible 014.JPG)
Attachments
----------------
'59 SF convertible 007.JPG (161KB - 488 downloads)
'59 SF convertible 008.JPG (159KB - 509 downloads)
'59 SF convertible 009.JPG (148KB - 493 downloads)
'59 SF convertible 010.JPG (154KB - 491 downloads)
'59 SF convertible 011.JPG (157KB - 485 downloads)
'59 SF convertible 012.JPG (166KB - 683 downloads)
'59 SF convertible 013.JPG (159KB - 475 downloads)
'59 SF convertible 014.JPG (162KB - 482 downloads)
|
|
| |
|
Expert 5K+
Posts: 7808
Location: Williams California | After doing the driver's side, the passenger side went rather smoothly, and came out well. Now all the fabricating and piecing together has been completed, so on with the next phase, the cleaning.
---John
 ('59 SF convertible 001.JPG) ('59 SF convertible 001.JPG)
 ('59 SF convertible 002.JPG) ('59 SF convertible 002.JPG)
Attachments
----------------
'59 SF convertible 001.JPG (165KB - 486 downloads)
'59 SF convertible 002.JPG (164KB - 476 downloads)
|
|
| |
|
Expert
Posts: 2612
Location: Parts Unknown | Kenny J. - 2010-06-07 8:05 PM
big m - 2010-06-04 11:53 AM
narleycharlie - 2010-06-04 5:14 AM
............not many people like 59 Plymouths , you buildin it cause you like or all the parts came together at the right time ?
I happen to be one of the select few that likes the '59's as much as the prior years. I guess I'd have to in order to consider doing this project!
---John
So let's see.....there's Charlie, you, Roger, Tom and me........too bad we can't find a sixth person. That would be a WHOLE half dozen.
K.
I like '59 Plymouths AND add me to the short, short list that wants John to use a 3 speed stick (you and me )
BTW, this is AWESOME - keep postin the progress !!!! You make me feel like a simpleton (and I'm holdin my head high!)
GREAT WORK ! ! ! !
|
|
| |
|
Inactive by user's request
Location: Las Vegas, Nevada | big m - 2010-06-07 5:04 PM
I did just find another V-8 stick tranny in the building here, if you'd like, I'll hang on to it for you!
---John
Great. Add it to my pile, along with that stick stuff from the trunk of that '62. It can come here with the Satellite, or maybe I can pick it all up in November.
K. |
|
| |
|
Elite Veteran
Posts: 664
Location: Wales, Wisconsin | This is the reason I love the Internet. Watching someone resurrect a car I have never dreamed of finding much less seeing. Very cool project and thank you for sharing with us. Really enjoy reading your posts. |
|
| |
|
Veteran
Posts: 210
Location: San Diego, CA | Great thread! Keep the pictures and story coming. I too love the 59's as much as the rest, if not more..... |
|
| |
|
Location: Parts Unknown | John,
When you set your wheel tubs, were the outer body skins (wheel well lips) in place to use in locating the tubs ? If not,
how did you locate them ?
|
|
| |
|

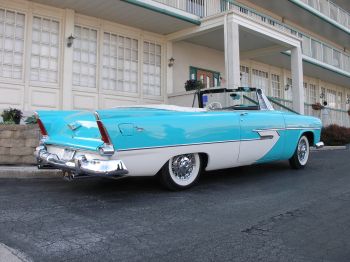
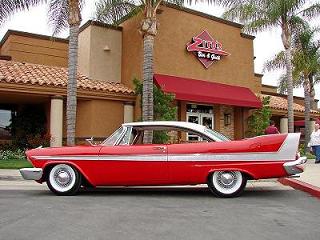
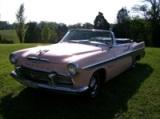
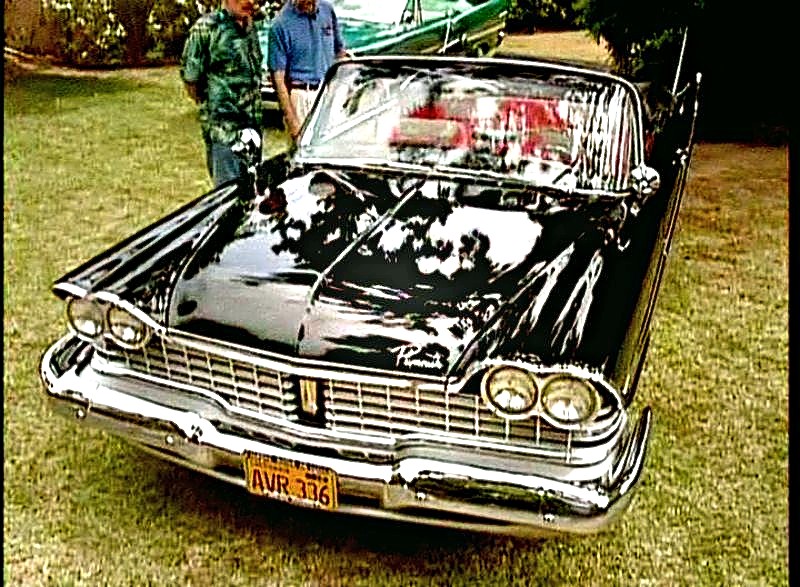
Expert
Posts: 3967
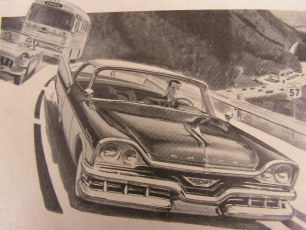
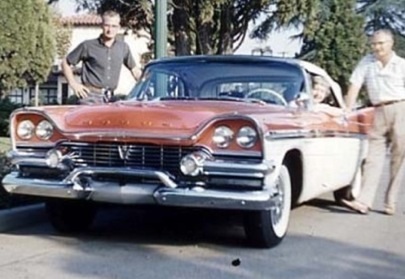
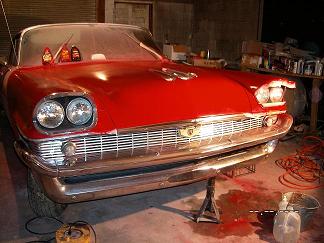
Location: DFW, TX | The '59 Sport Fury convertible is one of the most classy, high-end Plymouths ever made. You're doing a great job on yours John!
Here's a little inspiration - as if you needed it. GO MAN GO!!
 (1959PlymouthSportFuryConvertible.jpg) (1959PlymouthSportFuryConvertible.jpg)
Attachments
----------------
1959PlymouthSportFuryConvertible.jpg (201KB - 496 downloads)
|
|
| |
|
Expert
Posts: 2612
Location: Parts Unknown | Is that dash pad blue ? WOW  |
|
| |
|
Expert 5K+
Posts: 7808
Location: Williams California | Thanks for the positive comments!
---John |
|
| |
|
Expert 5K+
Posts: 7808
Location: Williams California | Doctor DeSoto - 2010-06-08 10:08 PM
John,
When you set your wheel tubs, were the outer body skins (wheel well lips) in place to use in locating the tubs ? If not,
how did you locate them ?
The coupe's quarter panels as well as the wheel openings were in relatively good shap, so it provided a decent guide for the reinstallation of the inner wheelwells. I did have to make readjustments to the driver's side afterwards to make the top assembly fit properly.
---John |
|
| |
|
Inactive by user's request
Location: Las Vegas, Nevada | big m - 2010-06-09 10:10 AM
Thanks for the positive comments!
Ya think we're gonna criticize somebody who is our main source of parts? |
|
| |
|

Board Moderator & Exner Expert 10K+
Posts: 13054
Location: Southern Sweden - Sturkö island | John, are you sure that you dont have some Swedish blood in you? you're performing a fabulous work with that wreck. I'm really curious of how you're going to bath the body. Very interesting and informative thread - keep up your good work and keep us posted. 
Edited by wizard 2010-06-09 2:10 PM
|
|
| |
|
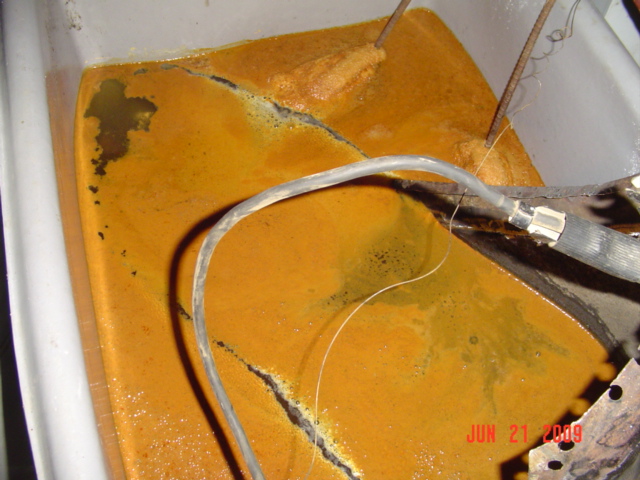
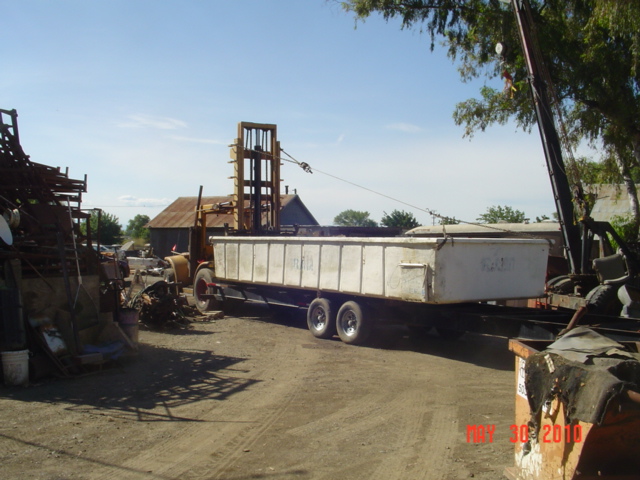
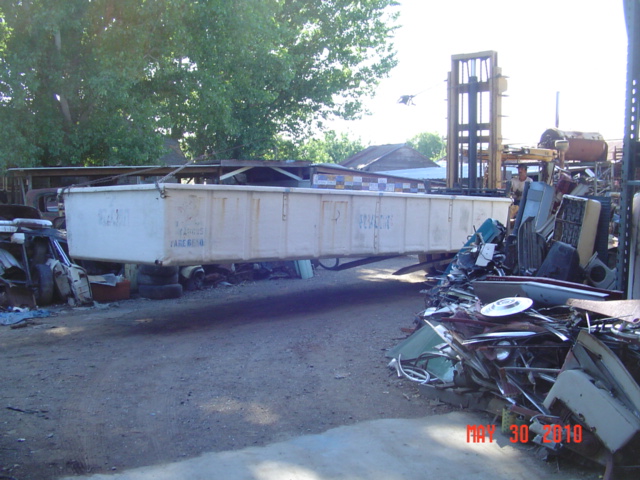
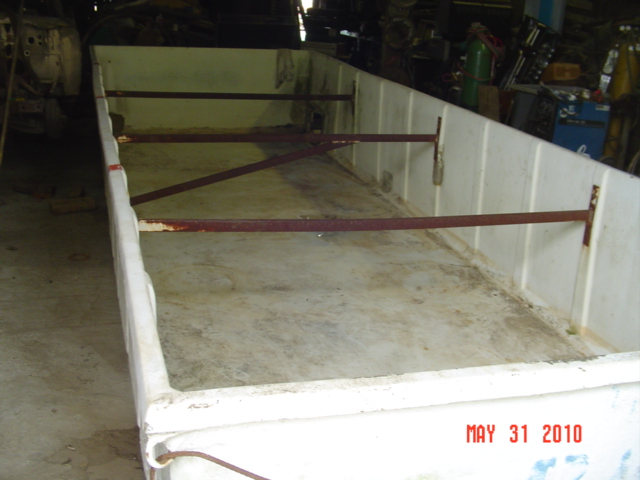
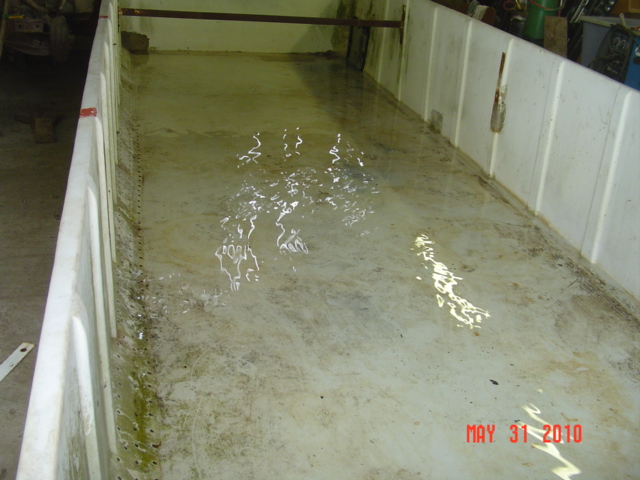
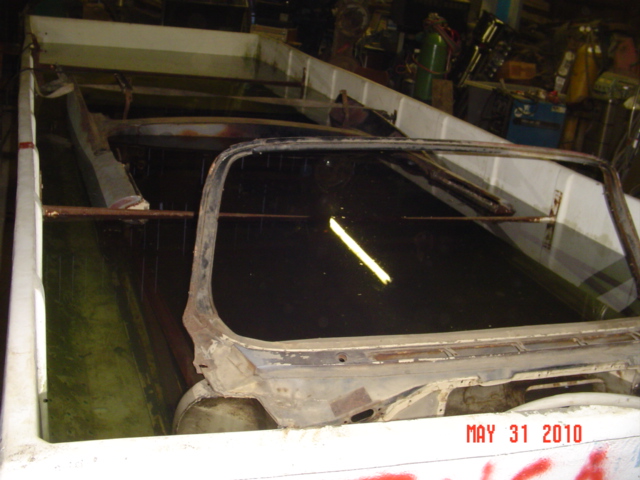
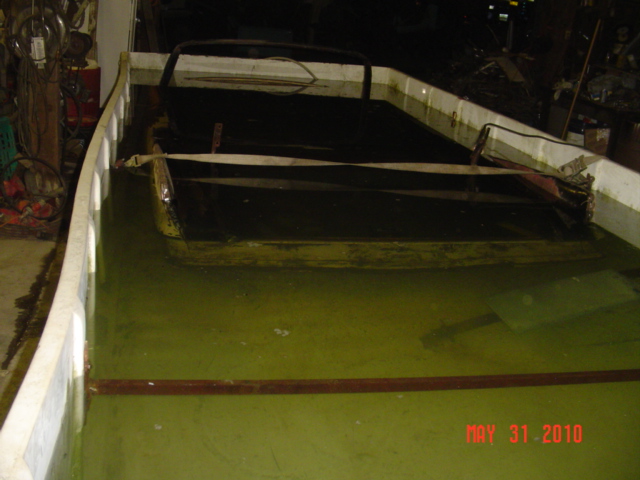
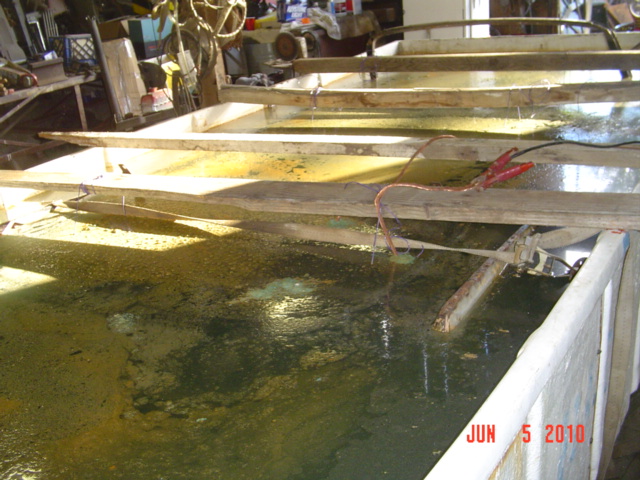
Expert 5K+
Posts: 7808
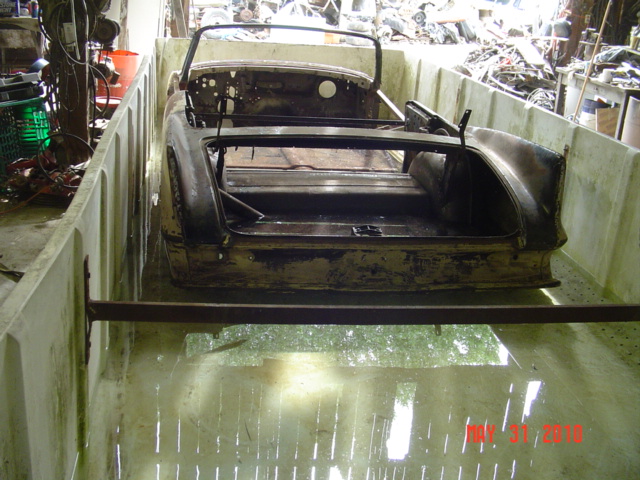
Location: Williams California | I scraped any loose rust and undercoating, afterwards blowing out the dust with an air hose. Now it's time to bring in the bin. This fiberglass bin was used to haul tomatoes during harvest, and was left behind on a property I was cleaning up. Never knew I was going to use it for anything. After getting it set in place on the concrete floor, it was hosed out, and all possible leakage points sealed up with silicone.
Two of the center braces required removal to fit the body in, and about eight inches of water was added. A few more small leaks were found, and we wet-patched them. The one brace was put back into the bin after the car was set in, and a trucker's strap held the sides together where the last brace could not be put back in. The car was carefully lowered in with a forklift jib, and the carrying straps removed from the body. Water was now almost to the halfway point, and baking soda [lots of it] was mixed into the hose stream. With the water level now almost over the cowl, A positive cable from the battery charger was connected to the anode[junk exhaust pipes] and the negative cable connected to the cathode [body]. After a few hours, the water began to discolor. The next morning, I used two old gondola shelves connected together with a copper cable that i could move around the body at will. The final photos show definite rust water after only one full day.
---John
 ('59 SF convertible 001.JPG) ('59 SF convertible 001.JPG)
 ('59 SF convertible 002.JPG) ('59 SF convertible 002.JPG)
 ('59 SF convertible 005.JPG) ('59 SF convertible 005.JPG)
 ('59 SF convertible 006.JPG) ('59 SF convertible 006.JPG)
 ('59 SF convertible 007.JPG) ('59 SF convertible 007.JPG)
 ('59 SF convertible 008.JPG) ('59 SF convertible 008.JPG)
 ('59 SF convertible 009.JPG) ('59 SF convertible 009.JPG)
 ('59 SF convertible 010.JPG) ('59 SF convertible 010.JPG)
 ('59 SF convertible 011.JPG) ('59 SF convertible 011.JPG)
 ('59 SF convertible 012.JPG) ('59 SF convertible 012.JPG)
 ('59 SF convertible 014.JPG) ('59 SF convertible 014.JPG)
 ('59 SF convertible 015.JPG) ('59 SF convertible 015.JPG)
 ('59 SF convertible 016.JPG) ('59 SF convertible 016.JPG)
Attachments
----------------
'59 SF convertible 001.JPG (156KB - 542 downloads)
'59 SF convertible 002.JPG (156KB - 504 downloads)
'59 SF convertible 005.JPG (160KB - 506 downloads)
'59 SF convertible 006.JPG (150KB - 515 downloads)
'59 SF convertible 007.JPG (160KB - 516 downloads)
'59 SF convertible 008.JPG (152KB - 509 downloads)
'59 SF convertible 009.JPG (159KB - 486 downloads)
'59 SF convertible 010.JPG (150KB - 513 downloads)
'59 SF convertible 011.JPG (161KB - 540 downloads)
'59 SF convertible 012.JPG (159KB - 502 downloads)
'59 SF convertible 014.JPG (151KB - 502 downloads)
'59 SF convertible 015.JPG (164KB - 534 downloads)
'59 SF convertible 016.JPG (152KB - 587 downloads)
|
|
| |
|
Expert
Posts: 2244
Location: Yorba Linda, Ca | Well, add 2 more fans of the 59 Plymouth Sport Fury Convertible fans.
Aivar, (He has a black 59 Sport Fury Convertible) I like it too so at least
8 fans.
Should you have any questions or need any measurements, I'm sure Aivar
would be willing to help!
Kent took a lotta measurements from my 59 Dodge Vert, last time He was here
but He is making a vert out of a hardtop.
Keep up the good work John, and maybe we can get a "Convertible Cruise"
planned, in the not too distant future!!
Gary |
|
| |
|
Walter passed away on Jul 29, 2014. We will miss you, Walt!
Posts: 5358
Location: Heaven Above (Formerly Oklahoma City,OK) | John, the only thing I could possibly say about what you're doing with that '59 is "WOW"! And you gotta really like punishment. What a job. . . . . . . . .
Uncle Walt
Edited by wbower3 2010-06-09 10:43 PM
|
|
| |
|
Elite Veteran
Posts: 755
Location: Big M Automotive's Yard | After this my desoto conv will be a snap! M'Lisa |
|
| |
|
Extreme Veteran
Posts: 530
Location: Wake Forest, NC | M'Lisa he is making you wait shame, shame. I can't wait to see her when she comes out of the bath. That is a heck of a tub. |
|
| |
|
Inactive by user's request
Location: Las Vegas, Nevada | John, you could offer a service with that tub. When you sell sheet metal, tell the buyer that for an additional 15% of the agreed price, you'll de-rust the parts before shipping. 
So between this project and M'Lisa's Desoto, where does the 4-4-2 stand in the attack plan?
Once I'm done with the Imperial, the blue wagon and the '57 Saratoga, I have to decide what to do next. If I ever get that far.  Maybe finish the '59 Impala? Return my Satellite Sebring to the road? Or dive into the '59 Plymouth two door wagon? Maybe finish the '59 Impala? Return my Satellite Sebring to the road? Or dive into the '59 Plymouth two door wagon? 
Too many cars, not enough life left.
K. |
|
| |
|
Expert 5K+
Posts: 7808
Location: Williams California | Kenny J. - 2010-06-10 12:36 PM
John, you could offer a service with that tub. When you sell sheet metal, tell the buyer that for an additional 15% of the agreed price, you'll de-rust the parts before shipping.
So between this project and M'Lisa's Desoto, where does the 4-4-2 stand in the attack plan?
Once I'm done with the Imperial, the blue wagon and the '57 Saratoga, I have to decide what to do next. If I ever get that far. Maybe finish the '59 Impala? Return my Satellite Sebring to the road? Or dive into the '59 Plymouth two door wagon?
Too many cars, not enough life left.
K.
Kenny, the Hurst/Olds will be next. I need to find a 455 short block to rebuild properly, she does not trust the engine that is currently in the car, ever since it was installed about fifteen years ago it has had heating problems. She will be re-clearing the car and some minor touch up, but not a complete paint job. We want to have the car ready for the nationals up in Reno next summer. The DeSoto will be sometime after that.
---John |
|
| |
|
Expert 5K+
Posts: 7808
Location: Williams California | 1959Dodge - 2010-06-09 5:53 PM
Well, add 2 more fans of the 59 Plymouth Sport Fury Convertible fans.
Aivar, (He has a black 59 Sport Fury Convertible ) I like it too so at least
8 fans.
Should you have any questions or need any measurements, I'm sure Aivar
would be willing to help!
Kent took a lotta measurements from my 59 Dodge Vert, last time He was here
but He is making a vert out of a hardtop.
Keep up the good work John, and maybe we can get a "Convertible Cruise"
planned, in the not too distant future!!
Gary
This car was also a solid black car with a red interior. Is Aivar's interior red as well?
---John |
|
| |
|

Expert 5K+
Posts: 8947
Location: WHEELING,WV.>>>HOME OF WWVA | i sure like your style Big John---------------------------------------------------------------------------------------------------later |
|
| |
|
Expert
Posts: 4043
Location: Connecticut | Awesome job, John ! Looks like a lot more work than my 59 Dodge conv. needed. Can't wait to see pics of the body when it emerges from the tank. Will you have to epoxy prime the body to keep it from re-rusting ?
Did the Plymouth convertibles have stronger (12ga.) rockers, sills and inner rockers, like the 59 Dodge did ? I imagined you going into the local grocery store and ordering 100 cases of baking soda. LOL ! Ron
|
|
| |
|
Elite Veteran
Posts: 755
Location: Big M Automotive's Yard | Usually it was me raiding the Walmart at different times to get all he needed.
Kenny, My Hurst Olds (not 442 :}) is next like John said. John put a short block in it when I grenaded the engine in 1990. The overheating got so bad I can olny drive 3-5 blocks and the temp gauge goes beserk! The last show I drove it to it took us 3-3.5 hours to go 35 miles.
Ok, back to Toothless the Black Fury (aka Rusty).
M'Lisa |
|
| |
|

Veteran
Posts: 175
Location: The Netherlands | big m - 2010-06-10 11:02 PM
This car was also a solid black car with a red interior. Is Aivar's interior red as well?
---John
Aivar's interior is red, you can see some pics and a movie clip on the 59 Plymouth website http://59sportfury.net/showcase/SportFury/Lejins/index.html
Ron |
|
| |
|
Expert
Posts: 1812
Location: Slidell La. | Wow John , you are making AMAZING progress , this 59 can ONLY be a keeper , cause NOBODY could afford the price tag , with all the labor you will have in it . Ain t nobody can look at a car again and say its too far gone . |
|
| |
|
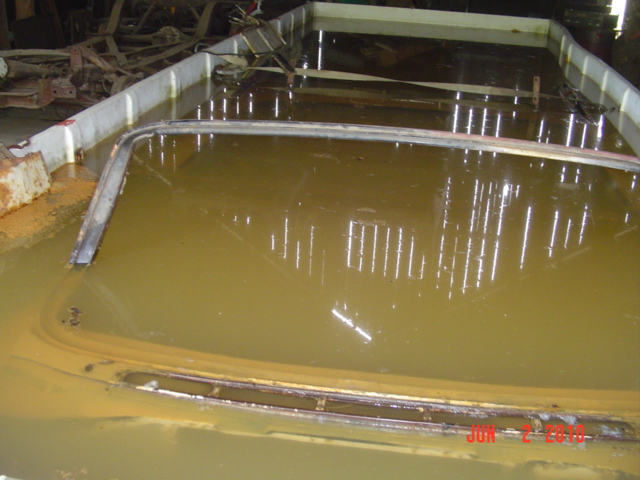
Expert 5K+
Posts: 7808
Location: Williams California | After letting the car soak with a mild 5 amps passing through the electrolyte, We suspended three grids in series, on above the trunk floor, and two in the passenger compartment. These were connected together with a heavy gauge copper cable. Now, the electrolyte is allowing 40 amps to pass through. The water continues to get murkier, it's almost black now. This is the last 48 hours the body will be submerged.
---John |
|
| |
|
Expert 5K+
Posts: 7808
Location: Williams California | Here are some photos-
 ('59 SF convertible 003.JPG) ('59 SF convertible 003.JPG)
 ('59 SF convertible 004.JPG) ('59 SF convertible 004.JPG)
 ('59 SF convertible 005.JPG) ('59 SF convertible 005.JPG)
Attachments
----------------
'59 SF convertible 003.JPG (157KB - 390 downloads)
'59 SF convertible 004.JPG (150KB - 396 downloads)
'59 SF convertible 005.JPG (165KB - 383 downloads)
|
|
| |
|
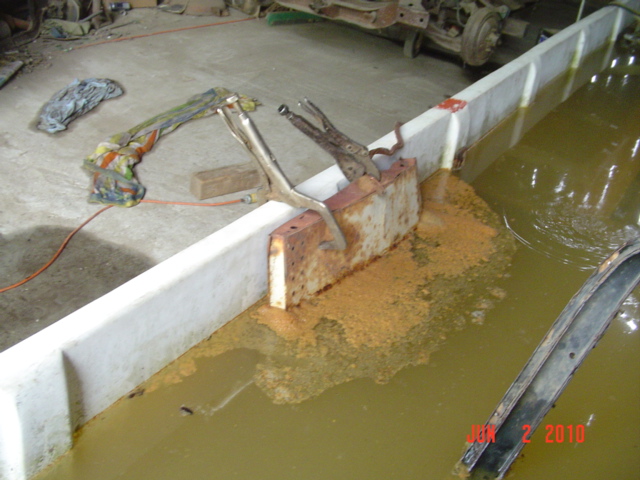
Expert 5K+
Posts: 7808
Location: Williams California | I drained the bin with a siphon hose to direct the water out of the building and into the gravel. The byproducts of this operation are not hazardous, except if I track rusty crud into the house! It took about ten hours to drain the majority of the water out. The photos show the amount of rust and crud that was released from the body of the car, and remember, it was scraped and blown out with air pressure before submerging it.
I used a garden hose to spray the majority of the rust out of the body, but more involved cleaning will be needed. You can actually see some shiny metal in the floors!
---John
 ('59 SF convertible 006.JPG) ('59 SF convertible 006.JPG)
 ('59 SF convertible 007.JPG) ('59 SF convertible 007.JPG)
 ('59 SF convertible 008.JPG) ('59 SF convertible 008.JPG)
 ('59 SF convertible 009.JPG) ('59 SF convertible 009.JPG)
 ('59 SF convertible 010.JPG) ('59 SF convertible 010.JPG)
 ('59 SF convertible 011.JPG) ('59 SF convertible 011.JPG)
 ('59 SF convertible 012.JPG) ('59 SF convertible 012.JPG)
 ('59 SF convertible 016.JPG) ('59 SF convertible 016.JPG)
 ('59 SF convertible 017.JPG) ('59 SF convertible 017.JPG)
 ('59 SF convertible 018.JPG) ('59 SF convertible 018.JPG)
Attachments
----------------
'59 SF convertible 006.JPG (159KB - 402 downloads)
'59 SF convertible 007.JPG (163KB - 363 downloads)
'59 SF convertible 008.JPG (156KB - 390 downloads)
'59 SF convertible 009.JPG (157KB - 386 downloads)
'59 SF convertible 010.JPG (153KB - 373 downloads)
'59 SF convertible 011.JPG (158KB - 394 downloads)
'59 SF convertible 012.JPG (148KB - 392 downloads)
'59 SF convertible 016.JPG (159KB - 401 downloads)
'59 SF convertible 017.JPG (152KB - 385 downloads)
'59 SF convertible 018.JPG (161KB - 387 downloads)
|
|
| |
|
Expert
Posts: 2612
Location: Parts Unknown |
|
|
| |
|
Inactive by user's request
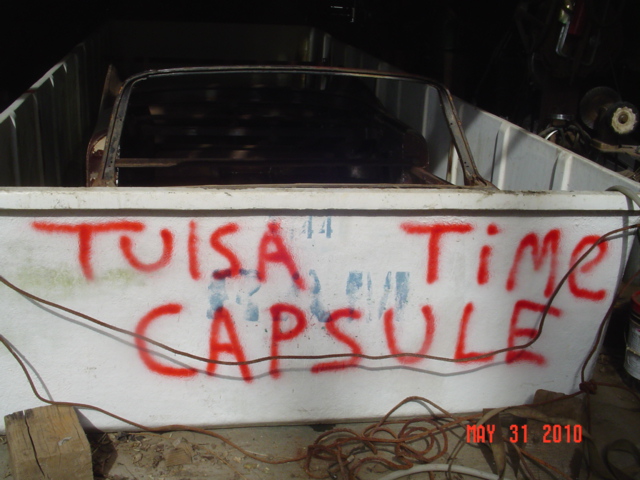
Location: Las Vegas, Nevada | Looks like you're better at this than "Ultra None" was with the Tulsa car.
K. |
|
| |
|
Extreme Veteran
Posts: 530
Location: Wake Forest, NC | That did a terrific job, I wish I had a mater bin. |
|
| |
|
Elite Veteran
Posts: 1060
Location: Building incorrect cars since 2000!! | Looking good John. I guess you know you have left it in to long when you only bring up the windshield surround |
|
| |
|

Expert
Posts: 3889
Location: Northen Virginia | John
thanks for save this car, this type of "rusty" restoration was always reserved to late 60's 6 figures muscles. You actually saved 2 cars!!.
keep us posted!!! |
|
| |
|
Extreme Veteran
Posts: 500
Location: Upper East Tennessee | Wow John! You're my hero! You really took the reverse electrolysis bath to the next level! Wow! 40 amps! You were really cooking man! |
|
| |
|
Expert
Posts: 2905
Location: little rock, AR | Don't look behind you now but the DEA is wondering what your making. Great looking project. |
|
| |
|
Expert 5K+
Posts: 7808
Location: Williams California | ronbo97 - 2010-06-10 7:35 PM
Awesome job, John ! Looks like a lot more work than my 59 Dodge conv. needed. Can't wait to see pics of the body when it emerges from the tank. Will you have to epoxy prime the body to keep it from re-rusting ?
Did the Plymouth convertibles have stronger (12ga.) rockers, sills and inner rockers, like the 59 Dodge did ? I imagined you going into the local grocery store and ordering 100 cases of baking soda. LOL ! Ron
Ron, I have not been able to ascertain if Plymouth also used the heavier gauge rockers, I have cut several convertibles up in the past, and don't ever remember seeing that, although you have to consider that these cars were complete rustbuckets. If anyone here on the site could chime in here, it would be much appreciated.
I'll have a lot of smaller areas to repair yet, so I won't be putting the car in primer until later. I will give the car a light soda or media blast just before that time.
---John |
|
| |
|
Expert 5K+
Posts: 7808
Location: Williams California | I spent Saturday cleaning the loose paint and loosened rust from the body, now I know exactly what areas will need further repairs. It's interesting to see how any loose paint or undercoating fell away during the process, any remaining undercoating scrapes off easily now.
---John
 ('59 SF convertible 001.JPG) ('59 SF convertible 001.JPG)
 ('59 SF convertible 002.JPG) ('59 SF convertible 002.JPG)
 ('59 SF convertible 003.JPG) ('59 SF convertible 003.JPG)
 ('59 SF convertible 004.JPG) ('59 SF convertible 004.JPG)
 ('59 SF convertible 005.JPG) ('59 SF convertible 005.JPG)
 ('59 SF convertible 006.JPG) ('59 SF convertible 006.JPG)
 ('59 SF convertible 007.JPG) ('59 SF convertible 007.JPG)
 ('59 SF convertible 008.JPG) ('59 SF convertible 008.JPG)
 ('59 SF convertible 009.JPG) ('59 SF convertible 009.JPG)
Attachments
----------------
'59 SF convertible 001.JPG (153KB - 391 downloads)
'59 SF convertible 002.JPG (158KB - 384 downloads)
'59 SF convertible 003.JPG (163KB - 399 downloads)
'59 SF convertible 004.JPG (157KB - 374 downloads)
'59 SF convertible 005.JPG (148KB - 381 downloads)
'59 SF convertible 006.JPG (160KB - 381 downloads)
'59 SF convertible 007.JPG (162KB - 391 downloads)
'59 SF convertible 008.JPG (165KB - 407 downloads)
'59 SF convertible 009.JPG (156KB - 390 downloads)
|
|
| |
|
Expert 5K+
Posts: 7808
Location: Williams California | Here are more photos after wirebrushing the panels.
---John
 ('59 SF convertible 001.JPG) ('59 SF convertible 001.JPG)
 ('59 SF convertible 002.JPG) ('59 SF convertible 002.JPG)
 ('59 SF convertible 003.JPG) ('59 SF convertible 003.JPG)
 ('59 SF convertible 004.JPG) ('59 SF convertible 004.JPG)
 ('59 SF convertible 005.JPG) ('59 SF convertible 005.JPG)
 ('59 SF convertible 006.JPG) ('59 SF convertible 006.JPG)
 ('59 SF convertible 007.JPG) ('59 SF convertible 007.JPG)
 ('59 SF convertible 008.JPG) ('59 SF convertible 008.JPG)
Attachments
----------------
'59 SF convertible 001.JPG (160KB - 376 downloads)
'59 SF convertible 002.JPG (150KB - 396 downloads)
'59 SF convertible 003.JPG (154KB - 376 downloads)
'59 SF convertible 004.JPG (148KB - 376 downloads)
'59 SF convertible 005.JPG (163KB - 383 downloads)
'59 SF convertible 006.JPG (153KB - 382 downloads)
'59 SF convertible 007.JPG (167KB - 480 downloads)
'59 SF convertible 008.JPG (158KB - 383 downloads)
|
|
| |
|
Expert
Posts: 2996
Location: Sept. 1958 | big m - 2010-06-14 1:09 PM
ronbo97 - 2010-06-10 7:35 PM
Awesome job, John ! Looks like a lot more work than my 59 Dodge conv. needed. Can't wait to see pics of the body when it emerges from the tank. Will you have to epoxy prime the body to keep it from re-rusting ?
Did the Plymouth convertibles have stronger (12ga.) rockers, sills and inner rockers, like the 59 Dodge did ? I imagined you going into the local grocery store and ordering 100 cases of baking soda. LOL ! Ron
Ron, I have not been able to ascertain if Plymouth also used the heavier gauge rockers, I have cut several convertibles up in the past, and don't ever remember seeing that, although you have to consider that these cars were complete rustbuckets. If anyone here on the site could chime in here, it would be much appreciated.
I'll have a lot of smaller areas to repair yet, so I won't be putting the car in primer until later. I will give the car a light soda or media blast just before that time.
---John
John-
Your doing a hell of a job on this car. Keep up the good work.
May I add, my 58 Plymouth Convertible has 12 gauge rockers/sill area, while the inners are thinner 18 gauge. |
|
| |
|
Elite Veteran
Posts: 1116
Location: CA | This is probably a stupid question but I don't care. I'm constantly amazed by the skills of some of you guys and it makes me want to know more so I can get to that point eventually. When you dip the car like that and remove all corrosion protection, how do you respray material on the inner panels that are welded together and have very little room? Like the inner doors and rear wheel wells? Nice work! |
|
| |
|
Expert 5K+
Posts: 7808
Location: Williams California | christine-lover - 2010-06-14 5:50 PM
big m - 2010-06-14 1:09 PM
ronbo97 - 2010-06-10 7:35 PM
Awesome job, John ! Looks like a lot more work than my 59 Dodge conv. needed. Can't wait to see pics of the body when it emerges from the tank. Will you have to epoxy prime the body to keep it from re-rusting ?
Did the Plymouth convertibles have stronger (12ga.) rockers, sills and inner rockers, like the 59 Dodge did ? I imagined you going into the local grocery store and ordering 100 cases of baking soda. LOL ! Ron
Ron, I have not been able to ascertain if Plymouth also used the heavier gauge rockers, I have cut several convertibles up in the past, and don't ever remember seeing that, although you have to consider that these cars were complete rustbuckets. If anyone here on the site could chime in here, it would be much appreciated.
I'll have a lot of smaller areas to repair yet, so I won't be putting the car in primer until later. I will give the car a light soda or media blast just before that time.
---John
Thanks for the information, Matt. That's a big help.
---John
John-
Your doing a hell of a job on this car. Keep up the good work.
May I add, my 58 Plymouth Convertible has 12 gauge rockers/sill area, while the inners are thinner 18 gauge. |
|
| |
|
Expert 5K+
Posts: 7808
Location: Williams California | Finsinthemirror - 2010-06-14 7:26 PM
This is probably a stupid question but I don't care. I'm constantly amazed by the skills of some of you guys and it makes me want to know more so I can get to that point eventually. When you dip the car like that and remove all corrosion protection, how do you respray material on the inner panels that are welded together and have very little room? Like the inner doors and rear wheel wells? Nice work!
Not a stupid question at all.
The reverse electrolysis does not have any lingering chemicals to cause corrosion, unlike most chemical dipping, although sealant and/or metal treatment will need to be applied to these hidden areas. There are long nozzles available to attach to a pressure pot to force the protectants into hidden seams and crevices. This step will be a ways down the road for this car.
---John |
|
| |
|
Exner Expert 19,174 posts. Neil passed away 18 Sep 2015. You will be missed, Neil!
Posts: 19146
Location: bishop, ca | ...But, at least John doesn't have (yet) any blasting media depositions to try to remove, from the nooks/crannies. |
|
| |
|
Expert 5K+
Posts: 7808
Location: Williams California | Next up will be to cut out the weak sections of floor in the car, and find some suitable replacements in the yard to use in their place.
---John |
|
| |
|
Expert
Posts: 1812
Location: Slidell La. | Man , that is a good feeling to walk into your yard and have your pick of what you need , not having to go running all over town . I had that luxury when I was doing my engine swap , I had 2 other old Mopars in my yard that I was able to pick apart for all the little Mopar specific clips , connectors , linkages , you name it . It is a good feeling and a big plus in your favor . Keep pluggin John , we re all tuned in for the next episode , right here on the Bat Channel . |
|
| |
|
Elite Veteran
Posts: 1107
Location: Arvada, Colorado (NW Denver Metro Area) | Ron, I will check the Rockers on my 59 Belvedere convert, I have the top of the passenger side Rocker open right now as I was about to weld in a new cap to them and then set the replacement floor in place on top of that cap before welding it all up.
Will advise if the Plymouth has this convert only re-enforcement. I know my 70 Cuda Convert had extra re-enforcing in the rockers (uni-body car) but didn't even think to really look at how the 59 rocker structure was layed out and supported by other metal parts coming together. Figured the X-frame would give it rigidity.
Keep up the good work John! |
|
| |
|
Expert
Posts: 1295
Location: Nasco , SWEDEN | Great job so far John, keep the up the spirit! Morgan 
Edited by mogge65 2010-06-22 11:45 AM
|
|
| |
|
Expert 5K+
Posts: 7808
Location: Williams California | mogge65 - 2010-06-22 8:44 AM
Great job so far John, keep the up the spirit! Morgan (O )
Thanks, Morgan!
---John |
|
| |
|
Expert
Posts: 1812
Location: Slidell La. | John, I know your probably going to use original sheetmetal from your yard , but I did notice surfing through RockAuto , they do sell floors and inner and outer rockers . I was really surprised to see the inner rockers , gotta get me some of them .
I notice in a lot of instances where the floors are good but are heavily pitted , what does a restorer do in those cases , I m sure you will change them out , but in other instances is it normal to load it up with filler primer and be done with it . Was just wondering what people may do in those circumstances . |
|
| |
|
Expert 5K+
Posts: 7808
Location: Williams California | The heavily pitted and pinholed sections of the floor I will replace. There is a process where zinc is electrically sprayed over the panels, and it will fill holes up to a quarter inch, and can be filed smooth afterwards. Light pitting the filler primer will take care of, as long as the metal is prepped correctly.
---John |
|
| |
|

Elite Veteran
Posts: 769
Location: Oley, PA | Fantastic work. Your project is an inspiration! Makes mine look so easy in comparison. |
|
| |
|
Expert 5K+
Posts: 7808
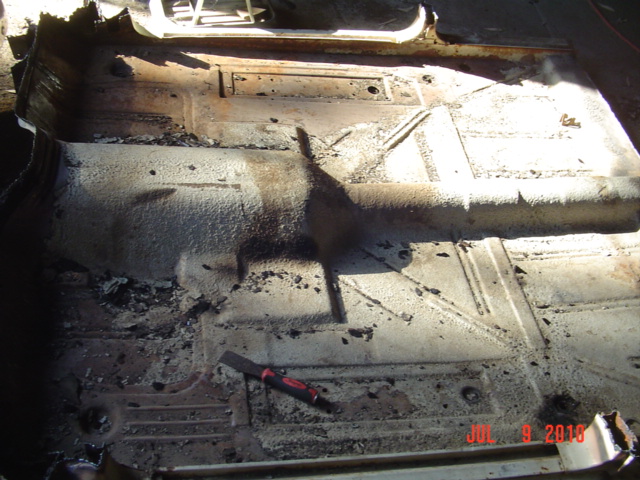
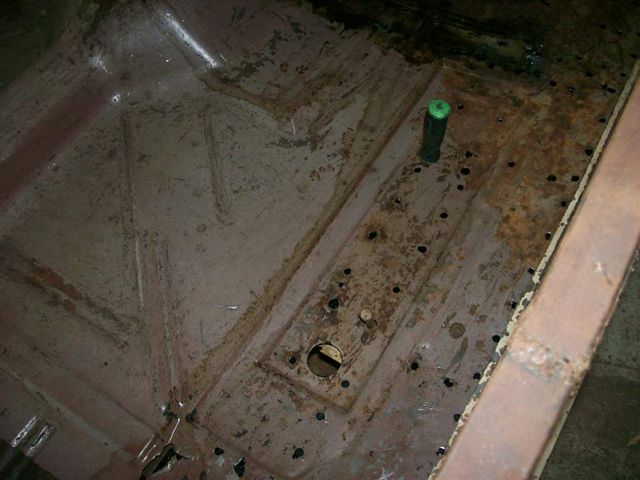
Location: Williams California | I removed the majority of the floorboards, as a good part was thin from pinholes and rust. There was quite a buildup of crud hidden beneath, a combination of dirt, sand, and rust residue.
 ('59 SF convertible 001.JPG) ('59 SF convertible 001.JPG)
 ('59 SF convertible 002.JPG) ('59 SF convertible 002.JPG)
 ('59 SF convertible 003.JPG) ('59 SF convertible 003.JPG)
 ('59 SF convertible 004.JPG) ('59 SF convertible 004.JPG)
Attachments
----------------
'59 SF convertible 001.JPG (157KB - 365 downloads)
'59 SF convertible 002.JPG (158KB - 355 downloads)
'59 SF convertible 003.JPG (150KB - 373 downloads)
'59 SF convertible 004.JPG (151KB - 370 downloads)
|
|
| |
|
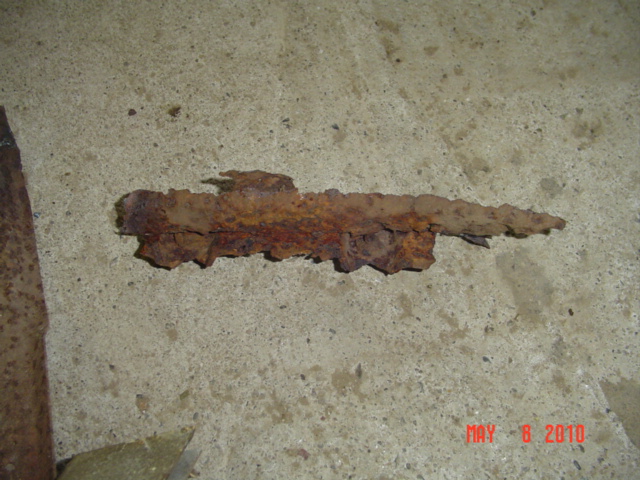
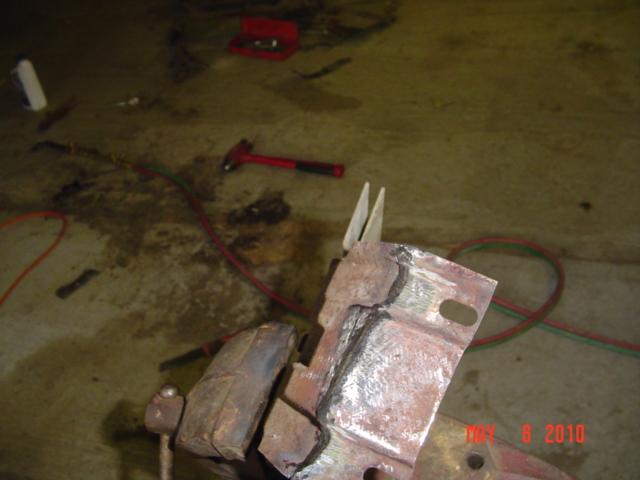
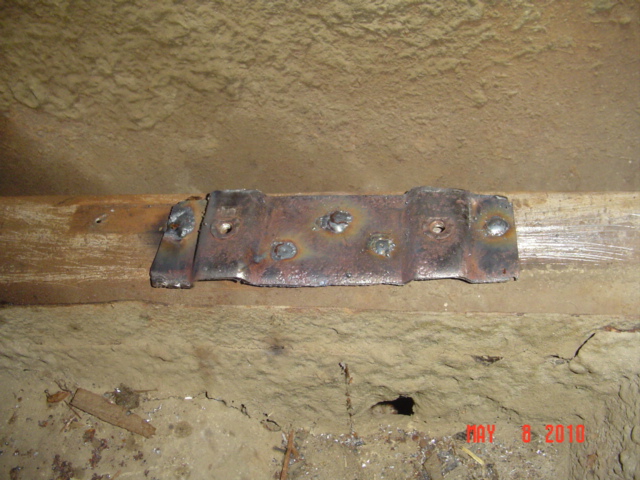
Expert 5K+
Posts: 7808
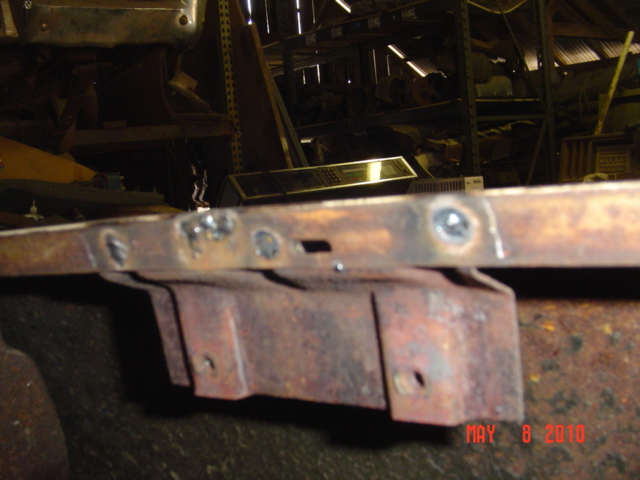
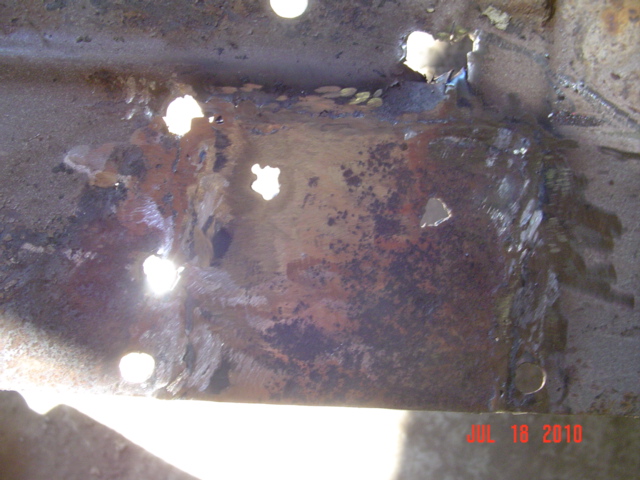
Location: Williams California | Notice one of the body mounts was missing in the photos above? When I cut the floor around it, I found it was no longer attached! Only one tiny tack weld right from the factory. All the other mounts and outriggers were in excellent condition, and cleaned up easily. I will treat these with OverRust before installing the replacement floor section. I did find a few pinholes in the inner rockers, but the surrounding metal was solid, so I'll mig weld them in.
Note that the frame is being used as a jig to keep everything in place while doing this.
---John
 ('59 SF convertible 005.JPG) ('59 SF convertible 005.JPG)
 ('59 SF convertible 006.JPG) ('59 SF convertible 006.JPG)
 ('59 SF convertible 009.JPG) ('59 SF convertible 009.JPG)
 ('59 SF convertible 010.JPG) ('59 SF convertible 010.JPG)
 ('59 SF convertible 011.JPG) ('59 SF convertible 011.JPG)
Attachments
----------------
'59 SF convertible 005.JPG (162KB - 355 downloads)
'59 SF convertible 006.JPG (153KB - 377 downloads)
'59 SF convertible 009.JPG (152KB - 346 downloads)
'59 SF convertible 010.JPG (148KB - 359 downloads)
'59 SF convertible 011.JPG (148KB - 356 downloads)
|
|
| |
|
Expert
Posts: 4043
Location: Connecticut | When I did the floors on my 59 Dodge convertible, I left the 'tunnel' and rockers intact, in addition to using the frame as a jig, to keep things from twisting up. My 'tunnel' was solid without any pinholes, while the floors were a mess and were replaced with rust free ones from Kansas. The rockers, sills and inner rockers were eventually replaced due to rust and damage, but not before the floors were welded in place.
Ron
|
|
| |
|
Expert
Posts: 2612
Location: Parts Unknown |
Everytime I "check in" and see the progress you are making, I think how amazing this project is, how amazing the work you
are doing is, and how much I am enjoying this thread. Just thought I'd type it this time around. Keep up the fantastic job !!!!
|
|
| |
|
Extreme Veteran
Posts: 530
Location: Wake Forest, NC | This is the tread I check first when I log in, well done. |
|
| |
|
Location: Parts Unknown | big m - 2010-06-15 10:09 AM
Ron, I have not been able to ascertain if Plymouth also used the heavier gauge rockers, I have cut several convertibles up in the past, and don't ever remember seeing that, although you have to consider that these cars were complete rustbuckets. If anyone here on the site could chime in here, it would be much appreciated.
I will give the car a light media blast just before that time.
---John
***************************************************************
As far as I know, ALL convertibles got the heavy gauge rockers. While I never cut up a Dodge, I have been able to
inspect those from the other marques.
About that "media blast" ...... just place a radio near the car and turn on NPR or MSNBC. The liberal media will do
plenty of "blasting" about you not just scrapping this hunk of junk and buying a Prius. Honestly John, I am embarrassed
and ashamed over this horrific waste. Think of all the ghetto addicts you could help support with government programs
if you directed your funds and energy to those most deserving ! 
What is wrong with you, man ?
|
|
| |
|
Expert 5K+
Posts: 7808
Location: Williams California |
Brent, you do have a great sense of humor! LOL!
---John |
|
| |
|
Location: Parts Unknown | If I didn't laugh at the stuff I have to deal with, I'd end up killing people !
|
|
| |
|
Extreme Veteran
Posts: 369
Location: buchanan,Ga. | Golly Big M,I thought I had body work to do...but your really doing it do it!!! Way to go looking darn good!!! Keep posting those photos. |
|
| |
|
Expert 5K+
Posts: 7808
Location: Williams California | Thanks, Teffany, and it's good to see you back on your own car!
---John |
|
| |
|
Expert 5K+
Posts: 7808
Location: Williams California | I cut the floors from a '59 Chrysler out in the yard, scraped the undercoating from the surface, and drilled the spotwelds out to remove the rockers and underpinnings from the floor stamping. In the process, I found several areas that will need repair due to alkali being packed between the mounts and floor.
---John
 ('59 SF convertible 001.JPG) ('59 SF convertible 001.JPG)
 ('59 SF convertible 002.JPG) ('59 SF convertible 002.JPG)
 ('59 SF convertible 003.JPG) ('59 SF convertible 003.JPG)
 ('59 SF convertible 004.JPG) ('59 SF convertible 004.JPG)
Attachments
----------------
'59 SF convertible 001.JPG (147KB - 345 downloads)
'59 SF convertible 002.JPG (151KB - 345 downloads)
'59 SF convertible 003.JPG (162KB - 373 downloads)
'59 SF convertible 004.JPG (161KB - 372 downloads)
|
|
| |
|
Expert
Posts: 4043
Location: Connecticut | Hmmm...aren't 59 Chrysler floors different from 59 Plymouth, longer and wider with different stampings ? Ron
|
|
| |
|
Expert 5K+
Posts: 7808
Location: Williams California | Ron, the width is exactly the same, at 63 1/2", The front floors are identical stampings, although, the rears are longer with different stampings. The floors past the door jambs are in good condition in the Plymouth, so I will not be needing those areas.
---John |
|
| |
|
Exner Expert 19,174 posts. Neil passed away 18 Sep 2015. You will be missed, Neil!
Posts: 19146
Location: bishop, ca | An interesting point of reference is how shallow the seat troughs are on the 59 floor pans, compared to the 57-58 boys.
|
|
| |
|
Extreme Veteran
Posts: 530
Location: Wake Forest, NC | It's nice to see a 59 floor that is solid. What kind of spot weld drill do you use its getting a heck of a workout. |
|
| |
|
Elite Veteran
Posts: 1060
Location: Building incorrect cars since 2000!! | John that is one helluva job. Looks great!!!! |
|
| |
|

Veteran
Posts: 195
Location: New Philadelphia, Ohio | You've got a bigger set than I do John! I can't believe the progress you've made with this machine! Plus all the work your putting into building the car...Astounding. Can't wait to see her finished!
Ripper |
|
| |
|
Expert 5K+
Posts: 7808
Location: Williams California | Fins/413 - 2010-07-17 3:55 AM
It's nice to see a 59 floor that is solid. What kind of spot weld drill do you use its getting a heck of a workout.
Some of these were done with a simple 7/16" drill bit, while others I used a carbide burr in a high speed drill motor.
---John |
|
| |
|
Expert 5K+
Posts: 7808
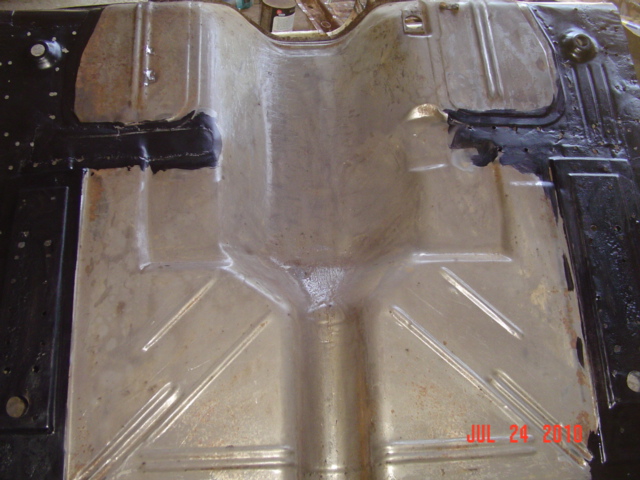
Location: Williams California | I cut out the small areas where I had found rust, cut out patches, and butt welded them in. Then it was to grinding the welds flush, and cleaning up the edges to ready for installation. After flipping the floor section over, all undercoating and grease was removed, and the areas where the floor was to meet the underbracing wire wheeled, and treated with Over-Rust [similar to POR 15]
---John
 ('59 SF convertible 001.JPG) ('59 SF convertible 001.JPG)
 ('59 SF convertible 002.JPG) ('59 SF convertible 002.JPG)
 ('59 SF convertible 004.JPG) ('59 SF convertible 004.JPG)
 ('50 Ford 011.JPG) ('50 Ford 011.JPG)
Attachments
----------------
'59 SF convertible 001.JPG (157KB - 367 downloads)
'59 SF convertible 002.JPG (152KB - 355 downloads)
'59 SF convertible 004.JPG (158KB - 361 downloads)
'50 Ford 011.JPG (150KB - 359 downloads)
|
|
| |
|
Expert 5K+
Posts: 7808
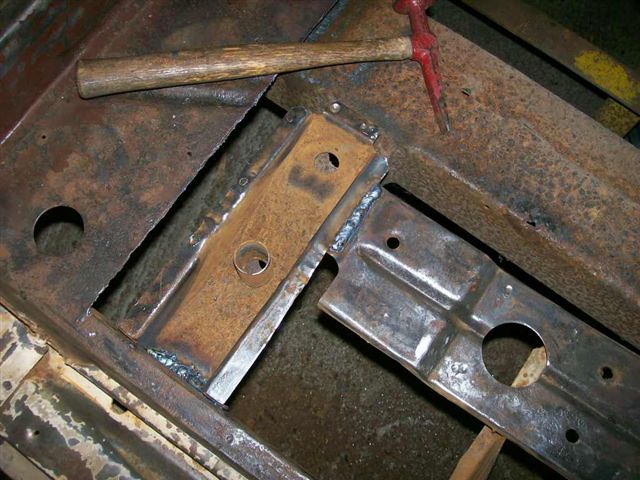
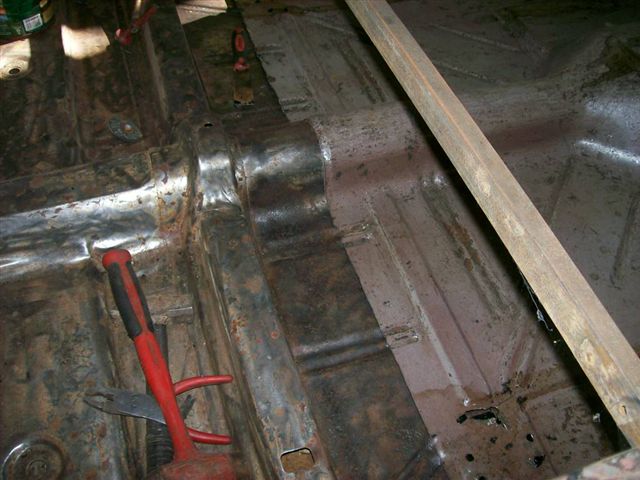
Location: Williams California | The body support was welded back on, and the seat reinforcements were also rewelded to their supports, as the welds on them had broken. The underpinnings were also metal treated after cleaning, and the floorboard was lifted in place. I used a plasma cutted to trim the existing floor, using a straightedge on both sections to avoid any large gaps. Screwdrivers worked well to align all the mounting holes, and bolts were placed in them to keep the alignment. Clamps were used to hold the firewall seam right to where it needed to be, and a few tack welds were done to hold it in place.
---John
 (big m 2 263.jpg) (big m 2 263.jpg)
 (big m 2 264.jpg) (big m 2 264.jpg)
 (big m 2 265.jpg) (big m 2 265.jpg)
 (big m 2 266.jpg) (big m 2 266.jpg)
 (big m 2 267.jpg) (big m 2 267.jpg)
 (big m 2 268.jpg) (big m 2 268.jpg)
 (big m 2 269.jpg) (big m 2 269.jpg)
 (big m 2 270.jpg) (big m 2 270.jpg)
Attachments
----------------
big m 2 263.jpg (72KB - 360 downloads)
big m 2 264.jpg (68KB - 364 downloads)
big m 2 265.jpg (58KB - 359 downloads)
big m 2 266.jpg (48KB - 348 downloads)
big m 2 267.jpg (51KB - 334 downloads)
big m 2 268.jpg (65KB - 387 downloads)
big m 2 269.jpg (58KB - 401 downloads)
big m 2 270.jpg (74KB - 365 downloads)
|
|
| |
|
Extreme Veteran
Posts: 591
Location: West Chester, PA | John, You're a brave soul...
Keep up the great work! |
|
| |
|
Expert 5K+
Posts: 7808
Location: Williams California | Thanks, Ron!
Love that photo of your reflection in your fender ornament!!
---John |
|
| |
|

Expert
Posts: 1728
Location: Fleetwood, Pa | Any beginner "body men" out there that want to see how it's done.....here's a perfect example!!! Keep up the good work, John!!! |
|
| |
|
Extreme Veteran
Posts: 530
Location: Wake Forest, NC | Great work as usual, do you weld with gas?. Those leaf springs across the frame look like they would make a good seat. |
|
| |
|
Location: Parts Unknown | Looks like you are ready for paint !
What colors will you go with when the messy part is done ?
Which do you think we be done first, your car, or my shop ?
|
|
| |
|
Expert 5K+
Posts: 7808
Location: Williams California | Fins/413 - 2010-08-03 4:35 AM
Great work as usual, do you weld with gas?. Those leaf springs across the frame look like they would make a good seat.
Eric, I use a Millermatic 250 mig welder with gas.
I had replaced my Fury's springs earlier this year, and the chassis was as good a place for me to set the old ones down and forget to put them away. LOL! |
|
| |
|
Expert 5K+
Posts: 7808
Location: Williams California | Doctor DeSoto - 2010-08-03 7:50 AM
Looks like you are ready for paint !
What colors will you go with when the messy part is done ?
Which do you think we be done first, your car, or my shop ?
The car will be solid black, with a red interior. I hope to have all the metalwork and solder done so I can get it protected in sealer before our rainy season hits. I'm sure you'll have your shop well on its way by then!
---John |
|
| |
|
Board Moderator & Exner Expert 10K+
Location: .Norfolk..Mafia.. ,England UK | Some Inspiration for Ya John.. Just so you can see the Light at the end of the Tunnel..
http://www.forwardlook.net/forums/forums/thread-view.asp?tid=32078&... |
|
| |
|

Expert
Posts: 2596
Location: Upplands Väsby, Sweden | Hi John!
You do a very nice metall work, It being a great car. Good Luck! |
|
| |
|
Veteran
Posts: 103
| Like everyone else, thanks John, for sharing this. Just read the whole thread, and am anxious to see more.
A 59 Fury, is one of few cars left on my list, that I have never owned, that I have always wanted.
Edited by HemiEd 2010-08-11 2:01 PM
|
|
| |
|

Veteran
Posts: 186
| Just spent a very nice half hour reading the whole thread....WOW!
|
|
| |
|
Expert 5K+
Posts: 7808
Location: Williams California | Front floors are now completely welded in, time to grind off the excess welds before progressing to the trunk area.
---John
 ('59 SF convertible 001.JPG) ('59 SF convertible 001.JPG)
 ('59 SF convertible 002.JPG) ('59 SF convertible 002.JPG)
 ('59 SF convertible 003.JPG) ('59 SF convertible 003.JPG)
Attachments
----------------
'59 SF convertible 001.JPG (162KB - 322 downloads)
'59 SF convertible 002.JPG (156KB - 331 downloads)
'59 SF convertible 003.JPG (158KB - 352 downloads)
|
|
| |
|
Expert
Posts: 1728
Location: Fleetwood, Pa | Piecing together very nicely, John!!! Keep inspiring us all!!! |
|
| |
|
Expert 5K+
Posts: 7808
Location: Williams California | Thanks, Bob!
---John |
|
| |
|
Extreme Veteran
Posts: 461
Location: Brooklyn NY | Wow!!! I think it's going to be great!! Everytime I see something of this level of craftsmanship being performed by John or Wizard or somebody else....I feel like such a hack. My friends say I'm good....I will never let them see this thread :}..........Ralph from Brooklyn |
|
| |
|
Regular
Posts: 75
| John-
As someone who has worked in the restoration industry, all I can say is WOW! I am so impressed with what you have done here. I cannot imagine undertaking such a project, but I am glad that there are people with the intestinal fortitude to do so. All of a sudden, DeSoto looks like a walk in the park compared to your car. All it needs are outer rockers and a bit of patching in the lower quarter panels. You have inspired me with your work. Keep it up!!
CaptCarl |
|
| |
|
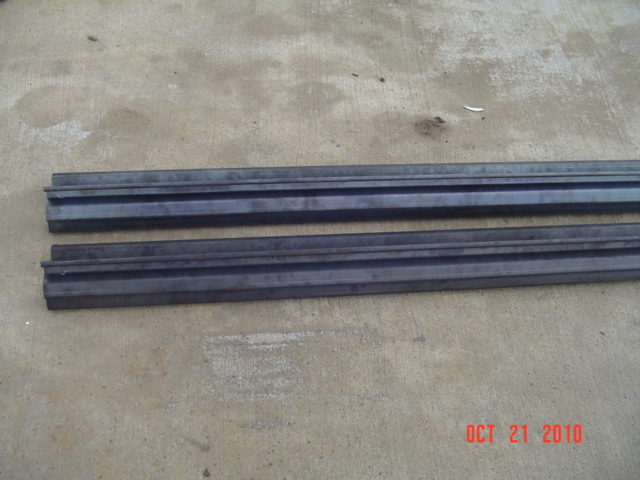
Expert 5K+
Posts: 7808
Location: Williams California | I finally got a chance to do a bit on the car. Getting the place cleaned up for the party has been an undertaking in itself!
Here are the replacement 12 gauge rocker panels. These were made with a hydraulic metal brake, as the gauge of the steel was a bit too thick to use a mechanical brake.
To get the dimensions of these parts correct, I cut a cross section from an undamaged rocker panel from another Mopar. You can visually see the difference in what was specified for a convertible versus a coupe or sedan.
---John
 (001.JPG) (001.JPG)
 (002.JPG) (002.JPG)
 (003.JPG) (003.JPG)
 (004.JPG) (004.JPG)
Attachments
----------------
001.JPG (148KB - 339 downloads)
002.JPG (151KB - 346 downloads)
003.JPG (152KB - 325 downloads)
004.JPG (160KB - 377 downloads)
|
|
| |
|
Regular
Posts: 52
Location: Columbia, SC | Wow, I just finished reading this thread too. Many others have said it, but I gotta do it too. Hats off to you, John, you are a major inspiration. |
|
| |
|
Expert
Posts: 2244
Location: Yorba Linda, Ca | Here's some more inspiration for ya John. I have interior shots too.
This is a 59 Sport Fury with the 361 4 barrel engine.
Enjoy!!
Nice job you are doing, when you are done we will have to get the
convertibles together for a cruise!!! It will have to be "Soon" as
I'm even older than Neil!!!!!
Gary
 (My Classic Car, Aivar's 1959 Plymouth Sport Fury Conv-1-3 modified.jpg) (My Classic Car, Aivar's 1959 Plymouth Sport Fury Conv-1-3 modified.jpg)
Attachments
----------------
My Classic Car, Aivar's 1959 Plymouth Sport Fury Conv-1-3 modified.jpg (185KB - 358 downloads)
|
|
| |
|
Expert
Posts: 3588
Location: Plymouth Spaceport | big m - 2010-10-21 7:32 PM
I finally got a chance to do a bit on the car. Getting the place cleaned up for the party has been an undertaking in itself!
Here are the replacement 12 gauge rocker panels. These were made with a hydraulic metal brake, as the gauge of the steel was a bit too thick to use a mechanical brake.
To get the dimensions of these parts correct, I cut a cross section from an undamaged rocker panel from another Mopar. You can visually see the difference in what was specified for a convertible versus a coupe or sedan.
---John
John,your work is amazing!
I've had to weld in a new trunk pan and drivers side floor pan in the past,but nothing on the scale of what you're doing!
Wish I had a shop like yours!
What's that "over rust" stuff like? Does it have to be top coated like Por-15 to protect it from UV rays?
I can only imagine how much work it must be clearing room for your party,if you need to clear some more space I'd be happy to store that '58 Plymouth at my place!
Edited by 1960DesotoAdventurer 2010-10-22 11:05 AM
|
|
| |
|
Expert 5K+
Posts: 5139
Location: cornpatch county, Southwest IOA | Good heavens John! three pages here and I cannot believe I missed all of them till now. Maybe I have Plymouths on my
" ignore " list! I stand in awe at people that have the ability and the dedication to take on a prject like this. Mo-Power- To- YA, and you can bet I will be looking for your progress pics......................MO |
|
| |
|
Extreme Veteran
Posts: 530
Location: Wake Forest, NC | Beautiful job on those rockers, they ought to stiffen her up. |
|
| |
|
Expert
Posts: 4043
Location: Connecticut | Real nice job on those rockers, John. I did mine in the same manner. Did you press them yourself, or have a shop make them for you ? Ron
|
|
| |
|
Expert 5K+
Posts: 7808
Location: Williams California | ronbo97 - 2010-10-24 12:35 PM
Real nice job on those rockers, John. I did mine in the same manner. Did you press them yourself, or have a shop make them for you ? Ron
A local shop here did these for me. I have only a mechanical sheetmetal brake, which would not work on this gauge of steel.
---John |
|
| |
|
Exner Expert 19,174 posts. Neil passed away 18 Sep 2015. You will be missed, Neil!
Posts: 19146
Location: bishop, ca | The belly section-shape of the new rocker looks to be spot-on, but the door sill area looks to be a little long/wide,
compared to the OEM rocker section.
I had to buy two sets of aftermarket outer quarter panels , a couple years ago, when I replaced Horrie's driver's-side
outer rocker panel....(after it had been custom-formed, in so-so/fairly-good-but-not-great configuration, in 1981, when
aftermarket panels were not available, when I repaired his hidden/covered-over rust-out areas)....because both sets
of those panels had serious pressing-shape flaws in them.
My shop decided to use the better of the two, and just to section-in its belly and lower area into the existing rocker panel,
rather than to try to 'make' the entire piece be correctly shaped.
|
|
| |
|
Expert 5K+
Posts: 7808
Location: Williams California | Neil,
I think what you are seeing is an optical illusion as the sample piece is laying at a different angle. They line right up when placed end to end.
---John |
|
| |
|
Exner Expert 19,174 posts. Neil passed away 18 Sep 2015. You will be missed, Neil!
Posts: 19146
Location: bishop, ca | Well, that's good to know; the aftermarket panels are somewhat less than perfectly shaped.
|
|
| |
|
| WOW...your level of determination and skill is off the charts, John...you're a cornerstone of this forum. Reading all this makes me want to rip into my ragtop project full speed ahead!! Thank you for posting this, a massive help to so many! |
|
| |
|
Expert 5K+
Posts: 7808
Location: Williams California | An update on this project-
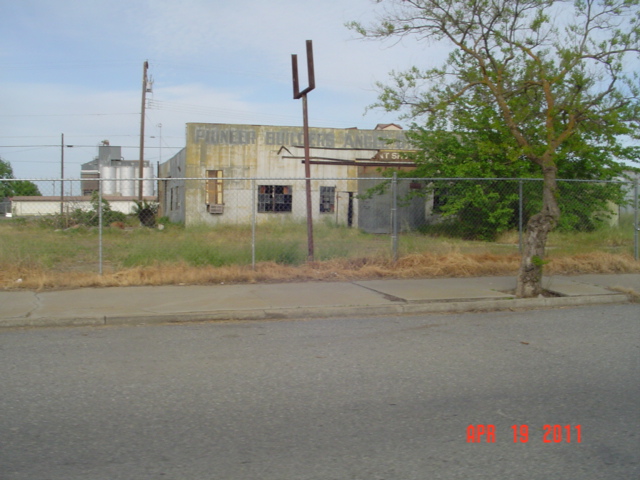
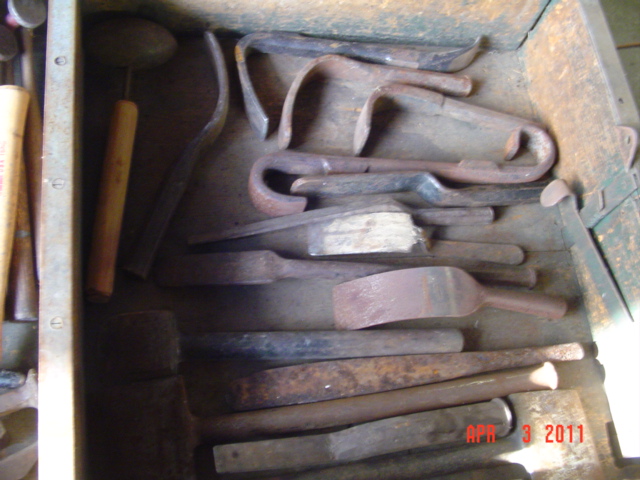
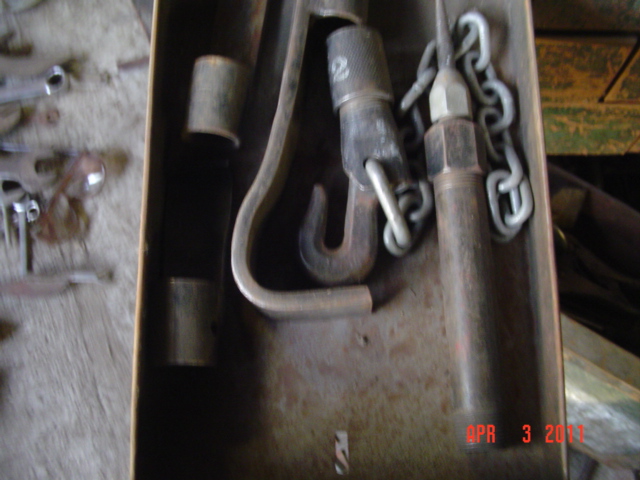
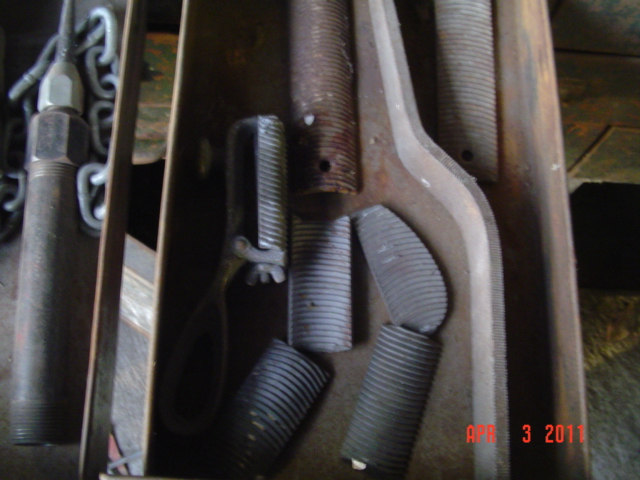
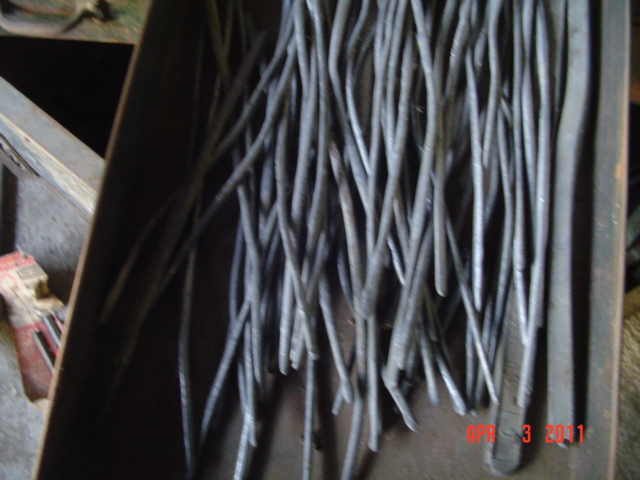
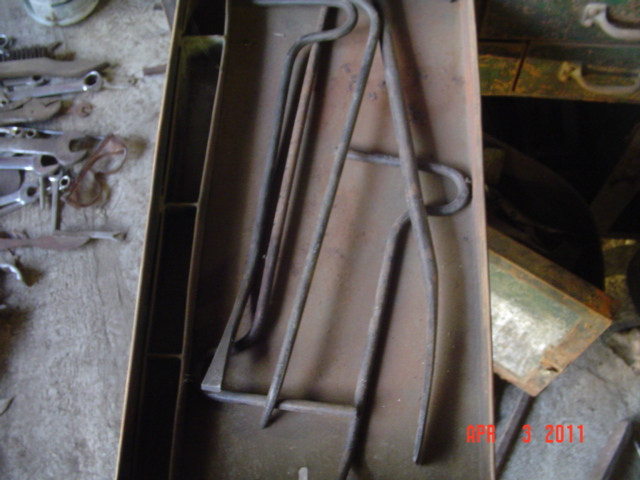
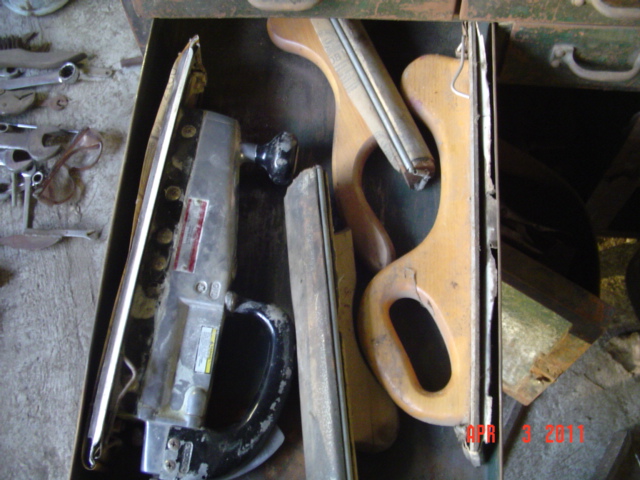
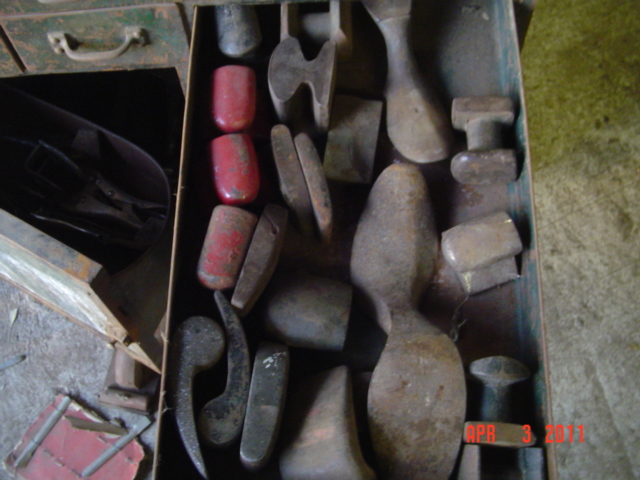
I have taken a lot of other projects in the time between working on this last, and now. I was called by an estate attorney for the late Leon Shelhorse, who ran Williams Auto Body and towing, and was the local AAA garage since 1957. He closed down in the early '80's. I leased his property fifteen years ago, and helped him to sell some of the collector cars he had stored on the properties he owned. When I bought my ranch, I moved my personal cars out, and he called in a scrap outfit that crushed most of the remaining cars, mostly from the sixties aznd seventies. Some cars were left behind, as well as an assortment of 2-ton trucks, piles of junk, and lots of trash. The attorney gave me salvage rights on the tow yard, and the body shop, in order to clean it up and help sell it for the heirs. I only saved a few vehicles, as they had some value, and scrapped the rest. The body shop had been plagued with midnight visitors [thieves] for years, and any of the easy to remove and sell tools were long gone. I did get some vintage equipment, a safe from the 1800's, and Leon's personal hand made toolbox, although all that was left inside was a Mopar door handle tool, and three small lead paddles.
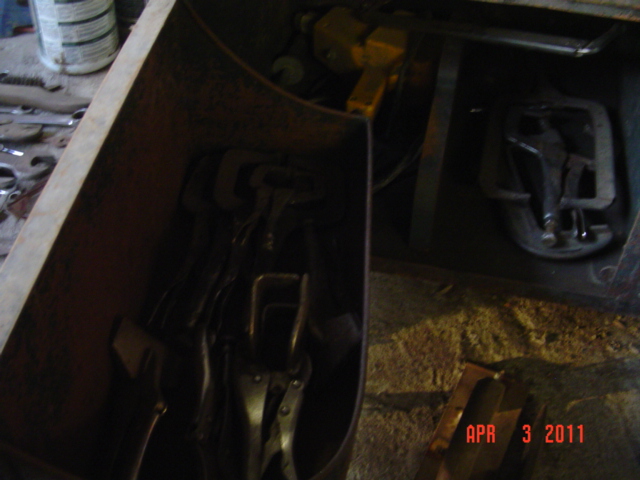
I got to thinking, that this would be an excellent box to keep all my specialty body tools in, and keep them separate from my mechanic tools. Now I have place for everything that is organized better. The top lid of the box holds my solder files, and each drawer holds my body picks, spoons, slapping files, dollies, hammers, etc.
Soon I will be back to work on the '59, and now have a better way to keep my body tools organized for the job.
---John
 (001.JPG) (001.JPG)
 (002.JPG) (002.JPG)
 (030.JPG) (030.JPG)
 (031.JPG) (031.JPG)
 (032.JPG) (032.JPG)
 (033.JPG) (033.JPG)
 (034.JPG) (034.JPG)
 (035.JPG) (035.JPG)
 (036.JPG) (036.JPG)
 (037.JPG) (037.JPG)
 (038.JPG) (038.JPG)
 (039.JPG) (039.JPG)
 (040.JPG) (040.JPG)
 (041.JPG) (041.JPG)
Attachments
----------------
001.JPG (147KB - 323 downloads)
002.JPG (163KB - 305 downloads)
030.JPG (160KB - 289 downloads)
031.JPG (153KB - 299 downloads)
032.JPG (154KB - 299 downloads)
033.JPG (156KB - 312 downloads)
034.JPG (163KB - 326 downloads)
035.JPG (157KB - 336 downloads)
036.JPG (163KB - 296 downloads)
037.JPG (157KB - 317 downloads)
038.JPG (158KB - 318 downloads)
039.JPG (161KB - 307 downloads)
040.JPG (164KB - 303 downloads)
041.JPG (157KB - 324 downloads)
|
|
| |
|
Expert
Posts: 2519
Location: central Illinois | I believe these tools will be in good hands! Great work John. You should consider yourself a Master Craftsman.
And I happen to like the 59 Fury's. Great choice and what dedication you have. |
|
| |
|
Expert 5K+
Posts: 5139
Location: cornpatch county, Southwest IOA | John. If that door handle tool looks like the one used back in the day, It will bring over $200 on e-bay! A table knife with the tip bent at 90 dergee works just fine for me thankyou!......................MO |
|
| |
|
Expert 5K+
Posts: 7808
Location: Williams California | MOPAR-TO-YA - 2011-04-26 10:36 PM
John. If that door handle tool looks like the one used back in the day, It will bring over $200 on e-bay! A table knife with the tip bent at 90 dergee works just fine for me thankyou!......................MO
Steve-
I'd been using a bent Taiwan screwdriver to release the handles for years. Never thought about using a table knife!
---John |
|
| |
|
Expert 5K+
Posts: 7808
Location: Williams California | I finally got caught up enough to resume work on this car.
12 Gauge rocker panel installation- Now, I cut the original 18 gauge rockers from the body with the body firmly positioned on the frame. There was no rust found, but wanted the stronger panels to reduce body flex that convertibles can suffer from. Next, the inside was wire brushed, and a dolly and hammer was used to smooth out the inner panel. A grinder removed the nubs left from the spot welds, and a wire wheel removed any loose residue. Next, the surfaces were coated with the Over-Rust to treat the metal before installing the new panels.
The replacements were then cut to size, and mated to the car body.
---John
 (59 SF convertible 001.JPG) (59 SF convertible 001.JPG)
 (59 SF convertible 002.JPG) (59 SF convertible 002.JPG)
 (59 SF convertible 003.JPG) (59 SF convertible 003.JPG)
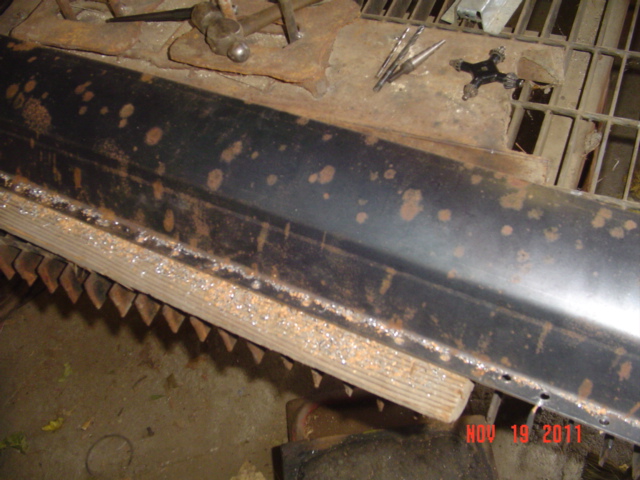 (59 SF convertible 005.JPG) (59 SF convertible 005.JPG)
 (59 SF convertible 006.JPG) (59 SF convertible 006.JPG)
 (59 SF convertible 007.JPG) (59 SF convertible 007.JPG)
Attachments
----------------
59 SF convertible 001.JPG (159KB - 276 downloads)
59 SF convertible 002.JPG (158KB - 280 downloads)
59 SF convertible 003.JPG (162KB - 300 downloads)
59 SF convertible 005.JPG (156KB - 295 downloads)
59 SF convertible 006.JPG (147KB - 301 downloads)
59 SF convertible 007.JPG (162KB - 334 downloads)
|
|
| |
|
Expert 5K+
Posts: 7808
Location: Williams California | With both sides of the rocker panels now complete, I assembled the rotisserie I had bought last summer. It was made by a fellow down south of here, he markets them here as a 'Carotator'. It was very easy to assemble, and the steel is heavy gauge, I would recommend them to anyone. I have lots of finish work to do, as well as lots of grinding. Not to mention, I have decided to replace rather than patch the trunk pan, as it it heavily pitted. I have a reasonably solid '57 pan cut out of a car I scrapped recently that I will use.
I used a series of blocks on jacks, and barrels, to set the car body up by myself.
---John
 ('59 SF convertible 003.JPG) ('59 SF convertible 003.JPG)
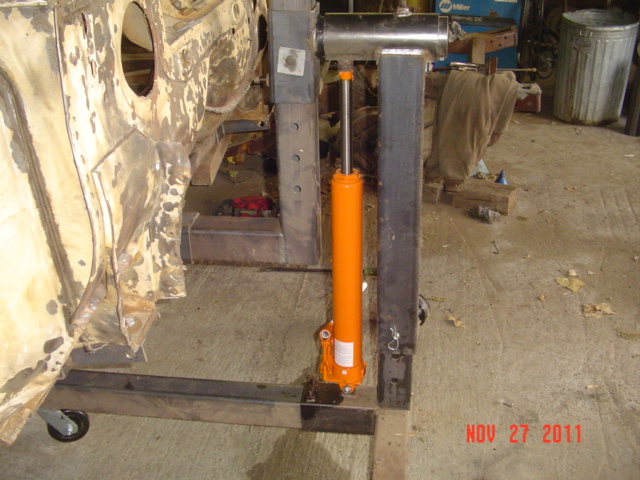 ('59 SF convertible 004.JPG) ('59 SF convertible 004.JPG)
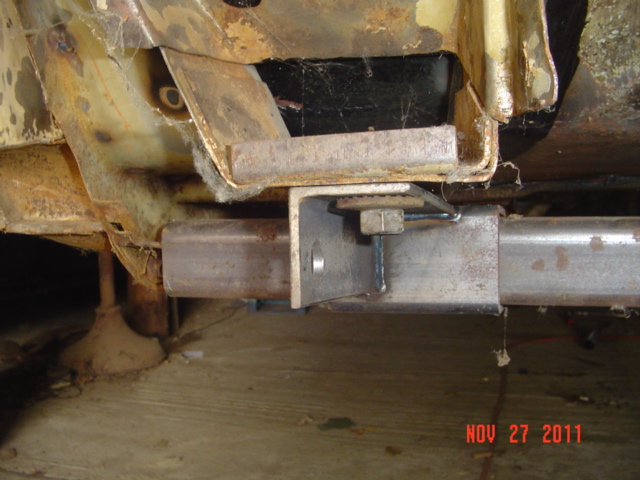 ('59 SF convertible 005.JPG) ('59 SF convertible 005.JPG)
 ('59 SF convertible 006.JPG) ('59 SF convertible 006.JPG)
 ('59 SF convertible 007.JPG) ('59 SF convertible 007.JPG)
 ('59 SF convertible 002.JPG) ('59 SF convertible 002.JPG)
Attachments
----------------
'59 SF convertible 003.JPG (156KB - 295 downloads)
'59 SF convertible 004.JPG (158KB - 304 downloads)
'59 SF convertible 005.JPG (150KB - 315 downloads)
'59 SF convertible 006.JPG (157KB - 307 downloads)
'59 SF convertible 007.JPG (154KB - 296 downloads)
'59 SF convertible 002.JPG (164KB - 322 downloads)
|
|
| |
|
Veteran
Posts: 114
Location: South Australia | That rotissary looks the goods John,it would be very handy in my shed!
Great to see you back into "Rusty"mate,It's better than any serial on tv,thats for sure! |
|
| |
|

Expert 5K+
Posts: 6203
Location: Big pimpin' | Looking good John. Every time I need some inspiration, I take a look at this thread. |
|
| |
|
Expert 5K+
Posts: 7808
Location: Williams California | muddy - 2011-12-07 2:24 AM
That rotissary looks the goods John,it would be very handy in my shed!
Great to see you back into "Rusty"mate,It's better than any serial on tv,thats for sure!
Thanks, Grant! Hopefully I can stay on it for awhile this time instead of bouncing between other projects.
---John |
|
| |
|
Expert 5K+
Posts: 7808
Location: Williams California | dukeboy - 2011-12-07 3:47 AM
Looking good John. Every time I need some inspiration, I take a look at this thread.
Thanks, Chaney! I really enjoy watching your build threads as well.
---John |
|
| |
|
Expert 5K+
Posts: 7808
Location: Williams California | Another minor dilemna- Where to put the frame until I can use the croossmember and extra mounts in the donor frame. This thing is rusty, and could easily be considered scrap, so I do not want to put it outside where one of the guys may toss it in the scrap bin, but it will be in the way inside. I used a couple come alongs and raised it to the ceiling, and chained it up out of the way until I am ready for it.
---John
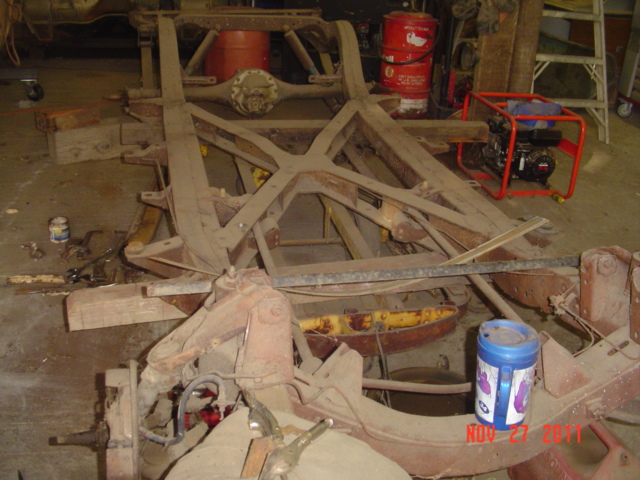 ('59 SF convertible 002.JPG) ('59 SF convertible 002.JPG)
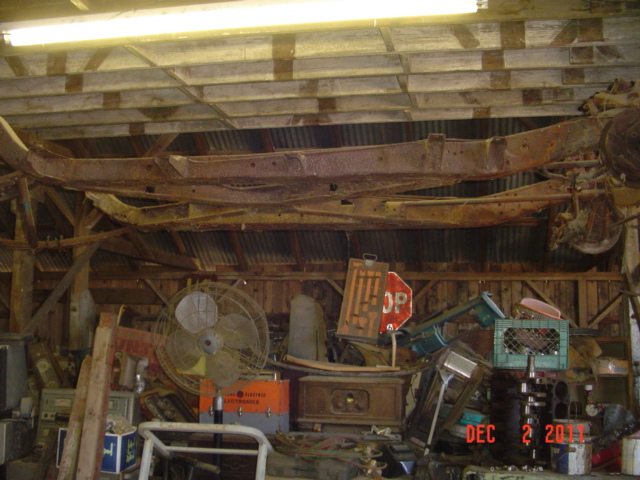 (Deal Wrecking 001.JPG) (Deal Wrecking 001.JPG)
Attachments
----------------
'59 SF convertible 002.JPG (164KB - 292 downloads)
Deal Wrecking 001.JPG (167KB - 443 downloads)
|
|
| |
|
Exner Expert 19,174 posts. Neil passed away 18 Sep 2015. You will be missed, Neil!
Posts: 19146
Location: bishop, ca | John, there have been some OEM correct MoPar convertible mufflers on the 'Pay, recently.
|
|
| |
|
Expert 5K+
Posts: 7808
Location: Williams California | d500neil - 2011-12-07 1:08 PM
John, there have been some OEM correct MoPar convertible mufflers on the 'Pay, recently.
Neil, do you happen to have the auction number by chance? If so, thanks in advance!!
---John |
|
| |
|
Expert
Posts: 2905
Location: little rock, AR | You have taken the old saying "you have a lot of junk hanging around" to a new level!!!
Edited by oldwood 2011-12-07 10:04 PM
|
|
| |
|
Exner Expert 19,174 posts. Neil passed away 18 Sep 2015. You will be missed, Neil!
Posts: 19146
Location: bishop, ca | I'll see what I can do.....
|
|
| |
|
Expert 5K+
Posts: 7808
Location: Williams California | I received my recast steering wheel back from Koch's. They did a good job on it overall, they were originally going to cast the clear plastic and repair the handgrips, but they recast the handgrips as well, and may I add, at no extra cost!!
---John
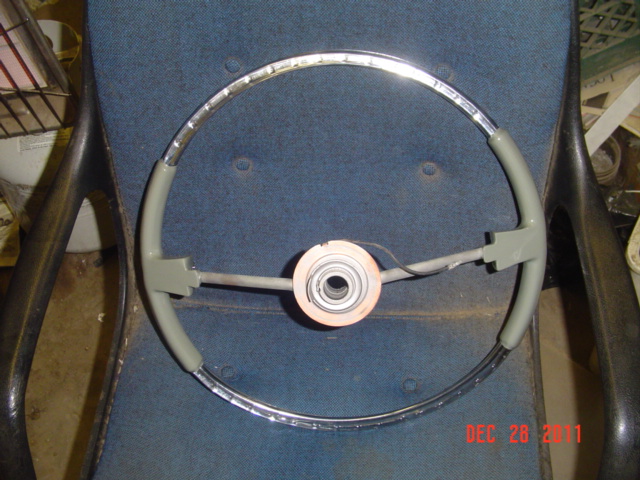 ('59 SF convertible 004.JPG) ('59 SF convertible 004.JPG)
 ('59 SF convertible 003.JPG) ('59 SF convertible 003.JPG)
Attachments
----------------
'59 SF convertible 004.JPG (145KB - 299 downloads)
'59 SF convertible 003.JPG (161KB - 312 downloads)
|
|
| |
|
Expert
Posts: 2596
Location: Upplands Väsby, Sweden | Look great steering wheel (If same firm new rechromed the steering frame?). Hope I can see your Sport Fury in live when I go to CA. |
|
| |
|

Elite Veteran
Posts: 957
Location: Signal Mountain, TN | That wheel looks nice.
I am familiar with Koch's... they do some really nice work.
|
|
| |
|
Extreme Veteran
Posts: 481
Location: The Netherlands | What color is that steering wheel?
Also what was your plan for the interior color? I forgot |
|
| |
|
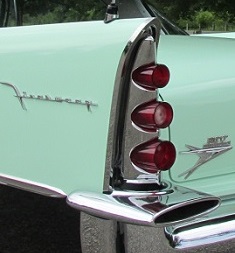
Expert
Posts: 2788
Location: USA - KY |
Incredible work, John!
I especially like that circular badge that was STILL hanging desperately on to the rear fin in the first "before" pictures. It's a wonder it was still there, and that no one had picked it off over the years.
This car is going to be absolutely wonderful when you are done. I also like the '59's.
|
|
| |
|
Expert 5K+
Posts: 7808
Location: Williams California | Windsor59 - 2011-12-28 10:52 AM
Look great steering wheel (If same firm new rechromed the steering frame?). Hope I can see your Sport Fury in live when I go to CA.
The chrome ring was in good condition, although the plastic had disintegrated. It was not necessary to re chrome it.
Look forward to meeting you in January when you visit too!
---John |
|
| |
|
Expert 5K+
Posts: 7808
Location: Williams California | BarnFind57 - 2011-12-28 11:03 AM
That wheel looks nice.
I am familiar with Koch's... they do some really nice work.
Thanks, Rick. I had met them several years ago when they were buying core steering wheels. I had a good feeling about the way they were doing things.
---John |
|
| |
|
Expert 5K+
Posts: 7808
Location: Williams California | Matthew Keij - 2011-12-28 2:07 PM
What color is that steering wheel?
Also what was your plan for the interior color? I forgot
Hi Matthew,
The color of the interior was red, with a black exterior and dash. The sterering wheel handgrips are gray, as is the center pad for it.
---John |
|
| |
|
Expert 5K+
Posts: 7808
Location: Williams California | FIN ME - 2011-12-29 5:38 AM
Incredible work, John!
I especially like that circular badge that was STILL hanging desperately on to the rear fin in the first "before" pictures. It's a wonder it was still there, and that no one had picked it off over the years.
This car is going to be absolutely wonderful when you are done. I also like the '59's.
(O )
Thanks! I was surprised the badges were still on the quarters, but the yard where the car was found was deep in the forest in upstate New York, and not visible from any roadway. My late friend Jim found the yard by word of mouth, and sent the car out to me.
---John |
|
| |
|
Extreme Veteran
Posts: 481
Location: The Netherlands | big m - 2011-12-29 1:58 PM
Matthew Keij - 2011-12-28 2:07 PM
What color is that steering wheel?
Also what was your plan for the interior color? I forgot
Hi Matthew,
The color of the interior was red, with a black exterior and dash. The sterering wheel handgrips are gray, as is the center pad for it.
---John
Johnnie,
The Sport Fury steering wheels were black, brown, green or blue.
Just a note for originality |
|
| |
|
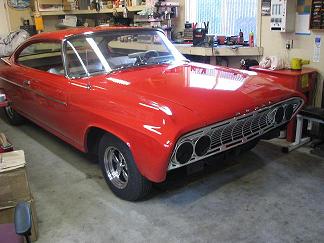
Extreme Veteran
Posts: 466
Location: Vancouver, Washington | Hey Matt- ran across this add, maybe a source for parts if you are in need
http://portland.craigslist.org/clk/pts/2763159573.html |
|
| |
|
Expert 5K+
Posts: 7808
Location: Williams California | Matthew Keij - 2011-12-29 12:21 PM
big m - 2011-12-29 1:58 PM
Matthew Keij - 2011-12-28 2:07 PM
What color is that steering wheel?
Also what was your plan for the interior color? I forgot
Hi Matthew,
The color of the interior was red, with a black exterior and dash. The sterering wheel handgrips are gray, as is the center pad for it.
---John
Johnnie,
The Sport Fury steering wheels were black, brown, green or blue.
Just a note for originality
Thanks for the info, Matt. This one was the same color as what I removed from this car originally, so the steering wheel may have been changed out years ago.
---John |
|
| |
|
Expert 5K+
Posts: 7808
Location: Williams California |
DesotoPat sent me that link yesterday, and I have arranged to buy that particular car.
---John |
|
| |
|
Extreme Veteran
Posts: 530
Location: Wake Forest, NC | Well done, save another from the crusher |
|
| |
|
Account Inactive by Request
Posts: 1601
| Amazing talent and capability shown here, John. But will the "numbers match" when you are done? Neil will want to research it! |
|
| |
|
Expert 5K+
Posts: 7808
Location: Williams California | carjock - 2011-12-31 6:24 AM
Amazing talent and capability shown here, John. But will the "numbers match" when you are done? Neil will want to research it!
LOL!
Thanks, Jim!
---John |
|
| |
|
New User
Posts: 1
| I'm really impressed with what you're doing. I only wish that I could have the skill and talent to do it, too. I love following these threads about anyone who has the tenacity or the stubborness to re-build a ragged out, rust bucket. Here is one I found on the Team Impala board. Same kinda work.
This guy really wanted a '61 Impala convertible, but couldn't afford one. When he found this one, he bought it.
Here's the URL:
http://www.impalas.net/forums/showthread.php?t=686
I thought you might enjoy it, so Happy reading .... it's a long one, but worth it.
__________________
Jeff
in SW FLA
|
|
| |
|
Veteran
Posts: 114
Location: South Australia | Just read the Impala story...WOW!!....that bloke must have REALY wanted a '61 rag top!He realy is doing it the hard way,to start off with a car that ruff!!
Storys like his and John's here are realy inspiring stuff to people like me,who have never tackled projects on this scale before.
WOW again!
|
|
| |
|
Expert 5K+
Posts: 7808
Location: Williams California | jeff0547 - 2012-01-03 11:26 AM
I'm really impressed with what you're doing. I only wish that I could have the skill and talent to do it, too. I love following these threads about anyone who has the tenacity or the stubborness to re-build a ragged out, rust bucket. Here is one I found on the Team Impala board. Same kinda work.
This guy really wanted a '61 Impala convertible, but couldn't afford one. When he found this one, he bought it.
Here's the URL:
http://www.impalas.net/forums/showthread.php?t=686
I thought you might enjoy it, so Happy reading .... it's a long one, but worth it.
__________________
Jeff
in SW FLA
Thanks for the link, Jeff. Lots of hard work went into that car, no doubt!!
---John |
|
| |
|
Expert
Posts: 2596
Location: Upplands Väsby, Sweden | What work he puts into his Impala.
Difficult to understand for us northerners that you can not find a better project in the U.S..
To me there seems to be many more items which
Or am I wrong? (Ok I know some model is where rare...)
Sure, similar to work on this Impala 61 John (Big M) Sport Fury conv 59
Wish I were as handy with sheet metal like them.
Edited by Windsor59 2012-01-04 3:48 PM
|
|
| |
|
Expert 5K+
Posts: 8947
Location: WHEELING,WV.>>>HOME OF WWVA | musta wanted a 61 real bad but the end results will be fantastic . a good dose of fortitude in that project . i always thought the 61 was one of the best lookin chevrolets and a rag to boot ----------------------------------------------------later |
|
| |
|
Expert 5K+
Posts: 7808
Location: Williams California | I had a trunk floor cut out of a car I scrapped a year or two ago, it had a two inch rust hole next to the fuel filler tube which is why I could never sell it. Just a bit extra labor to repair, and convenient in that it was already out.
Next photos show the donor pan, separating it from pieces I will not be using, and repair of the rust hole before installation.
---John
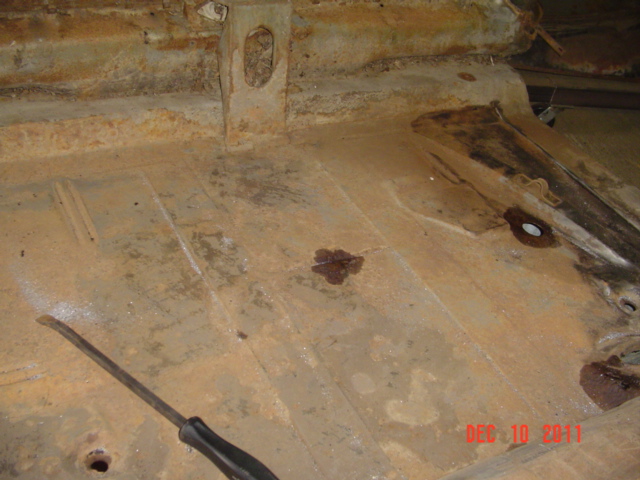 ('59 SF convertible 001.JPG) ('59 SF convertible 001.JPG)
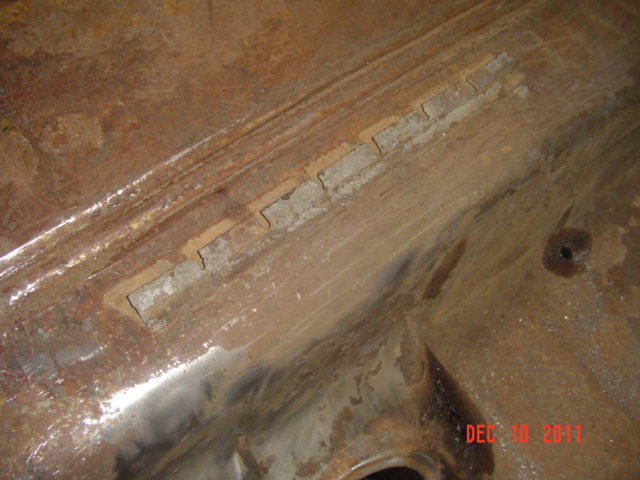 ('59 SF convertible 002.JPG) ('59 SF convertible 002.JPG)
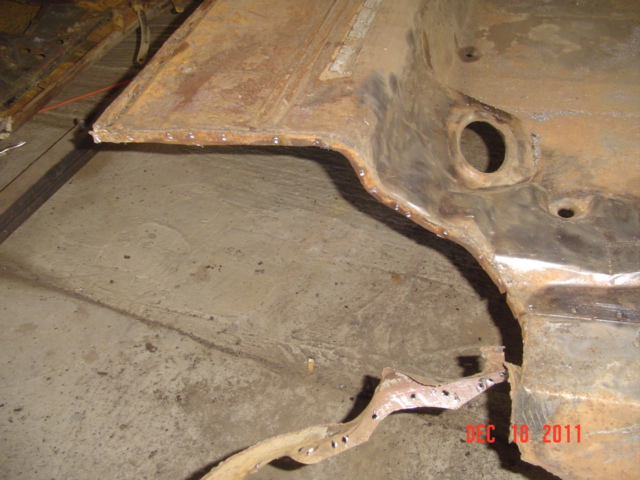 ('59 SF convertible 003.JPG) ('59 SF convertible 003.JPG)
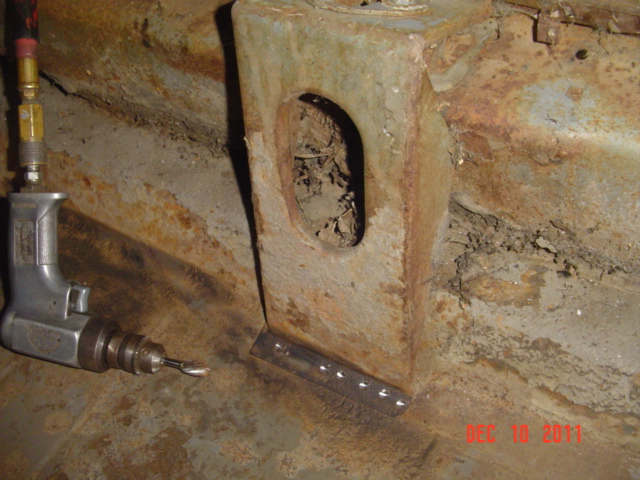 ('59 SF convertible 004.JPG) ('59 SF convertible 004.JPG)
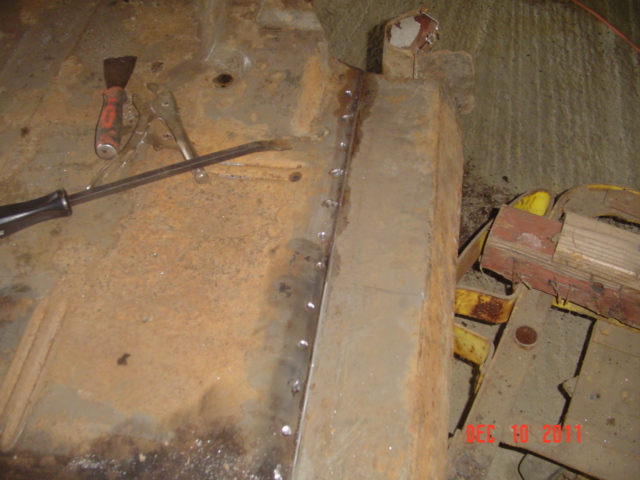 ('59 SF convertible 005.JPG) ('59 SF convertible 005.JPG)
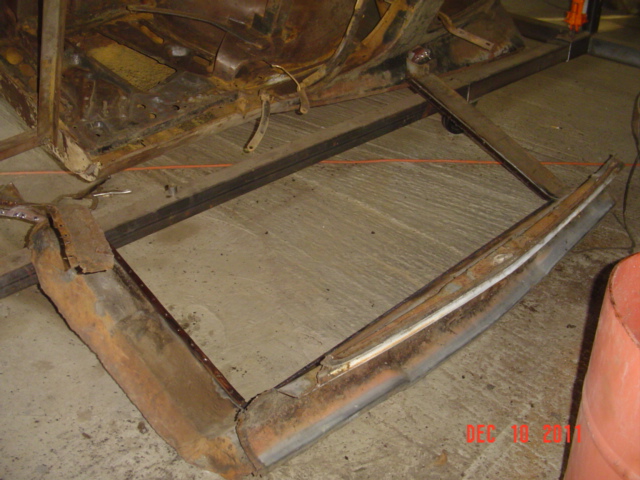 ('59 SF convertible 006.JPG) ('59 SF convertible 006.JPG)
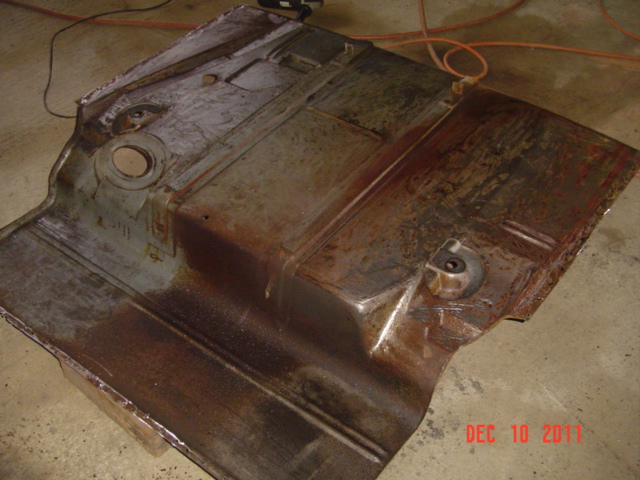 ('59 SF convertible 007.JPG) ('59 SF convertible 007.JPG)
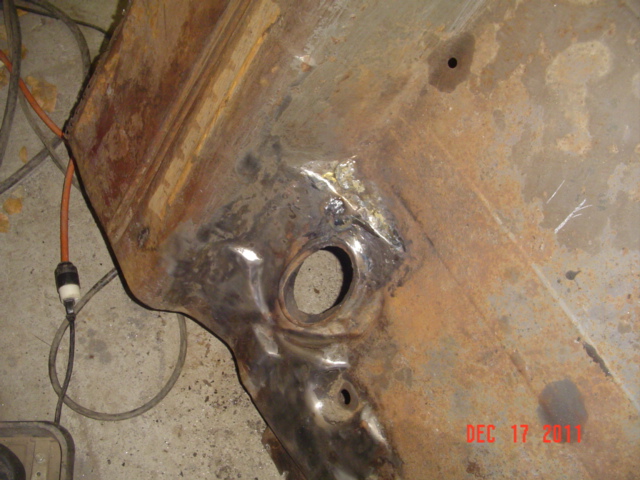 ('59 SF convertible 001.JPG) ('59 SF convertible 001.JPG)
Attachments
----------------
'59 SF convertible 001.JPG (151KB - 288 downloads)
'59 SF convertible 002.JPG (157KB - 291 downloads)
'59 SF convertible 003.JPG (156KB - 291 downloads)
'59 SF convertible 004.JPG (157KB - 299 downloads)
'59 SF convertible 005.JPG (166KB - 440 downloads)
'59 SF convertible 006.JPG (159KB - 297 downloads)
'59 SF convertible 007.JPG (156KB - 292 downloads)
'59 SF convertible 001.JPG (159KB - 274 downloads)
|
|
| |
|
Expert 5K+
Posts: 7808
Location: Williams California | I positioned the rear half of the body on horses to prevent undue stress on the body before cutting the trunk out. Photo of the trunk before removal, shows the thin metal.
---John
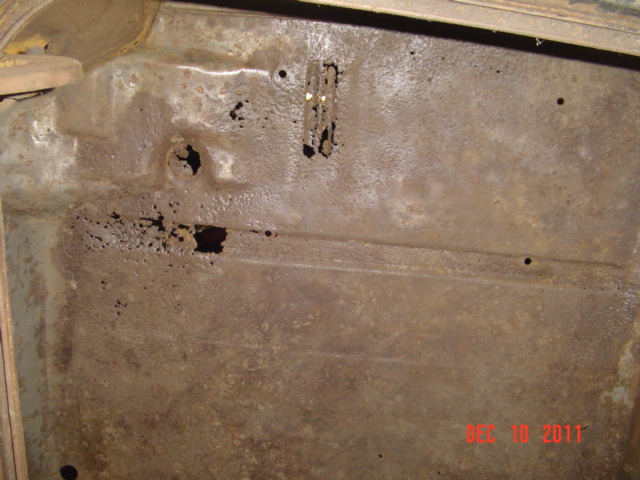 ('59 SF convertible 008.JPG) ('59 SF convertible 008.JPG)
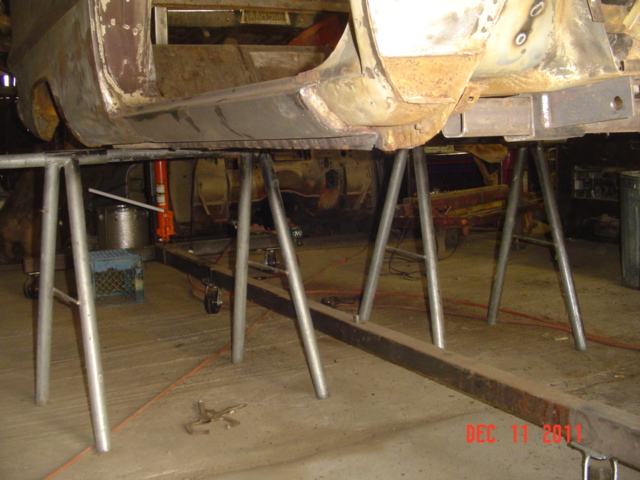 ('59 SF convertible 001.JPG) ('59 SF convertible 001.JPG)
Attachments
----------------
'59 SF convertible 008.JPG (159KB - 279 downloads)
'59 SF convertible 001.JPG (160KB - 279 downloads)
|
|
| |
|
Expert 5K+
Posts: 7808
Location: Williams California | Cutting the old trunk pan out, and preparing for the installation of its replacement-
---John
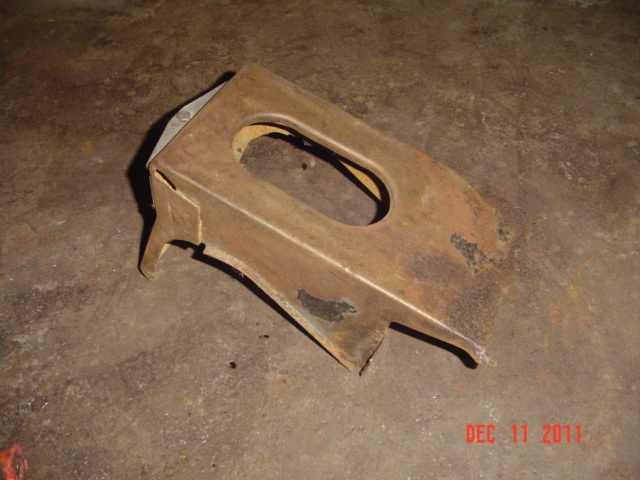 ('59 SF convertible 002.JPG) ('59 SF convertible 002.JPG)
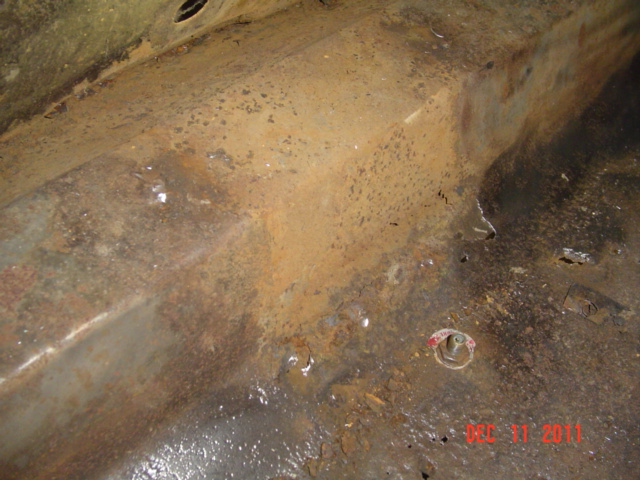 ('59 SF convertible 003.JPG) ('59 SF convertible 003.JPG)
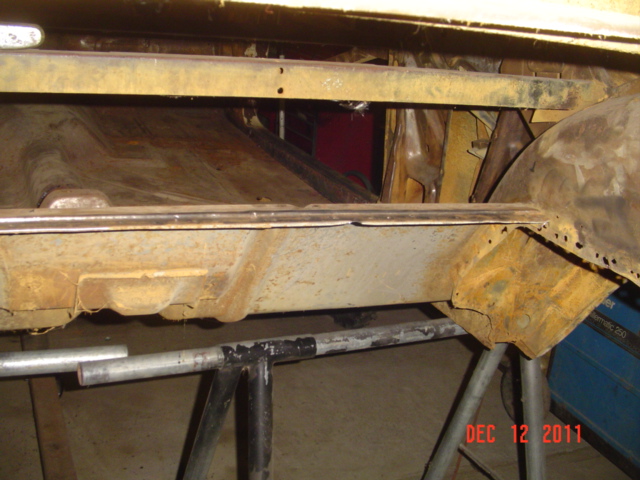 ('59 SF convertible 004.JPG) ('59 SF convertible 004.JPG)
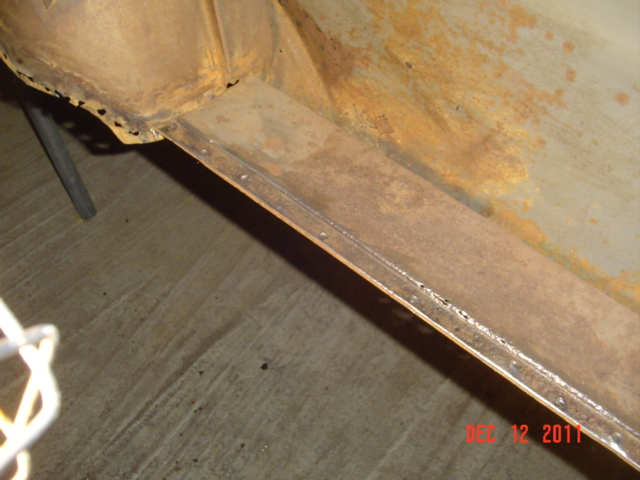 ('59 SF convertible 005.JPG) ('59 SF convertible 005.JPG)
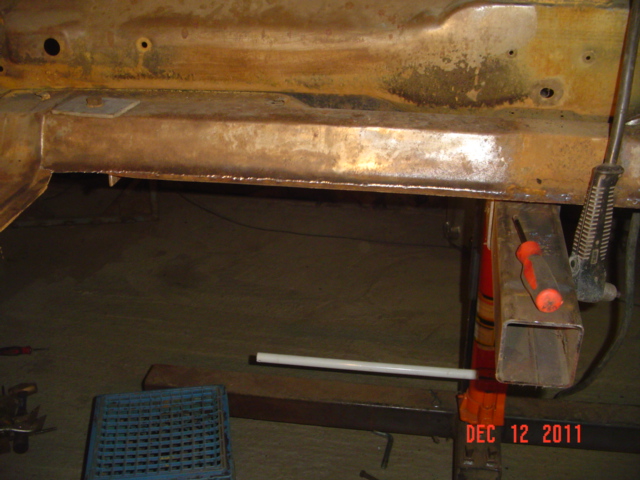 ('59 SF convertible 006.JPG) ('59 SF convertible 006.JPG)
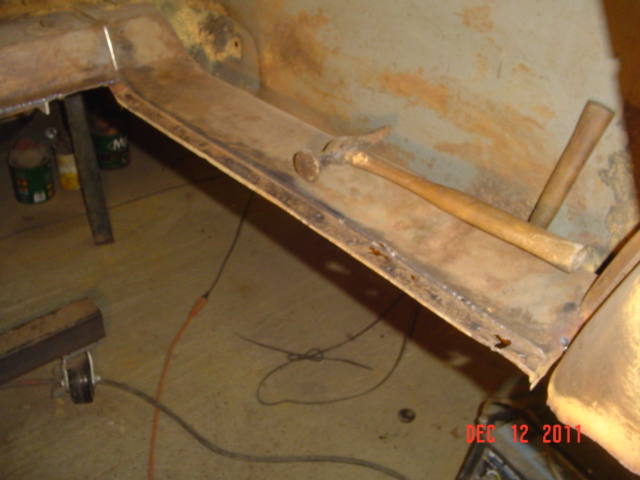 ('59 SF convertible 007.JPG) ('59 SF convertible 007.JPG)
Attachments
----------------
'59 SF convertible 002.JPG (155KB - 269 downloads)
'59 SF convertible 003.JPG (156KB - 287 downloads)
'59 SF convertible 004.JPG (157KB - 282 downloads)
'59 SF convertible 005.JPG (159KB - 271 downloads)
'59 SF convertible 006.JPG (165KB - 279 downloads)
'59 SF convertible 007.JPG (150KB - 285 downloads)
|
|
| |
|
Expert 5K+
Posts: 7808
Location: Williams California | Cleaning rough edges and any loose rust, then treating the metal, then setting the pan in place. I found a rust hole in behind the trunk catch support, I will repair this before installing the replacement support.
---John
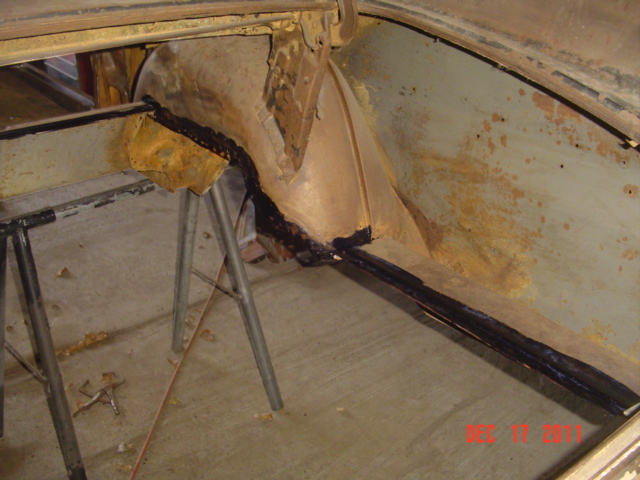 ('59 SF convertible 002.JPG) ('59 SF convertible 002.JPG)
 ('59 SF convertible 003.JPG) ('59 SF convertible 003.JPG)
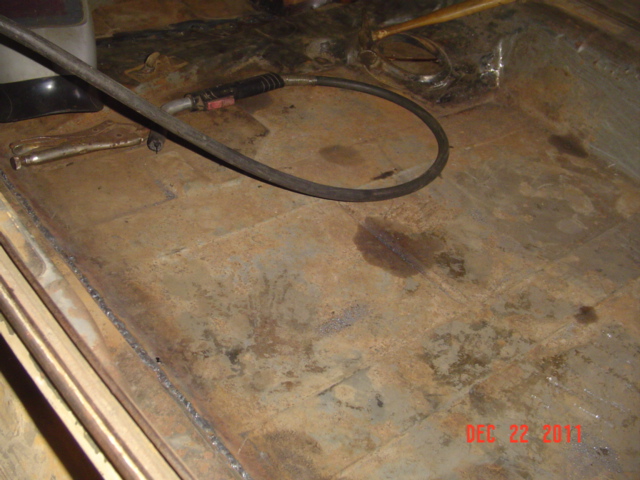 ('59 SF convertible 001.JPG) ('59 SF convertible 001.JPG)
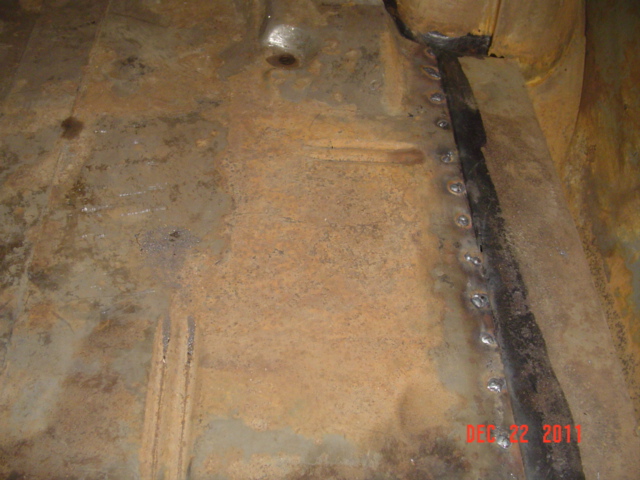 ('59 SF convertible 002.JPG) ('59 SF convertible 002.JPG)
Attachments
----------------
'59 SF convertible 002.JPG (151KB - 274 downloads)
'59 SF convertible 003.JPG (156KB - 283 downloads)
'59 SF convertible 001.JPG (160KB - 282 downloads)
'59 SF convertible 002.JPG (153KB - 281 downloads)
|
|
| |
|
Elite Veteran
Posts: 957
Location: Signal Mountain, TN | Impressive, John.....
I am looking forward to seeing this one on the road nearly as much as my own,
|
|
| |
|
Expert
Posts: 2996
Location: Sept. 1958 | Nice job John. Your making good progress all the time. Seeing your updates gives more inspiration. I put mine on hold for a bit, have some family issues that arised. |
|
| |
|
Expert
Posts: 1295
Location: Nasco , SWEDEN | Thank´s for sharing John, you are making good progress!
 (postcard_4.JPG) (postcard_4.JPG)
Attachments
----------------
postcard_4.JPG (72KB - 258 downloads)
|
|
| |
|
Member
Posts: 9
Location: nor-cal | OH MY WORD!!!!
I just HAVE to come visit and I am only 90 minutes away... this is insane! taking a pile of rusty metal and recreating what took 100 ton presses 10 seconds...
All I can say is WOW!!!
Dang John-super impressive.
BTW-wanna share that tomatoe bin-great idea BTW-never thought of that use for one of these.
this inspires me to maybe restore my dads 55 2dr imperial. or maybe his 4door.
both are in PRIME concourse shape compared to what you are doing!
Buddy of mine in Tahoe owns a restored "christopher" which I have always admired..
BTW-I work in Chico and we have a laser and waterjet cutter. Laser rated up to 1/2" and waterjet to 18"-yep inches...
PM me if you need some parts cut. we also have a hyd press that will do 10'x0.50" mild steel.
Mark |
|
| |
|
Expert 5K+
Posts: 7808
Location: Williams California | ccpanel - 2012-02-04 4:03 PM
OH MY WORD!!!!
I just HAVE to come visit and I am only 90 minutes away... this is insane! taking a pile of rusty metal and recreating what took 100 ton presses 10 seconds...
All I can say is WOW!!!
Dang John-super impressive.
BTW-wanna share that tomatoe bin-great idea BTW-never thought of that use for one of these.
this inspires me to maybe restore my dads 55 2dr imperial. or maybe his 4door.
both are in PRIME concourse shape compared to what you are doing!
Buddy of mine in Tahoe owns a restored "christopher" which I have always admired..
BTW-I work in Chico and we have a laser and waterjet cutter. Laser rated up to 1/2" and waterjet to 18"-yep inches...
PM me if you need some parts cut. we also have a hyd press that will do 10'x0.50" mild steel.
Mark
Thanks, Mark,
Give me a call, you are welcome to wander here and have a look around at the cars anytime I am open for business- [530] 473-2225
I'll let you know if I need something precision cut also.
---John |
|
| |
|

Veteran
Posts: 260
| John, I bet you'll have that piece with the trunk latch striker welded in the right place on the first attempt! It took me about 20 tries before I got it in the right spot. That was harder than pulling the body off the frame! I too have a rust converter for treating the metal but wasn't having much luck welding the treated metal-do you turn up the heat to get a good weld in these cases? |
|
| |
|
Expert 5K+
Posts: 7808
Location: Williams California | Hi Lisa,
Just be sure that the metal is clean where it is to be welded. A good file works well to remove anything on the surface of the metal that may affect a good weld.
I still need to find the trunk latch support in one of the parts cars, but haven't had time to do so yet.
---John |
|
| |
|
Exner Expert 19,174 posts. Neil passed away 18 Sep 2015. You will be missed, Neil!
Posts: 19146
Location: bishop, ca | Lisa's comment sounds like you should remove an entire section, surrounding and including that latch support, so that
that complete ensemble could, then, be welded into the body as a unit which is 'pre-aligned'.
|
|
| |
|
Expert 5K+
Posts: 7808
Location: Williams California | Still working to smooth out the welds, have about 60% of the underside presentable now. I removed a trunk latch support from a parts car, but found a mouse nest in behind it that caused rust on the lower areas of it. Also I had a rust hole in the project car body that needed to be repaired before installing the support. Patch pieces were cut, and fitted, then butt welded to the body and the support, then ground smooth.
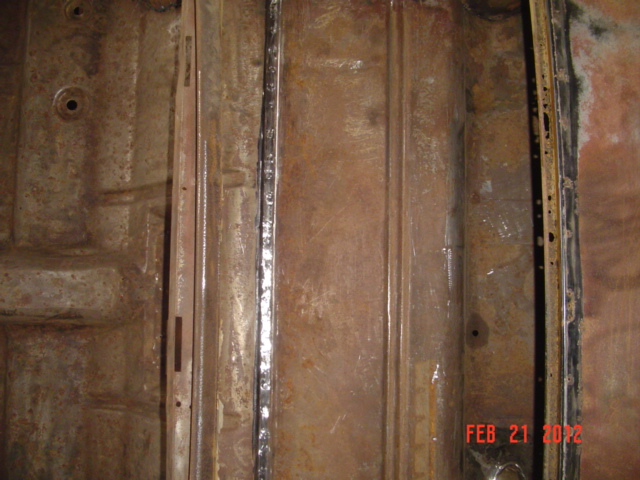 ('59 SF convertible 012.JPG) ('59 SF convertible 012.JPG)
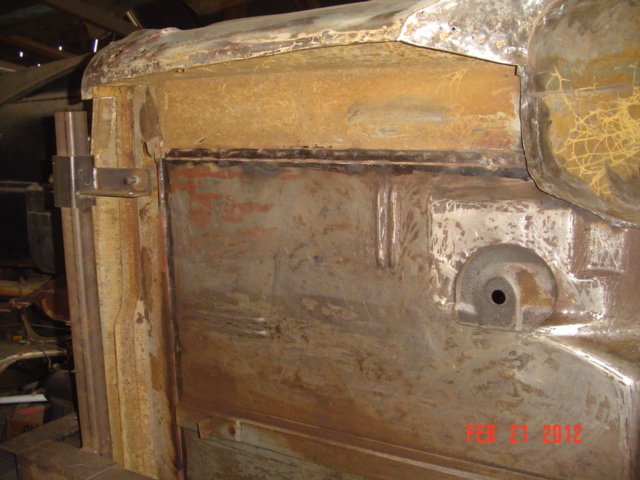 ('59 SF convertible 011.JPG) ('59 SF convertible 011.JPG)
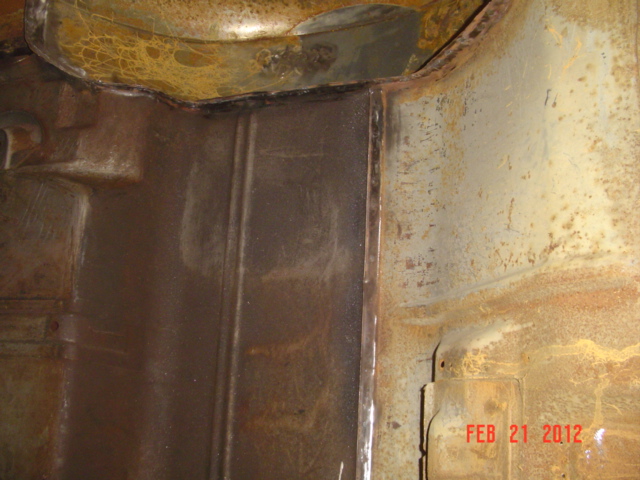 ('59 SF convertible 010.JPG) ('59 SF convertible 010.JPG)
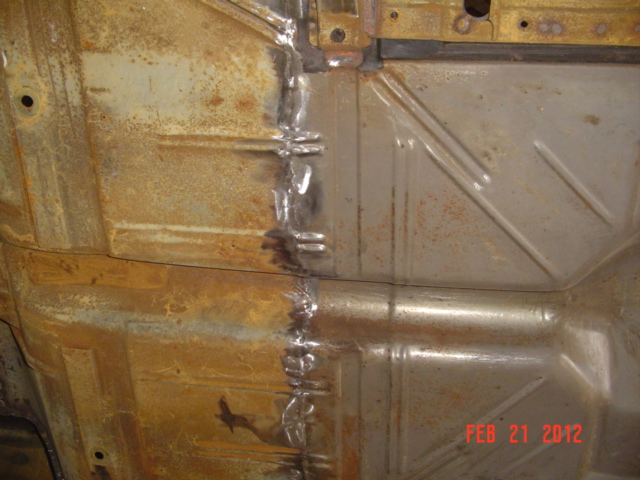 ('59 SF convertible 009.JPG) ('59 SF convertible 009.JPG)
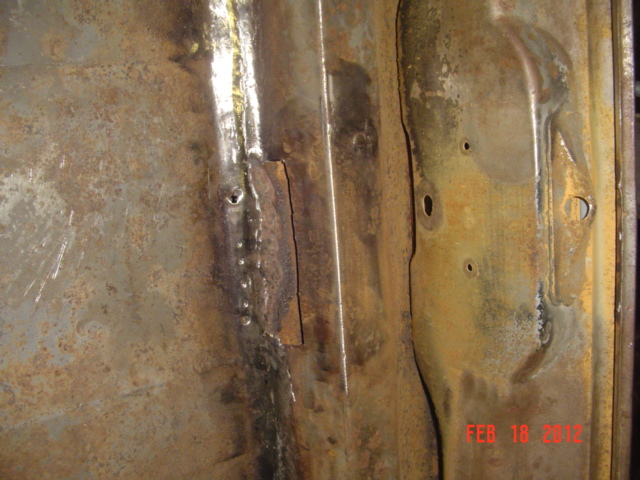 ('59 SF convertible 001.JPG) ('59 SF convertible 001.JPG)
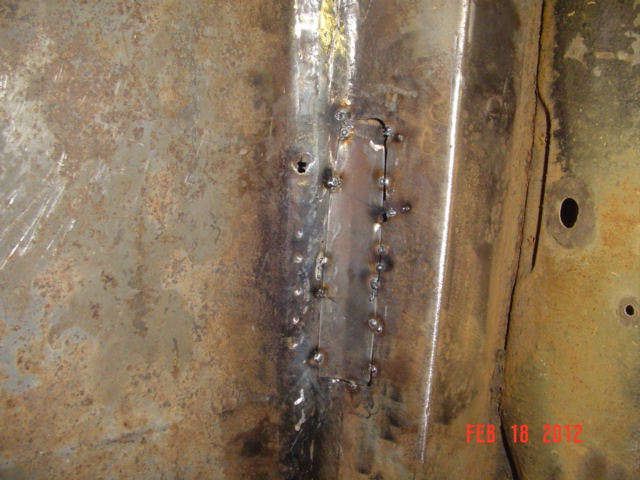 ('59 SF convertible 002.JPG) ('59 SF convertible 002.JPG)
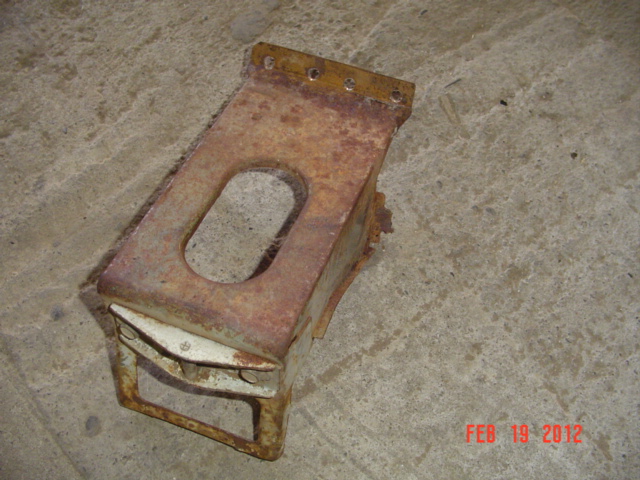 ('59 SF convertible 003.JPG) ('59 SF convertible 003.JPG)
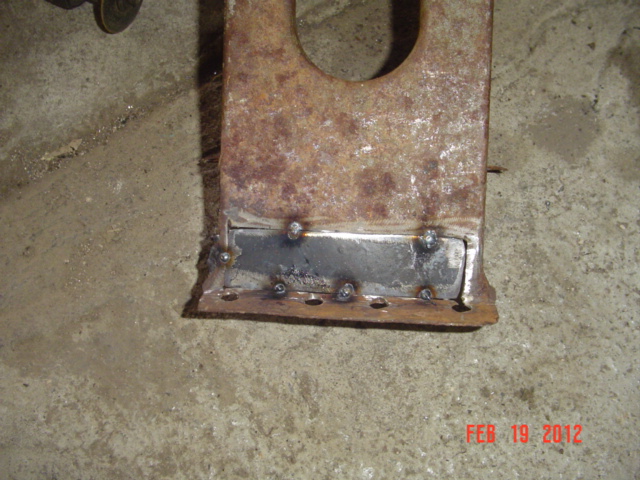 ('59 SF convertible 004.JPG) ('59 SF convertible 004.JPG)
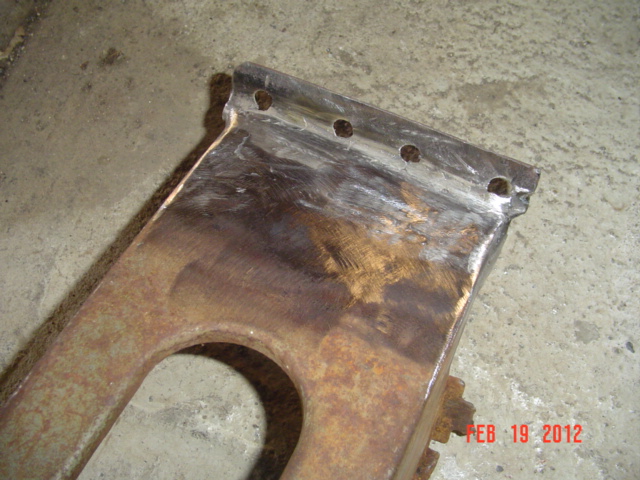 ('59 SF convertible 005.JPG) ('59 SF convertible 005.JPG)
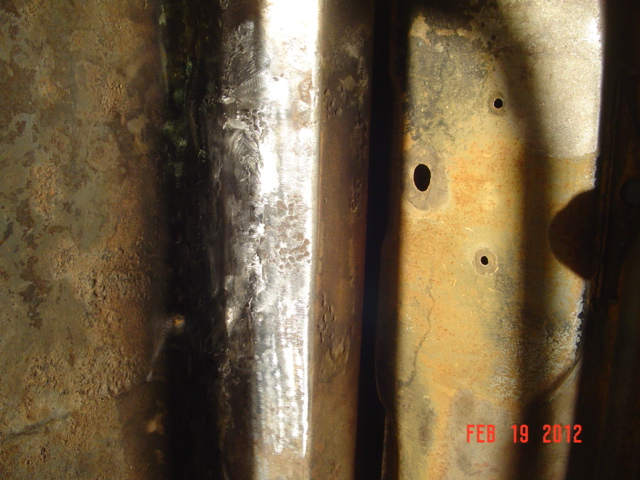 ('59 SF convertible 007.JPG) ('59 SF convertible 007.JPG)
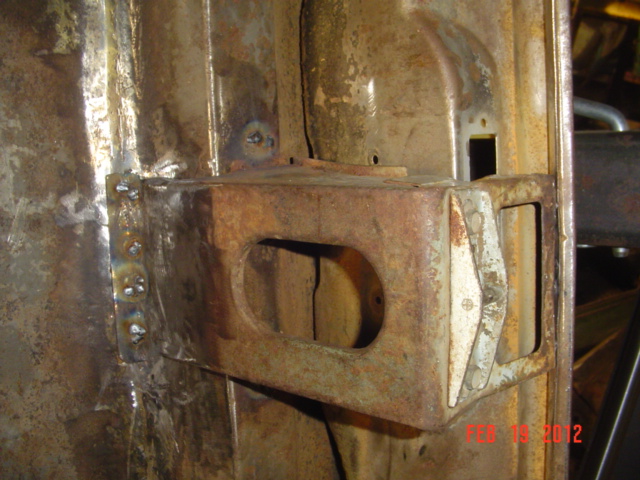 ('59 SF convertible 008.JPG) ('59 SF convertible 008.JPG)
Attachments
----------------
'59 SF convertible 012.JPG (157KB - 300 downloads)
'59 SF convertible 011.JPG (163KB - 289 downloads)
'59 SF convertible 010.JPG (157KB - 292 downloads)
'59 SF convertible 009.JPG (157KB - 292 downloads)
'59 SF convertible 001.JPG (163KB - 296 downloads)
'59 SF convertible 002.JPG (158KB - 291 downloads)
'59 SF convertible 003.JPG (159KB - 288 downloads)
'59 SF convertible 004.JPG (163KB - 301 downloads)
'59 SF convertible 005.JPG (156KB - 284 downloads)
'59 SF convertible 007.JPG (162KB - 313 downloads)
'59 SF convertible 008.JPG (155KB - 290 downloads)
|
|
| |
|
Veteran
Posts: 260
| It looks great John! |
|
| |
|
Expert 5K+
Posts: 7808
Location: Williams California | Lisa P - 2012-02-29 9:12 PM
It looks great John!
Thanks, Lisa!
I cheated on the trunk latch support location, I measured another car in the yard. I can see how easy it could be to center it with the rear license plate light, but the light is off to one side, rather than centered.
---John |
|
| |
|
Elite Veteran
Posts: 957
Location: Signal Mountain, TN | ^^^^ I noticed that on my '57... I thought I was imagining it at first, slowed down, looked again.... like you said, it's off to one side.
Looking Great, John. Lots of work, but it will be worth it in the end. I have brought back a couple of REALLY rusty rides, but never went past a "rat" stage... I just straightened and fixed rot and the crucial structural stuff. Enjoying watching this thread.
Keep it up!
|
|
| |
|
Expert
Posts: 1295
Location: Nasco , SWEDEN | red
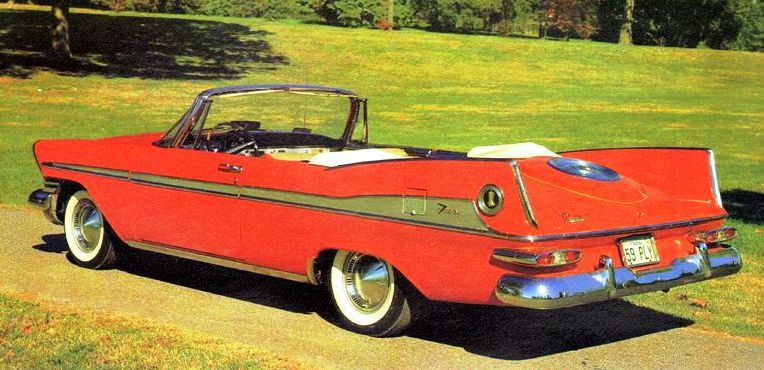 (1959Plymouth.jpg) (1959Plymouth.jpg)
Attachments
----------------
1959Plymouth.jpg (76KB - 278 downloads)
|
|
| |
|
Expert 5K+
Posts: 7808
Location: Williams California | Finally it feels like I am getting somewhere.
I decided to tackle the rust out on the driver side lower quarter, both the inner and outer skins had suffered from rust out.
I removed a section from a car in the yard that appeared to have a good lower area. After seperating the inner from the outer section, I found rust pitting. After an agressive cleaning, multiple pinholes appeared in the metal. I carefully welded each pinhole up with the mig welder, cooling the metal down constantly with a wet rag.
Next was to clean and fit the inner piece, to ready it for butt welding.
---John
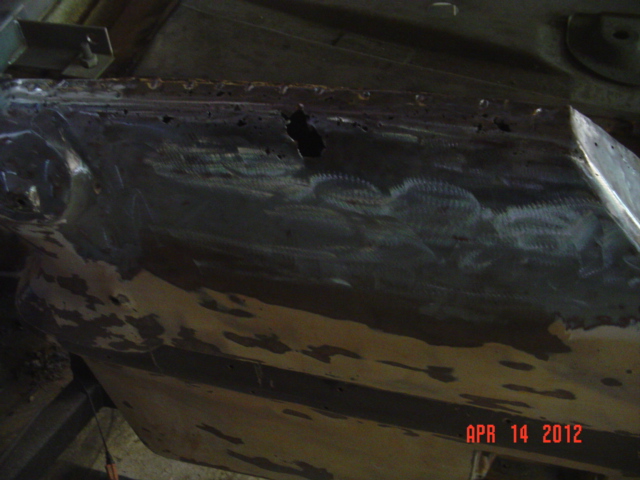 ('59 SF convertible 001.JPG) ('59 SF convertible 001.JPG)
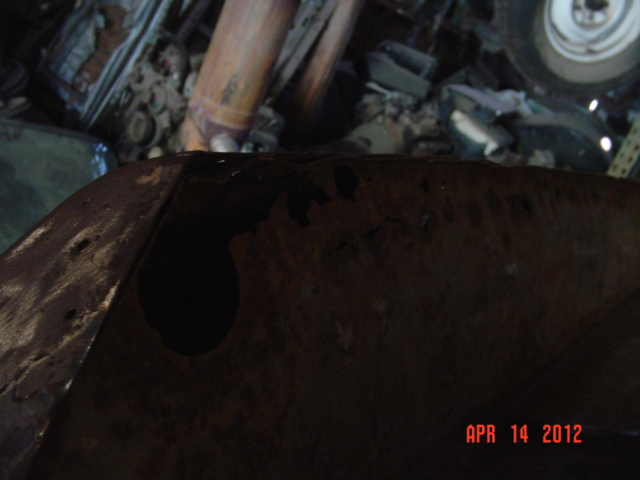 ('59 SF convertible 003.JPG) ('59 SF convertible 003.JPG)
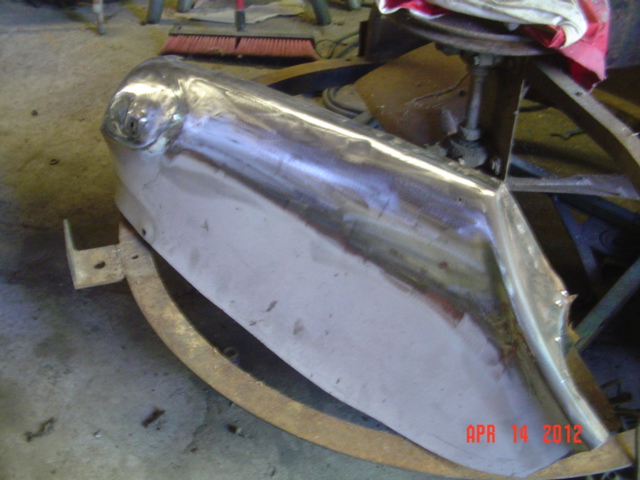 ('59 SF convertible 002.JPG) ('59 SF convertible 002.JPG)
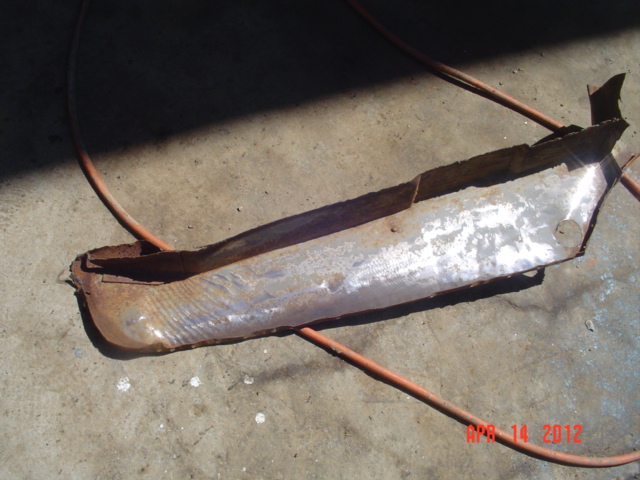 ('59 SF convertible 004.JPG) ('59 SF convertible 004.JPG)
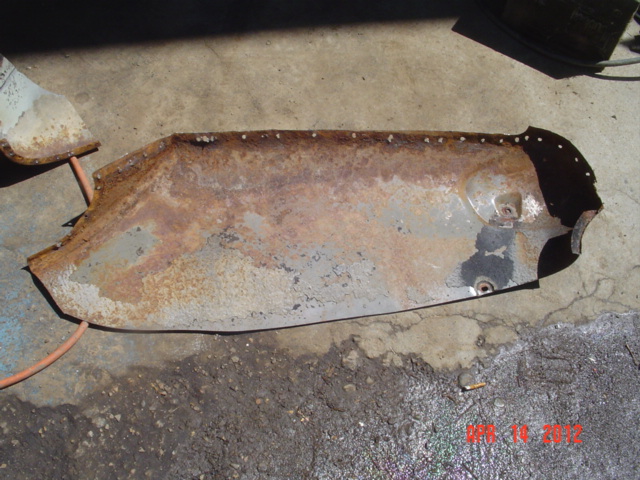 ('59 SF convertible 005.JPG) ('59 SF convertible 005.JPG)
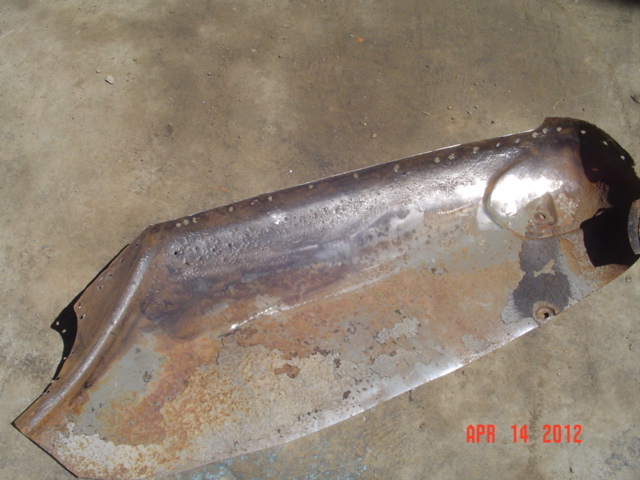 ('59 SF convertible 007.JPG) ('59 SF convertible 007.JPG)
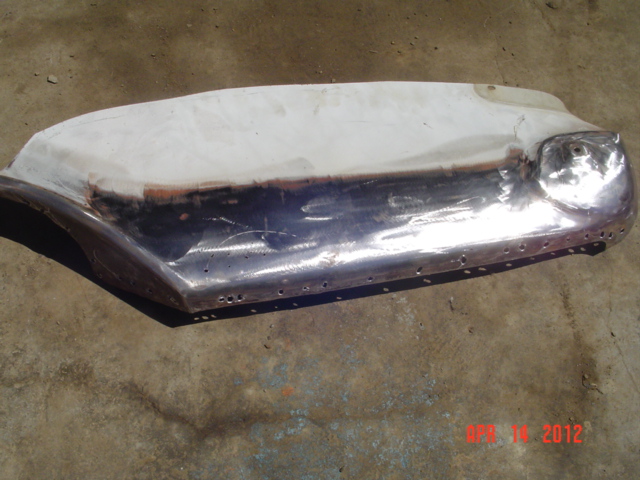 ('59 SF convertible 008.JPG) ('59 SF convertible 008.JPG)
Attachments
----------------
'59 SF convertible 001.JPG (159KB - 262 downloads)
'59 SF convertible 003.JPG (158KB - 281 downloads)
'59 SF convertible 002.JPG (149KB - 273 downloads)
'59 SF convertible 004.JPG (153KB - 288 downloads)
'59 SF convertible 005.JPG (150KB - 269 downloads)
'59 SF convertible 007.JPG (159KB - 292 downloads)
'59 SF convertible 008.JPG (163KB - 272 downloads)
|
|
| |
|
Expert 5K+
Posts: 7808
Location: Williams California | Next was to cut the repair sections to fit the body, the inner panel was completed first, so that both the inner and outer welds could be smoothed.
Then the outer panel was tacked and stitch welded slowly in place, the metal being continually cooled with a wet rag.
---John
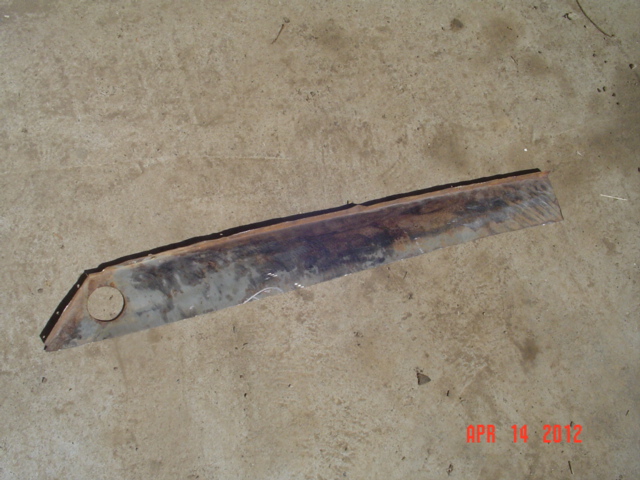 ('59 SF convertible 009.JPG) ('59 SF convertible 009.JPG)
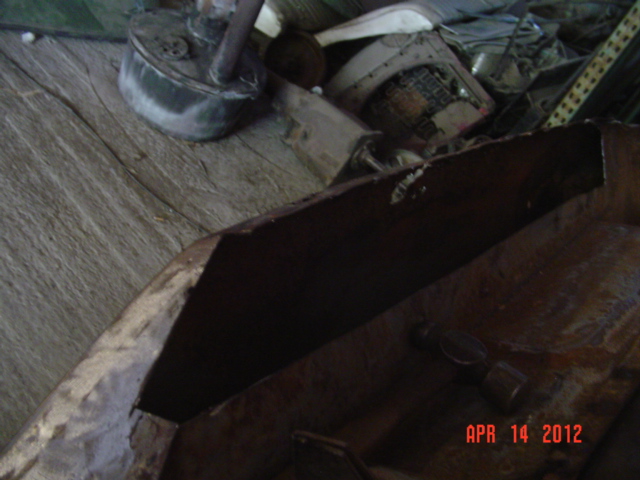 ('59 SF convertible 010.JPG) ('59 SF convertible 010.JPG)
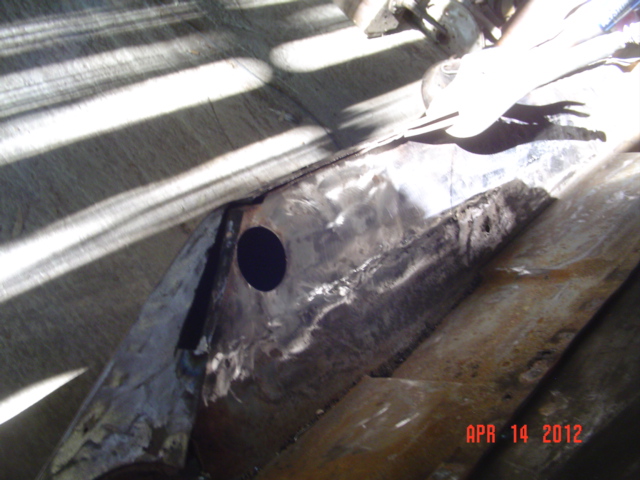 ('59 SF convertible 011.JPG) ('59 SF convertible 011.JPG)
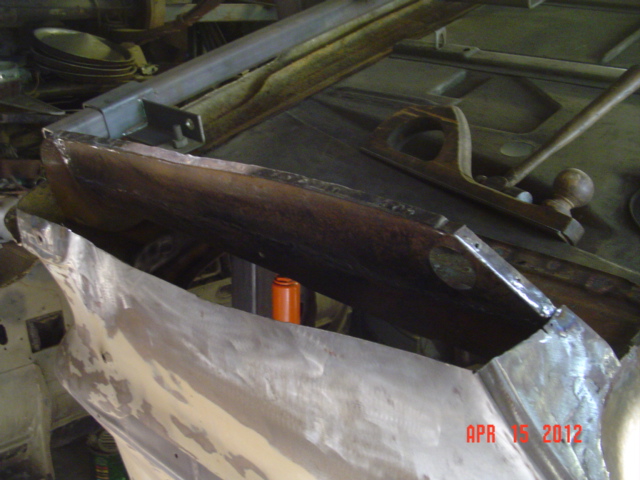 ('59 SF convertible 014.JPG) ('59 SF convertible 014.JPG)
Attachments
----------------
'59 SF convertible 009.JPG (155KB - 269 downloads)
'59 SF convertible 010.JPG (156KB - 295 downloads)
'59 SF convertible 011.JPG (155KB - 273 downloads)
'59 SF convertible 014.JPG (148KB - 265 downloads)
|
|
| |
|
Expert 5K+
Posts: 7808
Location: Williams California | Completed repair, needing only minor finish work-
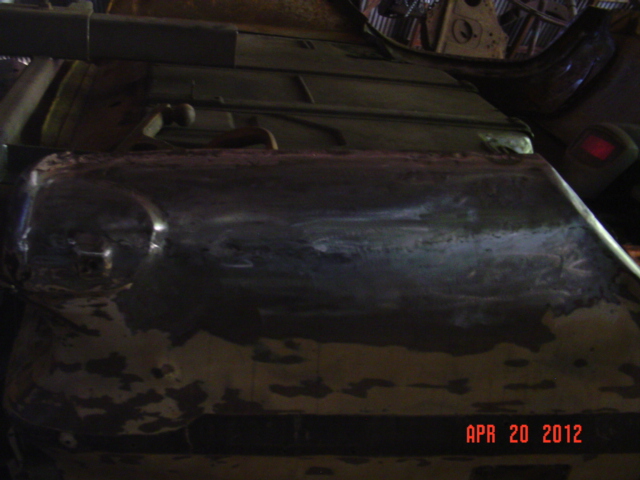 ('59 SF convertible 001.JPG) ('59 SF convertible 001.JPG)
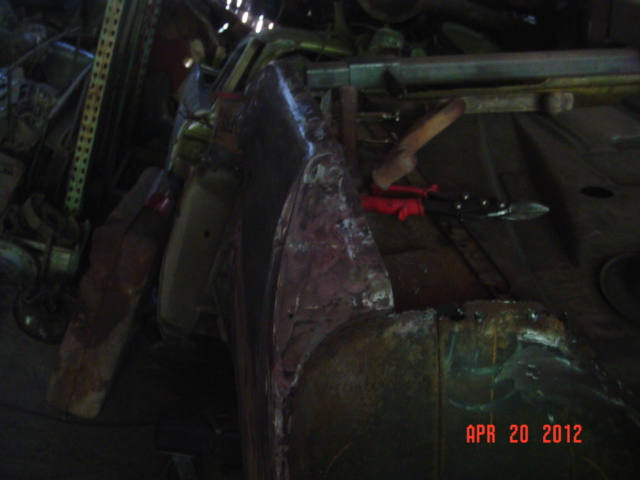 ('59 SF convertible 002.JPG) ('59 SF convertible 002.JPG)
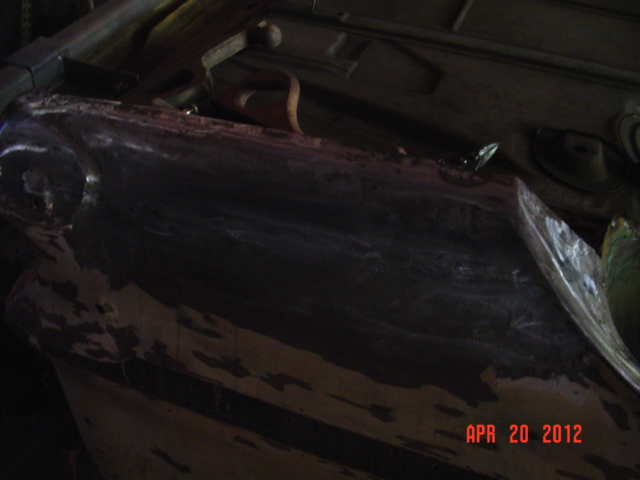 ('59 SF convertible 003.JPG) ('59 SF convertible 003.JPG)
Attachments
----------------
'59 SF convertible 001.JPG (164KB - 262 downloads)
'59 SF convertible 002.JPG (165KB - 266 downloads)
'59 SF convertible 003.JPG (155KB - 259 downloads)
|
|
| |
|
Expert 5K+
Posts: 7808
Location: Williams California | Next was to repair the dogleg areas on both sides. The rust was cut out, and repair pieces fabbed from the leftover piece of the quarter panel section from the donor car-
---John
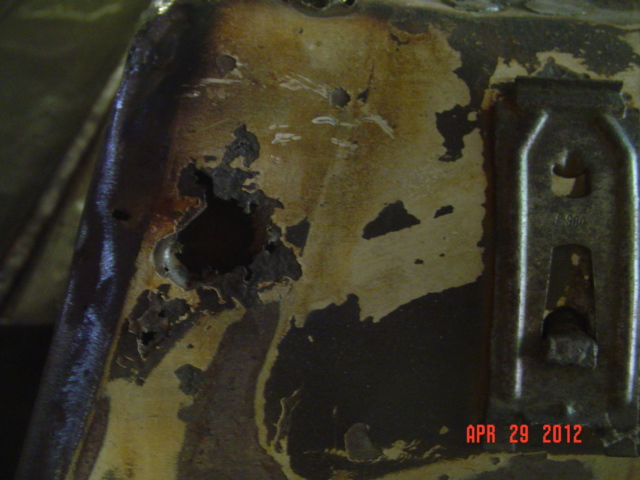 ('59 SF convertible 001.JPG) ('59 SF convertible 001.JPG)
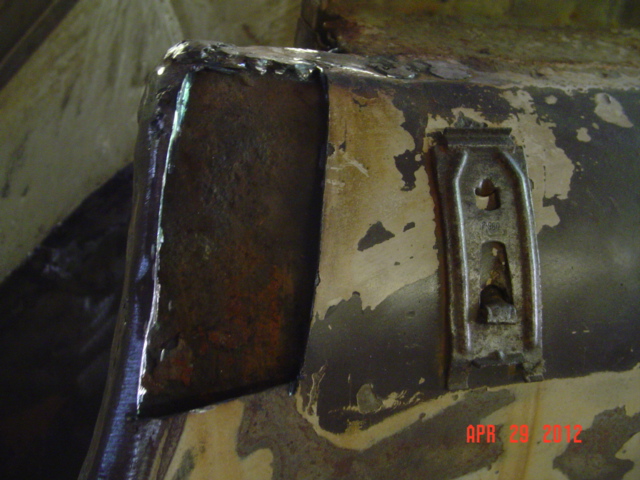 ('59 SF convertible 002.JPG) ('59 SF convertible 002.JPG)
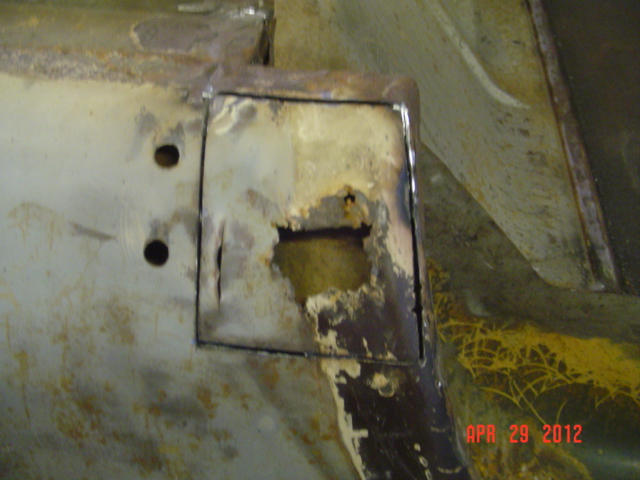 ('59 SF convertible 006.JPG) ('59 SF convertible 006.JPG)
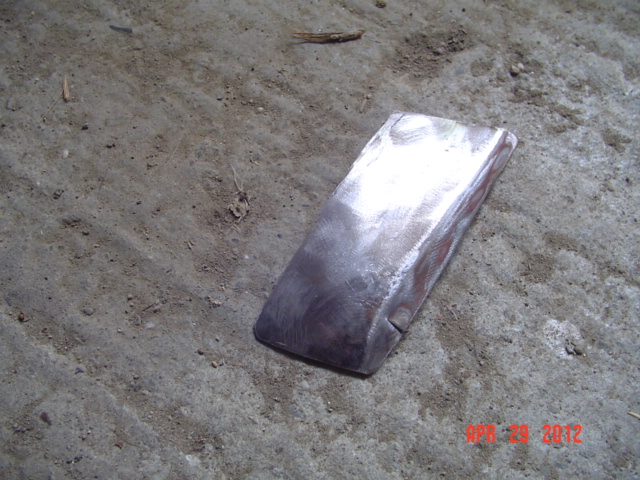 ('59 SF convertible 003.JPG) ('59 SF convertible 003.JPG)
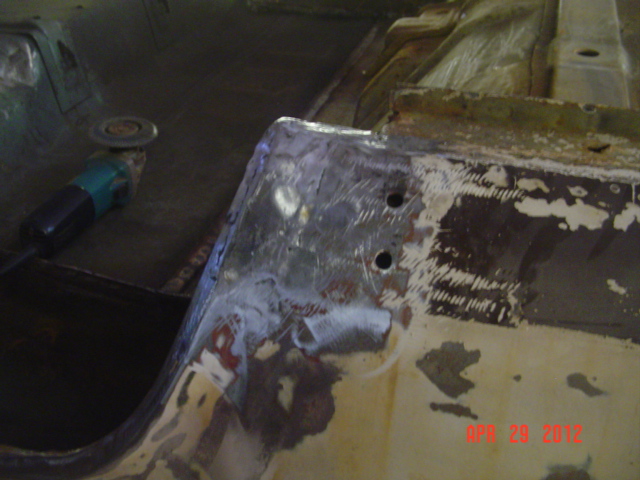 ('59 SF convertible 004.JPG) ('59 SF convertible 004.JPG)
Attachments
----------------
'59 SF convertible 001.JPG (150KB - 292 downloads)
'59 SF convertible 002.JPG (156KB - 273 downloads)
'59 SF convertible 006.JPG (164KB - 245 downloads)
'59 SF convertible 003.JPG (154KB - 272 downloads)
'59 SF convertible 004.JPG (161KB - 274 downloads)
|
|
| |
|
Expert 5K+
Posts: 7808
Location: Williams California | The right side quarter panel had some small holes at the bottom, it would have been easy to fabricate a piece to fit this area, however bondo was discovered above it, and an inch thick in places- After grinding the filler out, I found the metal had been worked and stretched badly, in fact it looked as wavy as a potato chip. Ungood.
I searched the back lot, but every panel that looked decent had either been patched or also had quantities of rust. I found a Savoy that looked like it had a good section, and spent two hours extracting it from the corner of the yard.
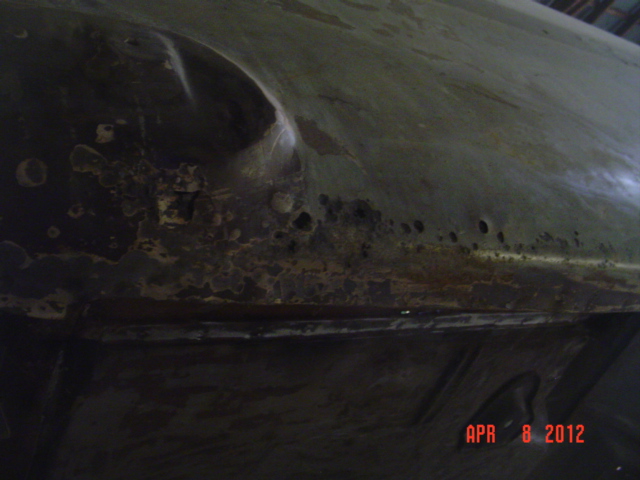 ('59 SF convertible 007.JPG) ('59 SF convertible 007.JPG)
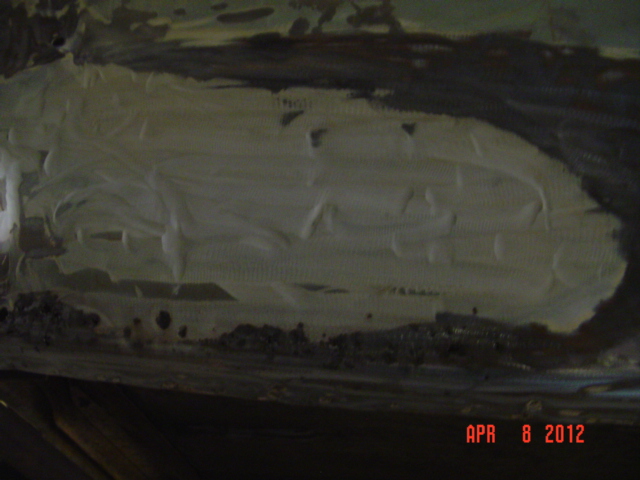 ('59 SF convertible 009.JPG) ('59 SF convertible 009.JPG)
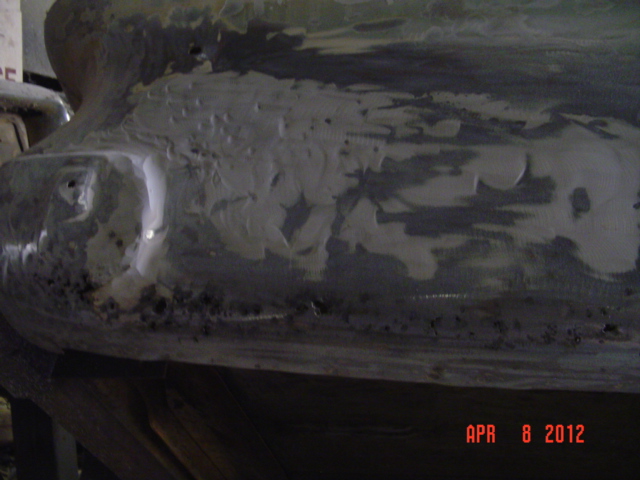 ('59 SF convertible 010.JPG) ('59 SF convertible 010.JPG)
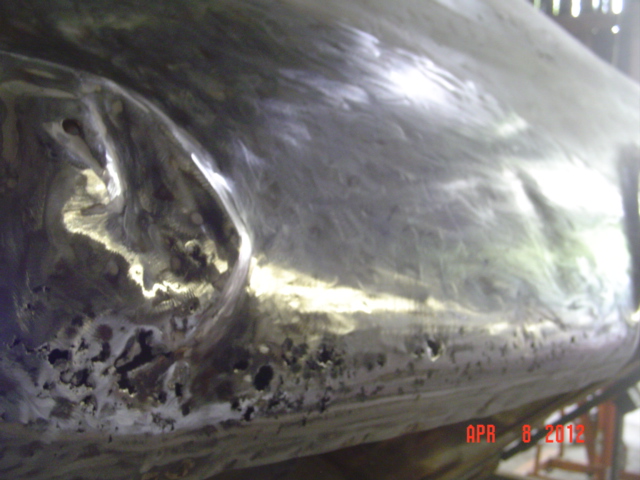 ('59 SF convertible 011.JPG) ('59 SF convertible 011.JPG)
Attachments
----------------
'59 SF convertible 007.JPG (148KB - 262 downloads)
'59 SF convertible 009.JPG (166KB - 335 downloads)
'59 SF convertible 010.JPG (156KB - 266 downloads)
'59 SF convertible 011.JPG (157KB - 272 downloads)
|
|
| |
|
Expert 5K+
Posts: 7808
Location: Williams California | I cut the outer quarter skin off, but it too had had poor work performed to it, and the lower section was straight, but had rust in behind the massive amount of undercoat that had gathered there. Before i cut the piece off, there were no pinholes or paint bubbles, but looking at the back side, the story was different. This was my last option, so I had to go with it.
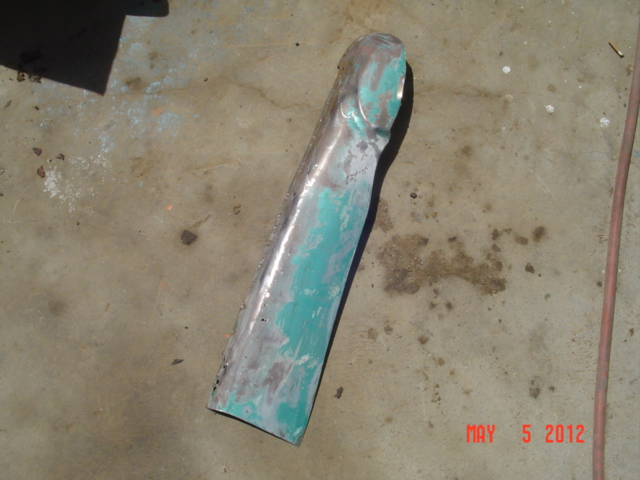 ('59 SF convertible 001.JPG) ('59 SF convertible 001.JPG)
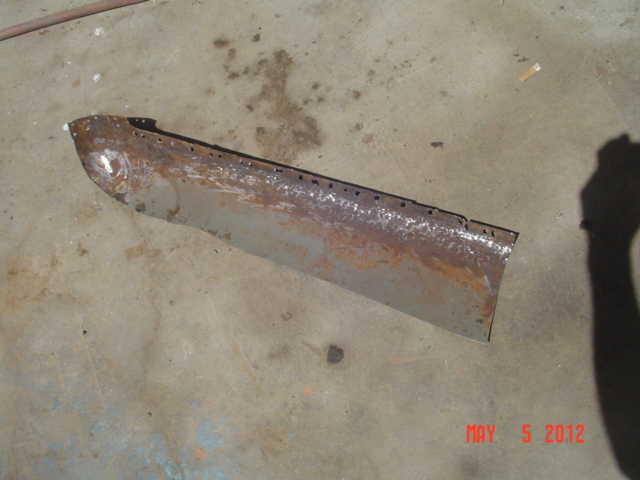 ('59 SF convertible 002.JPG) ('59 SF convertible 002.JPG)
Attachments
----------------
'59 SF convertible 001.JPG (151KB - 261 downloads)
'59 SF convertible 002.JPG (149KB - 266 downloads)
|
|
| |
|
Expert 5K+
Posts: 7808
Location: Williams California | After spending some time welding up all the pinholes and grinding it smooth, the repair piece was now ready. I decided to clean the inner panel and treat it before welding the repair piece in, and then I found numerous pinholes in it. I had to make a piece to duplicate the original, as the donor car had nothing there. I butt welded it in, and smoothed the welds. Next, i worked the stretched outer panel by heating and cooling it, and hitting it with a slapping file when hot. This shrunk the metal back successfully, to continue the repair.
I fitted the outer piece, tacked it, then stitch welded it in. The repair is completed except for some minor finishing work.
---John
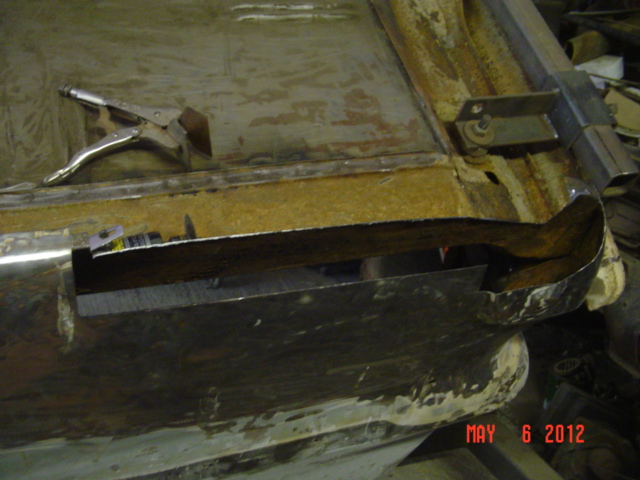 ('59 SF convertible 004.JPG) ('59 SF convertible 004.JPG)
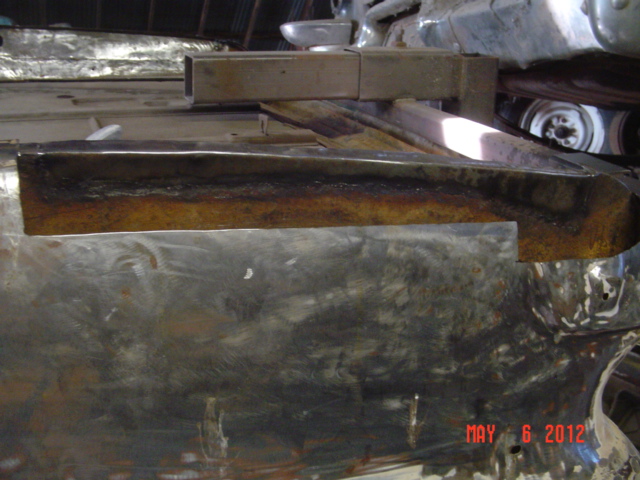 ('59 SF convertible 005.JPG) ('59 SF convertible 005.JPG)
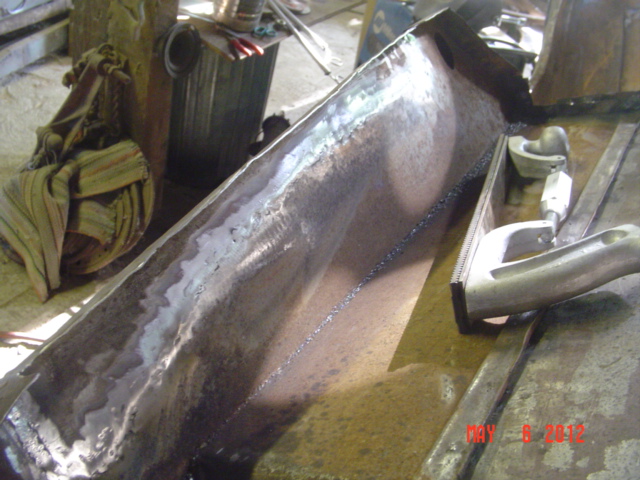 ('59 SF convertible 006.JPG) ('59 SF convertible 006.JPG)
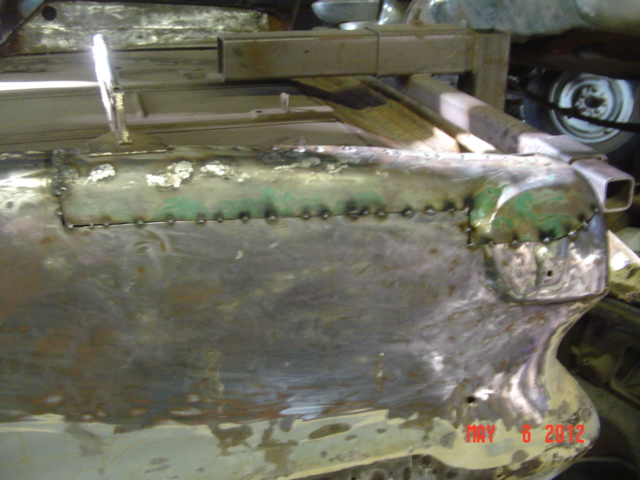 ('59 SF convertible 007.JPG) ('59 SF convertible 007.JPG)
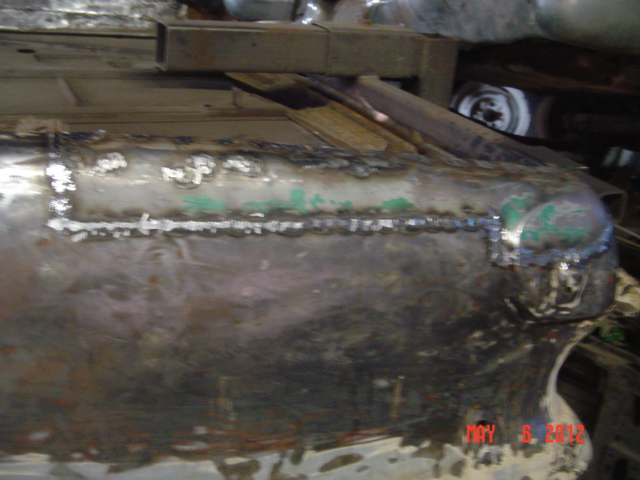 ('59 SF convertible 008.JPG) ('59 SF convertible 008.JPG)
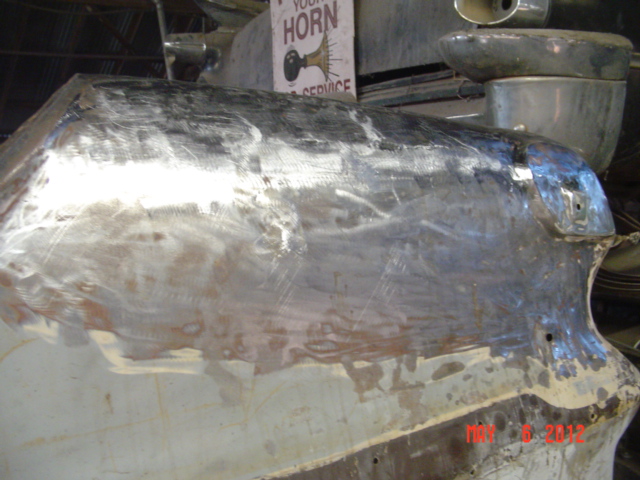 ('59 SF convertible 009.JPG) ('59 SF convertible 009.JPG)
Attachments
----------------
'59 SF convertible 004.JPG (152KB - 266 downloads)
'59 SF convertible 005.JPG (158KB - 256 downloads)
'59 SF convertible 006.JPG (163KB - 249 downloads)
'59 SF convertible 007.JPG (155KB - 273 downloads)
'59 SF convertible 008.JPG (147KB - 266 downloads)
'59 SF convertible 009.JPG (165KB - 265 downloads)
|
|
| |
|
Expert 5K+
Posts: 6203
Location: Big pimpin' | John, I all too well know what it is to do what you are doing right now, and I gotta say VERY well done! I also know what a PITA it is to post that many pics, but glad you did. |
|
| |
|
Elite Veteran
Posts: 957
Location: Signal Mountain, TN | Alright, John...
Truth....
Have you started walking around it making little motor sounds?
Looking nice, as always.
|
|
| |
|
Veteran
Posts: 260
| John, it looks like you're really getting things done now! Thanks for all of the work you do documenting the repairs, I go over it many times to learn how to tackle items like this on my own. |
|
| |
|
Board Moderator & Exner Expert 10K+
Posts: 13054
Location: Southern Sweden - Sturkö island | Go, go, John ny go - http://www.youtube.com/watch?v=Y3haYAbqKjA
Really nice to see the transformation of Rusty - keep us posted |
|
| |
|
Expert 5K+
Posts: 7808
Location: Williams California | dukeboy - 2012-05-15 9:36 PM
John, I all too well know what it is to do what you are doing right now, and I gotta say VERY well done! I also know what a PITA it is to post that many pics, but glad you did.
Thanks, Chaney!!
---John |
|
| |
|
Expert 5K+
Posts: 7808
Location: Williams California | BarnFind57 - 2012-05-16 3:35 AM
Alright, John...
Truth....
Have you started walking around it making little motor sounds?
Looking nice, as always.
LOL Rick!
It finally feels like I am getting somewhere, but there is still a lot to do at this point.
---John |
|
| |
|
Expert 5K+
Posts: 7808
Location: Williams California | Lisa P - 2012-05-16 9:20 AM
John, it looks like you're really getting things done now! Thanks for all of the work you do documenting the repairs, I go over it many times to learn how to tackle items like this on my own.
Heck, Lisa,
If this was your project, it probably would have been completed already!
Your DeSoto restoration was an inspiration to many on this site.
---John |
|
| |
|
Expert 5K+
Posts: 7808
Location: Williams California |
Good choice in music, Wiz!!
---John |
|
| |
|
Expert 5K+
Posts: 7808
Location: Williams California | Now removing the rust residue left from the reverse electrolysis, along with two layers of old paint. It will be easier to spot any high or low spots in the panels now.
---John
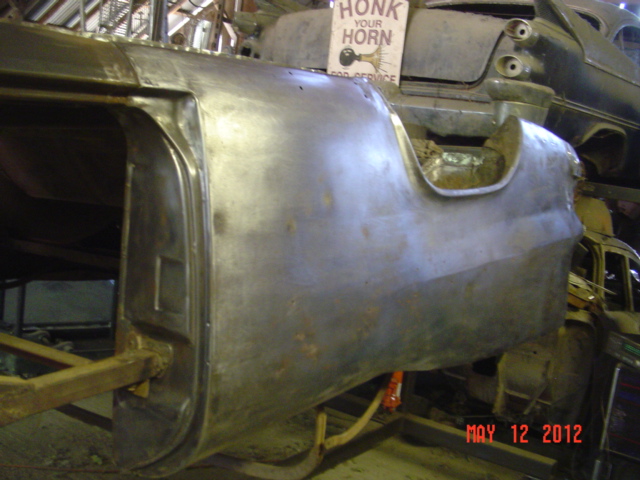 ('59 SF convertible 001.JPG) ('59 SF convertible 001.JPG)
 ('59 SF convertible 002.JPG) ('59 SF convertible 002.JPG)
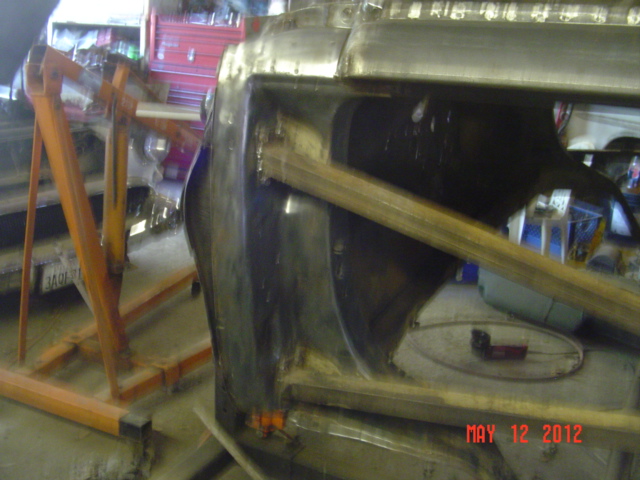 ('59 SF convertible 004.JPG) ('59 SF convertible 004.JPG)
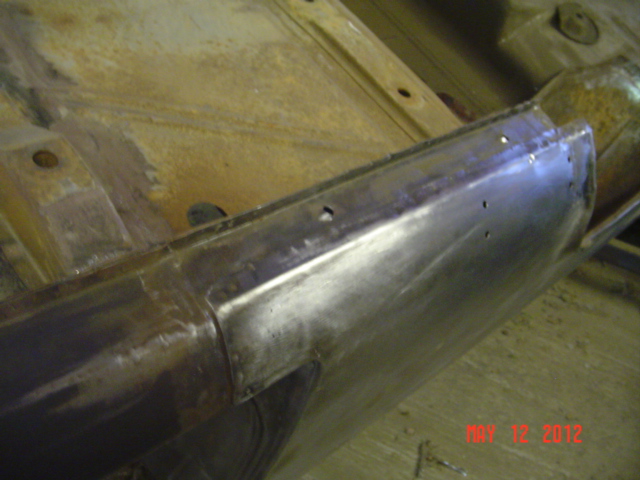 ('59 SF convertible 005.JPG) ('59 SF convertible 005.JPG)
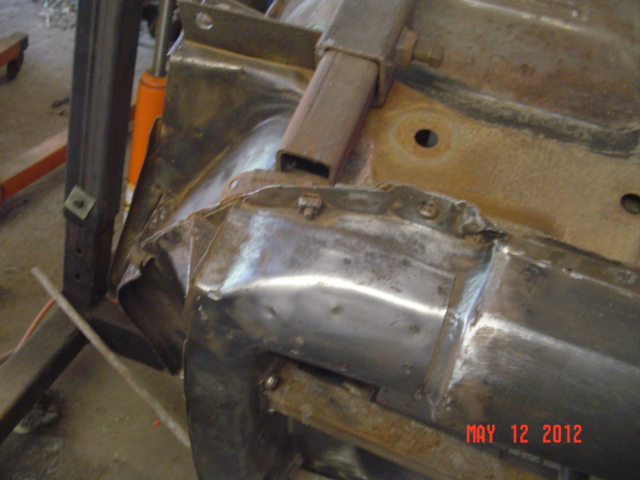 ('59 SF convertible 006.JPG) ('59 SF convertible 006.JPG)
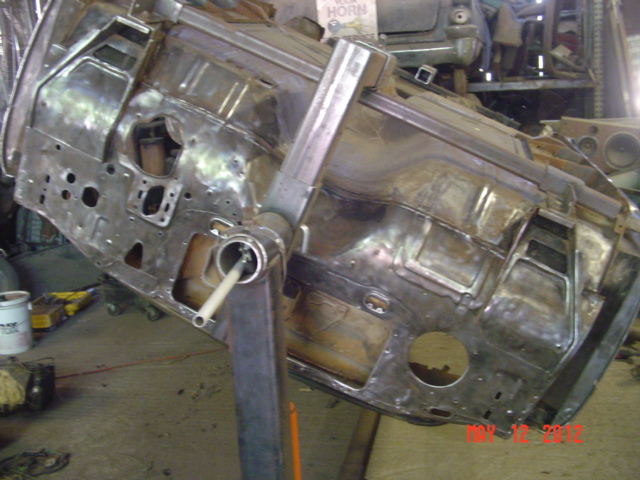 ('59 SF convertible 007.JPG) ('59 SF convertible 007.JPG)
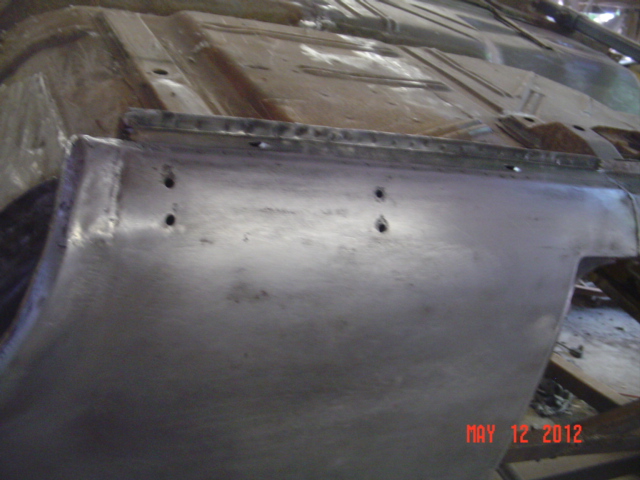 ('59 SF convertible 010.JPG) ('59 SF convertible 010.JPG)
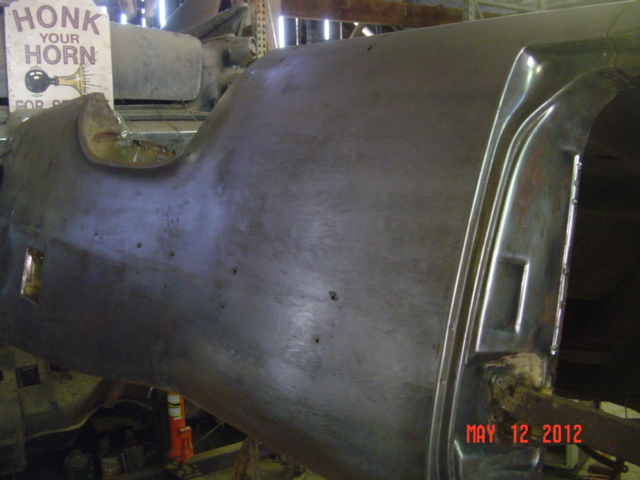 ('59 SF convertible 011.JPG) ('59 SF convertible 011.JPG)
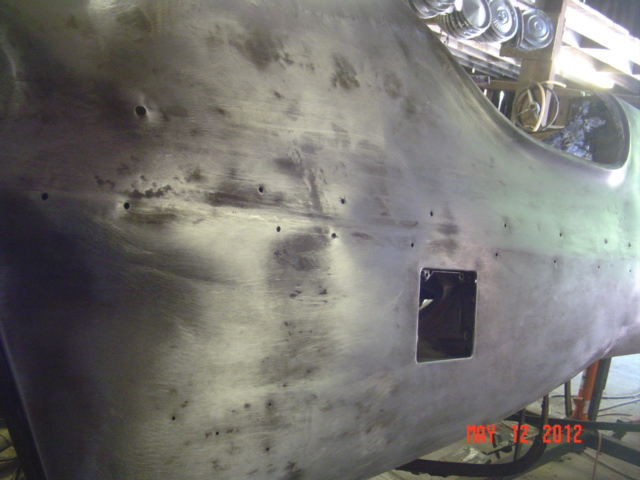 ('59 SF convertible 012.JPG) ('59 SF convertible 012.JPG)
Attachments
----------------
'59 SF convertible 001.JPG (149KB - 256 downloads)
'59 SF convertible 002.JPG (160KB - 260 downloads)
'59 SF convertible 004.JPG (151KB - 274 downloads)
'59 SF convertible 005.JPG (163KB - 260 downloads)
'59 SF convertible 006.JPG (146KB - 257 downloads)
'59 SF convertible 007.JPG (160KB - 261 downloads)
'59 SF convertible 010.JPG (155KB - 261 downloads)
'59 SF convertible 011.JPG (163KB - 260 downloads)
'59 SF convertible 012.JPG (158KB - 274 downloads)
|
|
| |
|
Expert
Posts: 4043
Location: Connecticut | John - Been meaning to ask this:
The inner 'scaffolding' that you're using to keep the body from collapsing into itself: How did you determine the correct dimensions for each of the braces and cross-braces ?
Ron |
|
| |
|
Expert 5K+
Posts: 7808
Location: Williams California | Ron,
I made those braces up in a hardtop body that was in good shape, using steel square tubing. These will fit any 2-door '57-59 Mopar, other than Imperial.
---John |
|
| |
|
Expert 5K+
Posts: 7808
Location: Williams California | Been hard at work massaging out ripples and high spots in the metal, most I removed with shrinking and dollying, but the dogleg area had a low spot that wouldn't budge. This was the piece I made and fitted in, so apparently the contour was off enough to create this slight depression. I broke out the lead and tinning supplies, also filling the seam on the windshield frame as the factory would have done.
---John
 ('59 SF convertible 001.JPG) ('59 SF convertible 001.JPG)
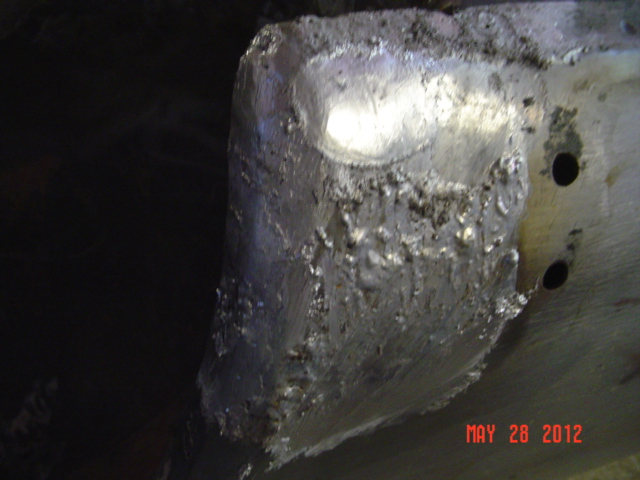 ('59 SF convertible 002.JPG) ('59 SF convertible 002.JPG)
 ('59 SF convertible 003.JPG) ('59 SF convertible 003.JPG)
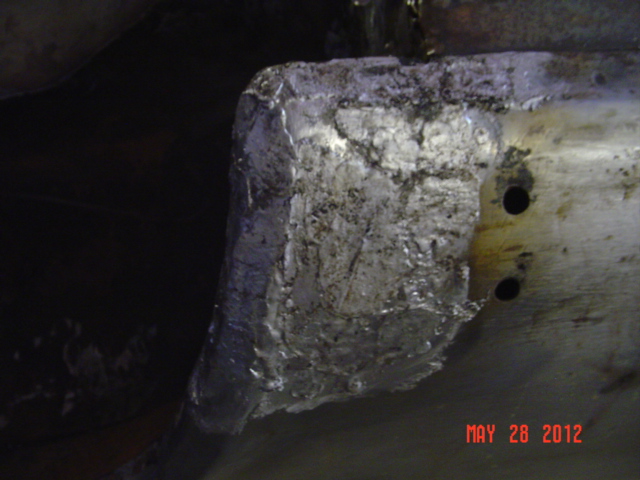 ('59 SF convertible 004.JPG) ('59 SF convertible 004.JPG)
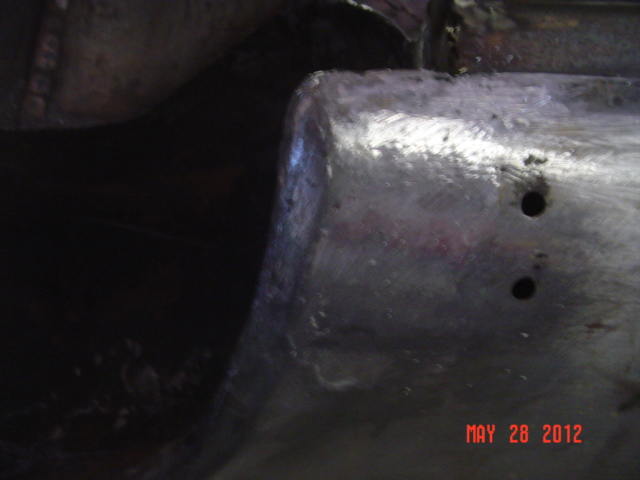 ('59 SF convertible 005.JPG) ('59 SF convertible 005.JPG)
 ('59 SF convertible 006.JPG) ('59 SF convertible 006.JPG)
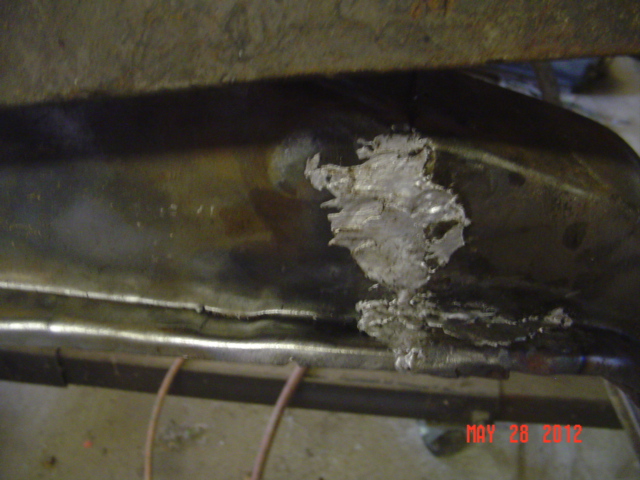 ('59 SF convertible 007.JPG) ('59 SF convertible 007.JPG)
 ('59 SF convertible 008.JPG) ('59 SF convertible 008.JPG)
 ('59 SF convertible 009.JPG) ('59 SF convertible 009.JPG)
 ('59 SF convertible 010.JPG) ('59 SF convertible 010.JPG)
Attachments
----------------
'59 SF convertible 001.JPG (156KB - 328 downloads)
'59 SF convertible 002.JPG (156KB - 345 downloads)
'59 SF convertible 003.JPG (150KB - 327 downloads)
'59 SF convertible 004.JPG (153KB - 336 downloads)
'59 SF convertible 005.JPG (157KB - 339 downloads)
'59 SF convertible 006.JPG (163KB - 342 downloads)
'59 SF convertible 007.JPG (158KB - 353 downloads)
'59 SF convertible 008.JPG (159KB - 343 downloads)
'59 SF convertible 009.JPG (160KB - 343 downloads)
'59 SF convertible 010.JPG (163KB - 349 downloads)
|
|
| |
|
Expert 5K+
Posts: 7808
Location: Williams California | More grinding and cleaning of welds continued on the bottom of the car, just about done with that part now. I probably have about 120 hours in that work alone in this project.
Quarter panels are now quite straight, as the bare metal shows. I still have a lot to do on the top side of the car yet, I will sandblast the body when the metalwork is complete, and then get it in primer to work on the chassis.
---John
 ('59 SF convertible 014.JPG) ('59 SF convertible 014.JPG)
 ('59 SF convertible 015.JPG) ('59 SF convertible 015.JPG)
 ('59 SF convertible 016.JPG) ('59 SF convertible 016.JPG)
 ('59 SF convertible 001.JPG) ('59 SF convertible 001.JPG)
 ('59 SF convertible 003.JPG) ('59 SF convertible 003.JPG)
 ('59 SF convertible 004.JPG) ('59 SF convertible 004.JPG)
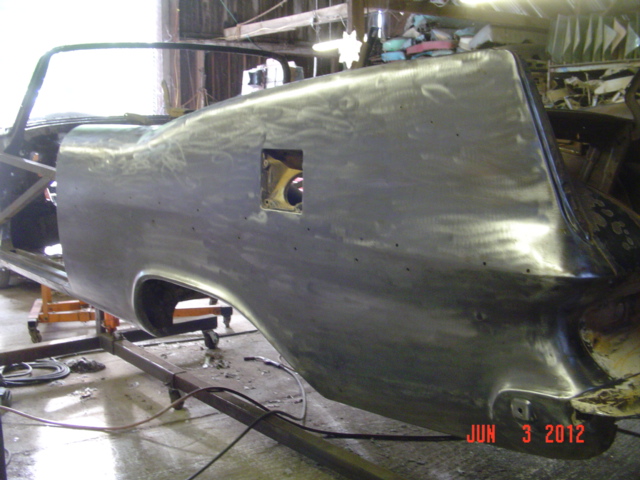 ('59 SF convertible 011.JPG) ('59 SF convertible 011.JPG)
Attachments
----------------
'59 SF convertible 014.JPG (156KB - 338 downloads)
'59 SF convertible 015.JPG (156KB - 338 downloads)
'59 SF convertible 016.JPG (164KB - 341 downloads)
'59 SF convertible 001.JPG (162KB - 333 downloads)
'59 SF convertible 003.JPG (164KB - 322 downloads)
'59 SF convertible 004.JPG (165KB - 349 downloads)
'59 SF convertible 011.JPG (154KB - 352 downloads)
|
|
| |
|
Expert 5K+
Posts: 6203
Location: Big pimpin' | John, you keep messin' round you gonna end up with a car! |
|
| |
|
Board Moderator & Exner Expert 10K+
Posts: 13054
Location: Southern Sweden - Sturkö island | Surely you know this John, but better safe than sorry - be careful if you're gonna sandblast the sheet metal - if the jet gets the sheet metal too hot, the heat will warp it out of shape. It's a painstaking work you're doing and I follow it with great interest!! |
|
| |
|
Expert
Posts: 4043
Location: Connecticut | I love looking at this thread ! Nice work, John. You're obsessed ! 
As a suggestion, it would be nice to see a top-down photo. If you stand on a ladder and shoot down, it'll give us an idea of what you've done and what's left.
Ron |
|
| |
|
Expert 5K+
Posts: 7808
Location: Williams California | wizard - 2012-06-05 10:45 AM
Surely you know this John, but better safe than sorry - be careful if you're gonna sandblast the sheet metal - if the jet gets the sheet metal too hot, the heat will warp it out of shape. It's a painstaking work you're doing and I follow it with great interest!!
Thanks, Sven! Any blasting I do will be for the body supports and floors that have rust residue, should be quite quick, as there hasn't been much that was not replaced.
---John |
|
| |
|
Expert 5K+
Posts: 7808
Location: Williams California | ronbo97 - 2012-06-05 1:26 PM
I love looking at this thread ! Nice work, John. You're obsessed ! As a suggestion, it would be nice to see a top-down photo. If you stand on a ladder and shoot down, it'll give us an idea of what you've done and what's left. Ron
Thanks, Ron!
I'll do that, I have a loft up above the car where I can take a photo from. I still have some work on the top well to do, also the trunk weatherstrip gutters.
---John |
|
| |
|
Expert
Posts: 4043
Location: Connecticut | big m - 2012-06-05 5:09 PM I still have some work on the top well to do, also the trunk weatherstrip gutters. ---John
The trunk lid weatherstrip channel should be a no-brainer since it's the same on all 59 Plymouths. And as a bonus, it's just spot-welded onto the body. I wouldn't even try to repair what's currently in place, since you probably have many donor cars.
Ron |
|
| |
|
Extreme Veteran
Posts: 468
| That's an awesome car lot of work on it so far! |
|
| |
|
Expert
Posts: 3951
Location: Bama | ronbo97 - 2012-06-05 5:23 PM big m - 2012-06-05 5:09 PM I still have some work on the top well to do, also the trunk weatherstrip gutters. ---John The trunk lid weatherstrip channel should be a no-brainer since it's the same on all 59 Plymouths. And as a bonus, it's just spot-welded onto the body. I wouldn't even try to repair what's currently in place, since you probably have many donor cars. Ron I'll bet Big M pondered that same notion. s**t dingle dangle
Edited by lawrence 2012-06-05 10:57 PM
|
|
| |
|
Extreme Veteran
Posts: 530
Location: Wake Forest, NC | A great thread and great work John. |
|
| |
|
Expert 5K+
Posts: 7808
Location: Williams California | Fins/413 - 2012-06-06 4:24 AM
A great thread and great work John.
Thanks, Eric!
---John |
|
| |
|
Expert 5K+
Posts: 7808
Location: Williams California | Next will be to either repair, or fabricate a new convertible pump mount, as this one looks like swiss cheese. I derusted it with reverse electrolysis, so at least there will be no surprises.
---John
 ('59 SF convertible 001.JPG) ('59 SF convertible 001.JPG)
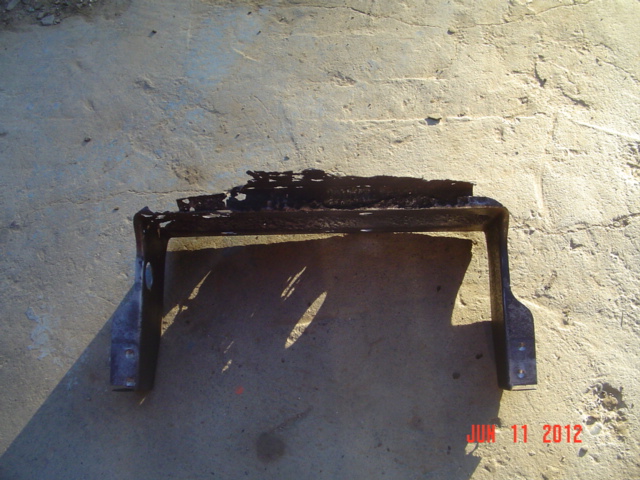 ('59 SF convertible 002.JPG) ('59 SF convertible 002.JPG)
 ('59 SF convertible 003.JPG) ('59 SF convertible 003.JPG)
Attachments
----------------
'59 SF convertible 001.JPG (162KB - 336 downloads)
'59 SF convertible 002.JPG (157KB - 345 downloads)
'59 SF convertible 003.JPG (156KB - 318 downloads)
|
|
| |
|

Expert
Posts: 3577
Location: Blythewood, SC | Not much to work with on the end there. |
|
| |
|
Expert 5K+
Posts: 7808
Location: Williams California | A little bit of good ol' American ingenuity-
I saved the upright sides, as they were not rusted badly, found a store shelf in the scrap pile that was the same gauge steel, and made the lower platform. I welded the uprights on my new piece, and cut a rectangular hole in the center.
Agsain, I raided the scrap pile and found part of a junk steering column that was just about the curvature I needed. I cut a section out, and formed the curved ends to duplicate the original, and welded it into place. A bit of metal finishing, and its hard to tell all this was done.
---John
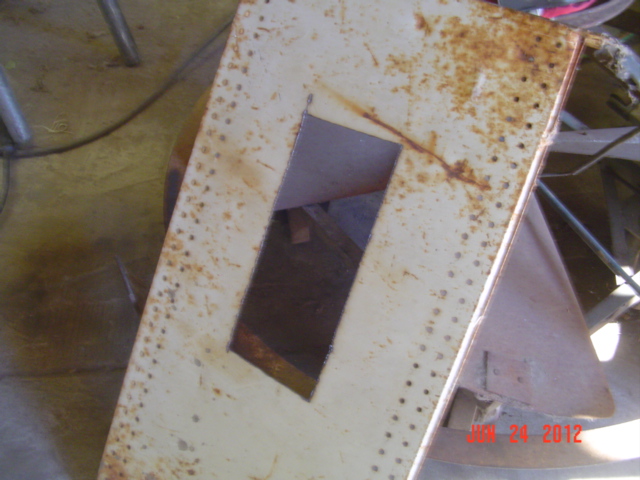 (020.JPG) (020.JPG)
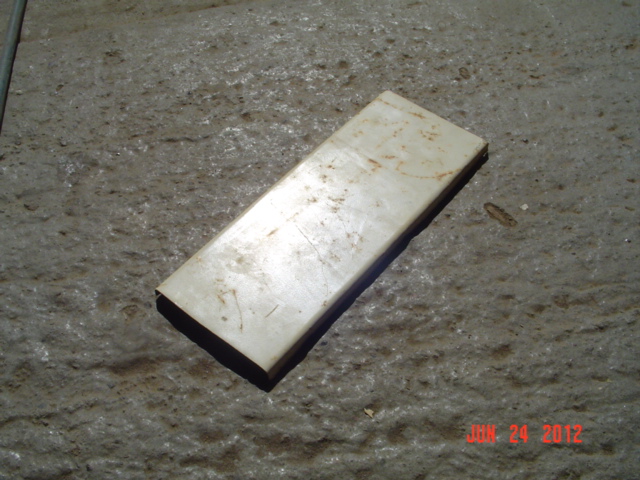 (021.JPG) (021.JPG)
 ('59 SF convertible 016.JPG) ('59 SF convertible 016.JPG)
 ('59 SF convertible 017.JPG) ('59 SF convertible 017.JPG)
 ('59 SF convertible 018.JPG) ('59 SF convertible 018.JPG)
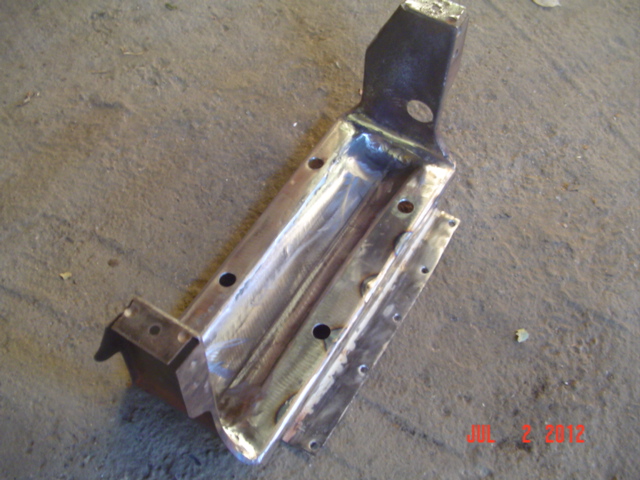 ('59 SF convertible 019.JPG) ('59 SF convertible 019.JPG)
Attachments
----------------
020.JPG (153KB - 317 downloads)
021.JPG (159KB - 331 downloads)
'59 SF convertible 016.JPG (149KB - 335 downloads)
'59 SF convertible 017.JPG (146KB - 319 downloads)
'59 SF convertible 018.JPG (159KB - 322 downloads)
'59 SF convertible 019.JPG (157KB - 335 downloads)
|
|
| |
|
Veteran
Posts: 143
Location: Malmberget, Sweden | It's always a pleasure to see craftsman at work,
|
|
| |
|
Expert
Posts: 2637
Location: Minor Hill, TN | How more you need to do before you are done? |
|
| |
|
Expert 5K+
Posts: 7808
Location: Williams California | I took a break from cleaning out the barn to do a bit more on the body. Up to the convertible top well I had a bit of finish work to do, mainly making up the end caps that go over the top main pivot. I saved the old pieces for templates, and used some mild steel to make a new one for the one side. The piece was then butt welded in, and the factory seam was then finished with solder.
 ('59 SF convertible 001.JPG) ('59 SF convertible 001.JPG)
 ('59 SF convertible 002.JPG) ('59 SF convertible 002.JPG)
 ('59 SF convertible 003.JPG) ('59 SF convertible 003.JPG)
 ('59 SF convertible 004.JPG) ('59 SF convertible 004.JPG)
 ('59 SF convertible 005.JPG) ('59 SF convertible 005.JPG)
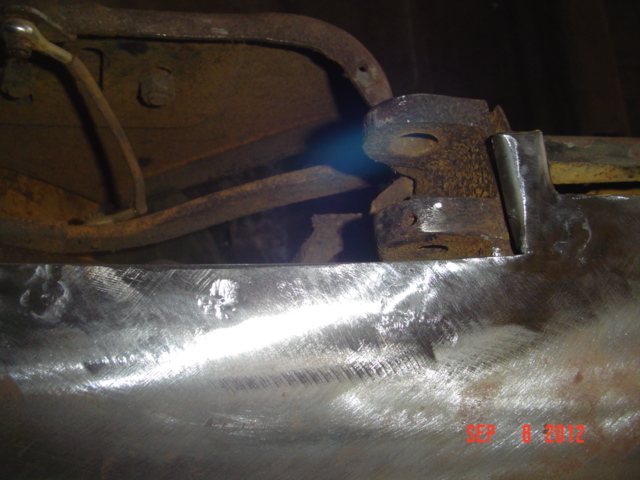 ('59 SF convertible 036.JPG) ('59 SF convertible 036.JPG)
 ('59 SF convertible 037.JPG) ('59 SF convertible 037.JPG)
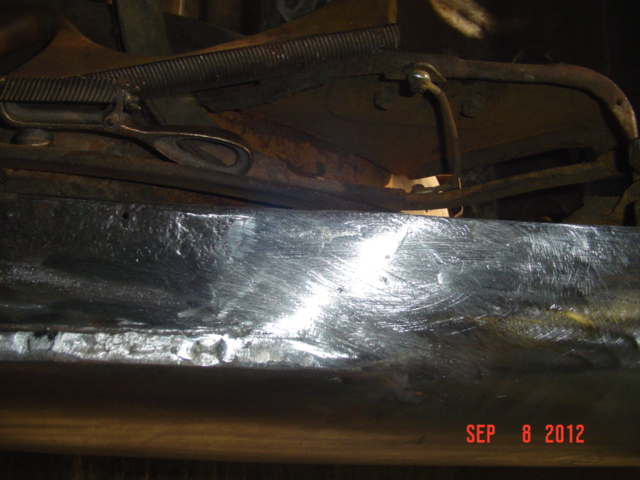 ('59 SF convertible 039.JPG) ('59 SF convertible 039.JPG)
Attachments
----------------
'59 SF convertible 001.JPG (151KB - 322 downloads)
'59 SF convertible 002.JPG (157KB - 320 downloads)
'59 SF convertible 003.JPG (154KB - 295 downloads)
'59 SF convertible 004.JPG (162KB - 325 downloads)
'59 SF convertible 005.JPG (159KB - 334 downloads)
'59 SF convertible 036.JPG (159KB - 318 downloads)
'59 SF convertible 037.JPG (156KB - 319 downloads)
'59 SF convertible 039.JPG (154KB - 320 downloads)
|
|
| |
|
Expert 5K+
Posts: 7808
Location: Williams California | On to the other side- There was a bit more hammer and dolly work required on this side, but I was able to use the original end cap as the rust was minor. I cleaned up the edges, and fitted the small piece, and welded it in. Then the seam was leaded in, rough filed, and checked. Next was to smooth the area out.
 ('59 SF convertible 040.JPG) ('59 SF convertible 040.JPG)
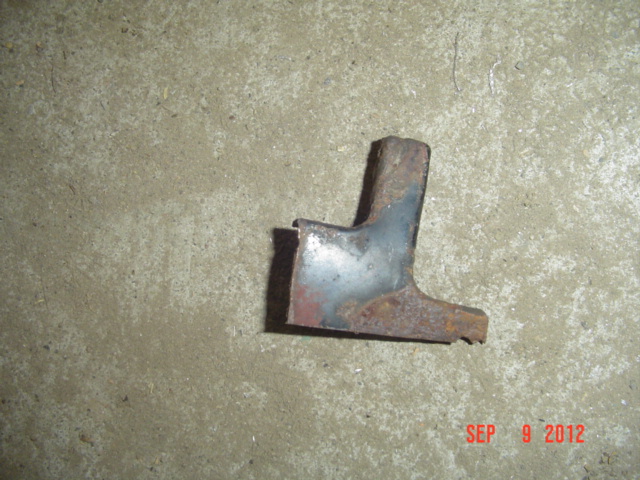 ('59 SF convertible 041.JPG) ('59 SF convertible 041.JPG)
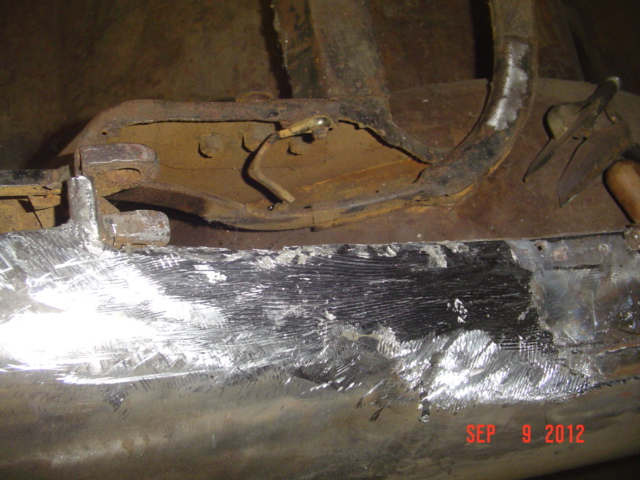 ('59 SF convertible 042.JPG) ('59 SF convertible 042.JPG)
 ('59 SF convertible 043.JPG) ('59 SF convertible 043.JPG)
 ('59 SF convertible 044.JPG) ('59 SF convertible 044.JPG)
Attachments
----------------
'59 SF convertible 040.JPG (157KB - 323 downloads)
'59 SF convertible 041.JPG (145KB - 333 downloads)
'59 SF convertible 042.JPG (161KB - 318 downloads)
'59 SF convertible 043.JPG (144KB - 299 downloads)
'59 SF convertible 044.JPG (157KB - 312 downloads)
|
|
| |
|
Regular
Posts: 69
Location: Northern Ireland | I like you're style make do and mend works for me, does the electrolysis get all the rust of and what do you use to kill the flash rust? I have started to use the molasses 9-1 water solution seems to be working well but am concerned about the flash rust hoping for some advice from somebody who has actually had to deal with it to cold in my shed for epoxy.
Thanks for the inspiration. |
|
| |
|
Elite Veteran
Posts: 957
Location: Signal Mountain, TN | Alright, John.. the truth...
You're already driving this car, right????
You're just releasing the pics as a teaser, I assume???
Looks killer, man. Nice work, as always. |
|
| |
|
Expert 5K+
Posts: 7808
Location: Williams California | slow2learn - 2012-09-26 10:50 AM
I like you're style make do and mend works for me, does the electrolysis get all the rust of and what do you use to kill the flash rust? I have started to use the molasses 9-1 water solution seems to be working well but am concerned about the flash rust hoping for some advice from somebody who has actually had to deal with it to cold in my shed for epoxy.
Thanks for the inspiration.
I have that problem, this being an open barn and not climate controlled. I simply spray a light oil such as WD-40 or similar penetrant on the surface to keep the oxygen away. I will be doing a light blasting to the body and spray with epoxy primer before I seal the body up and start on the chassis.
The reverse electrolysis does leave a rusty residue, but it's easily removed with a wire brush or scotch-brite pad.
---John |
|
| |
|
Expert 5K+
Posts: 7808
Location: Williams California | BarnFind57 - 2012-09-26 12:26 PM
Alright, John.. the truth...
You're already driving this car, right????
You're just releasing the pics as a teaser, I assume???
Looks killer, man. Nice work, as always. :cool:
I wish I could say I was getting close, Rick, but time to work on it seems to be getting scarcer and scarcer. I hauled in probably fifty cars in the last two months, with no signs of slowing down. Seems a lot of folks that have been hoarding cars, are now getting rid of their collections.
---John |
|
| |
|

Veteran
Posts: 241
Location: Southern CA | Hey John, you have some serious metal working talents! And you need them all for a project of that magnitude. I'm learning a lot reading this thread. Thanks for taking the time to share your restoration story...Steve |
|
| |
|
Expert 5K+
Posts: 7808
Location: Williams California | Leadfoot1000 - 2012-09-26 9:20 PM
Hey John, you have some serious metal working talents! And you need them all for a project of that magnitude. I'm learning a lot reading this thread. Thanks for taking the time to share your restoration story...Steve
Thanks, Steve, I'm glad you enjoyed reading it.
---John |
|
| |
|
Veteran
Posts: 188
| I am amazed from the efforts, time and energy some people like you are doing to save a nice old car.
Of course these nice car deserves all the efforts. And then you deserve to drive and enjoy them.
Regards |
|
| |
|
Expert 5K+
Posts: 7808
Location: Williams California | I decided rather than to replace sections of the trunk weatherstrip gutter, that I would repair what I had, as there was just the seams, and a small area where the rust had 'dog-eared' the edge. I used brass rod in order to do this. I also used an 80 grit disc toremove high spots from previous welds.
 ('59 SF convertible 024.JPG) ('59 SF convertible 024.JPG)
 ('59 SF convertible 025.JPG) ('59 SF convertible 025.JPG)
 ('59 SF convertible 027.JPG) ('59 SF convertible 027.JPG)
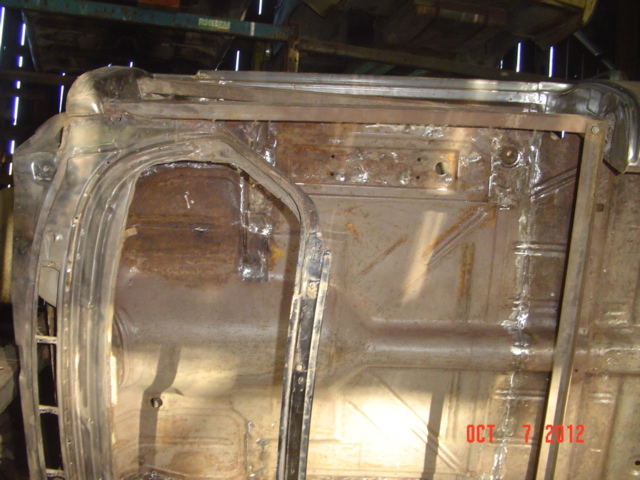 ('59 SF convertible 032.JPG) ('59 SF convertible 032.JPG)
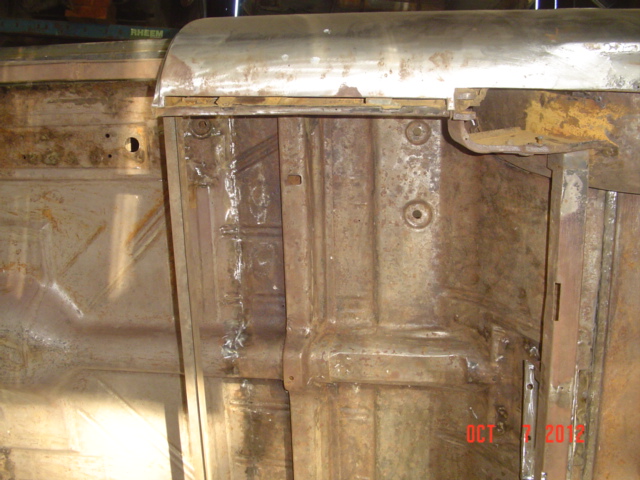 ('59 SF convertible 031.JPG) ('59 SF convertible 031.JPG)
 ('59 SF convertible 033.JPG) ('59 SF convertible 033.JPG)
Attachments
----------------
'59 SF convertible 024.JPG (153KB - 328 downloads)
'59 SF convertible 025.JPG (155KB - 316 downloads)
'59 SF convertible 027.JPG (151KB - 324 downloads)
'59 SF convertible 032.JPG (160KB - 329 downloads)
'59 SF convertible 031.JPG (159KB - 303 downloads)
'59 SF convertible 033.JPG (149KB - 322 downloads)
|
|
| |
|

Veteran
Posts: 234
Location: Chambersburg,PA | WOW! what an inspiring story,such awesome work,the compliment "great job" just dosen't seem good enough :O) Can't wait to see more. |
|
| |
|
Elite Veteran
Posts: 1102
Location: Hayward, Calif | GREAT WORK, John !! I see progress since the last time I was there. One of these days you will be riding in style !! Jerry |
|
| |
|
Expert 5K+
Posts: 5139
Location: cornpatch county, Southwest IOA | John, Don't you think if you did a restoration on Miss Belvy, it would be easier? I know you will get this car done someday, and when you do, you can honestly say you hand-built it 8-) ........................MO |
|
| |
|
Expert 5K+
Posts: 7808
Location: Williams California | Desotorandy - 2012-10-18 5:35 PM
WOW! what an inspiring story,such awesome work,the compliment "great job" just dosen't seem good enough :O) Can't wait to see more.
Thanks for the compliment, Randy! |
|
| |
|
Expert 5K+
Posts: 7808
Location: Williams California | 59 in Calif - 2012-10-18 7:07 PM
GREAT WORK, John !! I see progress since the last time I was there. One of these days you will be riding in style !! Jerry
Thanks, Jerry! Have you made any progress on the Dodge recently? |
|
| |
|
Expert 5K+
Posts: 7808
Location: Williams California | MOPAR-TO-YA - 2012-10-18 10:00 PM
John, Don't you think if you did a restoration on Miss Belvy, it would be easier? I know you will get this car done someday, and when you do, you can honestly say you hand-built it 8- ) ........................MO
Thanks, Steve, and you do realize, we'll be taking our usual cross-country trip once it's roadworthy, and coming to visit ya again.
---John |
|
| |
|
Expert 5K+
Posts: 7808
Location: Williams California | I found numerous rust holes in the drain channel for the convertible top well. I considered cutting this section from one of the '63 Chrysller 300 converts in the yard, but after making measurements, they were far too different. I decided to cut the decay out, and make the piece myself. I definitely did not want water draining into the interior afterwards!
I measured the arc of the piece I woulld need too fit in as the base of the gutter, and cut one out with a plasma cutter from a sheet of scrap steel. This would then be fitted to the car.
 ('59SF convertible 001.JPG) ('59SF convertible 001.JPG)
 ('59SF convertible 002.JPG) ('59SF convertible 002.JPG)
 ('59SF convertible 004.JPG) ('59SF convertible 004.JPG)
 ('59SF convertible 005.JPG) ('59SF convertible 005.JPG)
 ('59SF convertible 006.JPG) ('59SF convertible 006.JPG)
Attachments
----------------
'59SF convertible 001.JPG (147KB - 324 downloads)
'59SF convertible 002.JPG (154KB - 309 downloads)
'59SF convertible 004.JPG (153KB - 317 downloads)
'59SF convertible 005.JPG (153KB - 312 downloads)
'59SF convertible 006.JPG (160KB - 311 downloads)
|
|
| |
|
Expert 5K+
Posts: 7808
Location: Williams California | I made up a mating piece for the side of the drain channel, and welded them together. After dooing this, my repair piece was ready for fitting. I cleaned up the edges, and took a burr to a rust hole to get rid oof any weakened metal, and by then the hole was the size of a fifty cent piece. I made a piece to weld into it, butt welded, and ground it smooth.
Next, I placed the curved channel I had made intoo the body, and tacked it in place. Looked too be a good fit, so i welded it completely, and finished it off.
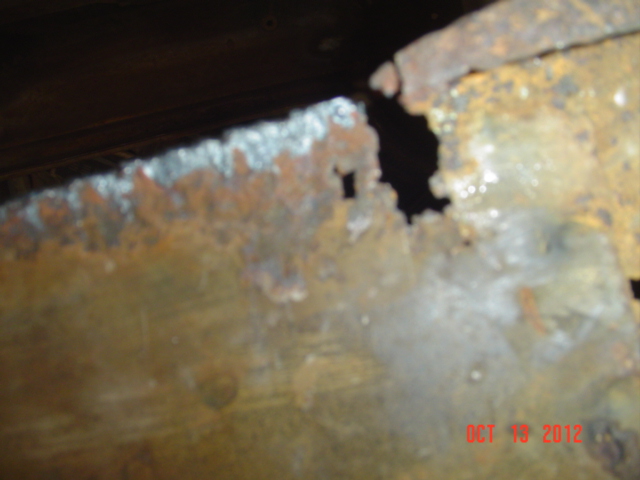 ('59SF convertible 007.JPG) ('59SF convertible 007.JPG)
 ('59SF convertible 008.JPG) ('59SF convertible 008.JPG)
 ('59SF convertible 009.JPG) ('59SF convertible 009.JPG)
 ('59SF convertible 011.JPG) ('59SF convertible 011.JPG)
 ('59SF convertible 013.JPG) ('59SF convertible 013.JPG)
Attachments
----------------
'59SF convertible 007.JPG (148KB - 308 downloads)
'59SF convertible 008.JPG (150KB - 312 downloads)
'59SF convertible 009.JPG (153KB - 305 downloads)
'59SF convertible 011.JPG (167KB - 467 downloads)
'59SF convertible 013.JPG (161KB - 314 downloads)
|
|
| |
|
Expert 5K+
Posts: 7808
Location: Williams California | I wanted to put the swages into the replacement rocker panel drain holes, so afrter measuring and drilling, I made a tool basically consisting of a slide hammer and nut and bolt, and was able to knock a slight swage into the 12 gauge steel. The purpose of this was to not draw dirt up into the rockers when driving on dirt roads and such.
---John
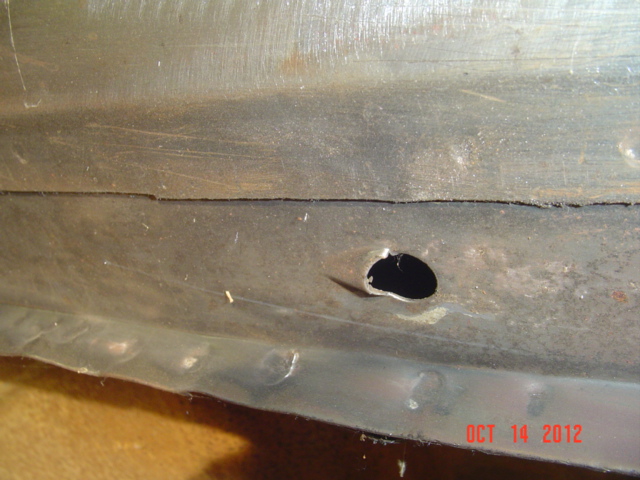 ('59SF convertible 015.JPG) ('59SF convertible 015.JPG)
 ('59SF convertible 016.JPG) ('59SF convertible 016.JPG)
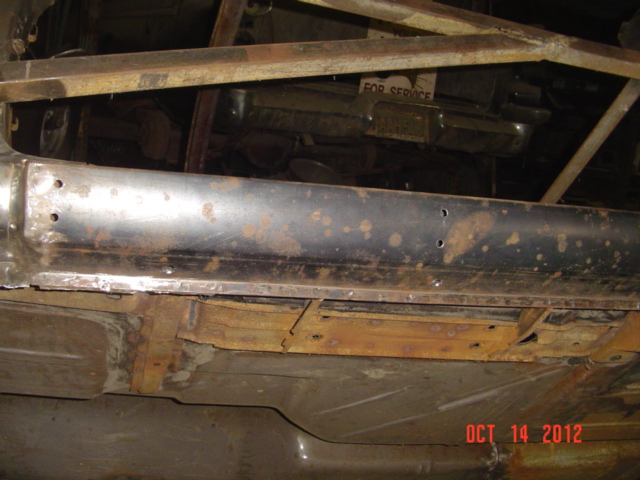 ('59SF convertible 017.JPG) ('59SF convertible 017.JPG)
Attachments
----------------
'59SF convertible 015.JPG (149KB - 311 downloads)
'59SF convertible 016.JPG (159KB - 319 downloads)
'59SF convertible 017.JPG (152KB - 308 downloads)
|
|
| |
|
Exner Expert 19,174 posts. Neil passed away 18 Sep 2015. You will be missed, Neil!
Posts: 19146
Location: bishop, ca | Amazing work, as always!
To what do you ascribe all of the rust out that Rusty endured?
Merely driving in a wet salty environment, or being stored in a wet area, continually?
In other words, is there any particular pattern to the damage which would tell a story about how 'he' got to be so deteriorated?
Any unusual areas of rust out; like, on that drain channel, that you don't usually see in a hulk???
|
|
| |
|
Expert 5K+
Posts: 7808
Location: Williams California | Thanks, Neil,
This car was left in an abandoned wrecking yard in Upstate New York since about 1965. The trees grew up around the yard, and obscured its contents from view. The wet environment hastened the rust out, as the car slowly sank into the soil. It was sold new in Ithaca, according to Chrysler historical, so it had 'lived' nearby since I got it. All the rust could be attributed to these facts.
A good friend of mine discovered this yard, and bought a '49 and '51 Mercury convertible, as well as seven or eight ford woody wagons for his needs, and he shipped this Plymouth out to me to cover a storage bill he owed me. Sadly, he passed away from cancer complications before he could see progress on this car, so I guess you could say I'm doing the work in his honor.
---John |
|
| |
|
Expert
Posts: 2637
Location: Minor Hill, TN | My Fathere told me that Chryler product vehicles back then had rust problems. Good luck with the restoration . How much more you need to do? I hope some year you bring it to the Cars on the Square in Athens, AL . I know they would love to have you come
|
|
| |
|
Expert 5K+
Posts: 7808
Location: Williams California | 1961plymouthfury - 2012-12-29 8:58 PM
My Fathere told me that Chryler product vehicles back then had rust problems. Good luck with the restoration . How much more you need to do? I hope some year you bring it to the Cars on the Square in Athens, AL . I know they would love to have you come
Thanks.
I have plenty more to do, although the body itself is almost ready for primer.
I have been shrinking some high spots on the body, and re-leading some of the body seams, as well as making the convertible specific mounts. My camera broke, and M'lisa bought me a new one for Christmas, so hopefully I can get the photos small enough to post.
---John |
|
| |
|
Expert
Posts: 2637
Location: Minor Hill, TN | I told my father about your car and were it sold. He told me the car sold brand new at a Erie J Miller Plymouth Chrysler Plymouth at Elmira Rd in Ithaca , NY. The dealership is no longer in business . I heard they got bought out by another dealership in Trumansbug |
|
| |
|
Veteran
Posts: 116
| JOHN THIS IS ONE OF THE BEST THREADS I HAVE EVER SEEN , YOU HAVE QUITE THE TALLENT IN RESURRECTION !!! |
|
| |
|
Expert 5K+
Posts: 7808
Location: Williams California | I jacked up our '59 Desoto convertible to get a look at the special convertible body mounts, and made several measurements.
As the floors were from a closed car, the outriggers from the seat brace would need to be removed, as convertibles do not use them. After removing them, the surface for the new mount was cleaned.
I fabricated a new mount from the same gauge steel, using the measurements from the Desoto. Next, a 3/8" hole was drilled in the proper spot, and a nut was tack welded to the reverse side.
---John
 ('59 SF convertible 003.JPG) ('59 SF convertible 003.JPG)
 ('59 SF convertible 001.JPG) ('59 SF convertible 001.JPG)
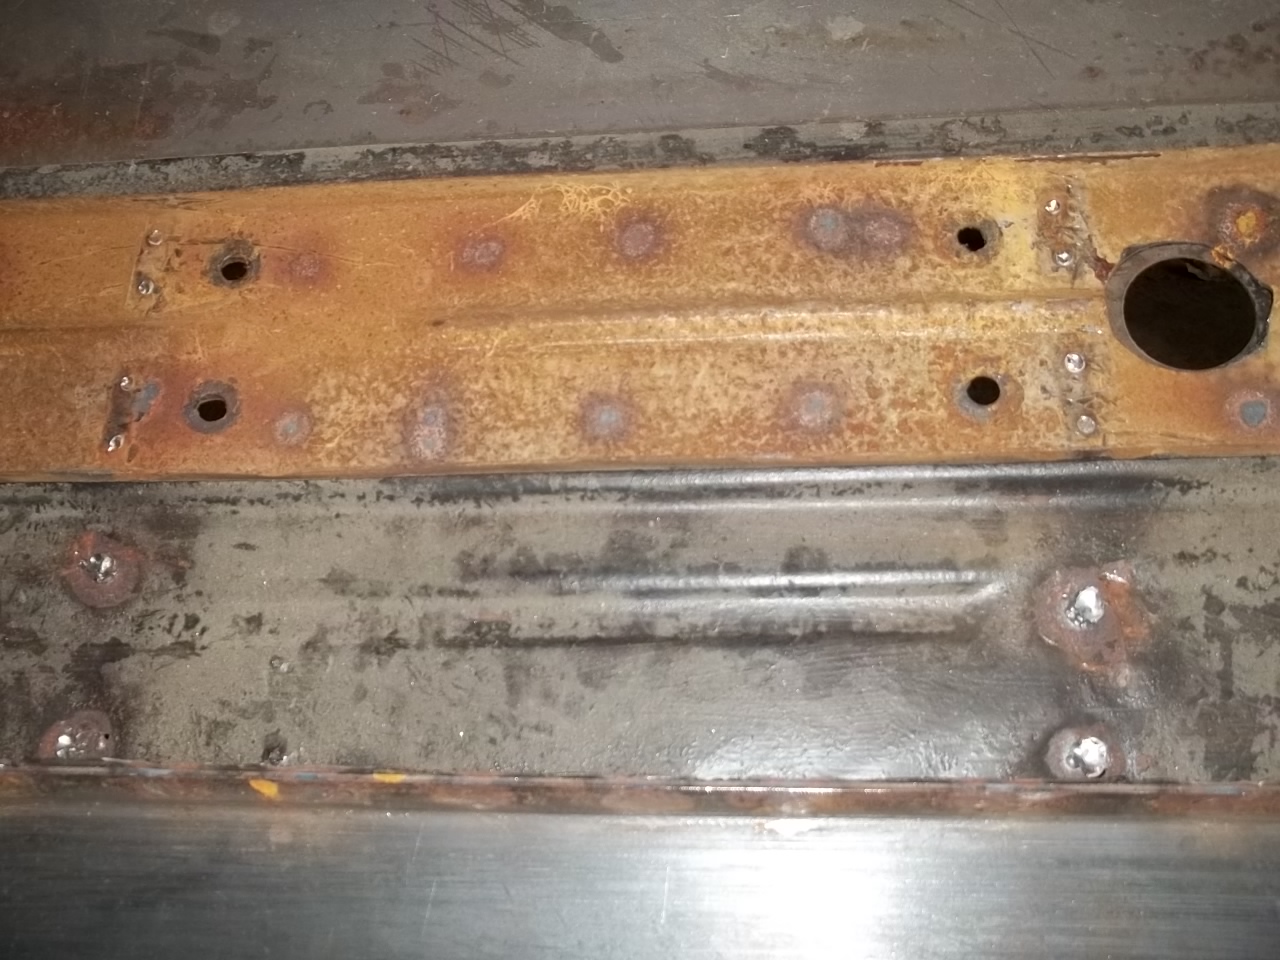 ('59 SF convertible 002.JPG) ('59 SF convertible 002.JPG)
 ('59 SF convertible 004.JPG) ('59 SF convertible 004.JPG)
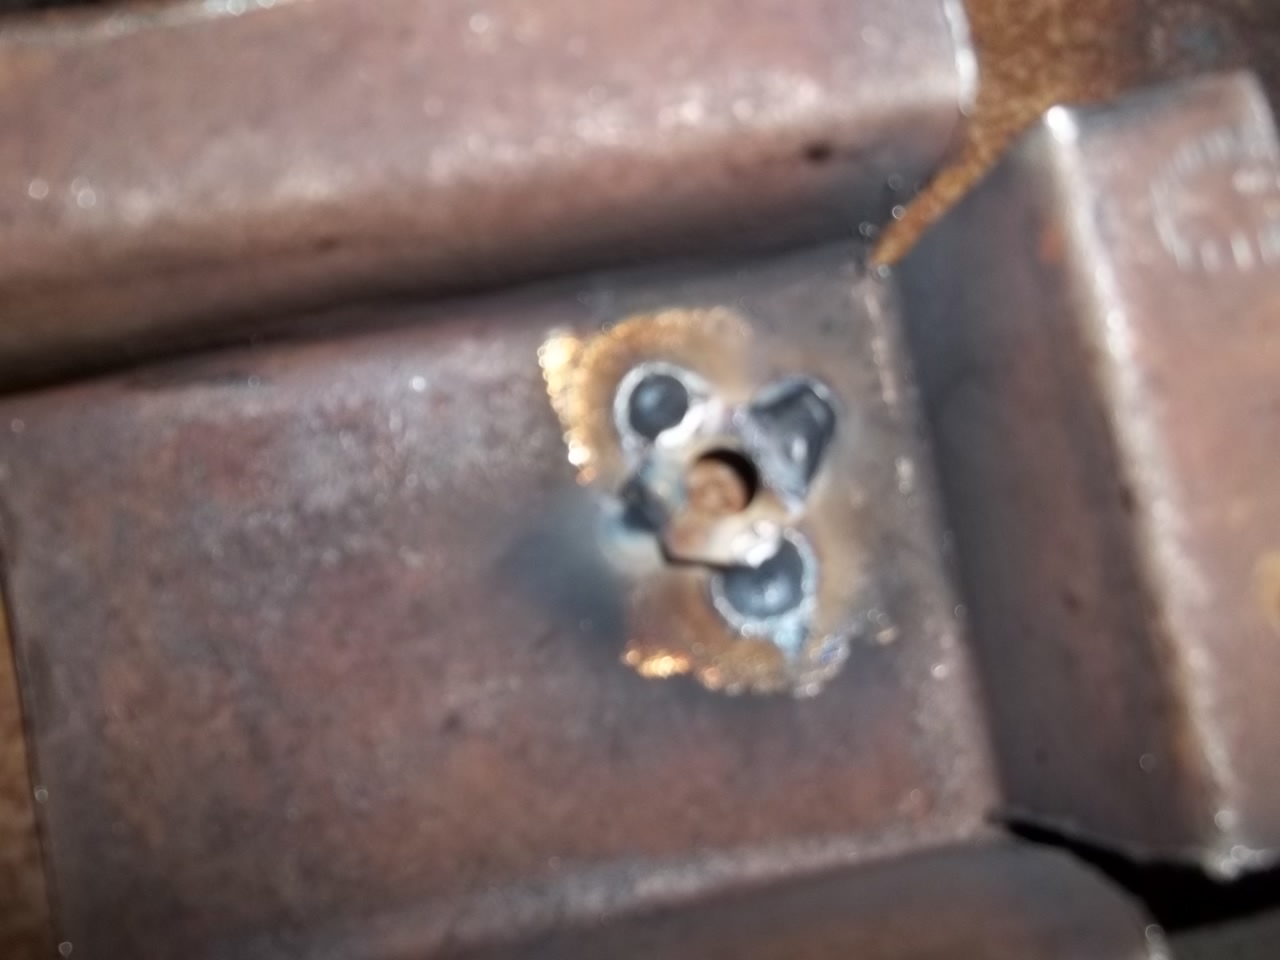 ('59 SF convertible 005.JPG) ('59 SF convertible 005.JPG)
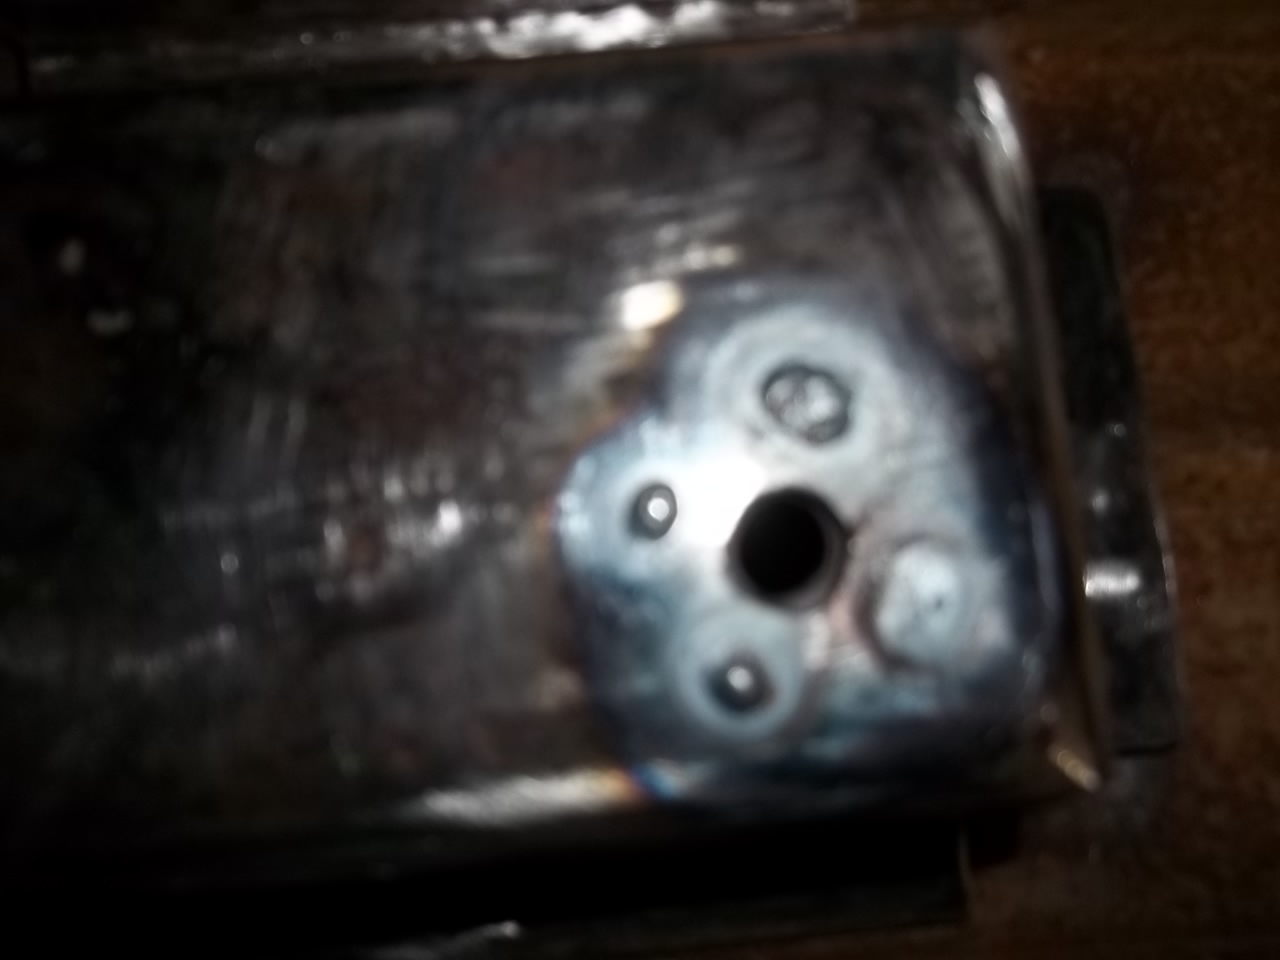 ('59 SF convertible 006.JPG) ('59 SF convertible 006.JPG)
Attachments
----------------
'59 SF convertible 003.JPG (386KB - 290 downloads)
'59 SF convertible 001.JPG (235KB - 301 downloads)
'59 SF convertible 002.JPG (456KB - 293 downloads)
'59 SF convertible 004.JPG (303KB - 305 downloads)
'59 SF convertible 005.JPG (257KB - 304 downloads)
'59 SF convertible 006.JPG (269KB - 282 downloads)
|
|
| |
|
Expert 5K+
Posts: 7808
Location: Williams California | Next, the new mount was welded in place, and the entire process was repeated for the opposite side.
---John
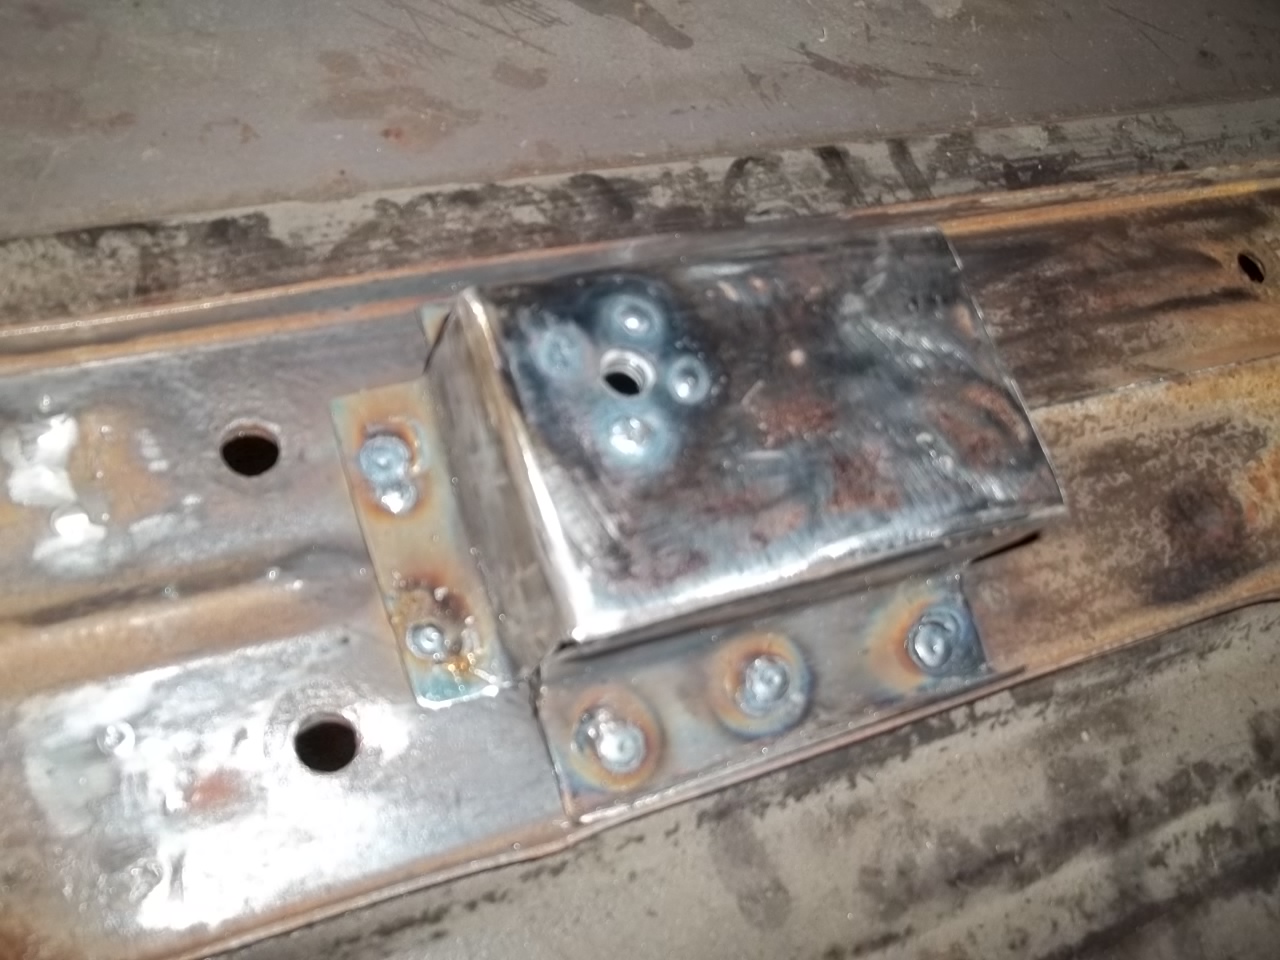 ('59 SF convertible 007.JPG) ('59 SF convertible 007.JPG)
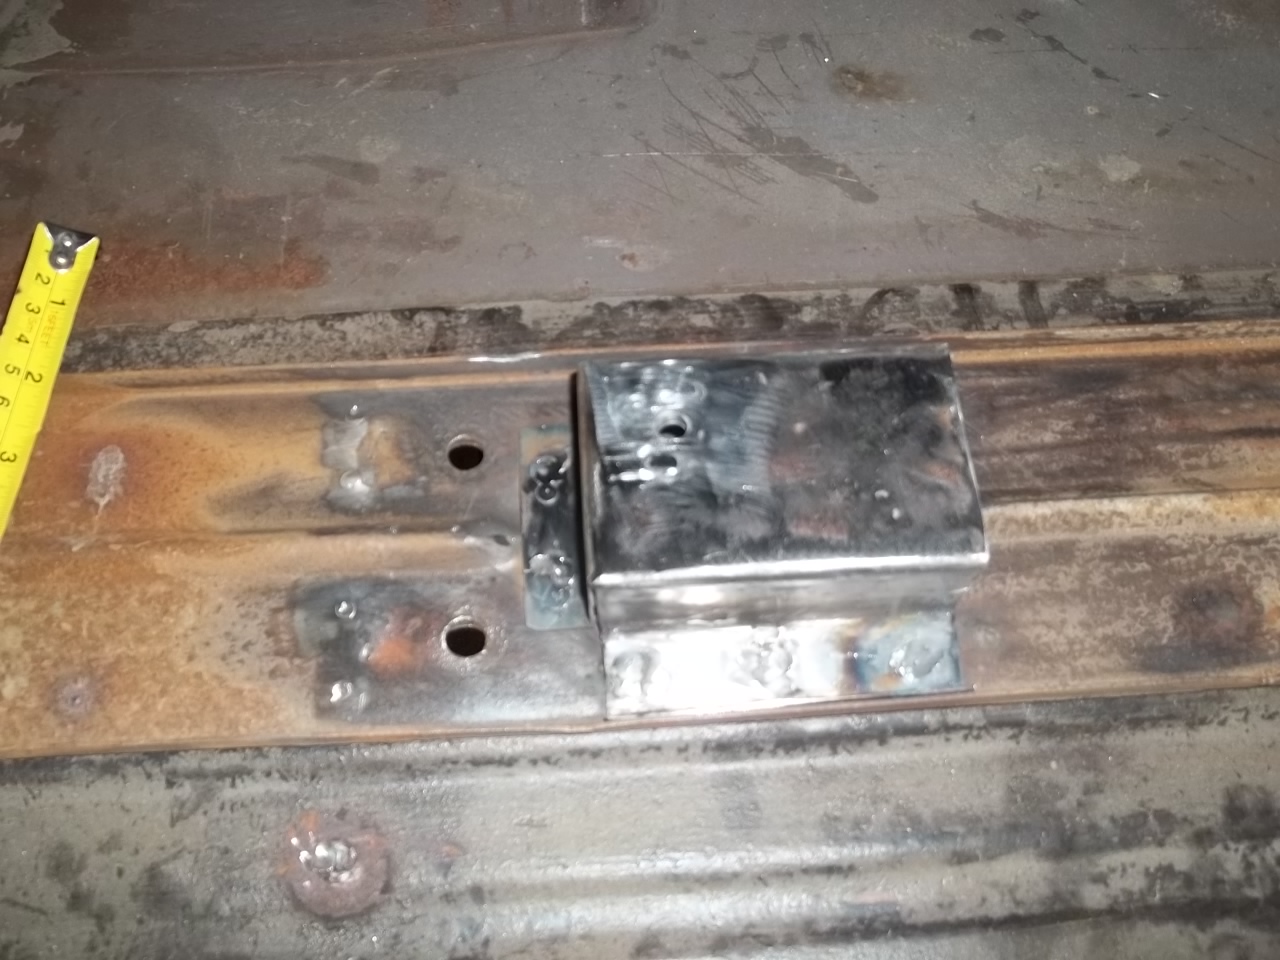 ('59 SF convertible 008.JPG) ('59 SF convertible 008.JPG)
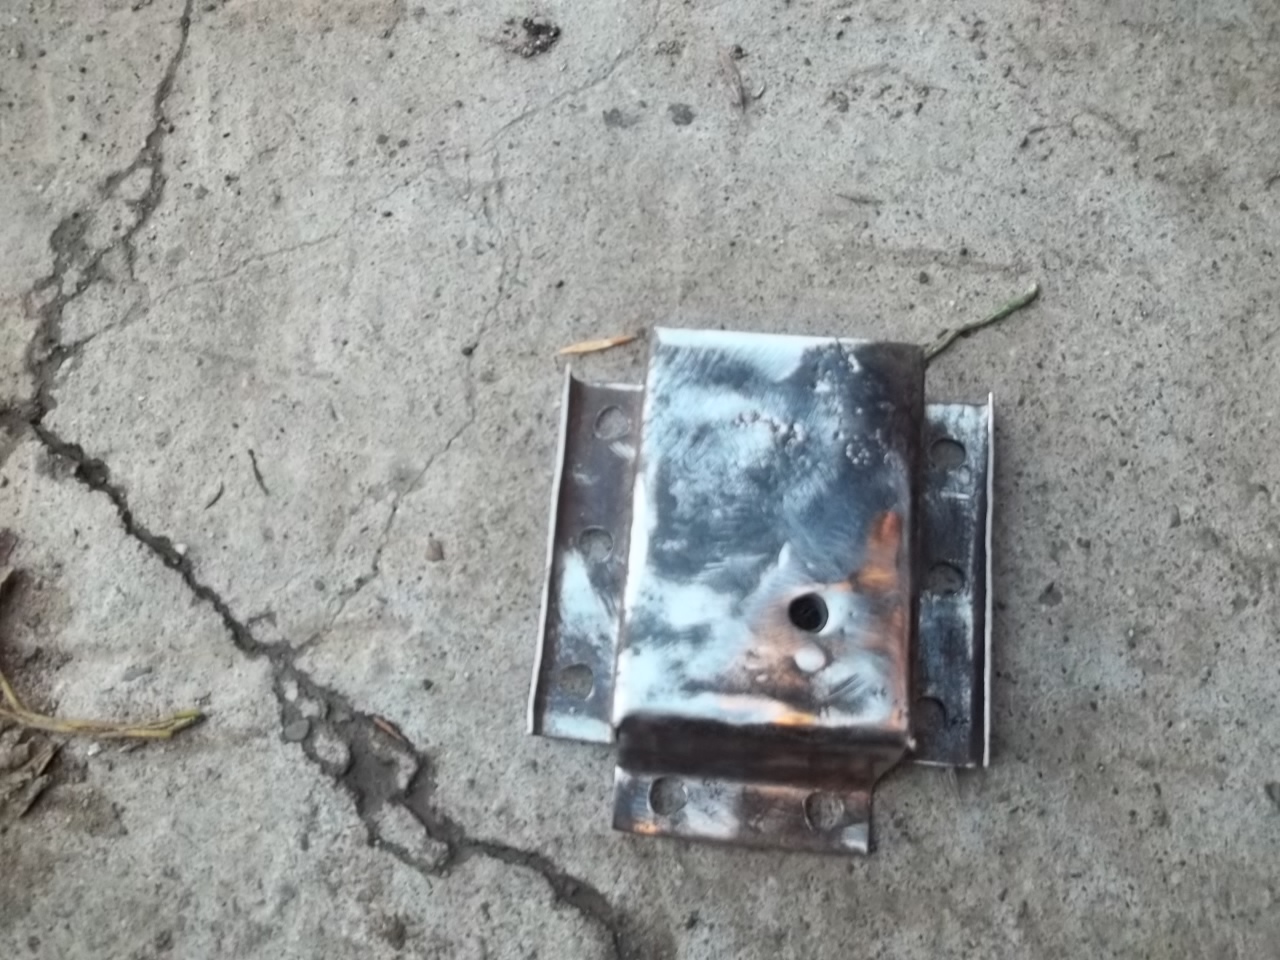 ('59 SF convertible 009.JPG) ('59 SF convertible 009.JPG)
 ('59 SF convertible 010.JPG) ('59 SF convertible 010.JPG)
 ('59 SF convertible 011.JPG) ('59 SF convertible 011.JPG)
Attachments
----------------
'59 SF convertible 007.JPG (390KB - 282 downloads)
'59 SF convertible 008.JPG (417KB - 310 downloads)
'59 SF convertible 009.JPG (484KB - 311 downloads)
'59 SF convertible 010.JPG (411KB - 298 downloads)
'59 SF convertible 011.JPG (261KB - 302 downloads)
|
|
| |
|
Expert 5K+
Posts: 7808
Location: Williams California | Next was to repair the seam on the deck panel, when the right side was hit, it had buckled the seam, and rusted behind the lead. I melted the old lead out, repaired the metal beneath, and paddled lead into the seam to finish it. I also did a bit more lead work elsewhere on the body, it really didn't need much.
---John
 ('59 SF convertible 008.JPG) ('59 SF convertible 008.JPG)
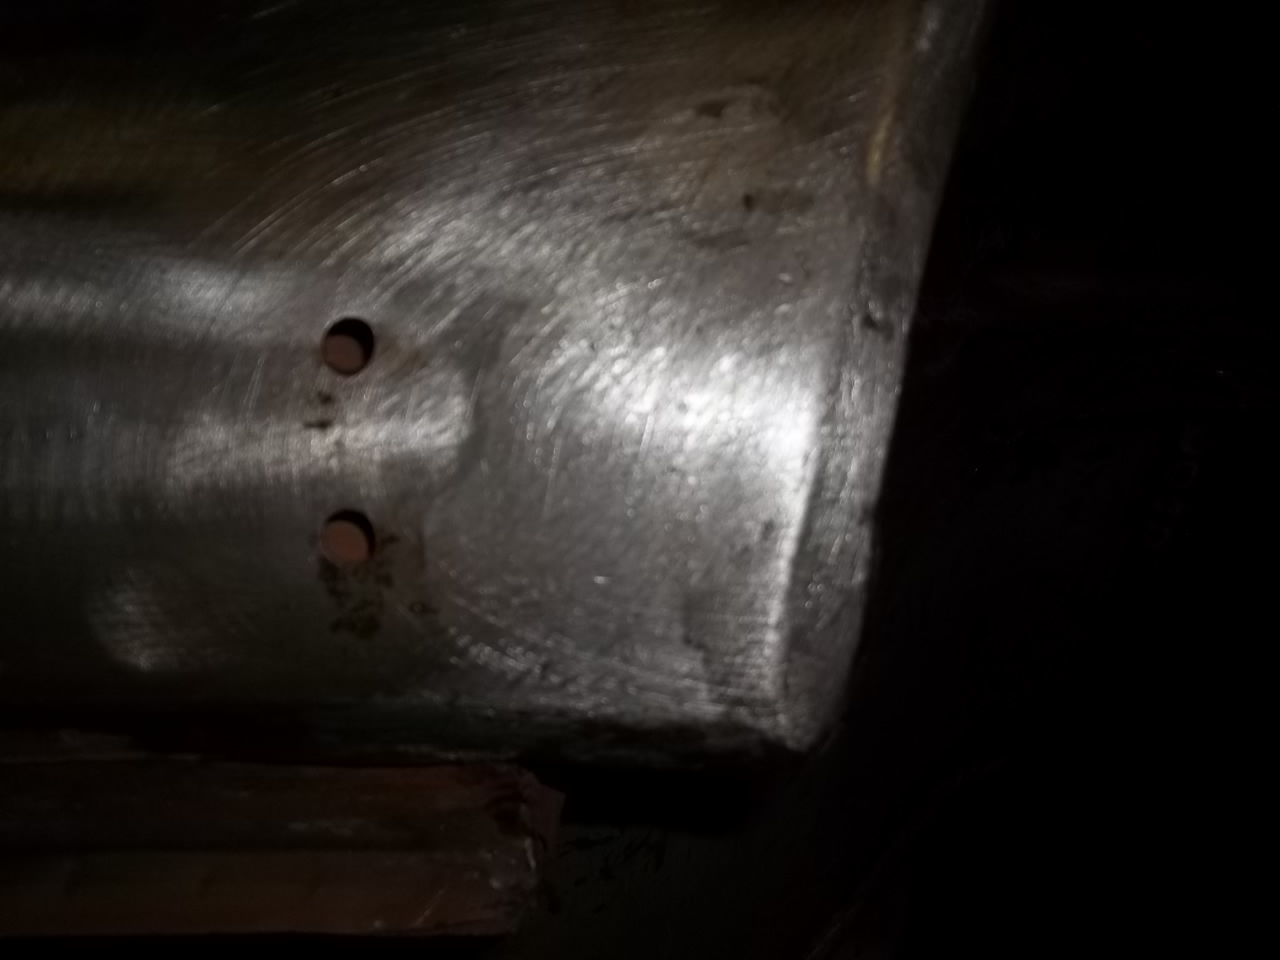 ('59 SF convertible 007.JPG) ('59 SF convertible 007.JPG)
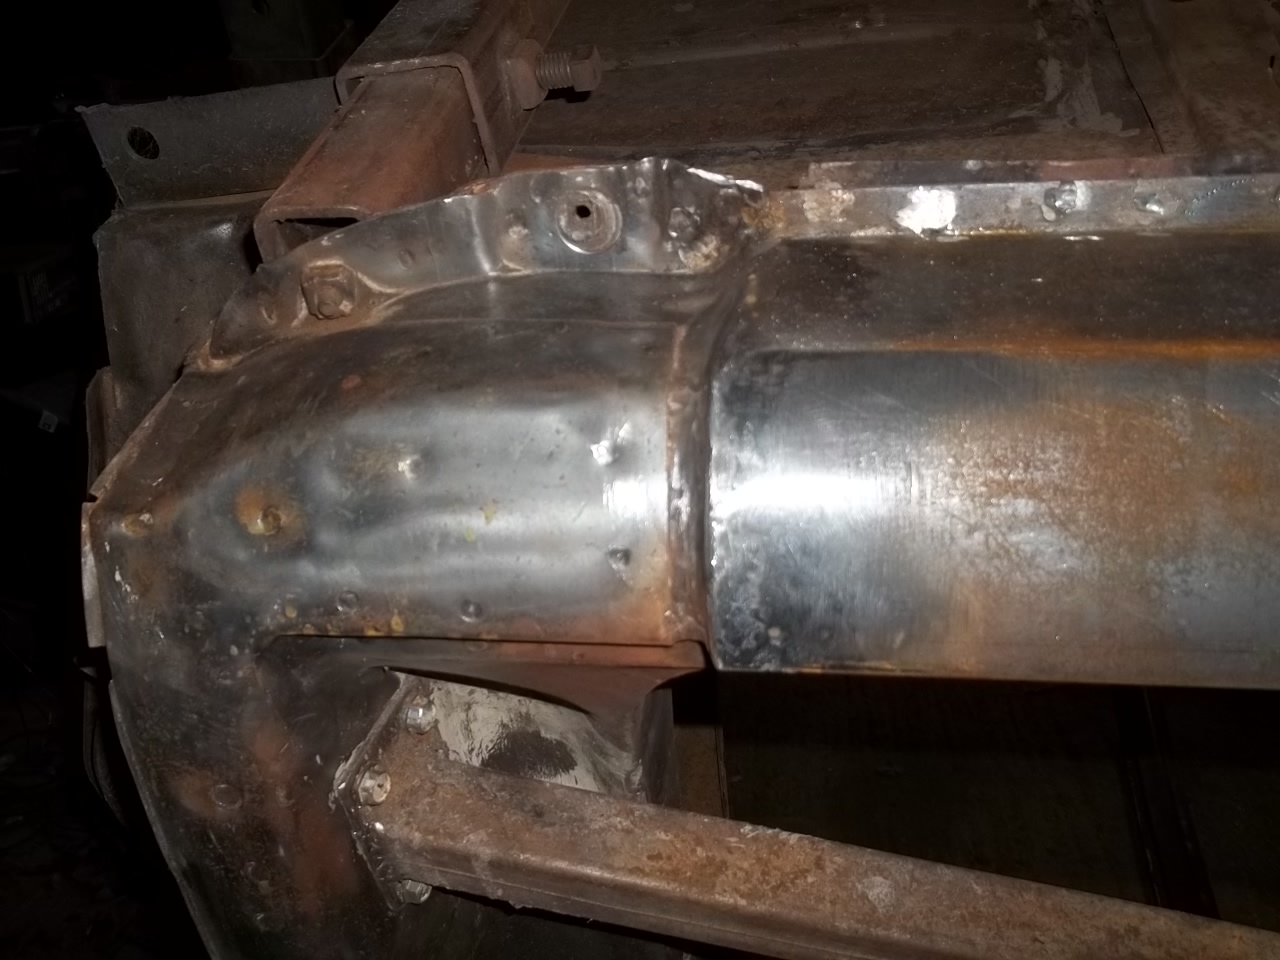 ('59 SF convertible 005.JPG) ('59 SF convertible 005.JPG)
 ('59 SF convertible 004.JPG) ('59 SF convertible 004.JPG)
 ('59 SF convertible 003.JPG) ('59 SF convertible 003.JPG)
 ('59 SF convertible 002.JPG) ('59 SF convertible 002.JPG)
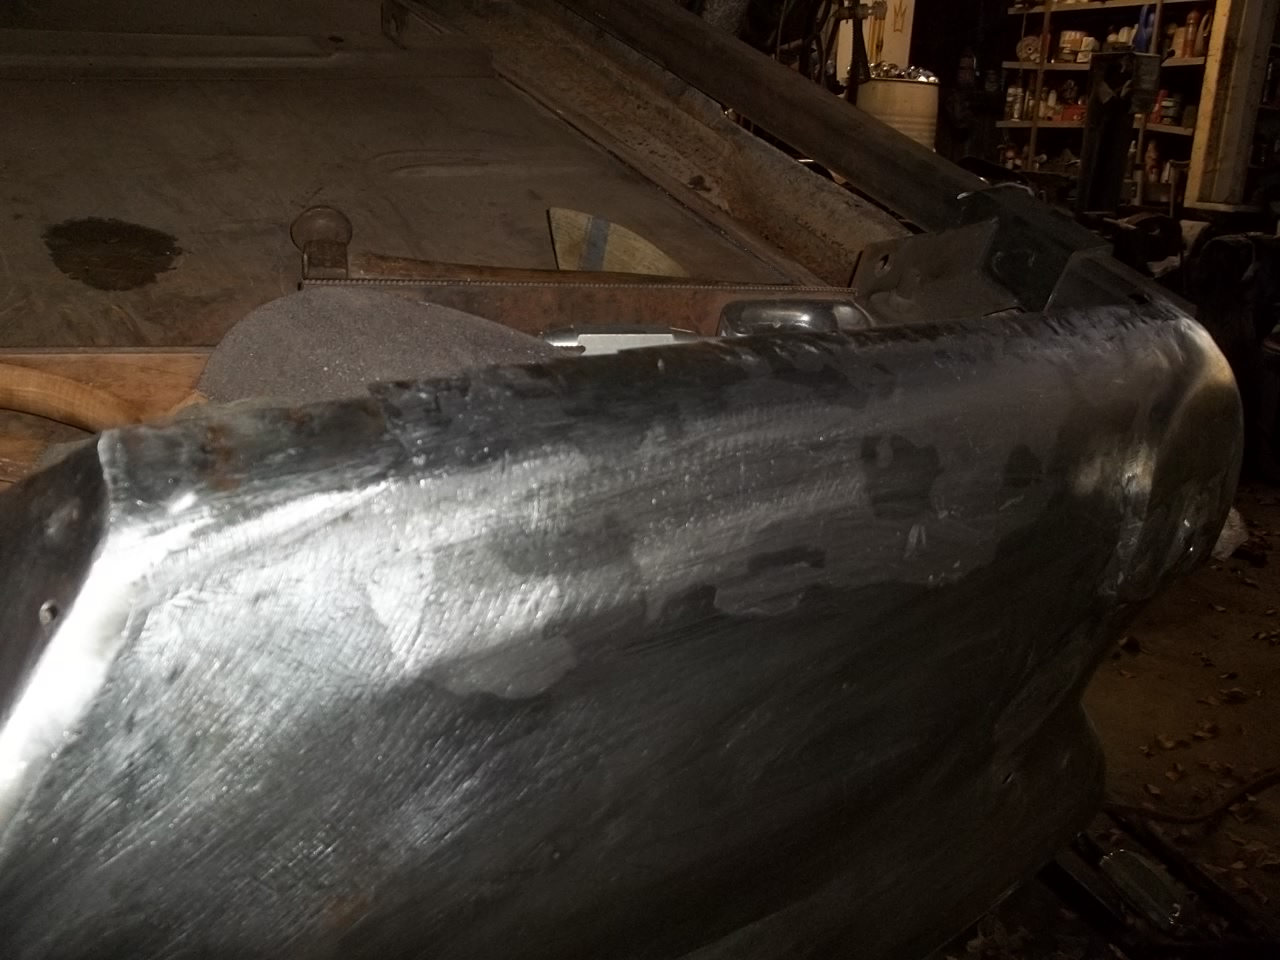 ('59 SF convertible 001.JPG) ('59 SF convertible 001.JPG)
Attachments
----------------
'59 SF convertible 008.JPG (319KB - 296 downloads)
'59 SF convertible 007.JPG (275KB - 305 downloads)
'59 SF convertible 005.JPG (362KB - 292 downloads)
'59 SF convertible 004.JPG (246KB - 299 downloads)
'59 SF convertible 003.JPG (286KB - 293 downloads)
'59 SF convertible 002.JPG (207KB - 320 downloads)
'59 SF convertible 001.JPG (257KB - 289 downloads)
|
|
| |
|
Expert
Posts: 2905
Location: little rock, AR | You have brought the term "Get the lead out" to a WHOLE NEW MEANING!!! Down here in the South your new name would be "Master John". |
|
| |
|
Elite Veteran
Posts: 1155
Location: somerville mass | sir - all i have to say is this - from what i saw 3 4 yrs ago this car or what was left was broken in two pieces - you are a genuine master at this trade. thank you for saving a fine example of the forward look.
steve |
|
| |
|
Member
Posts: 9
Location: nor-cal | how about a photo of the car showing the whole thing?
You have done soo much in teh details it kinda hard to see a car in the pile of newly fabricated parts!
from all the pics and comments I bet you are replacing half of the original steel!
a task of huge proportions!
congrats! |
|
| |
|
Expert 5K+
Posts: 7808
Location: Williams California | ccpanel - 2013-04-12 12:11 AM
how about a photo of the car showing the whole thing?
You have done soo much in teh details it kinda hard to see a car in the pile of newly fabricated parts!
from all the pics and comments I bet you are replacing half of the original steel!
a task of huge proportions!
congrats!
I'll have a photo or two showing the entire body shortly. Just about done with the heavy welding and fab work.
---John |
|
| |
|
Expert 5K+
Posts: 7808
Location: Williams California | I had saved the old quarter panel skins for a reason-The trim holes in the panels were for a base model Fury and not the Sport Fury. I thought the lower line of holes might be the same, but no such luck.
I measured the placement of the holes and spacing, and used a trim insert too determine their location on the quarter. Holes were then drilled with a 1/8" bit, then larger to the necessary size.
---John
 ('59 SF convertible 001.JPG) ('59 SF convertible 001.JPG)
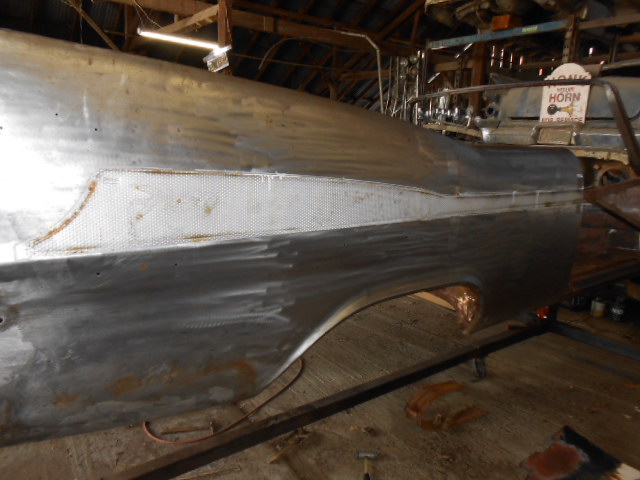 ('59 SF convertible 002.JPG) ('59 SF convertible 002.JPG)
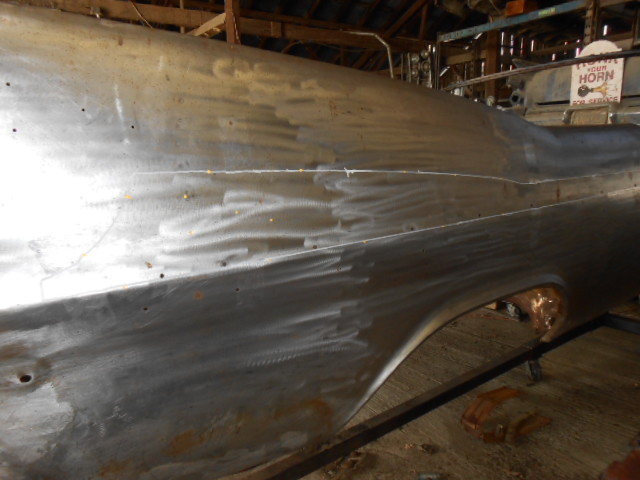 ('59 SF convertible 003.JPG) ('59 SF convertible 003.JPG)
 ('59 SF convertible 004.JPG) ('59 SF convertible 004.JPG)
Attachments
----------------
'59 SF convertible 001.JPG (126KB - 329 downloads)
'59 SF convertible 002.JPG (125KB - 329 downloads)
'59 SF convertible 003.JPG (125KB - 329 downloads)
'59 SF convertible 004.JPG (125KB - 331 downloads)
|
|
| |
|
Expert 5K+
Posts: 7808
Location: Williams California | The driver side was then done the same way.
Afterwards, all the trim holes that were not going to be used were carefully welded up, and ground smooth both on the inside and outside.
---John
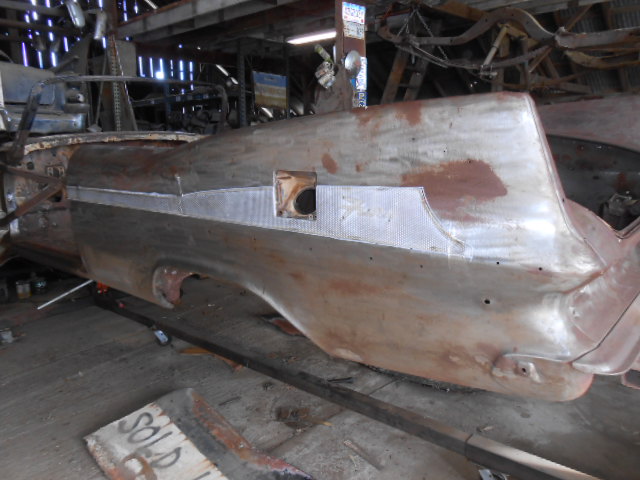 ('59 SF convertible 005.JPG) ('59 SF convertible 005.JPG)
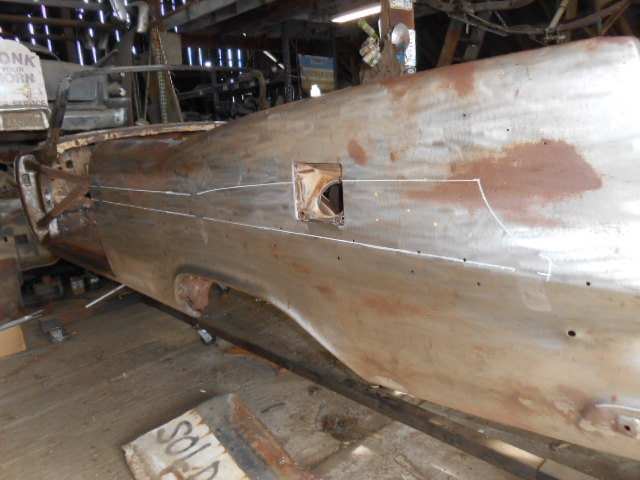 ('59 SF convertible 006.JPG) ('59 SF convertible 006.JPG)
 ('59 SF convertible 007.JPG) ('59 SF convertible 007.JPG)
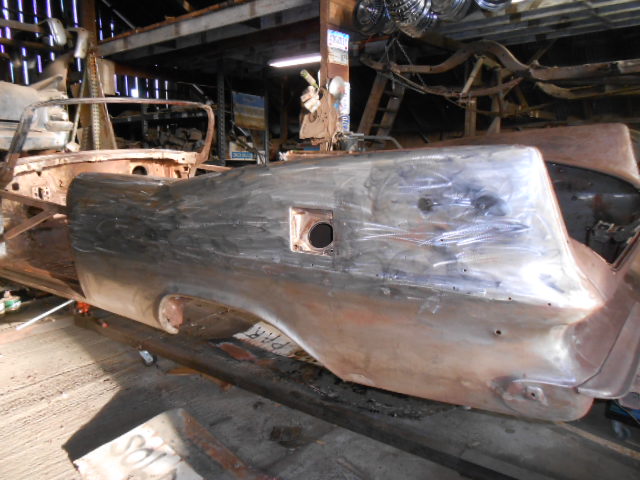 ('59 SF convertible 008.JPG) ('59 SF convertible 008.JPG)
Attachments
----------------
'59 SF convertible 005.JPG (125KB - 337 downloads)
'59 SF convertible 006.JPG (125KB - 331 downloads)
'59 SF convertible 007.JPG (126KB - 337 downloads)
'59 SF convertible 008.JPG (126KB - 338 downloads)
|
|
| |
|
Expert 5K+
Posts: 7808
Location: Williams California | The large medallions were interesting to get the placement for the holes to be drilled, as they were offset. These are specific for each side, due to the shape of the panel.
---John
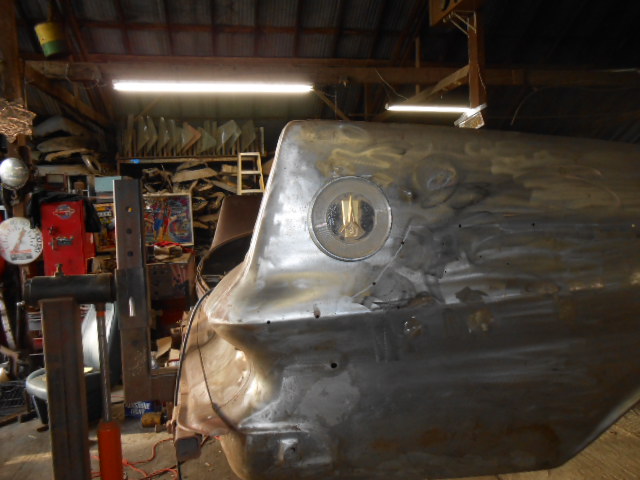 ('59 SF convertible 004.JPG) ('59 SF convertible 004.JPG)
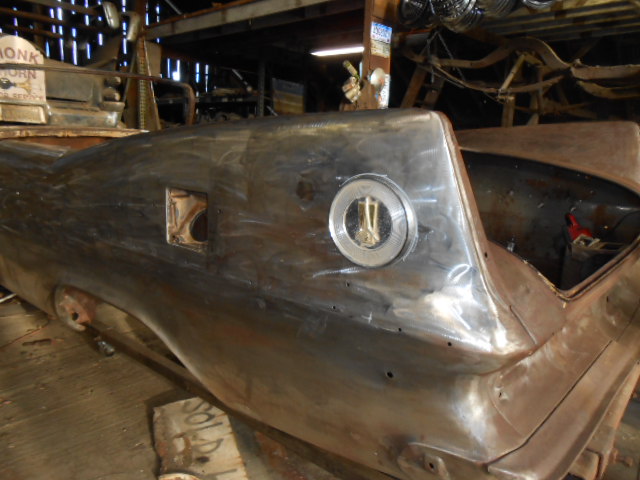 ('59 SF convertible 005.JPG) ('59 SF convertible 005.JPG)
Attachments
----------------
'59 SF convertible 004.JPG (126KB - 325 downloads)
'59 SF convertible 005.JPG (126KB - 326 downloads)
|
|
| |
|
| She's coming along nicely John! That '59 body is going to look so good, especially in convertible form. I've often thought if GM had built that body, they would have hidden the gas filler behind that Fury Medallion, seeing as how they seemed to love hiding the filler in unique places |
|
| |
|
Expert 5K+
Posts: 7808
Location: Williams California | Thanks, Jeff! |
|
| |
|
Expert 5K+
Posts: 7808
Location: Williams California | The convertible top cylinder mounts were eaten away badly, but these were all I had to work with.
I carefully removed what was left of them in order to determine what their mounting pieces looked like.
I blasted the loose rust off the mounts, and found they were badly pitted, and in places half their original thickness. I heated them up cherry red, and filled the low spots with brass, then removed the excess. These will work fine now.
---John
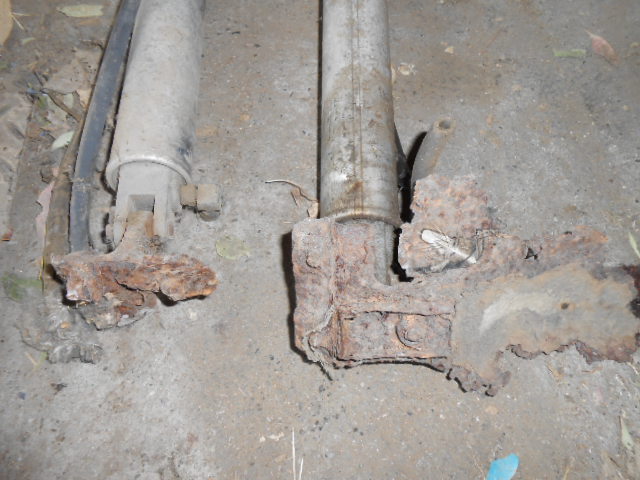 ('59 SF convertible 001.JPG) ('59 SF convertible 001.JPG)
 ('59 SF convertible 002.JPG) ('59 SF convertible 002.JPG)
 ('59 SF convertible 003.JPG) ('59 SF convertible 003.JPG)
 ('59 SF convertible 004.JPG) ('59 SF convertible 004.JPG)
 ('59 SF convertible 005.JPG) ('59 SF convertible 005.JPG)
 ('59 SF convertible 006.JPG) ('59 SF convertible 006.JPG)
 ('59 SF convertible 007.JPG) ('59 SF convertible 007.JPG)
Attachments
----------------
'59 SF convertible 001.JPG (125KB - 327 downloads)
'59 SF convertible 002.JPG (125KB - 319 downloads)
'59 SF convertible 003.JPG (125KB - 323 downloads)
'59 SF convertible 004.JPG (126KB - 319 downloads)
'59 SF convertible 005.JPG (125KB - 319 downloads)
'59 SF convertible 006.JPG (125KB - 326 downloads)
'59 SF convertible 007.JPG (126KB - 311 downloads)
|
|
| |
|
Expert 5K+
Posts: 7808
Location: Williams California | I had enough of the remains to one of the underbody reinforcement brackets, that I was able to come up with a suitable replacement. The corner underdash brackets from a 1960 Thunderbird were identical, except for the missing captive nut, and the length. I cut the bracket down, and found a suitable threaded nut that was close to the original.
Thanks to the help from Matt Dorshug, as he supplied proper placement measurements from his own convertible, I was able to drill the three holes and line up the underbody brace.
---John
 ('59 SF convertible 008.JPG) ('59 SF convertible 008.JPG)
 ('59 SF convertible 009.JPG) ('59 SF convertible 009.JPG)
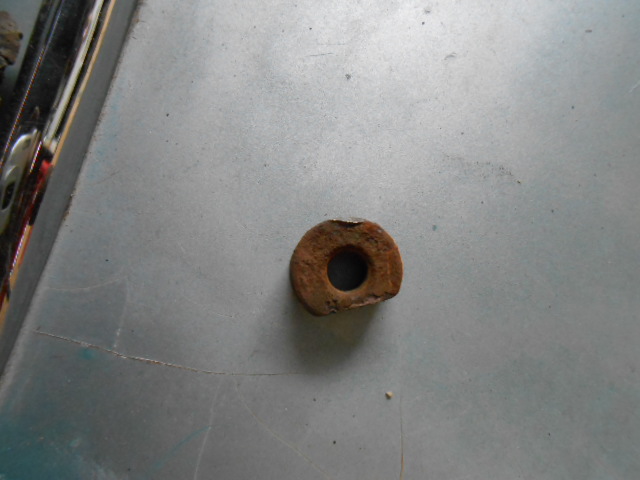 ('59 SF convertible 010.JPG) ('59 SF convertible 010.JPG)
 ('59 SF convertible 011.JPG) ('59 SF convertible 011.JPG)
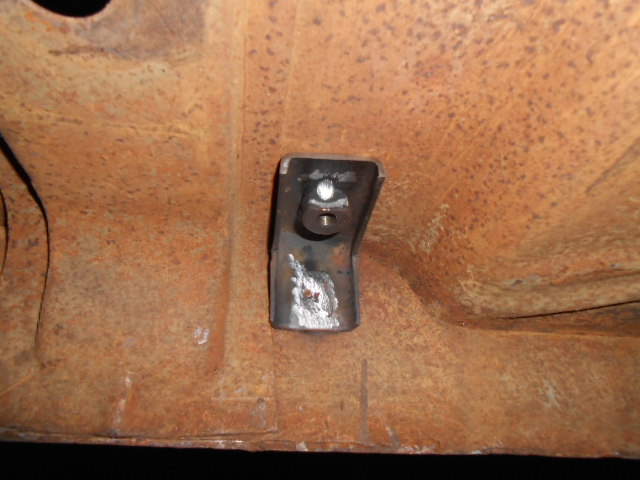 ('59 SF Convertible 001.JPG) ('59 SF Convertible 001.JPG)
Attachments
----------------
'59 SF convertible 008.JPG (126KB - 307 downloads)
'59 SF convertible 009.JPG (125KB - 322 downloads)
'59 SF convertible 010.JPG (133KB - 323 downloads)
'59 SF convertible 011.JPG (125KB - 313 downloads)
'59 SF Convertible 001.JPG (125KB - 317 downloads)
|
|
| |
|
Expert 5K+
Posts: 7808
Location: Williams California | Now that all the heavy welding is completed, time to have a blast! Sand blast, that is. One of my most dreaded messy jobs, but I refused to take the body somewhere to have it screwed up after spending all this labor on it.
I rolled the rotisserie outside the barn, and spent nearly a day and a half lightly blasting the inside and hidden areas, as well as the outside. After finishing, it took another two hours blowing sand from crevices and such.
Finally, I sprayed a good coat of etching primer throughout the body.
---John |
|
| |
|
Expert 5K+
Posts: 6203
Location: Big pimpin' | John, Awesome work. Those '60 Thunderbird pieces are many times what I do as well. Find something close and use that. I am amzed at the amount of work involved here. Again, Keep messin' round and you'll have a driver. |
|
| |
|
Expert 5K+
Posts: 7808
Location: Williams California | dukeboy - 2013-04-18 9:57 AM
John, Awesome work. Those '60 Thunderbird pieces are many times what I do as well. Find something close and use that. I am amzed at the amount of work involved here. Again, Keep messin' round and you'll have a driver.
Thanks, Chaney! |
|
| |
|
Expert 5K+
Posts: 7808
Location: Williams California | Here are the photos I meant to attach, except the computer wigged out.
---John
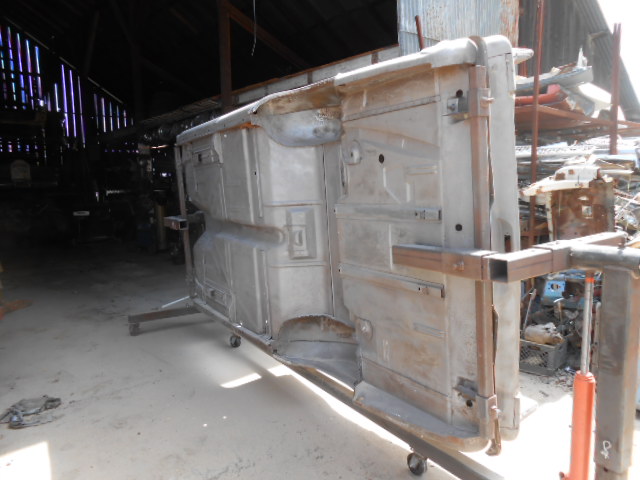 ('59 SF Convertible 002.JPG) ('59 SF Convertible 002.JPG)
 ('59 SF Convertible 003.JPG) ('59 SF Convertible 003.JPG)
 ('59 SF Convertible 004.JPG) ('59 SF Convertible 004.JPG)
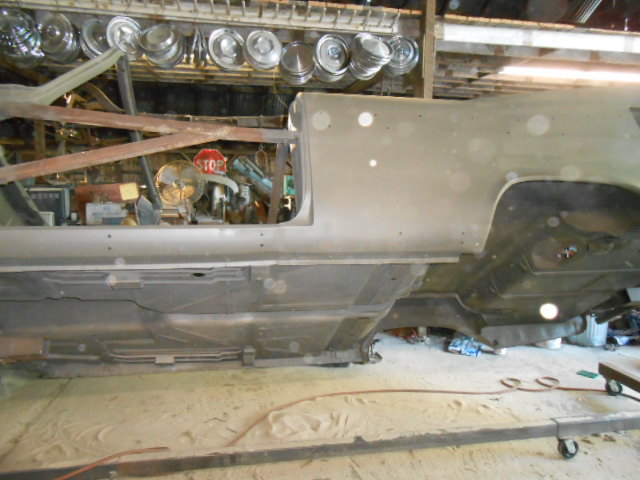 ('59 SF Convertible 005.JPG) ('59 SF Convertible 005.JPG)
 ('59 SF Convertible 006.JPG) ('59 SF Convertible 006.JPG)
Attachments
----------------
'59 SF Convertible 002.JPG (125KB - 315 downloads)
'59 SF Convertible 003.JPG (126KB - 309 downloads)
'59 SF Convertible 004.JPG (126KB - 322 downloads)
'59 SF Convertible 005.JPG (126KB - 310 downloads)
'59 SF Convertible 006.JPG (126KB - 307 downloads)
|
|
| |
|
Board Moderator & Exner Expert 10K+
Posts: 13054
Location: Southern Sweden - Sturkö island | Some work you've done there John - like "Bring em back alive" That car sure is a Phoenix |
|
| |
|
Expert
Posts: 2596
Location: Upplands Väsby, Sweden | Hi John
Found a pic at my Sport Fury I had before.
quarter panel skins holes
 (P1010010.JPG) (P1010010.JPG)
Attachments
----------------
P1010010.JPG (98KB - 311 downloads)
|
|
| |
|
Elite Veteran
Posts: 957
Location: Signal Mountain, TN | Wow.
Just wow...
Nice work, man.
|
|
| |
|
Expert
Posts: 2905
Location: little rock, AR | Well hell your almost finished!!! LOL Building the mtr. and drivetrain is the easy part. |
|
| |
|
Expert 5K+
Posts: 6203
Location: Big pimpin' | I'll say it yet again, this thread should be ear marked for Anyone that thinks their car has too much rust to save it. |
|
| |
|
Expert 5K+
Posts: 7808
Location: Williams California | wizard - 2013-04-18 10:20 AM
Some work you've done there John - like "Bring em back alive" That car sure is a Phoenix :)
Thanks, Sven!! |
|
| |
|
Expert 5K+
Posts: 7808
Location: Williams California | BarnFind57 - 2013-04-18 1:48 PM
Wow.
Just wow...
Nice work, man.
Thanks, Rick!
Nice to see you out enjoying your ride, lately!!
---John |
|
| |
|
Expert 5K+
Posts: 7808
Location: Williams California | oldwood - 2013-04-18 2:03 PM
Well hell your almost finished!!! LOL Building the mtr. and drivetrain is the easy part.
In reality, I had most of the mechanicals ready, but that was years ago, so hopefully most has no problems. I will be restoring and adding the convertible frame parts to a coupe frame next.
---John |
|
| |
|
Board Moderator & Exner Expert 10K+
Posts: 13054
Location: Southern Sweden - Sturkö island | Now to the big question John - would you ever be able to sell that car???? All the love, blood, sweat and pain you put into her will never balance - but you might have the car that you really wanted and eager for since many years. |
|
| |
|
Expert 5K+
Posts: 7808
Location: Williams California | That's right, Wiz. I'd better keep this one, as too much time will have been invested in it. It does have some sentimental value, as a good friend [Dammit Jim] found it, and my friend Roger helped me with it. Both have passed on now.
---John |
|
| |
|

Expert
Posts: 1324
Location: Hickory, NC | John your work is looking great... Won't be too much longer before she's starts becoming a car again! |
|
| |
|
Expert 5K+
Posts: 7808
Location: Williams California | PlymouthFury - 2013-04-20 6:58 AM
John your work is looking great... Won't be too much longer before she's starts becoming a car again!
Thanks, Austin!! |
|
| |
|
Expert 5K+
Posts: 5139
Location: cornpatch county, Southwest IOA | John, with all the patience, mental determination, and time-- you must not have any kids at home--or maybe even none. How else could a person do all the work you have done to get to this point??? My up-most respect for your skills , and hope someday I will be seeing this car on your next roadtrip adventure! ...........................MO |
|
| |
|
Walter passed away on Jul 29, 2014. We will miss you, Walt!
Posts: 5358
Location: Heaven Above (Formerly Oklahoma City,OK) | John, what's your completion date?
I need a quarter panel made for the right side of my CRL, and I want to ship it out for you to do it.
You do too good work.
Awesome even!.
Walt |
|
| |
|
Elite Veteran
Posts: 1060
Location: Building incorrect cars since 2000!! | Gives me hope John!! Looks great |
|
| |
|
Expert 5K+
Posts: 7808
Location: Williams California | 60 Plymouth - 2013-04-20 5:22 PM
Gives me hope John!! Looks great
Thanks, Aaron!
---John |
|
| |
|
Expert
Posts: 2637
Location: Minor Hill, TN | Looks good I hope 1 of these years I see you at the Cars and bikes on the square in Athens, AL . The more fowardlook cars there the merrier. I know these folks would love to have you attend. |
|
| |
|
Elite Veteran
Posts: 654
Location: NC | That is just WONDERFUL! You are magic! |
|
| |
|
Expert 5K+
Posts: 7808
Location: Williams California | MOPAR-TO-YA - 2013-04-20 2:04 PM
John, with all the patience, mental determination, and time-- you must not have any kids at home--or maybe even none. How else could a person do all the work you have done to get to this point??? My up-most respect for your skills , and hope someday I will be seeing this car on your next roadtrip adventure! ...........................MO
We do plan on making a road trip [if we can still afford fuel] as we had a blast doing this with the '58 wagon, and you and Cheryl are on our list to visit again.
---John |
|
| |
|
Expert 5K+
Posts: 7808
Location: Williams California | wbower3 - 2013-04-20 2:07 PM
John, what's your completion date?
I need a quarter panel made for the right side of my CRL, and I want to ship it out for you to do it.
You do too good work.
Awesome even!.
Walt
Thanks, Walt!
As to a completion date, it's hard to say, as I need to finish up a body work job on a Merc I was sucked into some time ago. I thought your bodywork was mostly done on your '55, or am I mistaken?
---Joohn |
|
| |
|
Expert 5K+
Posts: 7808
Location: Williams California | Now moving on to the chassis. The original convertible frame was rusted through in places, not worth trying to save, although there were some convertible specific pieces that needed to be saved.
I had another chassis from a coupe that had been blasted and painted gloss black years ago, perfect choice for this. I set the two side by side, noting any differences, and measuring any found.
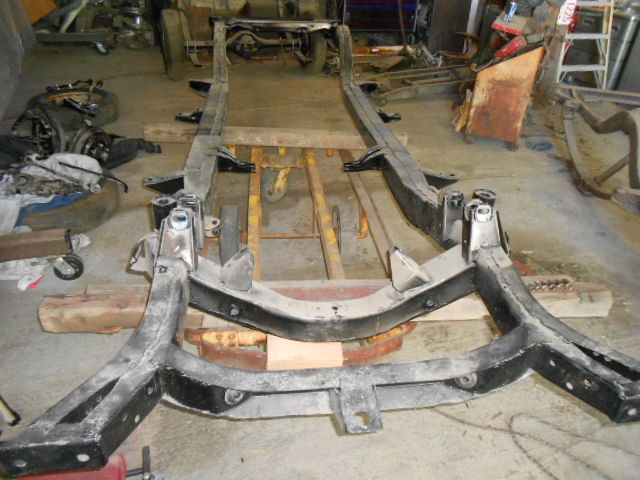 ('59 SF convertible 001.JPG) ('59 SF convertible 001.JPG)
 ('59 SF convertible 002.JPG) ('59 SF convertible 002.JPG)
Attachments
----------------
'59 SF convertible 001.JPG (126KB - 309 downloads)
'59 SF convertible 002.JPG (126KB - 308 downloads)
|
|
| |
|
Expert 5K+
Posts: 7808
Location: Williams California | I used a die grinder to remove the special convertible body mounts on each side, and sandblasted them clean. The donor frame was measured and marked for placement of these mount ears after cleaning the black paint off. Then, they were welded on.
Convertibles also used their own specific torsion bars, longer to clear the X-frame, so I went ahead and snipped the torsion bar mounts from the frame.
 ('59 SF convertible 003.JPG) ('59 SF convertible 003.JPG)
 ('59 SF convertible 004.JPG) ('59 SF convertible 004.JPG)
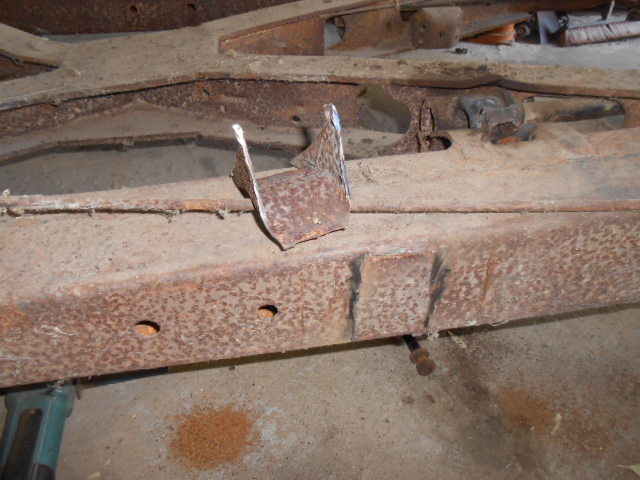 ('59 SF convertible 005.JPG) ('59 SF convertible 005.JPG)
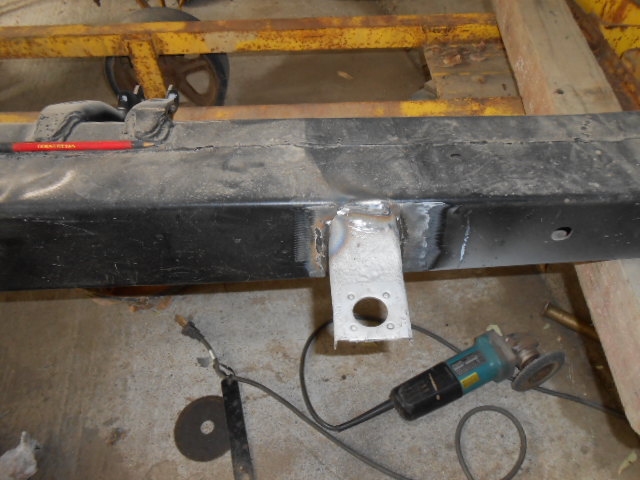 ('59 SF convertible 006.JPG) ('59 SF convertible 006.JPG)
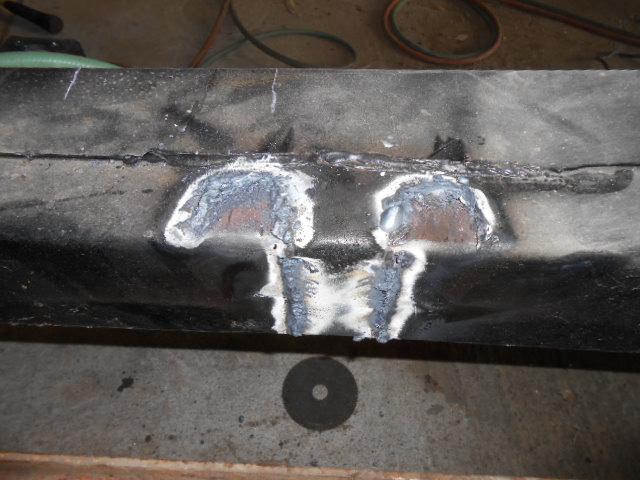 ('59 SF convertible 008.JPG) ('59 SF convertible 008.JPG)
 ('59 SF convertible 009.JPG) ('59 SF convertible 009.JPG)
Attachments
----------------
'59 SF convertible 003.JPG (125KB - 318 downloads)
'59 SF convertible 004.JPG (126KB - 262 downloads)
'59 SF convertible 005.JPG (126KB - 301 downloads)
'59 SF convertible 006.JPG (125KB - 317 downloads)
'59 SF convertible 008.JPG (125KB - 319 downloads)
'59 SF convertible 009.JPG (126KB - 300 downloads)
|
|
| |
|
Expert 5K+
Posts: 7808
Location: Williams California | I used a cutting torch to remove the X from the rusty frame, as well as the torsion bar mounts, as they nestle in the end of the X. I measured the torsion bar mounts I had cut out against the cleaner ones from the coupe frame, and found they were the same, so I welded these in place at the proper spots.
Then I completely sandblasted the X member to remove the rust from the deep pits. One end of the X on the top side was badly pitted, so I decided to fill these with brass to make it look a bit better. I also removed the remainder of the attaching pieces for the top, these were too far gone to reuse.
---John
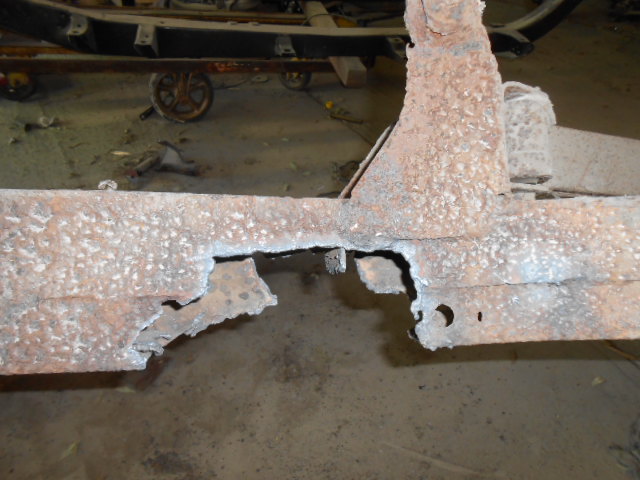 ('59 SF convertible 002.JPG) ('59 SF convertible 002.JPG)
 ('59 SF convertible 003.JPG) ('59 SF convertible 003.JPG)
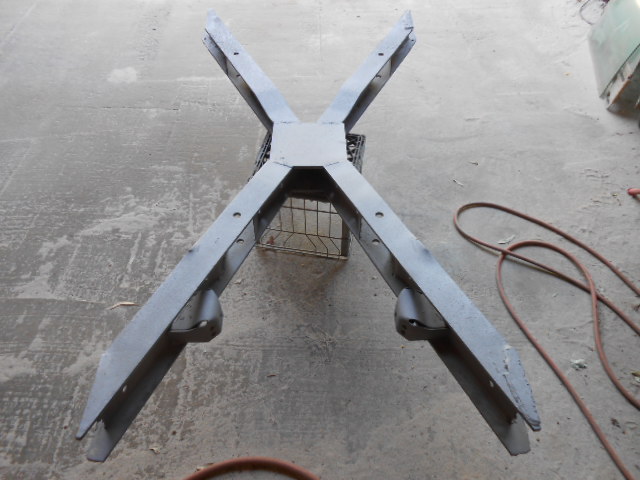 ('59 SF convertible 004.JPG) ('59 SF convertible 004.JPG)
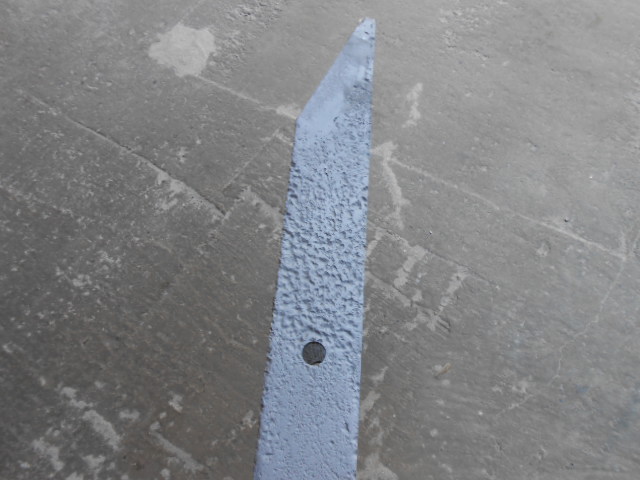 ('59 SF convertible 005.JPG) ('59 SF convertible 005.JPG)
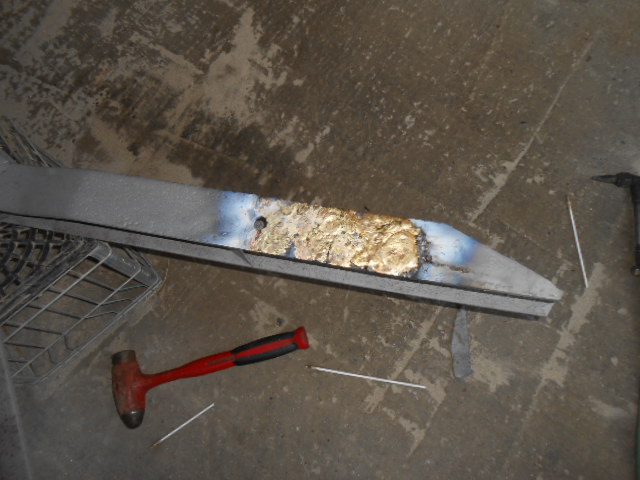 ('59 SF convertible 007.JPG) ('59 SF convertible 007.JPG)
 ('59 SF convertible 008.JPG) ('59 SF convertible 008.JPG)
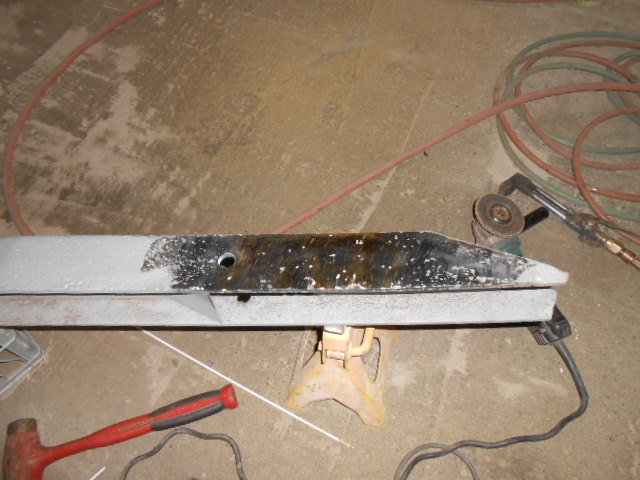 ('59 SF convertible 011.JPG) ('59 SF convertible 011.JPG)
Attachments
----------------
'59 SF convertible 002.JPG (126KB - 318 downloads)
'59 SF convertible 003.JPG (126KB - 316 downloads)
'59 SF convertible 004.JPG (125KB - 309 downloads)
'59 SF convertible 005.JPG (125KB - 310 downloads)
'59 SF convertible 007.JPG (125KB - 305 downloads)
'59 SF convertible 008.JPG (125KB - 305 downloads)
'59 SF convertible 011.JPG (125KB - 306 downloads)
|
|
| |
|
Location: Parts Unknown | I did all this work on my Adventurer years ago. Few realize both the depth one can "drown" in
a project like this, AND the satisfaction of mastering it to a point where nothing "scares" you any more !
John, ... you ARE aware than when all this work is done, it's going to be a 59 Plymouth, right ?
|
|
| |
|
Expert 5K+
Posts: 7808
Location: Williams California | Doctor DeSoto - 2013-05-03 8:48 PM
I did all this work on my Adventurer years ago. Few realize both the depth one can "drown" in
a project like this, AND the satisfaction of mastering it to a point where nothing "scares" you any more !
John, ... you ARE aware than when all this work is done, it's going to be a 59 Plymouth, right ?
There's not too many projects that I wouldn't consider as long as they are mostly complete. After this one, the '59 Desoto convertible will be easy, as it has little rust, and the '58 Fury which is also solid. The wrecked 300 D fuelie will be a bit more involved, but nothing like this. Hopefully I live long enough to complete a few of them LOL!
---John
|
|
| |
|
Veteran
Posts: 260
| Wow John, it looks awesome! Thanks again for all the photos and explanations of your restoration processes. I hope to use some of your techniques if I ever rescue another one! |
|
| |
|
Expert 5K+
Posts: 7808
Location: Williams California | Lisa P - 2013-05-05 5:19 PM
Wow John, it looks awesome! Thanks again for all the photos and explanations of your restoration processes. I hope to use some of your techniques if I ever rescue another one!
Thanks, Lisa!! |
|
| |
|
Expert
Posts: 4043
Location: Connecticut | John - An alternative idea to filling in the x-member pitting with brass is to crank up the settings on the MIG welder and puddle some weld bead in the rusted out areas, moving the nozzle in a circular motion. Then grind to smooth out. This would restore strength to the rusted out areas, where brass is a softer metal, not yielding as much strength.
Ron |
|
| |
|
Expert 5K+
Posts: 7808
Location: Williams California | ronbo97 - 2013-05-06 6:58 PM
John - An alternative idea to filling in the x-member pitting with brass is to crank up the settings on the MIG welder and puddle some weld bead in the rusted out areas, moving the nozzle in a circular motion. Then grind to smooth out. This would restore strength to the rusted out areas, where brass is a softer metal, not yielding as much strength.
Ron
I considered using that method, but I was waiting on a replacement liner for the welder, as it was not feeding correctly. The metal was not compromised enough to be any concern in using the brass, and I was able to keep moving along.
---John |
|
| |
|
Expert 5K+
Posts: 8947
Location: WHEELING,WV.>>>HOME OF WWVA | i used that brass method quite a few times , works like a charm . i figured you were good Big John but you're way past good ------------------------------------------------------------later |
|
| |
|
Location: Parts Unknown | Watch out, John ! Sounds like Chuck is fixin' to give you a kiss here pretty quick !
|
|
| |
|
Expert 5K+
Posts: 8947
Location: WHEELING,WV.>>>HOME OF WWVA | and a hug----------------------------------------------------------later |
|
| |
|
Extreme Veteran
Posts: 530
Location: Wake Forest, NC | John I find this thread inspirational thanks for sharing. |
|
| |
|
Expert 5K+
Posts: 7808
Location: Williams California | The X is then primered to prevent flash rusting.
Mating the convertible X to the frame-These are installed from the bottom of the frame at the factory, as the ends of the bars overlap the frame rails. After setting this in place, I mounted a lower A-arm to each side, and test fit each torsion bar. Looks good, so each weld was completed.
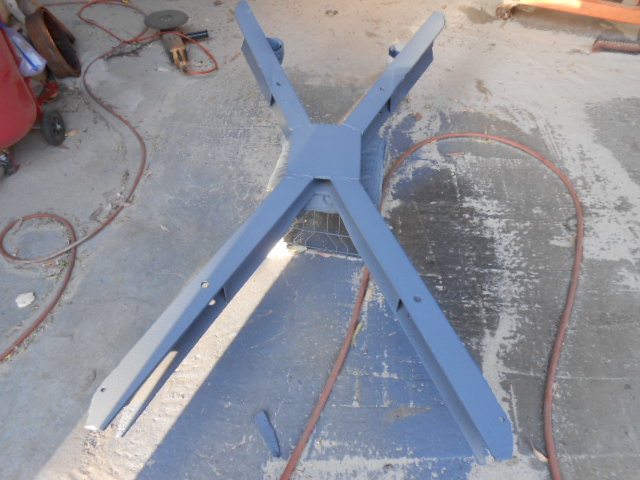 ('59 SF convertible 001.JPG) ('59 SF convertible 001.JPG)
 ('59 SF convertible 003.JPG) ('59 SF convertible 003.JPG)
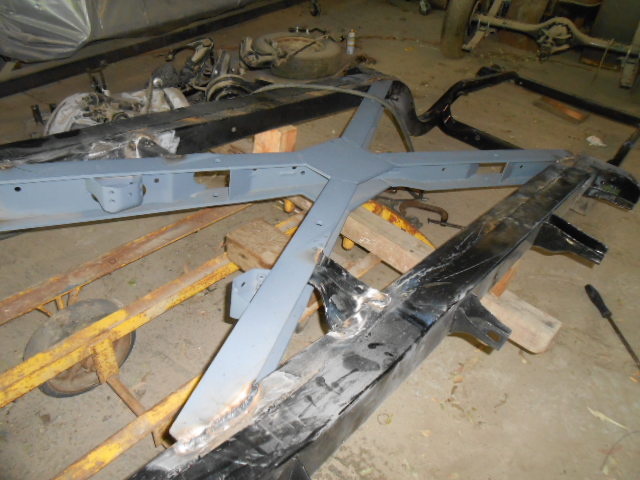 ('59 SF convertible 004.JPG) ('59 SF convertible 004.JPG)
Attachments
----------------
'59 SF convertible 001.JPG (125KB - 308 downloads)
'59 SF convertible 003.JPG (126KB - 309 downloads)
'59 SF convertible 004.JPG (125KB - 339 downloads)
|
|
| |
|
Expert 5K+
Posts: 7808
Location: Williams California | I had a couple friends help flip the frame over, as now it's getting heavy! It has been in the 90's here for daily high temps, and welding in the heat is not the most fun you can have, but I wanted to press on.
As I stated earlier, the bottom of the X overlaps the frame, and the top has gaps on each corner for installation at the factory. Apparently, the factory just used nondescript pieces of scrap to join the X to the frame, there was no real common size or shape. I cut four eliptical pieces from a piece of steel the same thickness, and used them to join the frame to the X support. After tacking all four corners in place and making sure the fit was good, the pieces were welded completely. Voila! A convertible frame!
---John
 ('59 SF convertible 002.JPG) ('59 SF convertible 002.JPG)
 ('59 SF convertible 004.JPG) ('59 SF convertible 004.JPG)
 ('59 SF convertible 007.JPG) ('59 SF convertible 007.JPG)
 ('59 SF convertible 009.JPG) ('59 SF convertible 009.JPG)
Attachments
----------------
'59 SF convertible 002.JPG (125KB - 319 downloads)
'59 SF convertible 004.JPG (124KB - 306 downloads)
'59 SF convertible 007.JPG (126KB - 262 downloads)
'59 SF convertible 009.JPG (125KB - 259 downloads)
|
|
| |
|
Expert 5K+
Posts: 7808
Location: Williams California | Big Al's son, Damian, wanted to earn a few bucks, so I put him to work scuffing and preparing the frame for paint, then I suspended it for painting, semi-gloss black.
---John
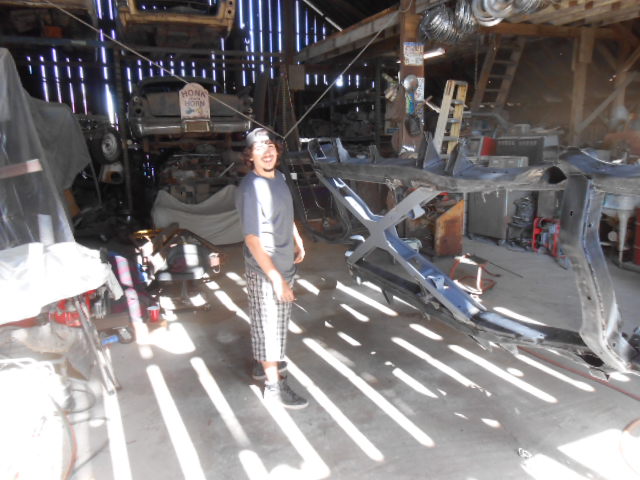 ('59 SF convertible 011.JPG) ('59 SF convertible 011.JPG)
 ('59 SF convertible 012.JPG) ('59 SF convertible 012.JPG)
 ('59 SF convertible 013.JPG) ('59 SF convertible 013.JPG)
Attachments
----------------
'59 SF convertible 011.JPG (126KB - 311 downloads)
'59 SF convertible 012.JPG (125KB - 309 downloads)
'59 SF convertible 013.JPG (126KB - 303 downloads)
|
|
| |
|
Expert 5K+
Posts: 5139
Location: cornpatch county, Southwest IOA | John, by any chance, have you kept track of how many spools of welding wire you have used on this project?.........................MO |
|
| |
|
Expert
Posts: 3889
Location: Northen Virginia | Amazing job John, great craftsmanship I love to see this car getting back to life. |
|
| |
|
Expert
Posts: 2905
Location: little rock, AR | I'm glad to see you hired a younger "Foward Looker" as we all are here for just a short time and this trade needs to be passed on. Here is an old saying: Doctor, I think we have a pulse. Good work Big John!!! |
|
| |
|
Expert 5K+
Posts: 7808
Location: Williams California | MOPAR-TO-YA - 2013-05-13 10:46 PM
John, by any chance, have you kept track of how many spools of welding wire you have used on this project?.........................MO
After working on this for so long, as well as other welding projects inbetween, I have no idea how much wire I have used. It would have been interesting to know, though.
---John |
|
| |
|
Expert 5K+
Posts: 7808
Location: Williams California | hemidenis - 2013-05-14 5:09 AM
Amazing job John, great craftsmanship I love to see this car getting back to life.
Thanks, Denis, I'm watching your projects come to life as well!! |
|
| |
|
Expert 5K+
Posts: 7808
Location: Williams California | oldwood - 2013-05-14 10:06 AM
I'm glad to see you hired a younger "Foward Looker" as we all are here for just a short time and this trade needs to be passed on. Here is an old saying: Doctor, I think we have a pulse. Good work Big John!!!
I try to get some of the younger generation to enjoy these cars, whether it be going to car shows, poker runs, etc. I totally support the younger folks entering the hobby, it would be nice to see more, rather than the gaming generation that we see quite often.
---John |
|
| |
|
Expert 5K+
Posts: 7808
Location: Williams California | Starting the reassembly of the chassis-
I saved the original hardware and had it zinc plated, and I replaced all the ball joints, bushings, etc, and painted the components.
---John
 ('59 SF convertible 001.JPG) ('59 SF convertible 001.JPG)
 ('59 SF convertible 002.JPG) ('59 SF convertible 002.JPG)
 ('59 SF convertible 003.JPG) ('59 SF convertible 003.JPG)
 ('59 SF convertible 004.JPG) ('59 SF convertible 004.JPG)
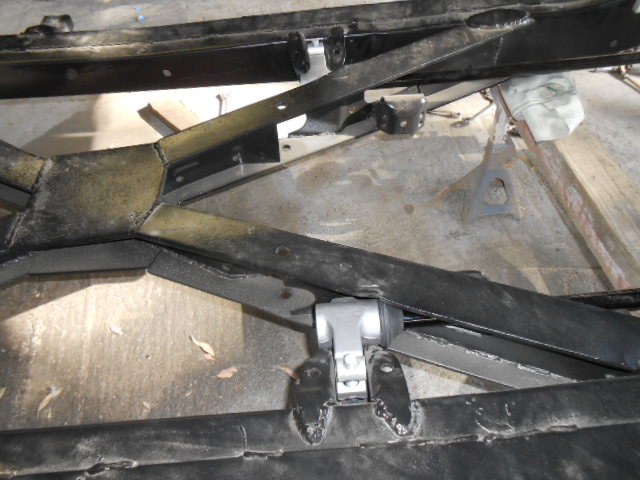 ('59 SF convertible 005.JPG) ('59 SF convertible 005.JPG)
Attachments
----------------
'59 SF convertible 001.JPG (126KB - 305 downloads)
'59 SF convertible 002.JPG (126KB - 308 downloads)
'59 SF convertible 003.JPG (127KB - 288 downloads)
'59 SF convertible 004.JPG (127KB - 290 downloads)
'59 SF convertible 005.JPG (125KB - 301 downloads)
|
|
| |
|
Expert
Posts: 4043
Location: Connecticut | Are those 12" brakes on the front ? Unless I'm mistaken, 57-9 Plymouths had lug bolts that went thru the wheel and screwed into the drums. Ron |
|
| |
|
Expert 5K+
Posts: 7808
Location: Williams California | ronbo97 - 2013-05-17 3:38 PM
Are those 12" brakes on the front ? Unless I'm mistaken, 57-9 Plymouths had lug bolts that went thru the wheel and screwed into the drums. Ron
I'll have to call you eagle eyes, Ron!
The front and rear brakes were updated years ago, and fitted with later drum brakes. The car that had these drove and stopped well, so I figured I would stick with them, as long as they function well.
---John
|
|
| |
|
Extreme Veteran
Posts: 591
Location: West Chester, PA | WOW!!!
John, I am always amazed with your work!
They say that "slow and steady wins the race", seems about right to me!
Hopefully she'll be done next year when I am able to come visit. |
|
| |
|
Expert 5K+
Posts: 7808
Location: Williams California | phurious - 2013-05-20 9:20 AM
WOW!!!
John, I am always amazed with your work!
They say that "slow and steady wins the race", seems about right to me!
Hopefully she'll be done next year when I am able to come visit.
Thanks, Ron!!! |
|
| |
|
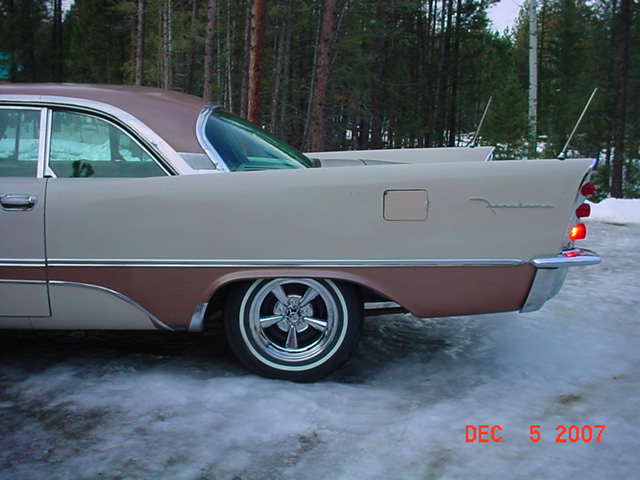
Regular
Posts: 84
Location: Northern sweden above the arctic circle!! | Awsome work John!
//Mikael
Edited by carmikael 2013-05-21 5:15 PM
|
|
| |
|
Expert
Posts: 2637
Location: Minor Hill, TN | Its getting there . How much more you need to do ? |
|
| |
|
Expert 5K+
Posts: 7808
Location: Williams California | 1961plymouthfury - 2013-05-22 12:19 AM
Its getting there . How much more you need to do ?
I still have a ways to go. I hope to have the chassis mostly completed this week, but then have body work to do on a customer's car. Once I get back to it, I will have to mount the body on the chassis, and begin block sanding. The top frame assembly will be a major job, as most of it is rusted junk.
---John |
|
| |
|
Expert
Posts: 2637
Location: Minor Hill, TN | I read were the car sold when it was brand new. I told my father and he said the car 1st sold at Erie J Miller Chrysler Plymouth in Ithaca,NY. I know you have more to do and good luck with it.
|
|
| |
|
Expert 5K+
Posts: 7808
Location: Williams California | Next was the rear axle. One of the threaded ends was buggered up, so I decided to replace it rather than risk problems with it. I removed the inner and outer seals, removed the chunk, and cleaned out the axle housing. I painted it gloss black, and installed the new seals. The third member was in good shape, and the backlash was within tolerance, so after painting it, I bolted it back to the housing. After reinstalling the axles, I positioned it beneath the frame.
I then hung the leaf springs, and mounted the third member. Each night, I have to cover the chassis up, as the bat guano can make quite a mess.
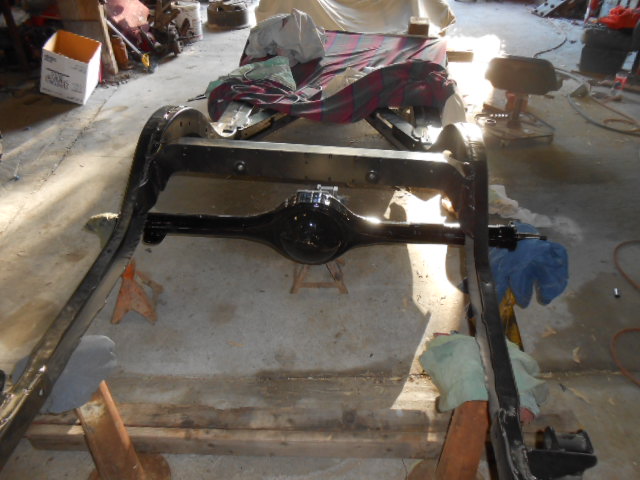 ('59 SF convertible 006.JPG) ('59 SF convertible 006.JPG)
 ('59 SF convertible 007.JPG) ('59 SF convertible 007.JPG)
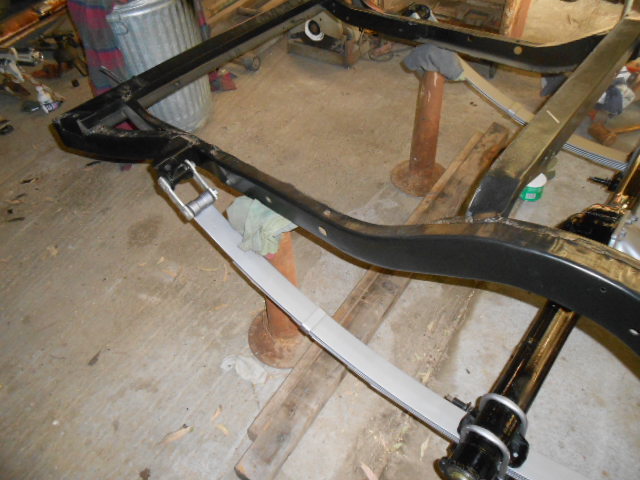 ('59 SF convertible 008.JPG) ('59 SF convertible 008.JPG)
 ('59 SF convertible 009.JPG) ('59 SF convertible 009.JPG)
 ('59 SF convertible 010.JPG) ('59 SF convertible 010.JPG)
 ('59 SF convertible 011.JPG) ('59 SF convertible 011.JPG)
Attachments
----------------
'59 SF convertible 006.JPG (126KB - 334 downloads)
'59 SF convertible 007.JPG (126KB - 305 downloads)
'59 SF convertible 008.JPG (126KB - 291 downloads)
'59 SF convertible 009.JPG (126KB - 292 downloads)
'59 SF convertible 010.JPG (126KB - 305 downloads)
'59 SF convertible 011.JPG (125KB - 289 downloads)
|
|
| |
|
Expert 5K+
Posts: 7808
Location: Williams California | I ran all the brake and fuel lines, and assembled the rear backing plates and drums, then a set of wheels [temporary, of course].
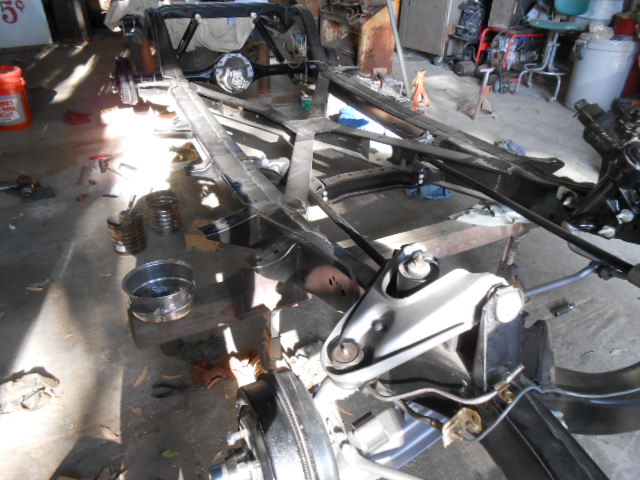 ('59 SF convertible 001.JPG) ('59 SF convertible 001.JPG)
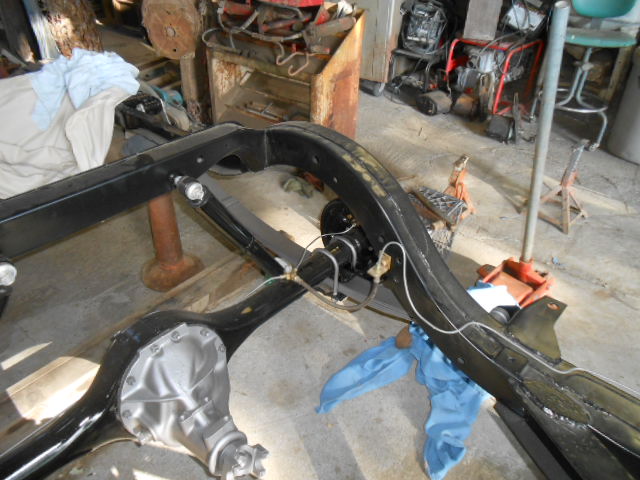 ('59 SF convertible 002.JPG) ('59 SF convertible 002.JPG)
 ('59 SF convertible 003.JPG) ('59 SF convertible 003.JPG)
 ('59 SF convertible 004.JPG) ('59 SF convertible 004.JPG)
Attachments
----------------
'59 SF convertible 001.JPG (127KB - 278 downloads)
'59 SF convertible 002.JPG (127KB - 306 downloads)
'59 SF convertible 003.JPG (125KB - 287 downloads)
'59 SF convertible 004.JPG (126KB - 288 downloads)
|
|
| |
|
Expert 5K+
Posts: 7808
Location: Williams California | I got the engine and trans painted and mated together, and installed it in the chassis. Then on to painting and installing small components.
---John
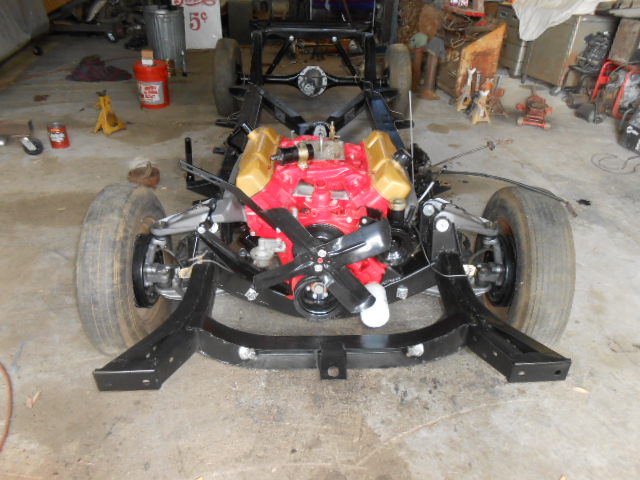 ('59 SF convertible 001.JPG) ('59 SF convertible 001.JPG)
 ('59 SF convertible 002.JPG) ('59 SF convertible 002.JPG)
 ('59 SF convertible 003.JPG) ('59 SF convertible 003.JPG)
 ('59 SF convertible 004.JPG) ('59 SF convertible 004.JPG)
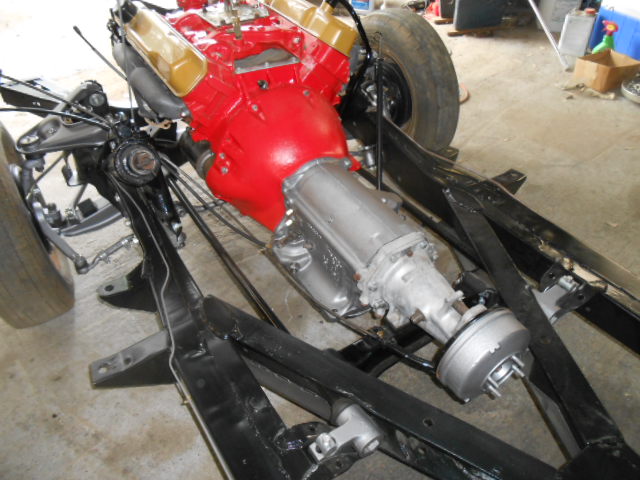 ('59 SF convertible 006.JPG) ('59 SF convertible 006.JPG)
 ('59 SF convertible 007.JPG) ('59 SF convertible 007.JPG)
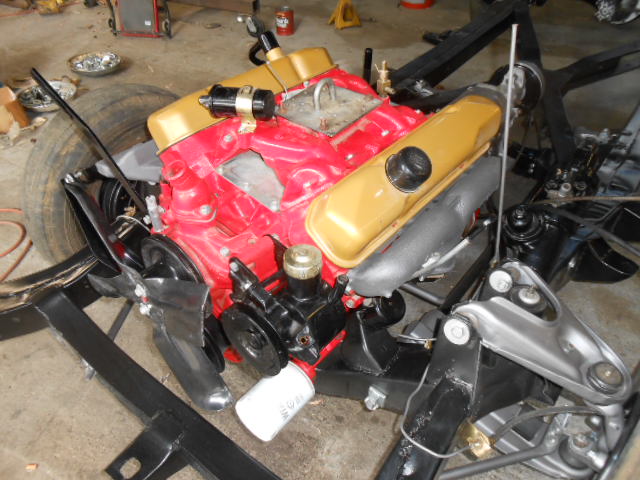 ('59 SF convertible 008.JPG) ('59 SF convertible 008.JPG)
Attachments
----------------
'59 SF convertible 001.JPG (125KB - 286 downloads)
'59 SF convertible 002.JPG (126KB - 296 downloads)
'59 SF convertible 003.JPG (126KB - 286 downloads)
'59 SF convertible 004.JPG (126KB - 281 downloads)
'59 SF convertible 006.JPG (126KB - 277 downloads)
'59 SF convertible 007.JPG (126KB - 302 downloads)
'59 SF convertible 008.JPG (126KB - 293 downloads)
|
|
| |
|
Expert
Posts: 4043
Location: Connecticut | Are you planning to paint the body and then lower it onto the frame ? I was kinda leery of that due to concern about paint scratches. What I ended up doing (with my Plymouth) was bolting the body to the frame, then installing the drive train after paint, but before the installation of the front clip. Going the same route with the convertible.
Ron |
|
| |
|
Exner Expert 19,174 posts. Neil passed away 18 Sep 2015. You will be missed, Neil!
Posts: 19146
Location: bishop, ca | That chassis detail is PRIMO!
|
|
| |
|
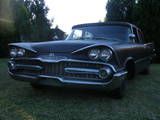
Elite Veteran
Posts: 982
Location: Upper Hunter NSW Australia | .....
.....
John, these build photos are Gold !!. Keep 'em coming .
Very helpful for me when I get to my body-off-frame stage on my '59 Dodge, gives me great inspiration and ideas.
Time consuming though it is, everyone benefits from your time taken to upload photos so thanks for the pics .
Brilliant !!!
....... |
|
| |
|
Extreme Veteran
Posts: 530
Location: Wake Forest, NC | Covering it at night is a good idea bat poop is very strong. Beautiful |
|
| |
|
Location: Parts Unknown | Is bat poop a PPG product ? Where do you get it ?
|
|
| |
|
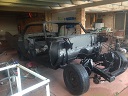
Expert 5K+
Posts: 8444
Location: Perth Australia | I believe it is readilly available in Transilvania
They have big bats there that really suck
So the story goes anyway
|
|
| |
|
Expert 5K+
Posts: 7808
Location: Williams California | ronbo97 - 2013-05-28 5:14 PM
Are you planning to paint the body and then lower it onto the frame ? I was kinda leery of that due to concern about paint scratches. What I ended up doing (with my Plymouth) was bolting the body to the frame, then installing the drive train after paint, but before the installation of the front clip. Going the same route with the convertible.
Ron
Ron,
my plan is to paint the underside of the body while on the rotisserie, then have some big boys help me set it onto the chassis. Finish body work and paint on the exterior will be later, after I fit all the body panels.
---John |
|
| |
|
Expert 5K+
Posts: 7808
Location: Williams California | d500neil - 2013-05-28 6:08 PM
That chassis detail is PRIMO!
Thanks, Neil, and I appreciate the info you had given me, it helped a lot!!
---John |
|
| |
|
Expert 5K+
Posts: 7808
Location: Williams California | VAN HELSING - 2013-05-28 8:10 PM
.....
.....
John, these build photos are Gold !!. Keep 'em coming .
Very helpful for me when I get to my body-off-frame stage on my '59 Dodge, gives me great inspiration and ideas.
Time consuming though it is, everyone benefits from your time taken to upload photos so thanks for the pics .
Brilliant !!!
.......
Thanks for the good words!!
---John |
|
| |
|
Elite Veteran
Posts: 982
Location: Upper Hunter NSW Australia | ttotired - 2013-05-29 11:38 PM
I believe it is readilly available in Transilvania
They have big bats there that really suck
So the story goes anyway
........
...
Nup, Van Helsing got rid of the Transylvanian bats way back in 1888......... so the movie goes anyway !!! BOOM BOOM
.......
.. |
|
| |
|
Expert 5K+
Posts: 7808
Location: Williams California | Doctor DeSoto - 2013-05-29 5:29 AM
Is bat poop a PPG product ? Where do you get it ?
It's 'Guano spot putty' tested on '87 Daihatsus.
---John |
|
| |
|
Expert 5K+
Posts: 8947
Location: WHEELING,WV.>>>HOME OF WWVA | uh oh big john , does the wifey know you're usin her fitted sheets as car covers ----------------------------------------------------------later |
|
| |
|
Expert 5K+
Posts: 7808
Location: Williams California | 60 dart - 2013-05-30 2:54 PM
uh oh big john , does the wifey know you're usin her fitted sheets as car covers ----------------------------------------------------------later
LMAO, Chuck! I'd probably be in the doghouse if that was the case! A fellow I bought some cars from gave me a few sacks of household goods, and these were included.
---John |
|
| |
|
Expert 5K+
Posts: 7808
Location: Williams California | While finishing up the bodywork on another car, I spent a few days gathering hardware from other cars in the yard. These I will have zinc plated, nearly 400 pieces.
I cleaned the entire bunch in acid to remove any rust, then neutralized them with a baking soda solution. Any with undercoat or paint I had to wire wheel, as the plating would not work properly with foreign matter. Afterwards, I washed the entire lot in lacquer thinner to remove any oil or undercoat residue.
One container will be yellow zinc [gold] and the other will be clear[silver]
---John
 ('59 SF convertible 001.JPG) ('59 SF convertible 001.JPG)
 ('59 SF convertible 002.JPG) ('59 SF convertible 002.JPG)
Attachments
----------------
'59 SF convertible 001.JPG (125KB - 287 downloads)
'59 SF convertible 002.JPG (126KB - 279 downloads)
|
|
| |
|
Expert 5K+
Posts: 7808
Location: Williams California | Got the body mount parts and hardware back from A&A plating, everything came out nice!
---John
 ('59 SF hardware 001.JPG) ('59 SF hardware 001.JPG)
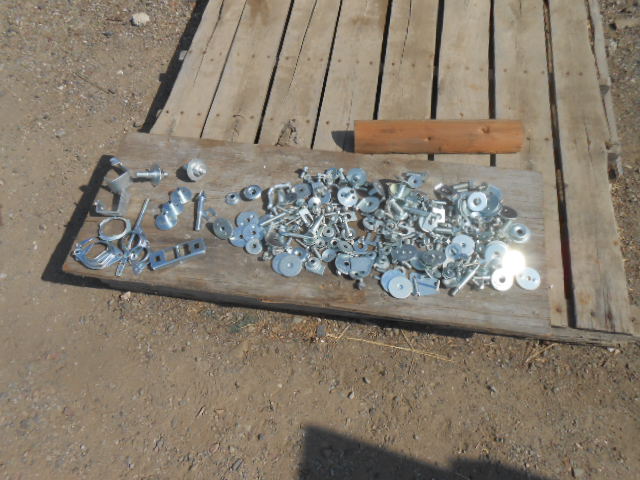 ('59 SF hardware 002.JPG) ('59 SF hardware 002.JPG)
Attachments
----------------
'59 SF hardware 001.JPG (125KB - 278 downloads)
'59 SF hardware 002.JPG (125KB - 270 downloads)
|
|
| |
|
Expert
Posts: 4043
Location: Connecticut | John - So what's your secret to remembering where each bolt, nut, screw and fastener goes on the car ? Ron |
|
| |
|
Elite Veteran
Posts: 781
Location: Montreal, Canada | Experience?
|
|
| |
|
Expert 5K+
Posts: 7808
Location: Williams California | ronbo97 - 2013-07-29 11:29 AM
John - So what's your secret to remembering where each bolt, nut, screw and fastener goes on the car ? Ron
Ron,
Even though I have taken an awful lot of these cars apart, often, I will have to go out back and check another car to see where something goes. I'd be a liar if I told you I knew where every one went to.
---John |
|
| |
|
Expert 5K+
Posts: 8444
Location: Perth Australia | Pictures, lots and lots of pictures is how I do it and I still get stumped on some things
|
|
| |
|
Member
Posts: 9
Location: nor-cal | big m - 2013-07-29 10:08 AM
Got the body mount parts and hardware back from A&A plating, everything came out nice!
---John
where are they and are they reasonable cost?
I am in Chico and am looking at getting a bumper plated or chromed-not sure but I think plated would be very cool.
(its a 1950 2 ton chevy truck front bumper) and yes-i do have mopar too... pair of 55 imperials and a 55 savoy and a 48 chry royal and sold our 49 ply bus coupe few years ago... got rid of our set of 36 plymouths too(kinda regret that one) |
|
| |
|
Expert 5K+
Posts: 5139
Location: cornpatch county, Southwest IOA | big m - 2013-07-29 3:54 PM
ronbo97 - 2013-07-29 11:29 AM
John - So what's your secret to remembering where each bolt, nut, screw and fastener goes on the car ? Ron
Ron,
Even though I have taken an awful lot of these cars apart, often, I will have to go out back and check another car to see where something goes. I'd be a liar if I told you I knew where every one went to.
---John |
|
| |
|
Location: Parts Unknown | You told him it is part of your religious expression, right ?
|
|
| |
|
Expert 5K+
Posts: 7808
Location: Williams California | ccpanel - 2013-07-29 8:41 PM
big m - 2013-07-29 10:08 AM
Got the body mount parts and hardware back from A&A plating, everything came out nice!
---John
where are they and are they reasonable cost?
I am in Chico and am looking at getting a bumper plated or chromed-not sure but I think plated would be very cool.
(its a 1950 2 ton chevy truck front bumper ) and yes-i do have mopar too... pair of 55 imperials and a 55 savoy and a 48 chry royal and sold our 49 ply bus coupe few years ago... got rid of our set of 36 plymouths too (kinda regret that one )
A&A is located in Sacramento, look up Alta plating on the web. They could probably give you an estimate over the phone.
Stop by next time you are in the area!
---John |
|
| |
|
Expert 5K+
Posts: 7808
Location: Williams California | I finally completed the Turnpike Cruiser job for a customer, now my spare time goes back to this.
I installed the exhaust system this last weekend, it was a chore to get everything placed without touching the torsion bars or the X-frame. Last item on the chassis for now will be fitting the trans cooling lines. Easy to route them without the body being in the way.
---John
 ('59 SF Convertible 001.JPG) ('59 SF Convertible 001.JPG)
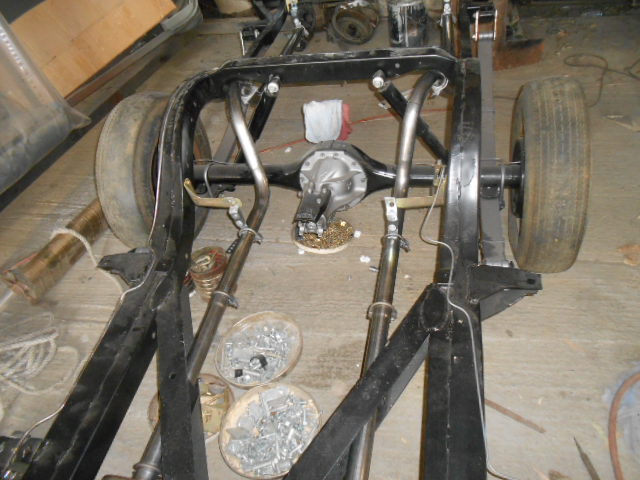 ('59 SF Convertible 002.JPG) ('59 SF Convertible 002.JPG)
Attachments
----------------
'59 SF Convertible 001.JPG (125KB - 254 downloads)
'59 SF Convertible 002.JPG (126KB - 247 downloads)
|
|
| |
|
Board Moderator & Exner Expert 10K+
Posts: 13054
Location: Southern Sweden - Sturkö island | Nice work John - I see some really tight, narrow passages there |
|
| |
|
Expert
Posts: 3889
Location: Northen Virginia | Amazing John!! and is very interesting how you keep all the cast iron parts of cast iron color, I never thought of that, mine was so rusted that I never could figure if they were factory painted or not, you may can tell us better. |
|
| |
|
Expert 5K+
Posts: 7808
Location: Williams California | wizard - 2013-09-24 11:00 PM
Nice work John - I see some really tight, narrow passages there
Thanks, Sven! |
|
| |
|
Expert 5K+
Posts: 7808
Location: Williams California | hemidenis - 2013-09-25 12:17 PM
Amazing John!! and is very interesting how you keep all the cast iron parts of cast iron color, I never thought of that, mine was so rusted that I never could figure if they were factory painted or not, you may can tell us better.
I used a POR 15 product called Metal Mask on those parts. Neil Vedder was a big help here as he had lots of factory brochures, assembly line pics, and those of his personal car. I was also able to check some of the lower mileage parts cars in the yard here to verify what was and was not painted.
---John |
|
| |
|
Expert
Posts: 3889
Location: Northen Virginia | I have a feeling that the whole frame wasn't paint on my Imperial, I could find NO trace of paint in it, or the rear axle assy, except in those areas near to the engine, which would be visible with the hood opened. |
|
| |
|
Expert 5K+
Posts: 7808
Location: Williams California | I wanted to replace the rear filler panel, as it had been bent when the bumper was pushed in, also, both ends were twisted. I figured it would take a good eight hours to get the metal satisfactorily straight. I had another option, which was to remove it and replace it with the NOS one I had found at a local swap meet for $40. I had to set the rear of the body down from the rotisserie, as it was in the way of accessing the back of it. By Using this piece rather than repairing the original, I was able to save about six hours of work.
 ('59 SF convertible 002.JPG) ('59 SF convertible 002.JPG)
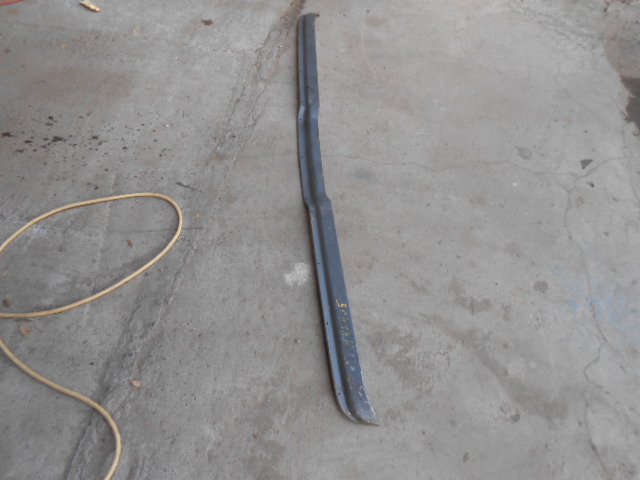 ('59 SF convertible 003.JPG) ('59 SF convertible 003.JPG)
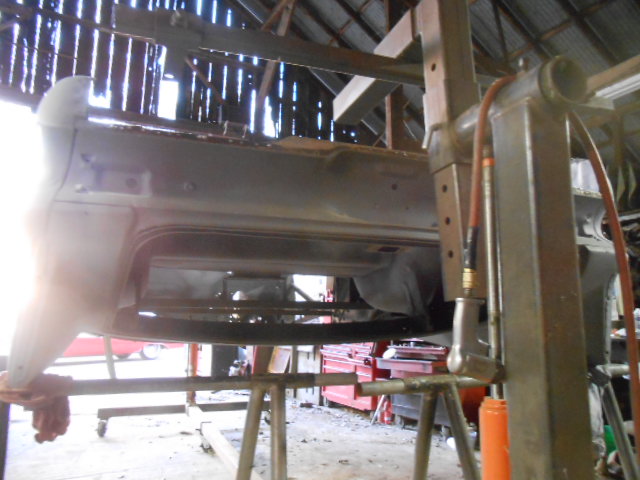 ('59 SF convertible 004.JPG) ('59 SF convertible 004.JPG)
Attachments
----------------
'59 SF convertible 002.JPG (126KB - 265 downloads)
'59 SF convertible 003.JPG (123KB - 247 downloads)
'59 SF convertible 004.JPG (126KB - 255 downloads)
|
|
| |
|
Expert 5K+
Posts: 7808
Location: Williams California | I had to use a carbide burr to remove the spot welds, as the angle would not allow drilling. After removing the bent panel, I cleaned and smoothed the body surface. Then I drilled holes in the panel for rosette welding later. Note the factory alignment [locator] holes in the panel, made for easy installation.
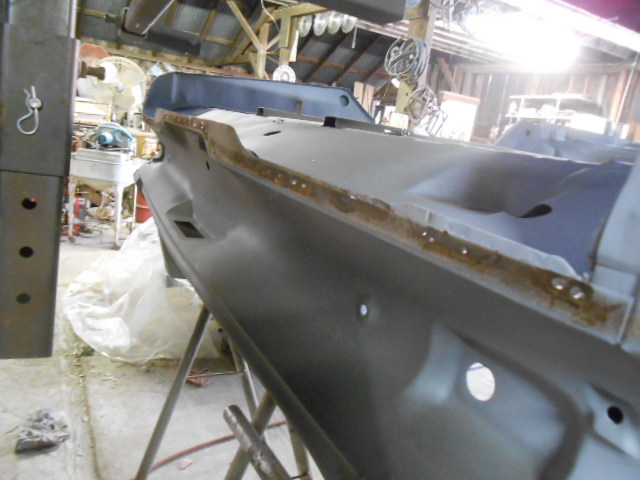 ('59 SF convertible 005.JPG) ('59 SF convertible 005.JPG)
 ('59 SF convertible 007.JPG) ('59 SF convertible 007.JPG)
 ('59 SF convertible 009.JPG) ('59 SF convertible 009.JPG)
Attachments
----------------
'59 SF convertible 005.JPG (128KB - 264 downloads)
'59 SF convertible 007.JPG (126KB - 286 downloads)
'59 SF convertible 009.JPG (126KB - 260 downloads)
|
|
| |
|
Expert 5K+
Posts: 7808
Location: Williams California | Panel is then clamped in place, and welded on. This entire process was completed in less than 2 hours.
---John
 ('59 SF convertible 010.JPG) ('59 SF convertible 010.JPG)
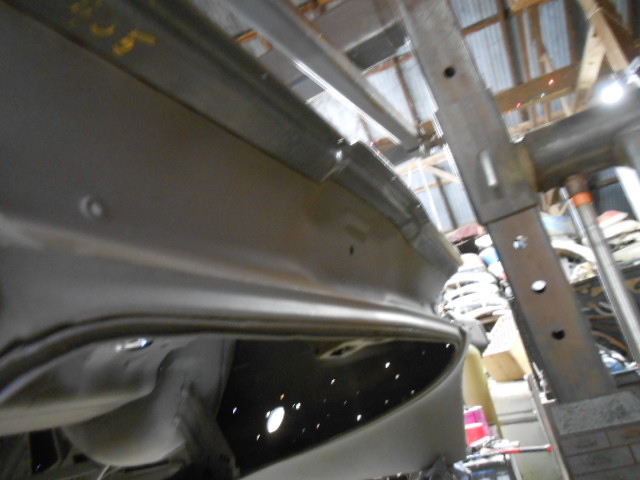 ('59 SF convertible 011.JPG) ('59 SF convertible 011.JPG)
Attachments
----------------
'59 SF convertible 010.JPG (126KB - 266 downloads)
'59 SF convertible 011.JPG (126KB - 257 downloads)
|
|
| |
|

Expert
Posts: 2264
Location: McComb, Mississippi | Excellent progress!! |
|
| |
|
Expert 5K+
Posts: 7808
Location: Williams California | plymouth - 2013-10-18 10:10 AM
Excellent progress!!
Thanks, Christian!
---John |
|
| |
|
Expert
Posts: 2788
Location: USA - KY |
Wow, John, you are one hard working and patient dude!
You make it look easy...but I know it's NOT!
|
|
| |
|
Expert 5K+
Posts: 7808
Location: Williams California | Thanks, Rosy!!
Luckily, the weather held out for painting, I was concerned that it would either get windy, or cold, but was still with 80 degrees for the high. I reapplied seam sealer to all the necessary areas on the lower body, I didn't want to paint the bottom and then have seam sealer ooze out somewhere afterwards. Next was to paint the underside, in preparation of mounting the body back on its chassis for panel fitment. Came out pretty decent, after using a half gallon of single stage enamel.
---John
 ('59 SF convertible 002.JPG) ('59 SF convertible 002.JPG)
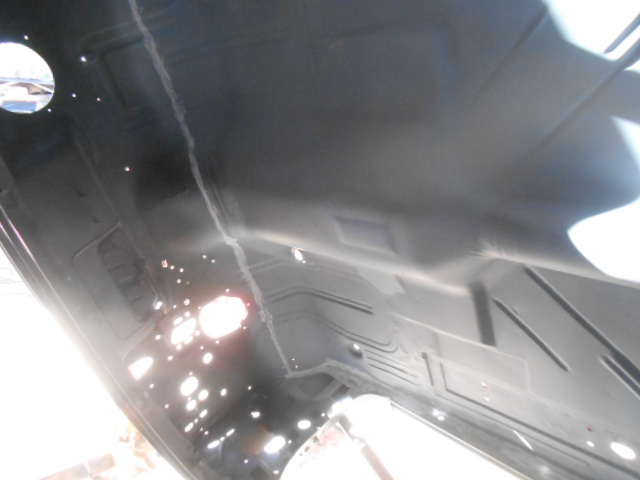 ('59 SF convertible 003.JPG) ('59 SF convertible 003.JPG)
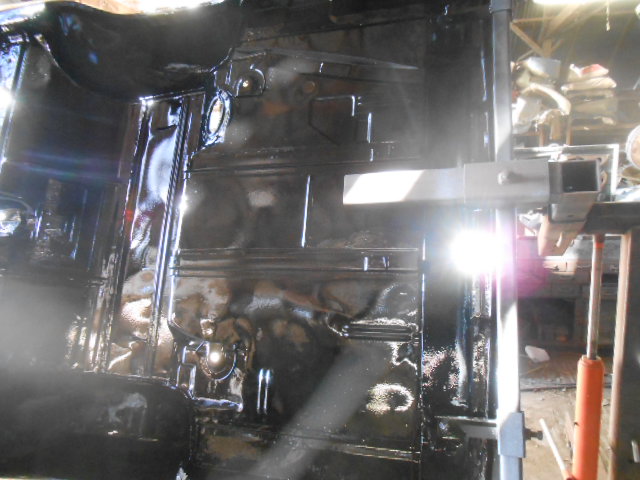 ('59 SF convertible 004.JPG) ('59 SF convertible 004.JPG)
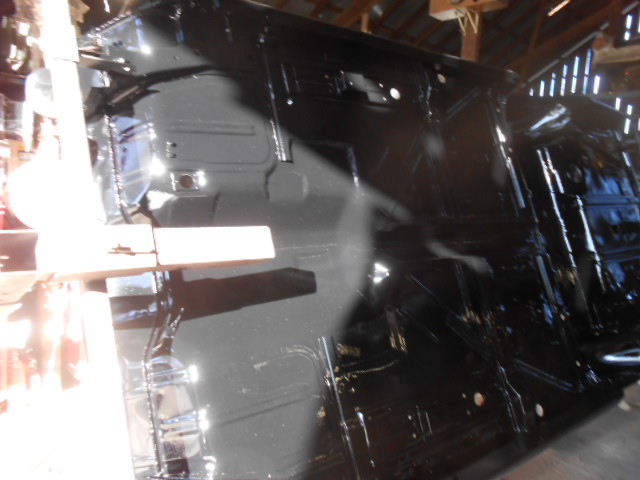 ('59 SF convertible 006.JPG) ('59 SF convertible 006.JPG)
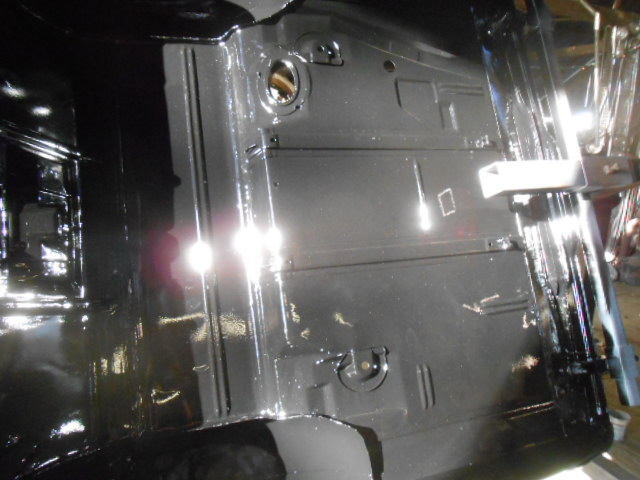 ('59 SF convertible 008.JPG) ('59 SF convertible 008.JPG)
Attachments
----------------
'59 SF convertible 002.JPG (126KB - 304 downloads)
'59 SF convertible 003.JPG (124KB - 312 downloads)
'59 SF convertible 004.JPG (125KB - 314 downloads)
'59 SF convertible 006.JPG (126KB - 301 downloads)
'59 SF convertible 008.JPG (124KB - 371 downloads)
|
|
| |
|
Board Moderator & Exner Expert 10K+
Posts: 13054
Location: Southern Sweden - Sturkö island | It's such a joy to see your progress after such a difficult project John - I read these posts with greatest interest. |
|
| |
|
Expert 5K+
Posts: 8444
Location: Perth Australia | Its good to finally put paint on instead of taking it off
|
|
| |
|
Expert
Posts: 2788
Location: USA - KY |
Oh, now that is pretty!
Great progress!
|
|
| |
|
Extreme Veteran
Posts: 537
Location: Upstate NY | Looks great John! A lot of work there. |
|
| |
|
Expert
Posts: 2905
Location: little rock, AR | Looking Gooooooood!!! Now what color is the car going to be? Please don't say R and W. |
|
| |
|
Expert
Posts: 4043
Location: Connecticut | My vote would be Bittersweet (code ZZ). John's keeping that detail a secret, I guess. Ron |
|
| |
|
Exner Expert 19,174 posts. Neil passed away 18 Sep 2015. You will be missed, Neil!
Posts: 19146
Location: bishop, ca |
I suppose, if you start with THIS, you could paint it any dayumm color(s) you want,
but, Rusty WAS a white car (right???) and he/she deserves to be "restored".
What color (codes) were its interior and top?
 (RUSTY.jpg) (RUSTY.jpg)
Attachments
----------------
RUSTY.jpg (48KB - 309 downloads)
|
|
| |
|
Expert 5K+
Posts: 7808
Location: Williams California | wizard - 2013-10-21 11:01 AM
It's such a joy to see your progress after such a difficult project John - I read these posts with greatest interest.
Thanks, Sven!! |
|
| |
|
Expert 5K+
Posts: 7808
Location: Williams California | d500neil - 2013-10-22 3:34 PM
I suppose, if you start with THIS, you could paint it any dayumm color(s) you want,
but, Rusty WAS a white car (right???) and he/she deserves to be "restored".
What color (codes) were its interior and top?
The original color was solid Tuxedo black, and the interior was red, with a white top. I will be going back to the same color and interior combos. The white on the car had been added sometime before 1965, when the car was crashed, and junked in the upstate New York yard where it languished all these years.
---John |
|
| |
|
Expert
Posts: 2905
Location: little rock, AR | You know what they say,especially in CA, once ya go BLACK ya never go BACK. LOL All kidding aside, Black cars must be RAZOR straight and I'm sure this one will be. You know with black its easier to see the red. Thats the seats don't cha know. Get you mind out of the gutter. |
|
| |
|
Elite Veteran
Posts: 1159
Location: D-70199 Heslach | doesn't matter for me what color. I've respect of such a big project. |
|
| |
|
Expert 5K+
Posts: 7808
Location: Williams California | oldwood - 2013-10-22 6:15 PM
You know what they say,especially in CA, once ya go BLACK ya never go BACK. LOL All kidding aside, Black cars must be RAZOR straight and I'm sure this one will be. You know with black its easier to see the red. Thats the seats don't cha know. Get you mind out of the gutter.
Dorsey, You're crazy, but I like it!! LOL!
Someday we'll get to meet up.
---John |
|
| |
|
Expert 5K+
Posts: 7808
Location: Williams California | ToMopar - 2013-10-23 12:07 AM
doesn't matter for me what color. I've respect of such a big project.
Thanks, ToM!! |
|
| |
|
Expert 5K+
Posts: 7808
Location: Williams California | After sorting body mount hardware, I placed the pieces in the necessary spots. I had to look at some cars in the yard, as it was not fresh in my mind. I was hoping to have some friends over to assist with lifting the body onto the frame, but one had a sore back, and another did not show. After a bit of thought, I hooked up an engine hoist to the front, and used the back half of the rotisserie to support the rear. By then, Austin had gotten back from Yuba City, and we easily rolled the body over the chassis, and set it in place.
Afterwards, I threaded all the body mount bolts, and tightened them up. Finally, I removed the braces from the doors and quarters.
---John
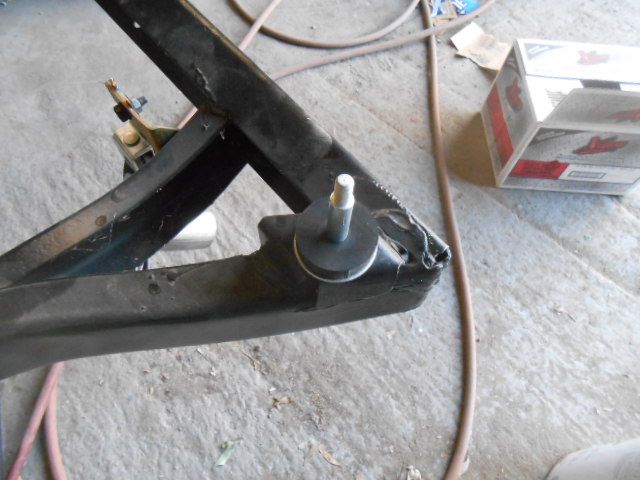 ('59 SF convertible 001.JPG) ('59 SF convertible 001.JPG)
 ('59 SF convertible 002.JPG) ('59 SF convertible 002.JPG)
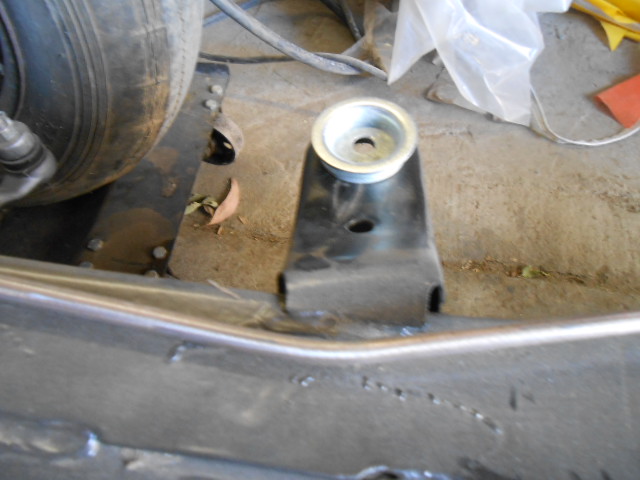 ('59 SF convertible 003.JPG) ('59 SF convertible 003.JPG)
 ('59 SF convertible 004.JPG) ('59 SF convertible 004.JPG)
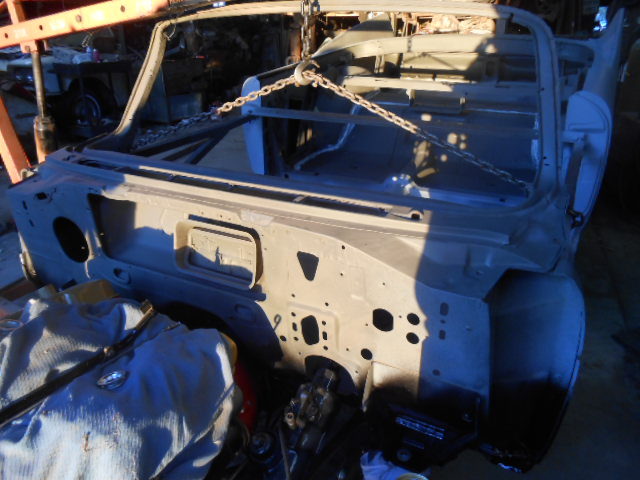 ('59 SF convertible 006.JPG) ('59 SF convertible 006.JPG)
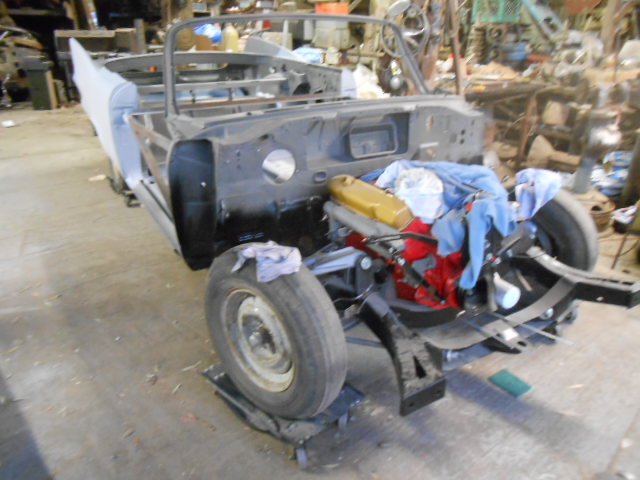 ('59 SF convertible 007.JPG) ('59 SF convertible 007.JPG)
 ('59 SF convertible 008.JPG) ('59 SF convertible 008.JPG)
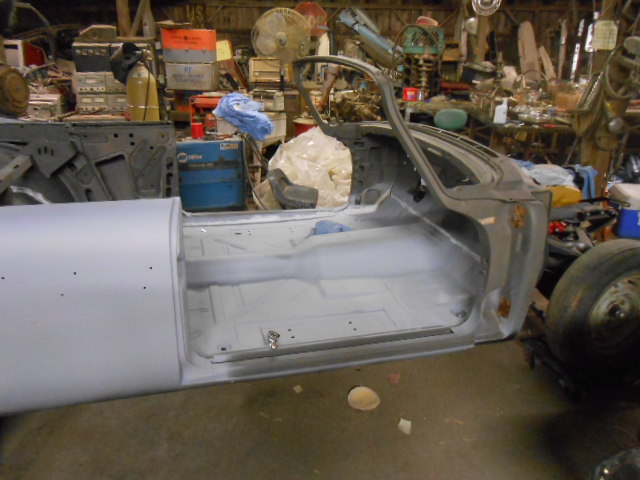 ('59 SF convertible 009.JPG) ('59 SF convertible 009.JPG)
Attachments
----------------
'59 SF convertible 001.JPG (126KB - 294 downloads)
'59 SF convertible 002.JPG (126KB - 294 downloads)
'59 SF convertible 003.JPG (126KB - 305 downloads)
'59 SF convertible 004.JPG (126KB - 286 downloads)
'59 SF convertible 006.JPG (127KB - 284 downloads)
'59 SF convertible 007.JPG (125KB - 296 downloads)
'59 SF convertible 008.JPG (126KB - 309 downloads)
'59 SF convertible 009.JPG (126KB - 306 downloads)
|
|
| |
|
Inactive by user's request
Location: Las Vegas, Nevada | It's coming along nicely, John.
But as you know, a car is original only once. So by restoring it, you are still ruining it...LOL!!!!!
Seriously, your accomplishment is amazing. And no, you can't have your 440 back for this one.
Tracie still talks about taking a family trip to Sacramento, so hopefully we'll be able to get together with you and M'Lisa then.
K. |
|
| |
|
Expert
Posts: 2905
Location: little rock, AR | I can just see you now driving down the CA coastline with dark sunglasses, cuban stogie,living the dream. I know what you mean when a helping hand is no where around. Close but NO cigar yet. Get back to work. |
|
| |
|
Expert 5K+
Posts: 7808
Location: Williams California | Kenny J. - 2013-10-29 9:45 AM
It's coming along nicely, John.
But as you know, a car is original only once. So by restoring it, you are still ruining it...LOL!!!!!
Seriously, your accomplishment is amazing. And no, you can't have your 440 back for this one.
Tracie still talks about taking a family trip to Sacramento, so hopefully we'll be able to get together with you and M'Lisa then.
K.
When you guys can make it, you know we'd love to see you!!
---John |
|
| |
|
Expert 5K+
Posts: 7808
Location: Williams California | oldwood - 2013-10-29 10:16 AM
I can just see you now driving down the CA coastline with dark sunglasses, cuban stogie,living the dream. I know what you mean when a helping hand is no where around. Close but NO cigar yet. Get back to work.
Thanks, Dorsey, it's actually starting to resemble an automobile finally.
---John |
|
| |
|
Expert
Posts: 4043
Location: Connecticut | John - You 'wrote the book' on how to do this correctly. You should publish this thread in book form so future restorers can learn from you. One minor thing: I noticed you were using some rubber body mounts. Unless I'm mistaken, I don't think any rubber mounts were used on the convert. There may have been a thread on this a while ago, but I can't be sure. Ron |
|
| |
|
Expert
Posts: 2596
Location: Upplands Väsby, Sweden | SUPER NICE WORK
Look like a car first time at many year
Thanks you show us how you built upp your Sport Fury |
|
| |
|

Account deactivated by owner's request
Location: On this barrel | Looking good ... And Austin likes his Mickey's!! |
|
| |
|
Expert 5K+
Posts: 7808
Location: Williams California | ronbo97 - 2013-10-29 1:17 PM
John - You 'wrote the book' on how to do this correctly. You should publish this thread in book form so future restorers can learn from you. One minor thing: I noticed you were using some rubber body mounts. Unless I'm mistaken, I don't think any rubber mounts were used on the convert. There may have been a thread on this a while ago, but I can't be sure. Ron
Thanks Ron, and I'll have to check into the rubber mount pads. I did look under the '59 Firesweep convertible and it had them, but that car had been monkeyed with too.
---John |
|
| |
|
Expert
Posts: 2596
Location: Upplands Väsby, Sweden | I think Ron have right no rubber between the body and frame I just looking at my Windsor no rubber just metal copper
Edited by Windsor59 2013-10-29 5:28 PM
|
|
| |
|
Expert
Posts: 2996
Location: Sept. 1958 | Yes. They use 10 metal cups total. But trunk floor ones just in front of rear most may use something else. Haven't got to that. They look like it in my Plymouth.
Nice work John. I can't wait till I get to that stage. Now has solid body like all FL verts should have! |
|
| |
|
Exner Expert 19,174 posts. Neil passed away 18 Sep 2015. You will be missed, Neil!
Posts: 19146
Location: bishop, ca | I've got correspondence from Dodge to Carl Kiefaeker, in Re: his specially-ordered D501 hard top which was built onto
a convertible frame.
That letter states that that car had : "Solid Convertible Body Spacers" on it.
Dunno what the 'solid' spacers are/were, but they were not "rubber" ones, apparently.
|
|
| |
|
Expert
Posts: 1324
Location: Hickory, NC | 56royaldodge - 2013-10-29 4:39 PM
Looking good ... And Austin likes his Mickey's!! :laugh:
Just gotta be careful not to get stung!!! |
|
| |
|
Expert 5K+
Posts: 7808
Location: Williams California | I checked beneath an untouched '58 convertible, and yes, indeed, all the mounts are solid. I've found that some FL cars used the same steel 'cups' at the very front mounts, so I'll have to see if I can gather enough of them.
Thanks for everyone's input on this also.
---John |
|
| |
|
Expert
Posts: 2637
Location: Minor Hill, TN | Its getting there. |
|
| |
|
Expert 5K+
Posts: 7808
Location: Williams California | It took about four hours of pulling body mounts, but I have finally gotten enough of the mount cups to replace the rubber mounts. after a thorough de-rusting, they are ready for installation.
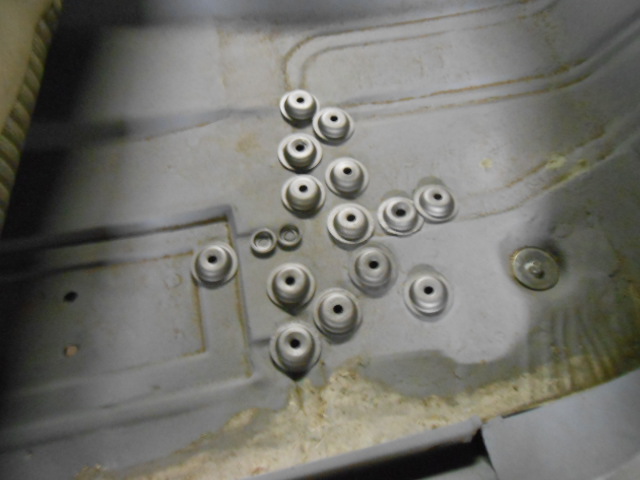 ('59 SF convertible 001.JPG) ('59 SF convertible 001.JPG)
Attachments
----------------
'59 SF convertible 001.JPG (126KB - 281 downloads)
|
|
| |
|
Expert 5K+
Posts: 7808
Location: Williams California | I stripped the two doors I had from a Fury, aside from several small dents and one poorly finished lead repair, they were pretty nice. After bumping and dinging the dents out, I sprayed metal etching primer on the bare steel.
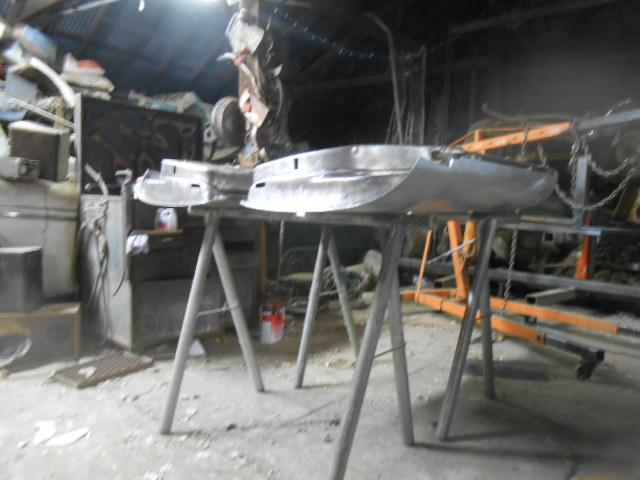 ('59 SF convertible 002.JPG) ('59 SF convertible 002.JPG)
 ('59 SF convertible 003.JPG) ('59 SF convertible 003.JPG)
Attachments
----------------
'59 SF convertible 002.JPG (126KB - 293 downloads)
'59 SF convertible 003.JPG (126KB - 289 downloads)
|
|
| |
|
Expert
Posts: 2637
Location: Minor Hill, TN | Its getting there I hope to see it a car show in Alabama or Tennesee |
|
| |
|
Expert 5K+
Posts: 7808
Location: Williams California | I gathered up a good set of 4-door car hinges, these usually have less wear as the doors are lighter. Removed the paint, and primered them. Next, was to hang the doors, and dig out the fenders I would be using, along with a core support, to roughly assemble the front group. The trim lines of the parts I was using was different than the Sport Fury, so all trim holes needed to be welded, and new ones drilled.
Glad I had done this, as I found several holes on the driver's side quarter were drilled incorrectly, and had to change them too.
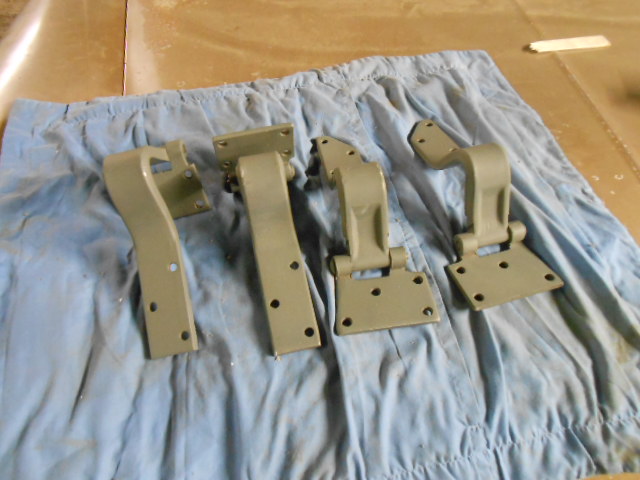 ('59 SF convertible 005.JPG) ('59 SF convertible 005.JPG)
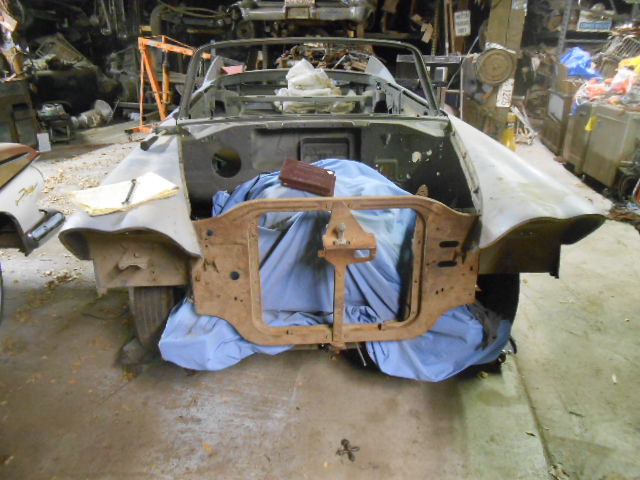 ('59 SF convertible 001.JPG) ('59 SF convertible 001.JPG)
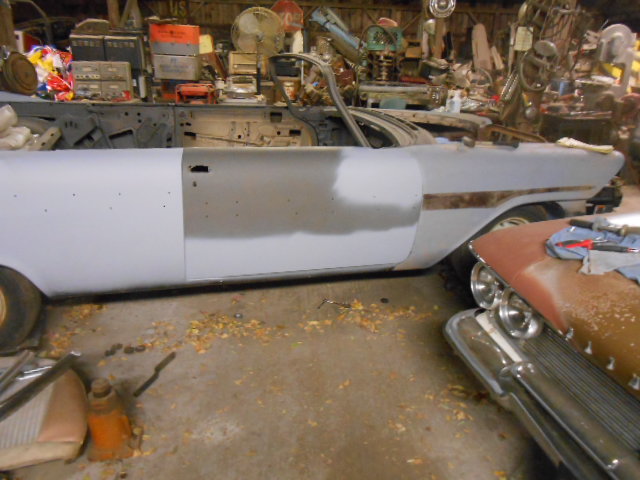 ('59 SF convertible 002.JPG) ('59 SF convertible 002.JPG)
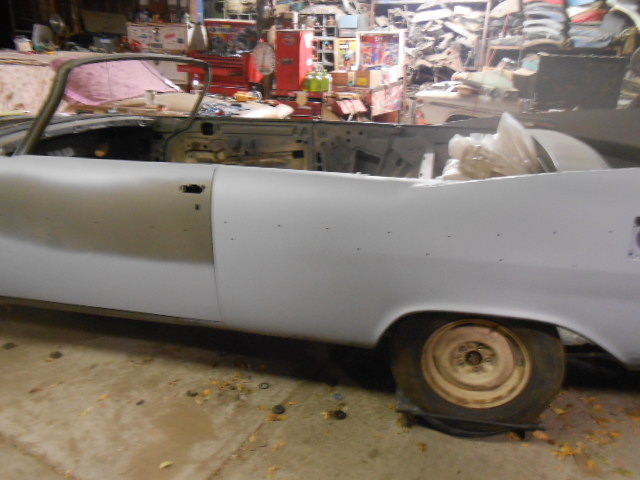 ('59 SF convertible 003.JPG) ('59 SF convertible 003.JPG)
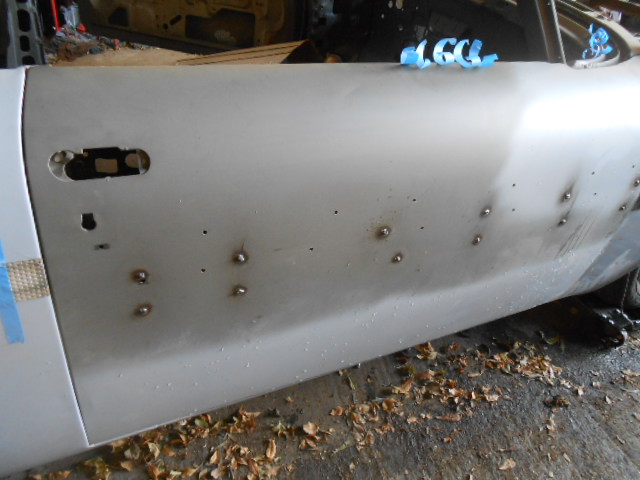 ('59 SF convertible 001.JPG) ('59 SF convertible 001.JPG)
 ('59 SF convertible 002.JPG) ('59 SF convertible 002.JPG)
 ('59 SF convertible 003.JPG) ('59 SF convertible 003.JPG)
 ('59 SF convertible 004.JPG) ('59 SF convertible 004.JPG)
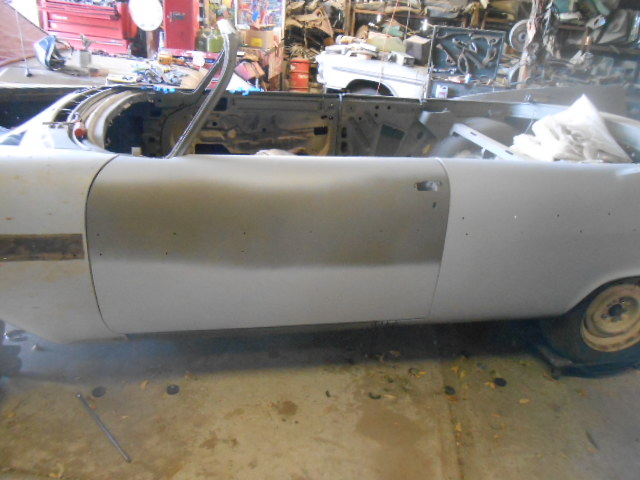 ('59 SF convertible 005.JPG) ('59 SF convertible 005.JPG)
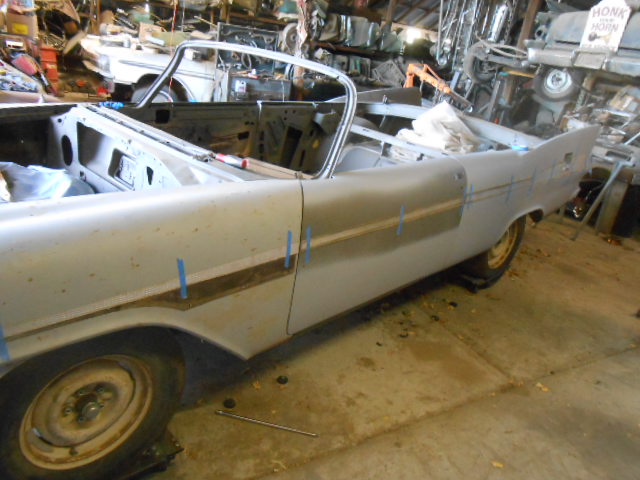 ('59 SF convertible 006.JPG) ('59 SF convertible 006.JPG)
 ('59 SF convertible 007.JPG) ('59 SF convertible 007.JPG)
Attachments
----------------
'59 SF convertible 005.JPG (127KB - 300 downloads)
'59 SF convertible 001.JPG (126KB - 305 downloads)
'59 SF convertible 002.JPG (126KB - 296 downloads)
'59 SF convertible 003.JPG (126KB - 279 downloads)
'59 SF convertible 001.JPG (125KB - 290 downloads)
'59 SF convertible 002.JPG (124KB - 273 downloads)
'59 SF convertible 003.JPG (126KB - 283 downloads)
'59 SF convertible 004.JPG (126KB - 298 downloads)
'59 SF convertible 005.JPG (124KB - 298 downloads)
'59 SF convertible 006.JPG (126KB - 266 downloads)
'59 SF convertible 007.JPG (126KB - 297 downloads)
|
|
| |
|
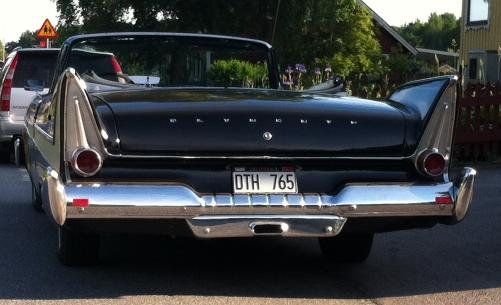
Location: Sweden | Great work, John. Looks like its getting somewhere! She will be astonishing having the color combination and the '59 chrome detailings in mind |
|
| |
|
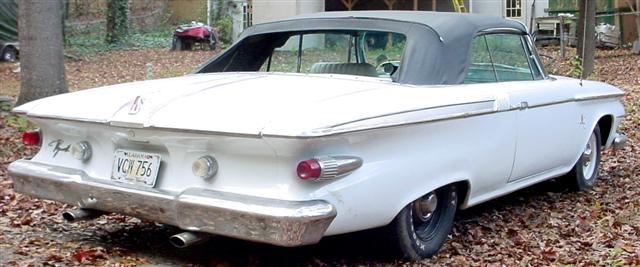
Elite Veteran
Posts: 873
Location: ALABAMA, HEART OF DIXIE | big m - QUOTE] that is a LOT of work with amazing results. I know what it takes to resurect a car like that. Very impressive, You truly brought that car back from the dead. Will.
|
|
| |
|
Expert
Posts: 3155
Location: NY & VT | Wow, just WOW!
John, what was the reason behind the solid body mounts on the convertibles? You'd think a lot of noise and vibration would be transmitted without the rubber cushion.
Edited by firedome 2014-01-01 1:24 PM
|
|
| |
|
Expert 5K+
Posts: 7808
Location: Williams California | firedome - 2014-01-01 10:23 AM
Wow, just WOW!
John, what was the reason behind the solid body mounts on the convertibles? You'd think a lot of noise and vibration would be transmitted without the rubber cushion.
Roger, the only reason I can think of is to reduce the possibility of body flex, as the reinforced rockers, X-frame, and extra body mounts used in the converts make the assembly quite stout. Too much body flex would cause the top rack components to fatigue and the castings crack.
---John |
|
| |
|
Expert
Posts: 4043
Location: Connecticut | Not to mention a ton of rattling as you drove over rough pavement or railroad tracks. Ron |
|
| |
|
Expert
Posts: 2905
Location: little rock, AR | This car reminds me of the Johnny Cash song: One Piece At A Time!!! Don't worry I'm not going to start singing. |
|
| |
|
Veteran
Posts: 108
Location: morkov denmark | wow, wish i had half your talent, looks great |
|
| |
|
Elite Veteran
Posts: 873
Location: ALABAMA, HEART OF DIXIE | 1960wbdart - 2014-01-04 8:25 AM wow, wish i had half your talent,
I hope your not refering to Dorseys singing talent ........ |
|
| |
|
Expert 5K+
Posts: 7808
Location: Williams California | rockerarm - 2014-01-04 8:44 AM
1960wbdart - 2014-01-04 8:25 AM wow, wish i had half your talent,
I hope your not refering to Dorseys singing talent ........
Good one, Will!! LOL! |
|
| |
|
Expert
Posts: 2905
Location: little rock, AR | You guy's are good!!! Santa is making his list for next year. I'm glad ya'll have 11 months to repent, so its not all coal and switches. LOL Will, can you remind me of the score of that game the other night??? |
|
| |
|
Elite Veteran
Posts: 873
Location: ALABAMA, HEART OF DIXIE | oldwood - 2014-01-04 2:33 PM You guy's are good!!! Santa is making his list for next year. I'm glad ya'll have 11 months to repent, so its not all coal and switches. LOL Will, can you remind me of the score of that game the other night???
There was a game ........???? I don't watch games, I perfer sports. |
|
| |
|
Expert 5K+
Posts: 7808
Location: Williams California | I stripped the two front fenders of paint and primer, found a small rust hole and a spot where the rocker molding had rubbed through the metal that I then welded up. After bumping and dinging the dents out, I scraped peeling undercoat from the inside, and sandblasted the entire inside, as well as the headlight areas. Next was to spray the fenders, inside and out with etching primer, until the finish body work can be done.
 ('59 SF convertible 001.JPG) ('59 SF convertible 001.JPG)
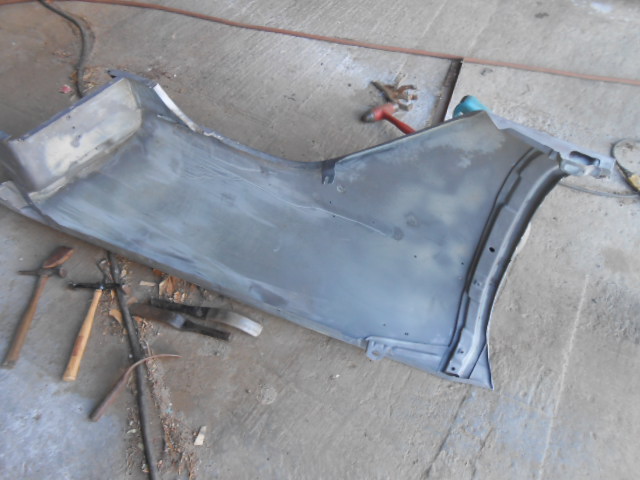 ('59 SF convertible 002.JPG) ('59 SF convertible 002.JPG)
 ('59 SF convertible 004.JPG) ('59 SF convertible 004.JPG)
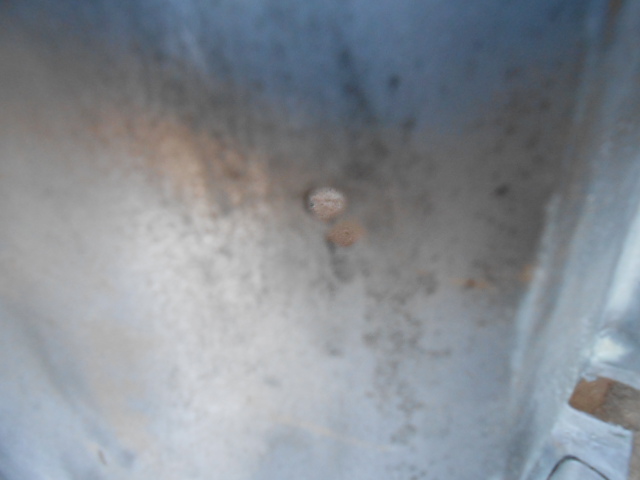 ('59 SF convertible 005.JPG) ('59 SF convertible 005.JPG)
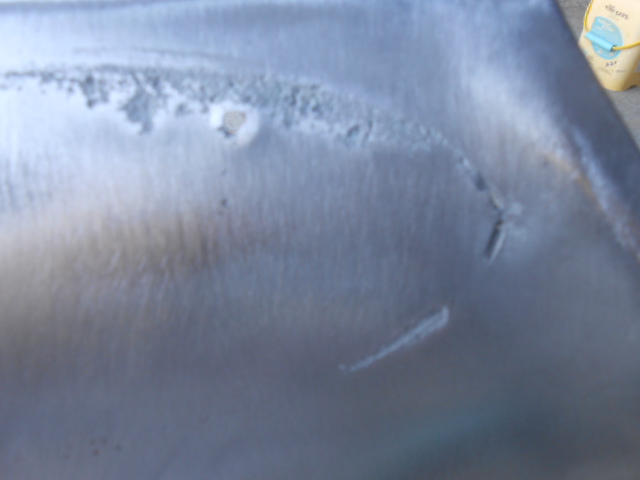 ('59 SF convertible 006.JPG) ('59 SF convertible 006.JPG)
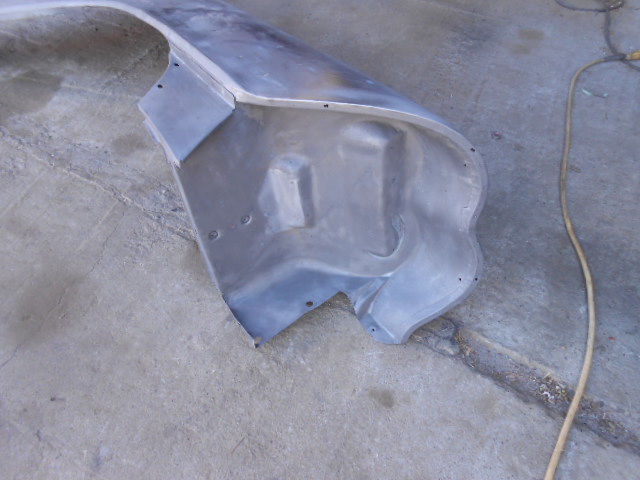 ('59 SF convertible 007.JPG) ('59 SF convertible 007.JPG)
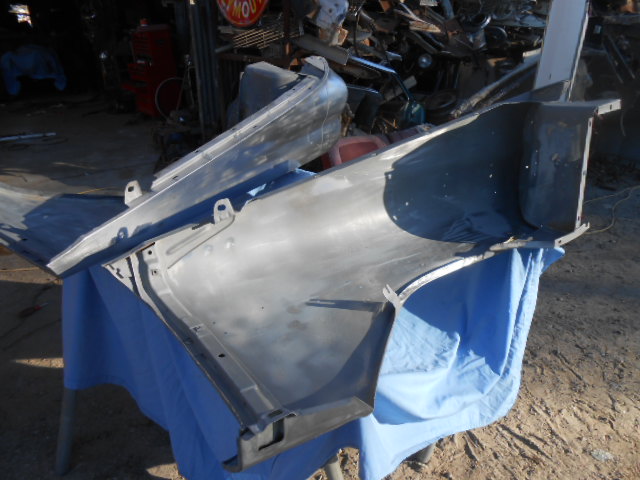 ('59 SF convertible 010.JPG) ('59 SF convertible 010.JPG)
 ('59 SF convertible 011.JPG) ('59 SF convertible 011.JPG)
Attachments
----------------
'59 SF convertible 001.JPG (126KB - 275 downloads)
'59 SF convertible 002.JPG (125KB - 297 downloads)
'59 SF convertible 004.JPG (125KB - 294 downloads)
'59 SF convertible 005.JPG (131KB - 270 downloads)
'59 SF convertible 006.JPG (132KB - 304 downloads)
'59 SF convertible 007.JPG (125KB - 298 downloads)
'59 SF convertible 010.JPG (126KB - 296 downloads)
'59 SF convertible 011.JPG (126KB - 297 downloads)
|
|
| |
|
Expert 5K+
Posts: 7808
Location: Williams California | Next,
I dug out the rustfree deck lid I had saved for a number of year, it was the only one I had ever found that didn't have rust bubbles in the lower lip. It did have two coats of paint that did not want to come off easily. After removing the paint on the top, I decided to sandblast the bottom as there was surface rust along with peeling paint. The tar paper-like material on the bottom was disintegrating, so I removed it all with a scraper.
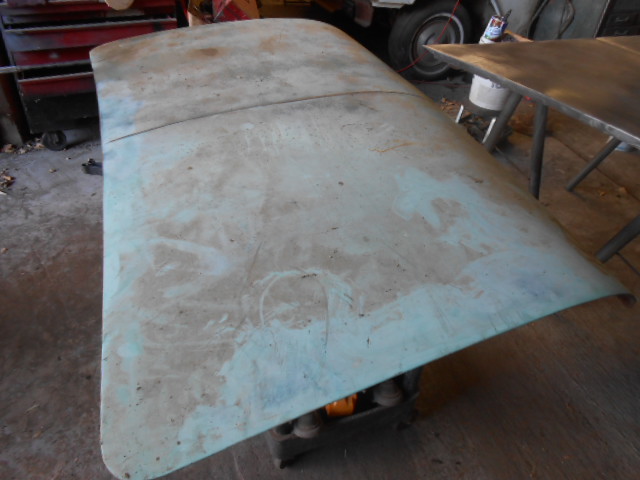 ('59 SF convertible 003.JPG) ('59 SF convertible 003.JPG)
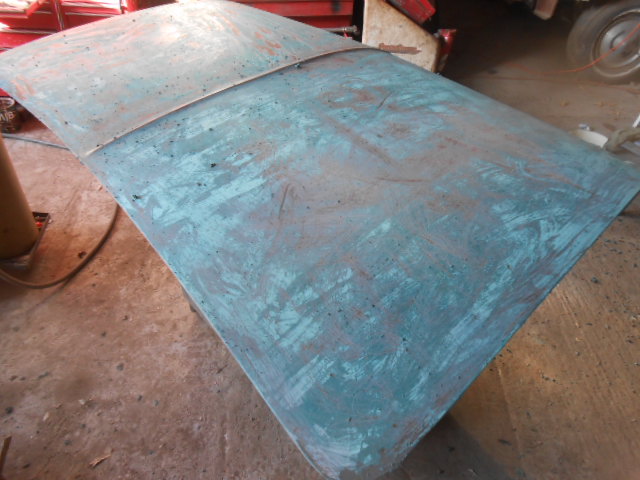 ('59 SF convertible 004.JPG) ('59 SF convertible 004.JPG)
 ('59 SF convertible 016.JPG) ('59 SF convertible 016.JPG)
 ('59 SF convertible 017.JPG) ('59 SF convertible 017.JPG)
 ('59 SF convertible 018.JPG) ('59 SF convertible 018.JPG)
 ('59 SF convertible 019.JPG) ('59 SF convertible 019.JPG)
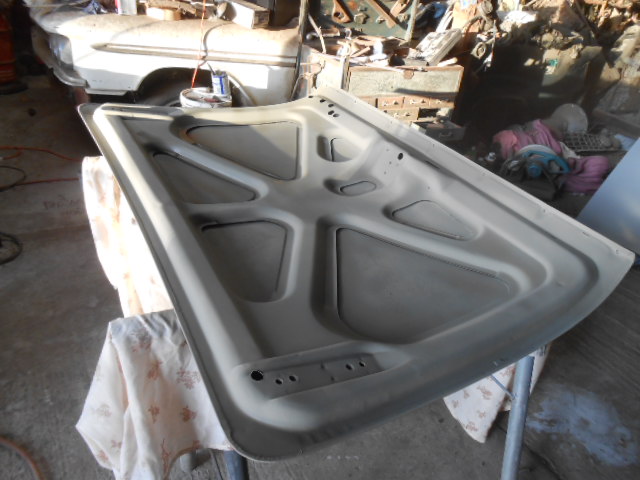 ('59 SF convertible 020.JPG) ('59 SF convertible 020.JPG)
Attachments
----------------
'59 SF convertible 003.JPG (125KB - 292 downloads)
'59 SF convertible 004.JPG (125KB - 282 downloads)
'59 SF convertible 016.JPG (122KB - 308 downloads)
'59 SF convertible 017.JPG (125KB - 313 downloads)
'59 SF convertible 018.JPG (126KB - 278 downloads)
'59 SF convertible 019.JPG (126KB - 296 downloads)
'59 SF convertible 020.JPG (126KB - 290 downloads)
|
|
| |
|
Expert 5K+
Posts: 8444
Location: Perth Australia | Did you manage to get all that paper stuff out from under the webbing John
Had a fun time with that stuff when I got it out of my dodge trunk lid
|
|
| |
|
Expert
Posts: 4043
Location: Connecticut | John - Do you plan to remove the outer skin so that the sound deadening material can be replaced ? I would think that it should be in place to keep the trunk lid from sounding tinny when closed. I'm facing the same issue with my 59 Dodge. Ron |
|
| |
|
Exner Expert 19,174 posts. Neil passed away 18 Sep 2015. You will be missed, Neil!
Posts: 19146
Location: bishop, ca | It appears what you'd have to do is separate the two trunk halves, and then paint them separately.
Then, the deadener sheet gets installed and the halves are crimped together.
And, additional finish color is sprayed onto the crimped edges, avoiding the deadener panels.
I spent two hours masking off the deadener panels and the entire rear of the car, so that only the underside could get
repainted....taking about 5 minutes' time.
Do you have another 59 PLY decklid, with good deadener panel(s) in it?
Edited by d500neil 2014-01-21 7:49 PM
|
|
| |
|
Expert 5K+
Posts: 7808
Location: Williams California | ronbo97 - 2014-01-21 2:36 PM
John - Do you plan to remove the outer skin so that the sound deadening material can be replaced ? I would think that it should be in place to keep the trunk lid from sounding tinny when closed. I'm facing the same issue with my 59 Dodge. Ron
The main reason for this material being there is to keep the outer skin from contacting the inner structure. The last car I restored that had this material in poor shape, I was able to cut sections of new material out, and carefully fish them into each opening, and between the two panels. Never had any problems afterwards. I'll probably do the same thing here. The old stuff was just turning to dust.
---John |
|
| |
|
Expert 5K+
Posts: 7808
Location: Williams California | d500neil - 2014-01-21 4:45 PM
It appears what you'd have to do is separate the two trunk halves, and then paint them separately.
Then, the deadener sheet gets installed and the halves are crimped together.
And, additional finish color is sprayed onto the crimped edges, avoiding the deadener panels.
I spent two hours masking off the deadener panels and the entire rear of the car, so that only the underside could get
repainted....taking about 5 minutes' time.
Do you have another 59 PLY decklid, with good deadener panel(s) in it?
Wish I could have salvaged the material, but as I told Ron, it was just turning to dust. Using an air gun easily removed what remained between the skins.
|
|
| |
|
Expert
Posts: 2996
Location: Sept. 1958 | Nice work John. As far as the insulation material, can you do what you did to the last car you worked on? Cut out sections and work them in? |
|
| |
|
Expert 5K+
Posts: 7808
Location: Williams California | The deck lid looked pretty straight, as there were no large dents easily visible, but it felt as though it had been through a hail storm, there were a dozen or so impressions in the top, and one large low spot directly in the center. Along the bottom lip, there were a few gouges that could not be removed with a stud gun, so I used lead to smooth them out. All the other low spots were removed using a stud gun and holding upward force on the center, and dinging around the circumference to relieve the high spots.
---John
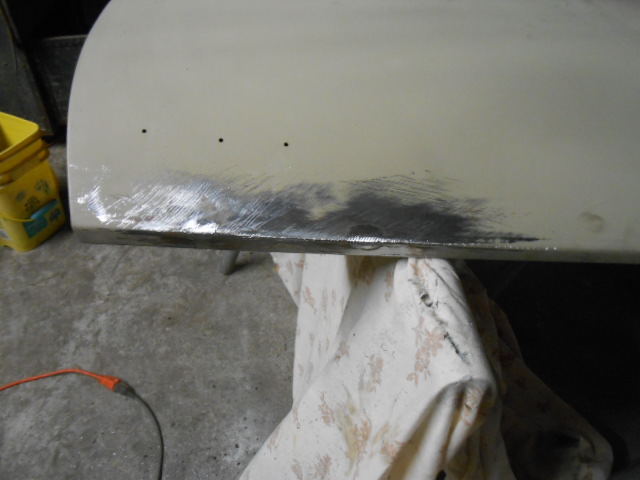 ('59 SF convertible 001.JPG) ('59 SF convertible 001.JPG)
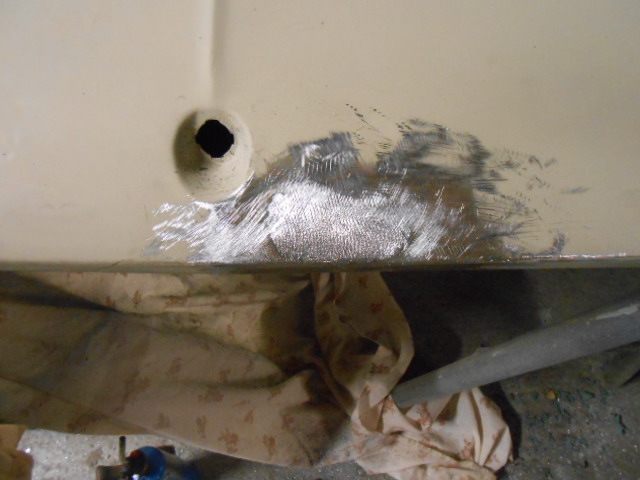 ('59 SF convertible 002.JPG) ('59 SF convertible 002.JPG)
 ('59 SF convertible 003.JPG) ('59 SF convertible 003.JPG)
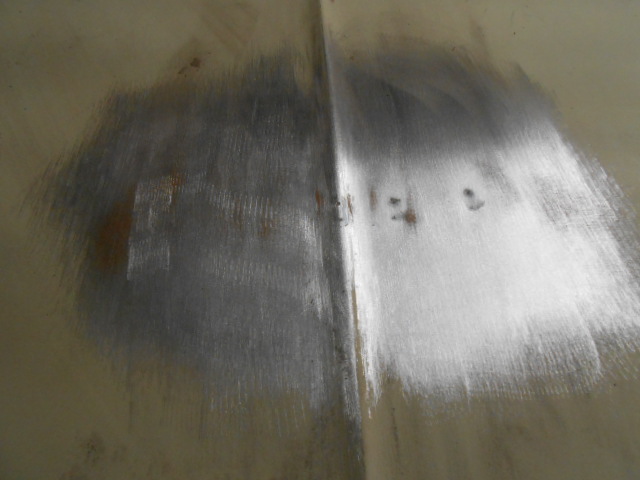 ('59 SF convertible 004.JPG) ('59 SF convertible 004.JPG)
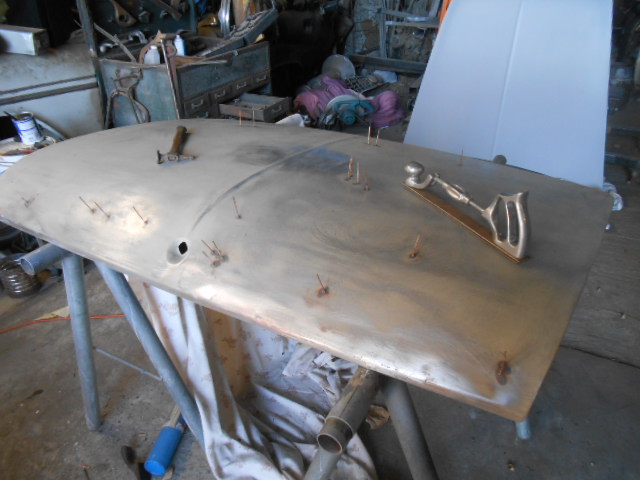 ('59 SF convertible 005.JPG) ('59 SF convertible 005.JPG)
Attachments
----------------
'59 SF convertible 001.JPG (122KB - 292 downloads)
'59 SF convertible 002.JPG (125KB - 307 downloads)
'59 SF convertible 003.JPG (125KB - 295 downloads)
'59 SF convertible 004.JPG (131KB - 313 downloads)
'59 SF convertible 005.JPG (126KB - 305 downloads)
|
|
| |
|
Expert
Posts: 4043
Location: Connecticut | John -
Looks like your trunk lid is receiving acupuncture ! :-)
Ron |
|
| |
|
Expert 5K+
Posts: 7808
Location: Williams California | ronbo97 - 2014-01-21 5:36 PM
John -
Looks like your trunk lid is receiving acupuncture ! :-)
Ron
LMAO!! |
|
| |
|
Expert
Posts: 1539
Location: Farnborough. Hampshire. England. | I've been thoroughly enjoying your post on Rusty....Thankyou John.. |
|
| |
|
Expert 5K+
Posts: 7808
Location: Williams California | Diesel45 - 2014-01-22 7:19 AM
I've been thoroughly enjoying your post on Rusty....Thankyou John..
Thanks, Fred! |
|
| |
|
Expert 5K+
Posts: 7808
Location: Williams California | After removing the dents, I sprayed the panel with a few good coats of filling primer, and then sprayed a guide coat on top. Using a long board, I block sanded the entire surface, the guide coat revealed any minor flaws. Spot putty was then lightly smoothed over these areas, and then sanded smooth. We used to call this putty 'Red Lead' as it was used to fill pinholes and scratches in the body work, not to be used as a filler. The deck was then sprayed and block sanded two more times to be sure it was straight.
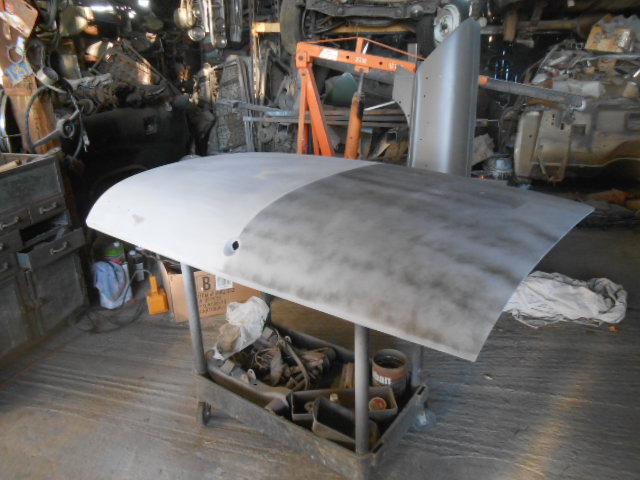 (59 SF convertible 005.JPG) (59 SF convertible 005.JPG)
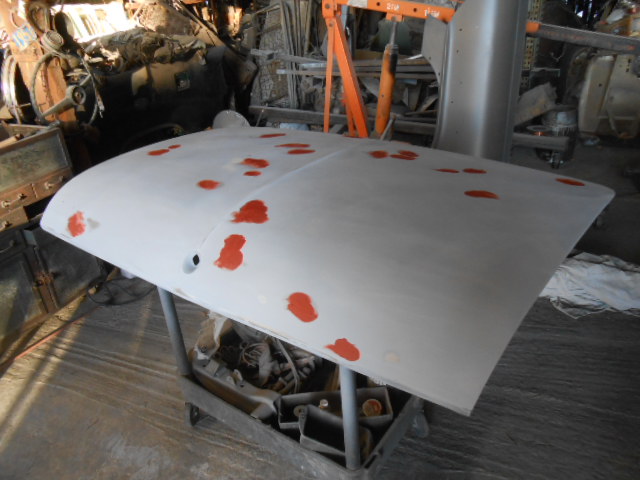 (59 SF convertible 006.JPG) (59 SF convertible 006.JPG)
Attachments
----------------
59 SF convertible 005.JPG (125KB - 314 downloads)
59 SF convertible 006.JPG (126KB - 321 downloads)
|
|
| |
|
Expert 5K+
Posts: 7808
Location: Williams California | Next was to find a decent hood to start with. To me, hoods and trunk lids are the hardest panels to get straight, as they are mostly flat surfaces. The hood I chose was gotten from Kenny J a few years ago when I delivered a car down to him, and picked up his pink '59 wagon. The hood had heavy surface rust, but for the most part was straight. I sanded for hours to remove the majority of the rust, and then used phosphoric acid to kill any that remained.
Next was to remove the broken bolts where the hinges mount, I welded nuts to the broken bolts, and carefully removed them. The inner support's spot welds also had failed, so while I had the welder fired up I tacked the failed welds back together.
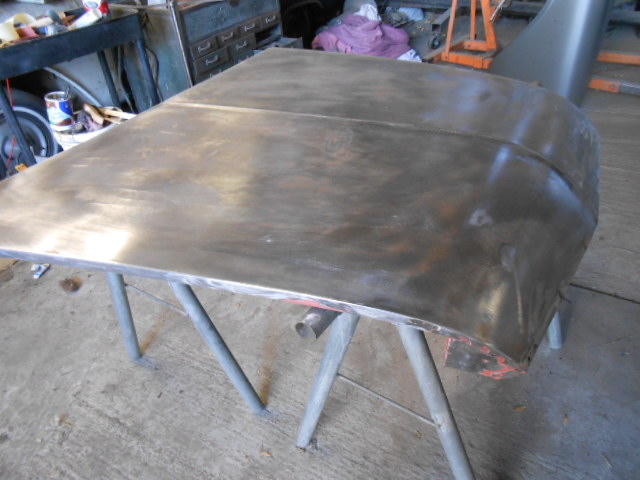 ('59 SF convertible 001.JPG) ('59 SF convertible 001.JPG)
 ('59 SF convertible 002.JPG) ('59 SF convertible 002.JPG)
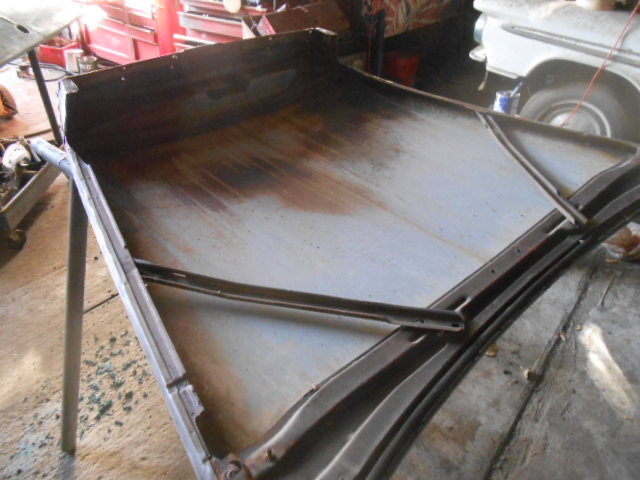 ('59 SF convertible 005.JPG) ('59 SF convertible 005.JPG)
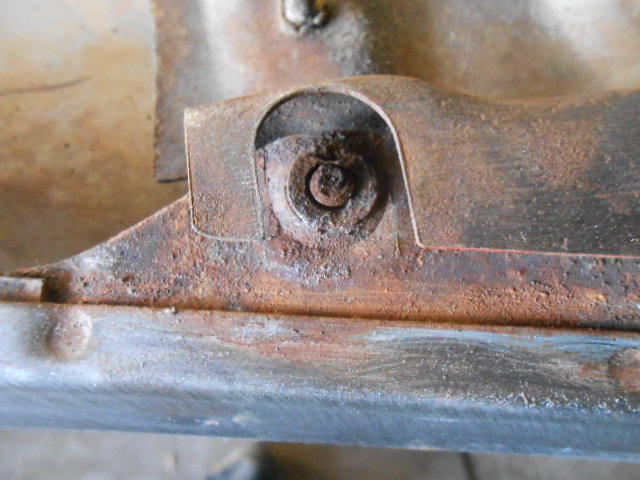 ('59 SF convertible 006.JPG) ('59 SF convertible 006.JPG)
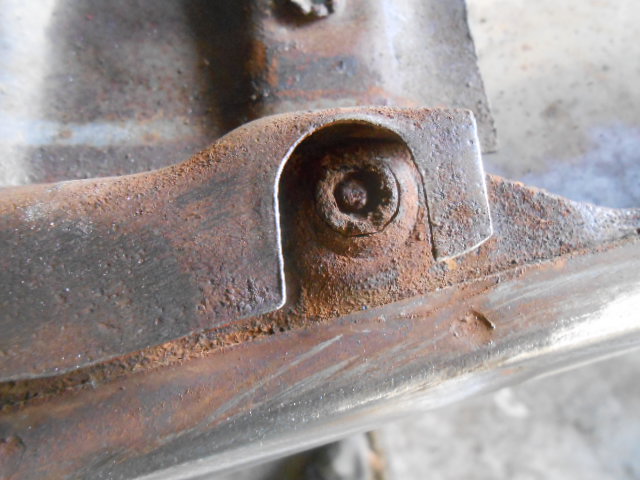 ('59 SF convertible 008.JPG) ('59 SF convertible 008.JPG)
 ('59 SF convertible 010.JPG) ('59 SF convertible 010.JPG)
 ('59 SF convertible 011.JPG) ('59 SF convertible 011.JPG)
 ('59 SF convertible 012.JPG) ('59 SF convertible 012.JPG)
Attachments
----------------
'59 SF convertible 001.JPG (126KB - 285 downloads)
'59 SF convertible 002.JPG (126KB - 300 downloads)
'59 SF convertible 005.JPG (126KB - 305 downloads)
'59 SF convertible 006.JPG (126KB - 286 downloads)
'59 SF convertible 008.JPG (126KB - 295 downloads)
'59 SF convertible 010.JPG (126KB - 288 downloads)
'59 SF convertible 011.JPG (126KB - 293 downloads)
'59 SF convertible 012.JPG (127KB - 291 downloads)
|
|
| |
|
Expert 5K+
Posts: 7808
Location: Williams California | Next was to lightly sandblast the bottom of the hood to remove the rust scale, and it was then treated with acid. Then just a few dings had to be bumped out, then lots of block sanding again.
 (59 SF convertible 001.JPG) (59 SF convertible 001.JPG)
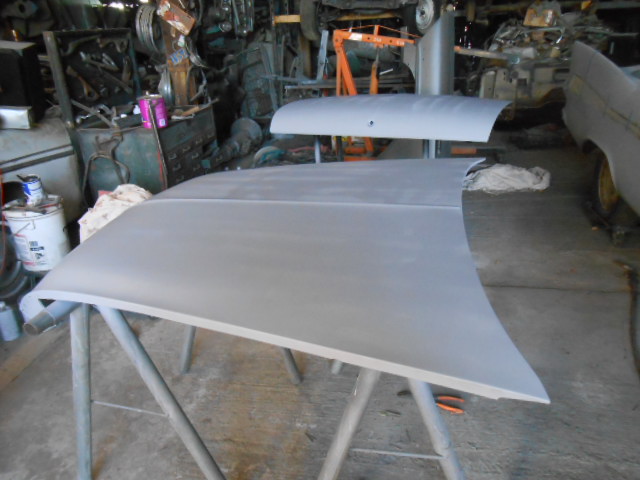 (59 SF convertible 002.JPG) (59 SF convertible 002.JPG)
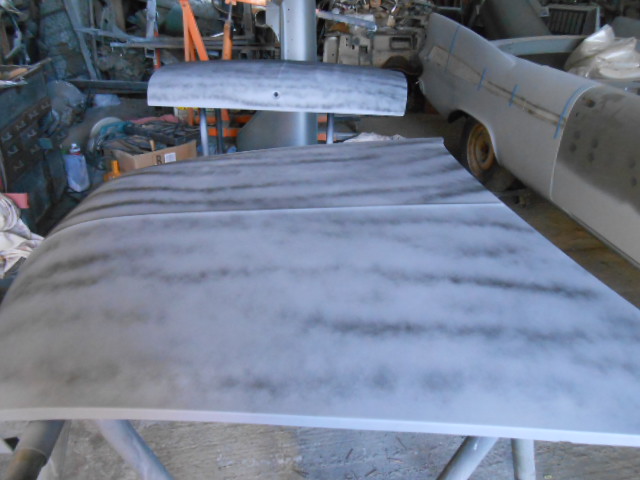 (59 SF convertible 003.JPG) (59 SF convertible 003.JPG)
 (59 SF convertible 007.JPG) (59 SF convertible 007.JPG)
Attachments
----------------
59 SF convertible 001.JPG (126KB - 301 downloads)
59 SF convertible 002.JPG (126KB - 300 downloads)
59 SF convertible 003.JPG (125KB - 303 downloads)
59 SF convertible 007.JPG (123KB - 298 downloads)
|
|
| |
|
Expert 5K+
Posts: 7808
Location: Williams California | Before going too far, I wanted to fit the deck lid to the body, and was glad that I did- the rear panel behind the top well was arched up too high in the center, probably from the hit in the right side that the car had taken years ago. I corrected this with a hit from a large hammer onto a 2x4, which brought the panel down to where it should be.
Next, I block sanded the hood and trunk lid with 400 grit, in preparation for painting.
 ('57 SF convertible 003.JPG) ('57 SF convertible 003.JPG)
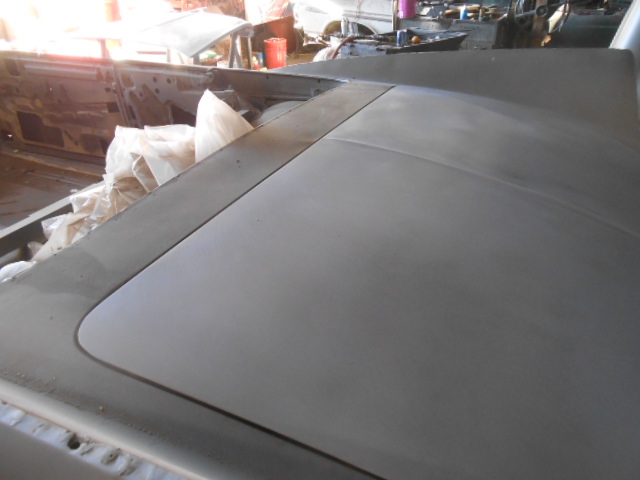 ('57 SF convertible 004.JPG) ('57 SF convertible 004.JPG)
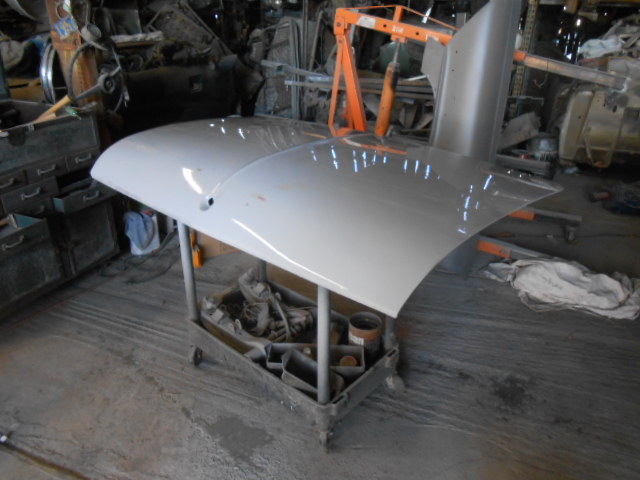 ('59 SF convertible 006.JPG) ('59 SF convertible 006.JPG)
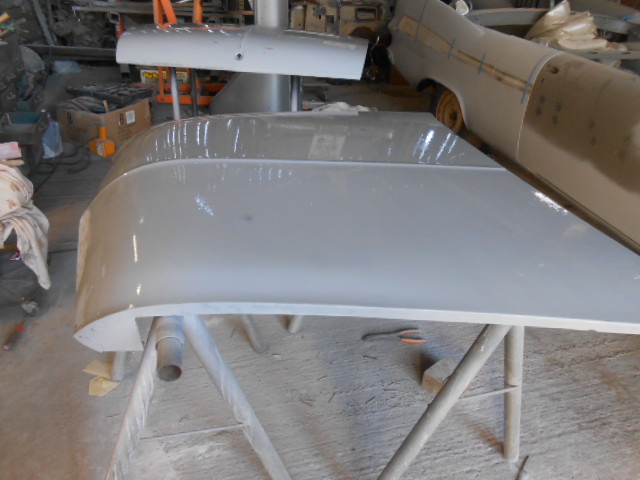 ('59 SF convertible 007.JPG) ('59 SF convertible 007.JPG)
Attachments
----------------
'57 SF convertible 003.JPG (123KB - 297 downloads)
'57 SF convertible 004.JPG (125KB - 272 downloads)
'59 SF convertible 006.JPG (124KB - 291 downloads)
'59 SF convertible 007.JPG (126KB - 287 downloads)
|
|
| |
|
Expert 5K+
Posts: 7808
Location: Williams California | I painted the bottoms of both the hood and deck lid, I may opt to use the greyish paint later, but this will keep rust away regardless.
Next, I applied paint to the top surfaces. These will be stored in the loft until the car is ready for their installation.
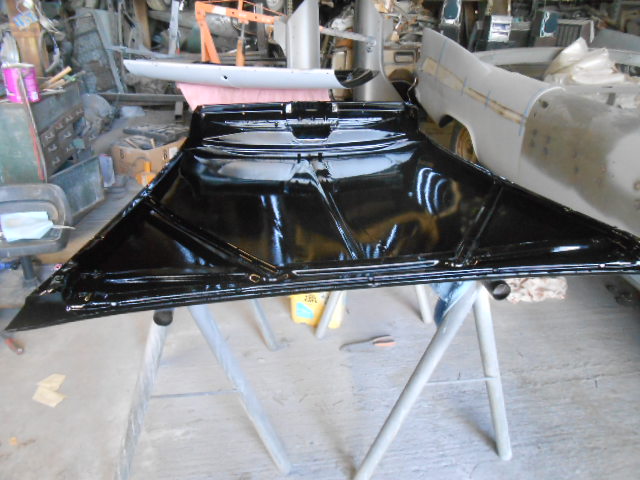 ('59 SF convertible 008.JPG) ('59 SF convertible 008.JPG)
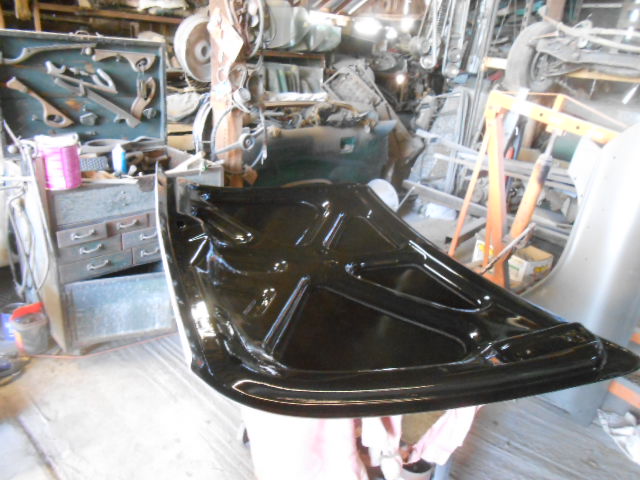 ('59 SF convertible 009.JPG) ('59 SF convertible 009.JPG)
 ('59 SF convertible 001.JPG) ('59 SF convertible 001.JPG)
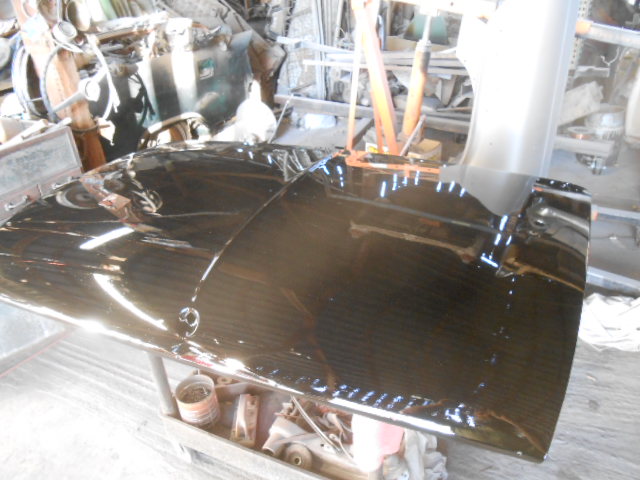 ('59 SF convertible 002.JPG) ('59 SF convertible 002.JPG)
Attachments
----------------
'59 SF convertible 008.JPG (126KB - 272 downloads)
'59 SF convertible 009.JPG (126KB - 290 downloads)
'59 SF convertible 001.JPG (125KB - 277 downloads)
'59 SF convertible 002.JPG (125KB - 299 downloads)
|
|
| |
|
Extreme Veteran
Posts: 481
Location: The Netherlands | Don't forget the 2 small holes for the gold V on the trunk! Don't see them in your pics.
Other than that, your work is great!! Want to see your car when it's done |
|
| |
|
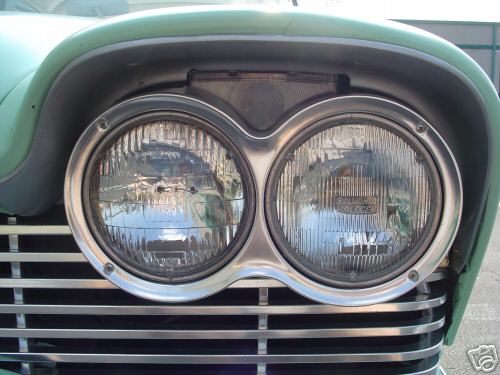
Elite Veteran
Posts: 1172
Location: Georgia | Very fine work, my friend!
She's looking great!
Pete |
|
| |
|
Expert
Posts: 1728
Location: Fleetwood, Pa | John, Is the final color of this car actually going to be black, or are you just putting gloss black on the sheet metal to make sure you got it all straight? That's exactly what I did with a car I restored about 20 years ago to make sure everything was nice and "straight"..... |
|
| |
|
Expert 5K+
Posts: 7808
Location: Williams California | Matthew Keij - 2014-01-30 10:09 AM
Don't forget the 2 small holes for the gold V on the trunk! Don't see them in your pics.
Other than that, your work is great!! Want to see your car when it's done
Thanks for reminding me, Matthew! Or should I call you Eagle eyes? The trunk lid did come from a six-cylinder car, so I will need to do that. At least I remembered to drill the holes for mounting the 'toilet seat'
---John |
|
| |
|
Expert 5K+
Posts: 7808
Location: Williams California | SavoyPlaza - 2014-01-30 10:31 AM
Very fine work, my friend!
She's looking great!
Pete
Thanks, Pedro!! |
|
| |
|
Expert 5K+
Posts: 7808
Location: Williams California | sidesho_bob1961 - 2014-01-30 1:15 PM
John, Is the final color of this car actually going to be black, or are you just putting gloss black on the sheet metal to make sure you got it all straight? That's exactly what I did with a car I restored about 20 years ago to make sure everything was nice and "straight".....
The car will be solid black on the exterior, Bob, so this is the final coat on these parts.
---John |
|
| |
|
Expert
Posts: 2905
Location: little rock, AR | big m - 2014-01-30 4:38 PM
Matthew Keij - 2014-01-30 10:09 AM
Don't forget the 2 small holes for the gold V on the trunk! Don't see them in your pics.
Other than that, your work is great!! Want to see your car when it's done
Thanks for reminding me, Matthew! Or should I call you Eagle eyes? The trunk lid did come from a six-cylinder car, so I will need to do that. At least I remembered to drill the holes for mounting the 'toilet seat'
---John[/QUOTEWhere does the "Kitchen Sink" go??? |
|
| |
|
Expert
Posts: 2788
Location: USA - KY |
NICE, John...you miracle worker, you!
Impressive stuff!
Your car is going from Rusty, Dusty, Crusty, and Musty...all the way to Lusty! (as in lustrous )
|
|
| |
|
Exner Expert 19,174 posts. Neil passed away 18 Sep 2015. You will be missed, Neil!
Posts: 19146
Location: bishop, ca |
John, this is of a 58 PLY, but, after your trunk paint cures, you can slide-in 'these' deadener
strips into it.
 (PICT0157.JPG) (PICT0157.JPG)
Attachments
----------------
PICT0157.JPG (109KB - 295 downloads)
|
|
| |
|
Exner Expert 19,174 posts. Neil passed away 18 Sep 2015. You will be missed, Neil!
Posts: 19146
Location: bishop, ca |
Trunk detailing deserves its own thread, but, the first photo shows a fully-painted under-trunk
and the second one shows a primer-sealer painted under-trunk (from Detroit and L.A.
assembly plants), but both have those wimpy-cheap deadener strips applied to them.
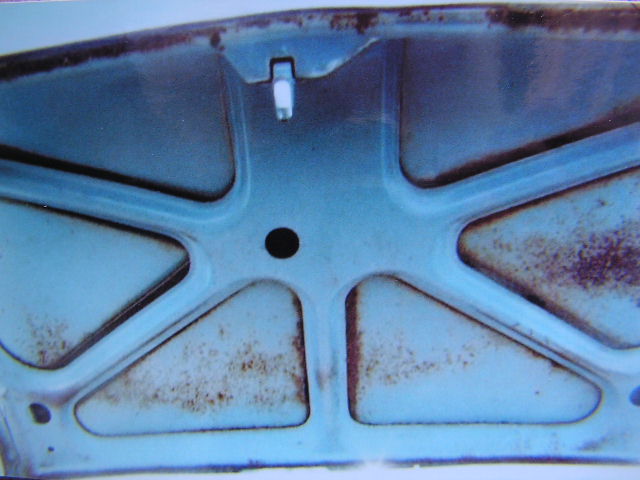 (PICT0158.JPG) (PICT0158.JPG)
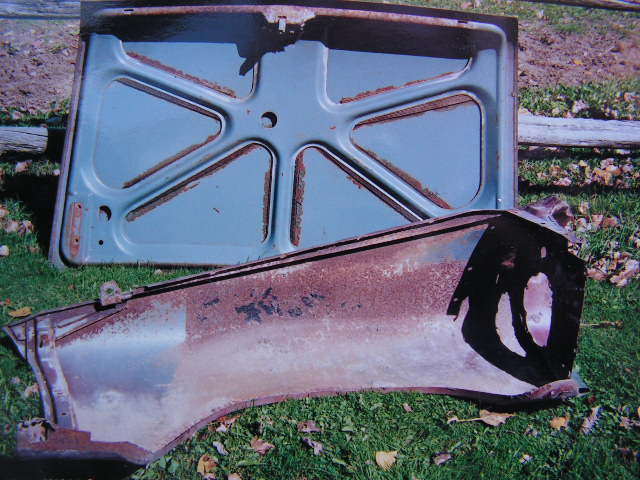 (PICT0159.JPG) (PICT0159.JPG)
Attachments
----------------
PICT0158.JPG (102KB - 294 downloads)
PICT0159.JPG (111KB - 274 downloads)
|
|
| |
|
Expert 5K+
Posts: 7409
Location: northern germany | so 59 plymouths did not have the card board like stuff (how do you name it?) sandwiched between the sheet metal?! |
|
| |
|
Exner Expert 19,174 posts. Neil passed away 18 Sep 2015. You will be missed, Neil!
Posts: 19146
Location: bishop, ca | The 59 PLY's (or at least some of them...) had the full-width/1-piece asphaltic deadener panels in their trunks.
John removed the full-size deadener from his car, but says that the deadener was too far deteriorated to save.
The photos, above, are from 57-59 PLY's; I showed them as examples of how John can insulate his trunk, and to
show that these 'strips' were installed on both the fully-painted trunk undersides, and on the L.A.-type sealer-primered
trunks.
|
|
| |
|
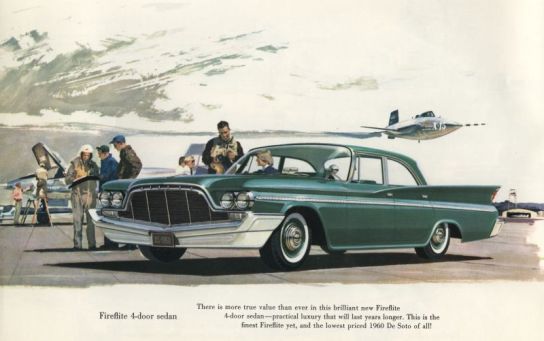
Elite Veteran
Posts: 692
Location: Los Angeles, California | I just hope more people learn the restoration techniques John uses, it will keep our classic cars in better shape, for a longer period of time. No cut corners with him...taking the hard way out to get the best prize in the end |
|
| |
|
Elite Veteran
Posts: 982
Location: Upper Hunter NSW Australia | 57Kelii - 2014-02-01 11:21 PM
I just hope more people learn the restoration techniques John uses, it will keep our classic cars in better shape, for a longer period of time. No cut corners with him...taking the hard way out to get the best prize in the end :)
....
..
Agree 100% with that. I'm teaching my son what I can now so that when I'm gone and the worms are feeding on me he can do his bit to keep these great cars going and so on .................
Johns pics have been a great inspiration for me and I've gained some good insights and ideas from them
....
.. |
|
| |
|
Expert 5K+
Posts: 7808
Location: Williams California | Glad these photos have been helpful, I do not have unlimited funds or time, so it goes rather slowly.
---John |
|
| |
|
Expert
Posts: 2905
Location: little rock, AR | big m - 2014-02-03 3:09 PM
Glad these photos have been helpful, I do not have unlimited funds or time, so it goes rather slowly.
---John I thought all of you CA boys gots sa check!!! LOL |
|
| |
|
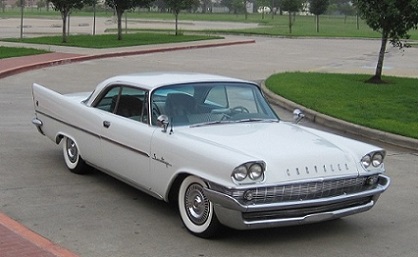
Expert
Posts: 2524
Location: Houston | John, In your opinion how important is it that the rotisserie be adjustable for height? The two main vertical uprights on your are telescopic, and have a hydraulic ram that allows you to raise and lower the body. Is that feature used as your work on the car, or is it just used to adjust the rotisserie to the car when you start, then left alone? I am planning to make my own and wonder if it necessary?
|
|
| |
|
Expert 5K+
Posts: 7808
Location: Williams California | Greg,
The main purpose is to allow the rotisserie to be used on practically any size car, but there were several times during the process that I either needed to raise, or lower the body to perform different jobs.
It is a very handy feature, but certainly not necessary if you plan on restoring similar cars.
I was originally going to build my own, but after watching the demo done at a local swap meet, put that idea aside. The entire unit [except hydraulic cylinders] is built locally, the steel is heavier than most, and the entire rotisserie was just over $1200. I couldn't justify building one as good as this at that price.
If you'd like info, please let me know, I'd be happy to supply it.
---John |
|
| |
|
Expert
Posts: 2524
Location: Houston | Thanks John. I plan to make my own for a few reasons ....I need to justify all my expensive welding equipment for one thing!
Actually I am going to make mine fairly portable....think of a trailer that is also a rotisserie. I want to be able to move it around easily, especially when I want to roll it to the back acreage to sandblast. I also have enough metal and axles lying around I will be all in for around $500. |
|
| |
|
Expert 5K+
Posts: 7808
Location: Williams California | Sounds good, Greg!!
I like the idea of making it portable over rougher surfaces-That could be really handy!! |
|
| |
|
Expert 5K+
Posts: 7808
Location: Williams California | Back to the doors-
There were some small holes where the sandblaster had blown the rust from the pitted metal that needed repair on the one door, the other had a half-inch hole punched through the bottom, maybe an attempt to provide drainage at one point. These I welded up and ground smooth. I block sanded the doors until they were nice and smooth.
Temperature was dropping by the time I was ready to paint, but I got several good coats on, afterwards I fired up the smudge pot to heat the air and help the paint set up.
 ('59 SF convertible 002.JPG) ('59 SF convertible 002.JPG)
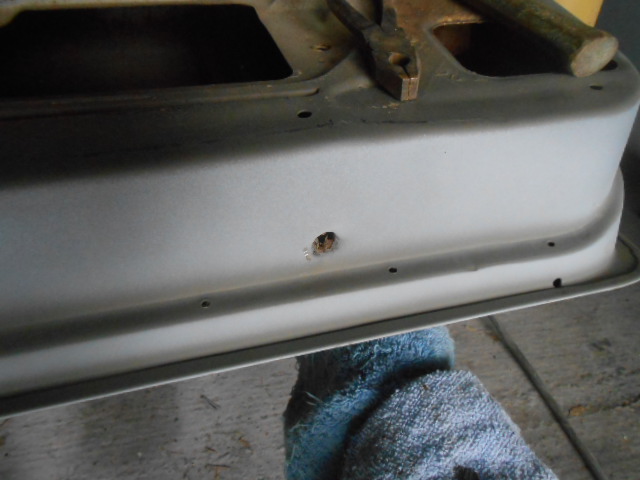 ('59 SF convertible 001.JPG) ('59 SF convertible 001.JPG)
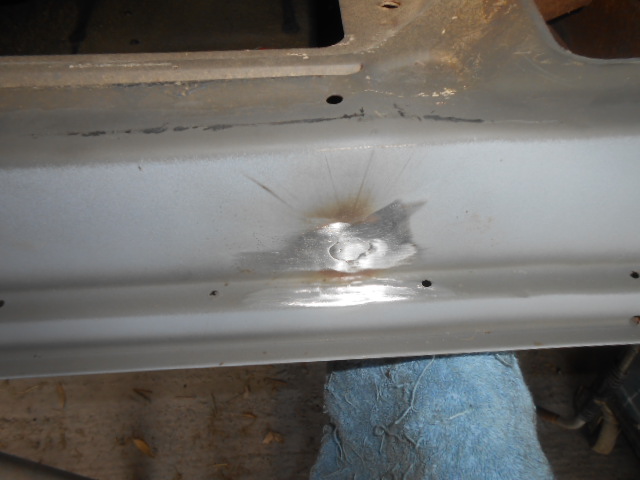 ('59 SF convertible 003.JPG) ('59 SF convertible 003.JPG)
 ('59 SF convertible 004.JPG) ('59 SF convertible 004.JPG)
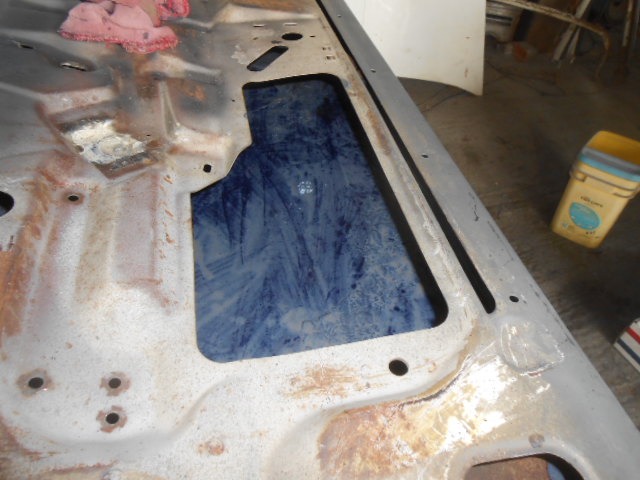 ('59 SF convertible 005.JPG) ('59 SF convertible 005.JPG)
 ('59 SF convertible 006.JPG) ('59 SF convertible 006.JPG)
 ('59 SF convertible 001.JPG) ('59 SF convertible 001.JPG)
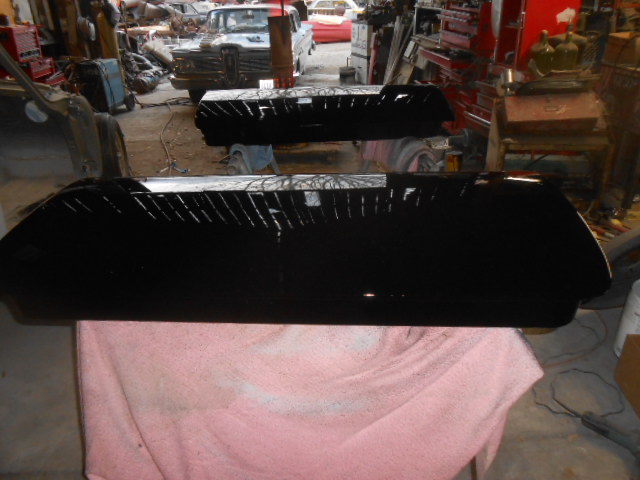 ('59 SF convertible 003.JPG) ('59 SF convertible 003.JPG)
 ('59 SF convertible 004.JPG) ('59 SF convertible 004.JPG)
Attachments
----------------
'59 SF convertible 002.JPG (132KB - 253 downloads)
'59 SF convertible 001.JPG (125KB - 271 downloads)
'59 SF convertible 003.JPG (126KB - 276 downloads)
'59 SF convertible 004.JPG (127KB - 268 downloads)
'59 SF convertible 005.JPG (125KB - 277 downloads)
'59 SF convertible 006.JPG (126KB - 284 downloads)
'59 SF convertible 001.JPG (126KB - 295 downloads)
'59 SF convertible 003.JPG (124KB - 254 downloads)
'59 SF convertible 004.JPG (125KB - 261 downloads)
|
|
| |
|
Veteran
Posts: 121
Location: bossier city, louisiana | Y'know I never thought a car as rough as "Rusty" would come together so well over time.I am astounded by your craftsmanship Big M, this car will definitely be one to be proud of.So much devotion,time and and hard work has gone into this vehicle many people would have thrown in the towel way before but you just keep on truckin'. Keep it up won't be too long and we'll be able to lay our eyes on the finished product. |
|
| |
|
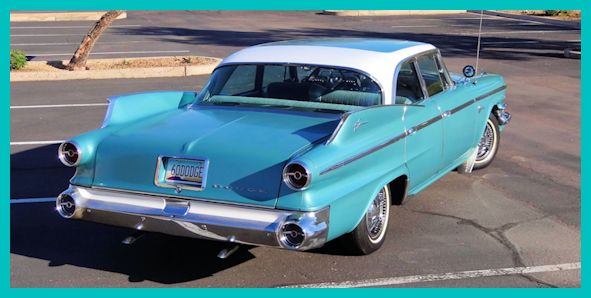
Expert
Posts: 2312
Location: Arizona | That Edsel in the background darn near burned out my eyeballs..... |
|
| |
|
Expert
Posts: 2524
Location: Houston | Definitely very nice going going on.
I'm curious.....you can get away with painting the cars in pieces as the black is pretty well guaranteed to to match up. What technique would you use if you were painting it some other color, particularly a light metallic? I've always struggled with that one... |
|
| |
|
Expert
Posts: 4043
Location: Connecticut | John - Do you have a spray booth or are you painting the cars out there in the open ? If it's out in the open, how do you avoid dust, and getting paint all over everything ? Also, are you painting with two stage or single stage ? Ron |
|
| |
|
Expert 5K+
Posts: 7808
Location: Williams California | GregCon - 2014-02-19 4:22 AM
Definitely very nice going going on.
I'm curious.....you can get away with painting the cars in pieces as the black is pretty well guaranteed to to match up. What technique would you use if you were painting it some other color, particularly a light metallic? I've always struggled with that one...
Greg-
I am a far better body man than I am a painter, If I tried to paint metallic in sections, it would probably look awful.
I do know there are folks out there that can, and do nice jobs this way, but I do not know the methods they use for the nice results.
---John |
|
| |
|
Expert 5K+
Posts: 7808
Location: Williams California | ronbo97 - 2014-02-19 5:11 AM
John - Do you have a spray booth or are you painting the cars out there in the open ? If it's out in the open, how do you avoid dust, and getting paint all over everything ? Also, are you painting with two stage or single stage ? Ron
Ron,
I do not have a spray booth, just an open barn. I can reduce the amount of dust in the paint by wetting the surrounding areas down before painting, and using a tack rag immediately before spraying. Nonetheless, there will always be something that gets in the paint, but I always plan on color sanding afterwards to remove most of the flaws.
I am using single stage enamel, in my opinion, two stage black does not look nearly as black, as the clear coat deflects the blackness. If you are ever at a car show where there are two black cars next to each other, and one is painted with single, and the other, 2-stage, you'll see what I mean. I want this the most black possible to highlight the trim!
---John |
|
| |
|
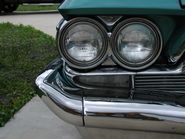
Extreme Veteran
Posts: 481
Location: near St Augustine, FL | John,
I am ONE HUNDRED PERCENT convinced there is nothing you can not do on a car. AMAZING! |
|
| |
|
Expert 5K+
Posts: 8444
Location: Perth Australia | I am also painting in peices and in the open, but with a metalic
As John says, there will be contamination in the paint, but wetting down helps as does trying to keep things clean.
I am useing acrylic paint and I am clear coating over the top.
I havnt had any problems with colour matching, it all seems to match up fine, my biggest problem has been panel fit and the associated scratches that have happened lining things up (at least trying to anyway).
The biggest problem with the metalic is that touching up with a paint brush still leaves the repair quite visible as the metalic particles seem to sort of hide with the brush and dont spread like they do out of the gun.
Overspray has not been a concern either, I am useing a gravity feed gun that requires a lot less air pressure to use than the suction guns I used to use.
Colour sanding a metalic takes a bit of the "bling" out of the paint as well, so once the colour is going on, I dont sand until the clear is on.
What I have found is that if you look into the paint, it looks sort of rough (bumpy), but its as smooth as glass after the clear is sanded and polished.
The clear is just that, clear.
All it does is makes the base coat shine, you see straight through it, like water on the car
I am not as good a body man as John, so no black for me
|
|
| |
|
Veteran
Posts: 161
Location: newton north carolina | John, what did you use for the sound deadening material in the trunk lid of your 59 Plymouth project? Dennis |
|
| |
|
Expert
Posts: 2524
Location: Houston | I agree John, the base/clear coat paint have a more plastic-y look and are not as deep in appearance. I don't paint much anymore but I am thinking of doing my next car (57 Desoto) with single stage but possibly also laying a clear on top. I've done that before with good results. |
|
| |
|

Expert
Posts: 1740
Location: Alaska | John, you mentioned the bats before.What are you doing to keep their mess off your project? |
|
| |
|
Extreme Veteran
Posts: 530
Location: Wake Forest, NC | Looking good John. I'm another one that wonders how you cover the painted pieces for storage. |
|
| |
|
Expert 5K+
Posts: 7808
Location: Williams California | 58coupe - 2014-02-23 5:45 AM
John, you mentioned the bats before.What are you doing to keep their mess off your project?
The bats migrate south to Mexico for the winter, so at this time, they are not a concern. I built a loft down one side of the barn, that I have the painted parts stored at, covered with towels and plastic sheeting. There are occasional sparrows that will fly in, but I chase them off. A few years ago some pigeons were thinking of roosting in there, but the birdshot discouraged them permanently.
---John |
|
| |
|
Expert 5K+
Posts: 7808
Location: Williams California | Painted the insides of the quarter panels, under the dash and deck areas, then all the floors. Almost ready to paint the exterior.
 ('59 SF convertible 001.JPG) ('59 SF convertible 001.JPG)
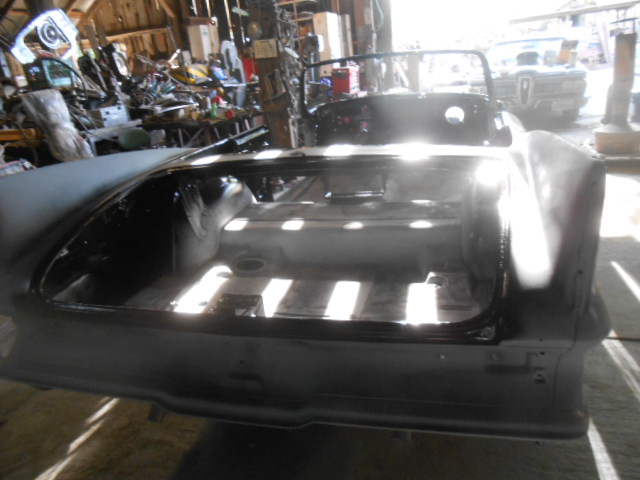 ('59 SF convertible 002.JPG) ('59 SF convertible 002.JPG)
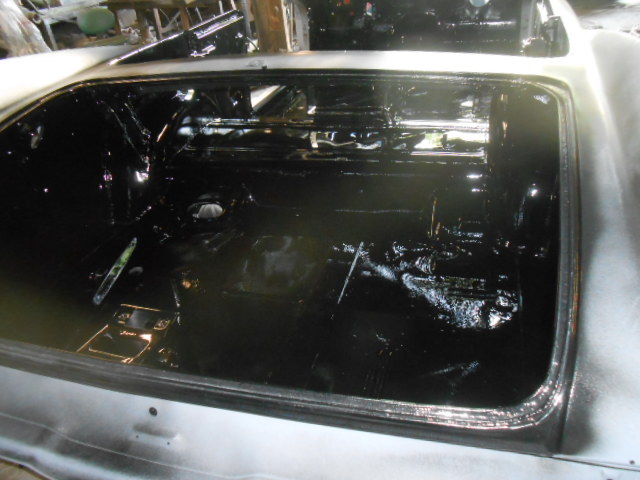 ('59 SF convertible 003.JPG) ('59 SF convertible 003.JPG)
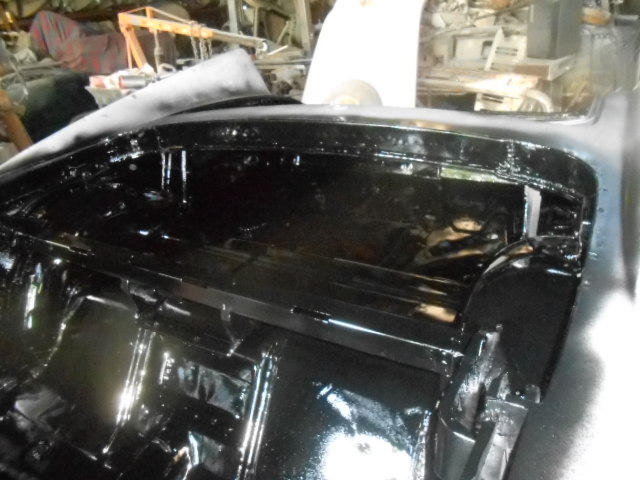 ('59 SF convertible 005.JPG) ('59 SF convertible 005.JPG)
Attachments
----------------
'59 SF convertible 001.JPG (126KB - 292 downloads)
'59 SF convertible 002.JPG (125KB - 259 downloads)
'59 SF convertible 003.JPG (125KB - 264 downloads)
'59 SF convertible 005.JPG (126KB - 274 downloads)
|
|
| |
|
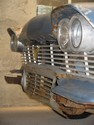
Member
Posts: 41
Location: Cognac , S-W of France | Great great job ! Bravo !
Edited by Metalshop16 2014-04-14 1:50 PM
|
|
| |
|
Expert
Posts: 3155
Location: NY & VT | John and Jan are our "miracle workers" here at Forward Look.org. The rest of us can only just look on in awe. What a pleasure, and an inspiration, to see the process unfold.
Edited by firedome 2014-04-14 8:44 PM
|
|
| |
|
Location: North Australia | John, fantastic workmanship, humbling to me as a Bloke who wants to be able to do the same kind of work, but never had the opportunity to do this kind of thing. I am a Fitter/machinist, so no stranger to working metal. To me this is more like an artisan's field of work. What makes it even more amazing is the basic tools you use and surroundings you do this work in. No offence intended or implied. I would love to watch you, help, and learn.
Did you get taught by someone?
Steve. |
|
| |
|
Expert 5K+
Posts: 7808
Location: Williams California | Thanks for the kind words, Jerome, Roger, and Steve.
I was trained as a professional mechanic, but never took any classes on bodywork. I learned by practicing, reading old school bodymen books, as well as watching some of the local old timers work. They are long gone, but I have been helping some younger guys with tips, so hopefully they will pick it up.
---John |
|
| |
|
Expert
Posts: 4043
Location: Connecticut | John - I read your post as, 'I was trained as a professional magician'. Seems appropriate, with the work you've done on this car. LOL ! Ron |
|
| |
|
Expert 5K+
Posts: 7808
Location: Williams California | Had a nice still afternoon and 80 degrees yesterday, so the Sport Fury is now painted fully.
---John
 (001.JPG) (001.JPG)
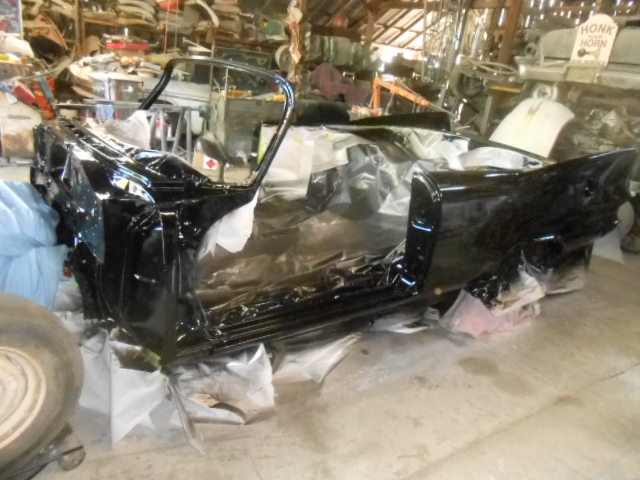 (002.JPG) (002.JPG)
Attachments
----------------
001.JPG (125KB - 285 downloads)
002.JPG (125KB - 294 downloads)
|
|
| |
|
Exner Expert 19,174 posts. Neil passed away 18 Sep 2015. You will be missed, Neil!
Posts: 19146
Location: bishop, ca | You gotta think up a new name for 'her/him'.
|
|
| |
|
Expert
Posts: 2788
Location: USA - KY |
Looking GREAT, John! You've been busy. You have indeed worked your magic on this car!
I agree; "Rusty" just doesn't suit this car anymore.
|
|
| |
|
Expert 5K+
Posts: 7808
Location: Williams California | d500neil - 2014-04-16 1:22 PM
You gotta think up a new name for 'her/him'.
M'lisa already did-
She named the car Toothless, after a dragon called a black Fury in an animated movie, "How to train your dragon"
---John |
|
| |
|

Expert
Posts: 1384
Location: Ocala, Florida | Good name! After looking at the first photo of this thread than this what they say is true you are an artist.
Edited by The Chrysler Kid 2014-04-16 8:40 PM
|
|
| |
|
Exner Expert 19,174 posts. Neil passed away 18 Sep 2015. You will be missed, Neil!
Posts: 19146
Location: bishop, ca | Well, he'll be "Toothless" until he is fully drivable....then, maybe "Toothy"...
|
|
| |
|
Expert
Posts: 2637
Location: Minor Hill, TN | It looks good in black all you will need is a white convertible top and it will look even better |
|
| |
|
Expert 5K+
Posts: 7808
Location: Williams California | Now that my driver is put back together, got a chance to do a bit on this one.
I climbed up to the loft where I had stored the doors, it was 100 degrees on Saturday, but probably 20 degrees hotter up there. Summer has officially arrived here! I had blankets covering them, but as you can see, they were still covered in dust. I did manage to get both fitted and aligned to the body, however. Also, I painted the inner fenders semi-gloss black, although with the paint still wet, looks like gloss black.
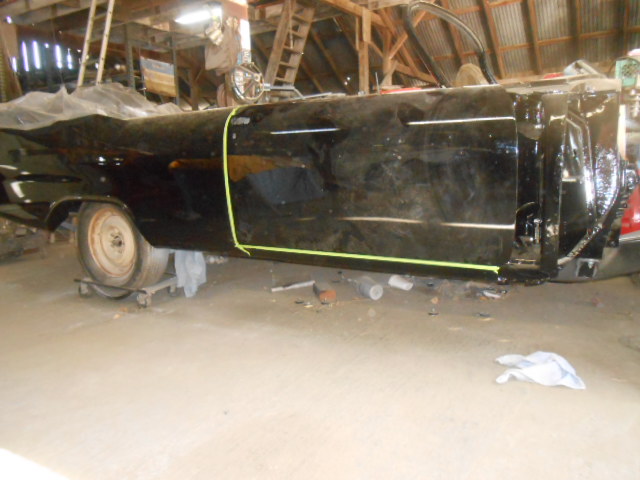 ('59 SF Convertible 013.JPG) ('59 SF Convertible 013.JPG)
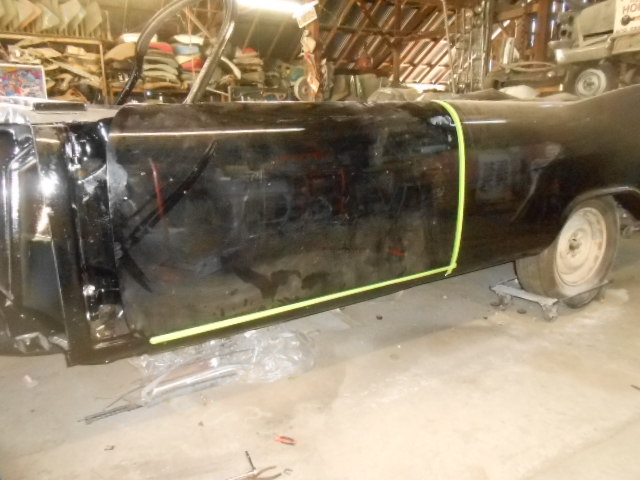 ('59 SF Convertible 014.JPG) ('59 SF Convertible 014.JPG)
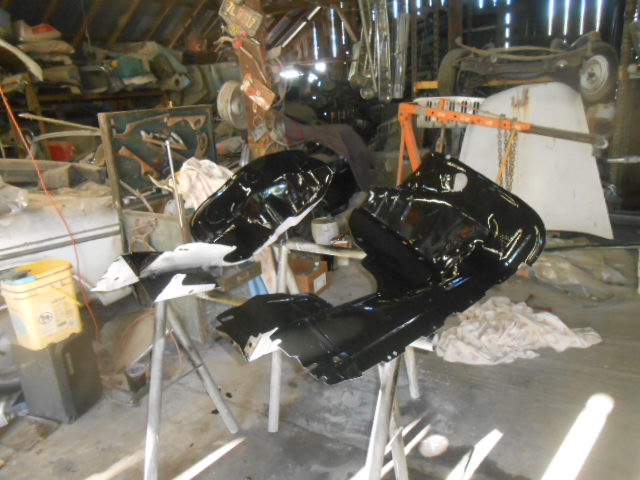 ('59 SF Convertible 015.JPG) ('59 SF Convertible 015.JPG)
Attachments
----------------
'59 SF Convertible 013.JPG (125KB - 279 downloads)
'59 SF Convertible 014.JPG (125KB - 284 downloads)
'59 SF Convertible 015.JPG (126KB - 278 downloads)
|
|
| |
|
Expert
Posts: 2637
Location: Minor Hill, TN | Its getting there. |
|
| |
|
Elite Veteran
Posts: 755
Location: Big M Automotive's Yard | I went out to the barn to see what John was doing. He is re-assembling the dash. Here are some photos. M'Lisa |
|
| |
|
Elite Veteran
Posts: 755
Location: Big M Automotive's Yard | I went out to the barn to see what John was doing. He is re-assembling the dash. Here are some photos. M'Lisa
 (DSC_0001_1043.JPG) (DSC_0001_1043.JPG)
 (DSC_0002_1044.JPG) (DSC_0002_1044.JPG)
 (DSC_0003_1045.JPG) (DSC_0003_1045.JPG)
Attachments
----------------
DSC_0001_1043.JPG (56KB - 266 downloads)
DSC_0002_1044.JPG (51KB - 271 downloads)
DSC_0003_1045.JPG (61KB - 275 downloads)
|
|
| |
|
Walter passed away on Jul 29, 2014. We will miss you, Walt!
Posts: 5358
Location: Heaven Above (Formerly Oklahoma City,OK) | Looking good John. You can get a lot done "One Day at a Time"!. Keep on hitting those "one day's"! |
|
| |
|
Expert
Posts: 1906
Location: Ontario, Canada | John,
I believe I read somewhere in your thread that this car was rescued from upstate NY. Could I ask where? Near Watertown?
Greg |
|
| |
|
Expert 5K+
Posts: 7808
Location: Williams California | LD3 Greg - 2014-06-22 7:42 PM
John,
I believe I read somewhere in your thread that this car was rescued from upstate NY. Could I ask where? Near Watertown?
Greg
Greg, the yard was somewhere near Ithaca, but I don't have further details, as my friend that found it has since passed away. He did say that the yard was no longer operating, and had a truck repair business located on the property.
---John |
|
| |
|
Extreme Veteran
Posts: 537
Location: Upstate NY | With all the rust in this area I am impressed with the progress and the methods to try to counter the effects of rust. I have a vehicle about as bad and have been gradually grinding, blasting and coating fresh metal with epoxy primers to try to keep what I have left. I can truly appreciate the SLOW painstaking progress you are achieving. Great job. I can see why people get so frustrated and give up because it is slow and expensive and easy to lose the vision of having it finally finished to enjoy the fruits of labor. Great job! |
|
| |
|
Expert 5K+
Posts: 7808
Location: Williams California | Thanks, Bob! |
|
| |
|
Expert
Posts: 1384
Location: Ocala, Florida | Amazing! Very impressive work! Cant wait to see it done. |
|
| |
|
Expert 5K+
Posts: 7808
Location: Williams California | Thanks, Randy!
Was going to fit the deck lid yesterday evening, but it was close to 110 degrees in the back of the barn, so I lost interest in doing so after fighting the torsion rods and hinges, and decided to throw some horseshoes with Big Al and his son.
---John |
|
| |
|
Expert
Posts: 2637
Location: Minor Hill, TN | My father told me the car sold brand new at Erie J Miller Chrysler plymouth in Ithaca, NY. I told him were the car sold brand new in Ithaca that is when he told me were it sold. I read a post here about the car and that is how I found out what location the car sold. the car has come along way and its getting there |
|
| |
|
Expert 5K+
Posts: 7808
Location: Williams California | Thanks, Steph!
I received my second set of coffee cans with re-plated hardware, and had the hood hinges plated also. Greg Conomos had sent me a set of his newly reproduced hood springs, so I painted them red and installed them on the hinges. Thanks again, Greg!
I bolted both fenders on, as well as the deck lid. I will have lots of adjusting panels, but I wanted to get things close so I can wetsand and buff the paint out first.
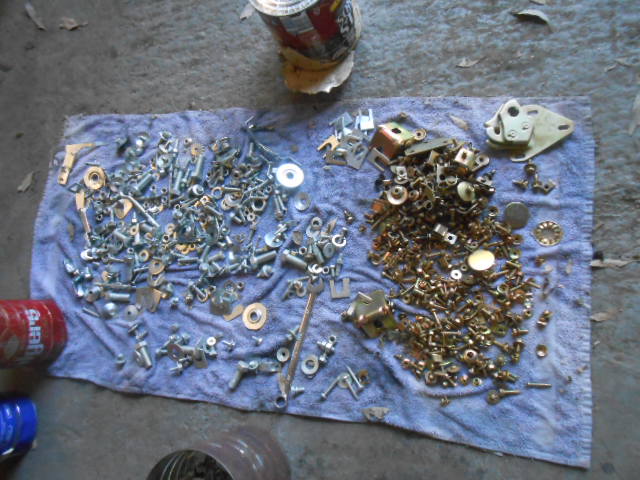 ('59 SF convertible 004.JPG) ('59 SF convertible 004.JPG)
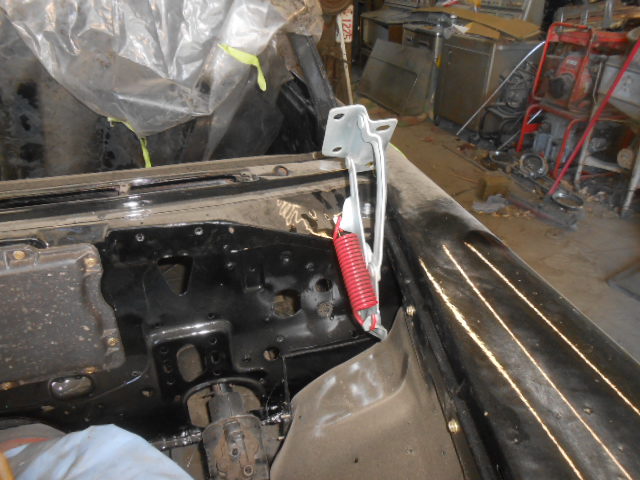 ('59 SF convertible 005.JPG) ('59 SF convertible 005.JPG)
 ('59 SF convertible 003.JPG) ('59 SF convertible 003.JPG)
Attachments
----------------
'59 SF convertible 004.JPG (126KB - 283 downloads)
'59 SF convertible 005.JPG (126KB - 274 downloads)
'59 SF convertible 003.JPG (126KB - 283 downloads)
|
|
| |
|
Exner Expert 19,174 posts. Neil passed away 18 Sep 2015. You will be missed, Neil!
Posts: 19146
Location: bishop, ca | John, have you, yet, bought a copy of Rusty's IBM card?
|
|
| |
|
Expert 5K+
Posts: 7808
Location: Williams California | d500neil - 2014-06-26 3:14 PM
John, have you, yet, bought a copy of Rusty's IBM card?
Funny you ask, Neil, I did this for three or four of my cars about five years ago, but I cannot remember which ones! I'll have to find them and have a look see.
---John |
|
| |
|
Expert
Posts: 2637
Location: Minor Hill, TN | You can go to the Chrysler history and request it they will need a copy of the title or registration |
|
| |
|
Expert 5K+
Posts: 7808
Location: Williams California | Body panels all assembled, finishing the wet sanding with 2000 grit in preparation for polishing.
---John
 ('59 SF convertible 001.JPG) ('59 SF convertible 001.JPG)
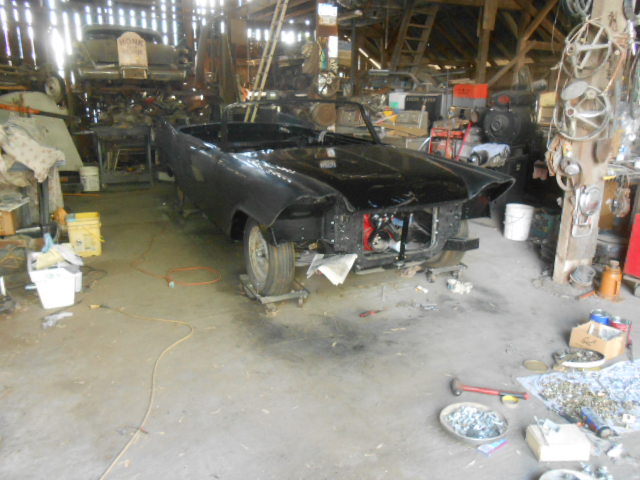 ('59 SF convertible 011.JPG) ('59 SF convertible 011.JPG)
Attachments
----------------
'59 SF convertible 001.JPG (132KB - 259 downloads)
'59 SF convertible 011.JPG (126KB - 263 downloads)
|
|
| |
|
Board Moderator & Exner Expert 10K+
Posts: 13054
Location: Southern Sweden - Sturkö island | Looks good John, now is the most rewarding time coming up - dressing up the car with the chrome |
|
| |
|
Expert 5K+
Posts: 7808
Location: Williams California | Spent the most of Saturday with a buffer- Now to get the aluminum trim re-anodized.
---John
 ('59 SF convertible 001.JPG) ('59 SF convertible 001.JPG)
Attachments
----------------
'59 SF convertible 001.JPG (126KB - 267 downloads)
|
|
| |
|
Expert
Posts: 2637
Location: Minor Hill, TN | Looking really good John |
|
| |
|
Expert 5K+
Posts: 7808
Location: Williams California | Thanks, Steph! |
|
| |
|
Board Moderator & Exner Expert 10K+
Posts: 13054
Location: Southern Sweden - Sturkö island | Looks good John - now's that the fun part remains..... what price are you asking?
Edited by wizard 2014-07-22 4:53 PM
|
|
| |
|
Exner Expert 19,174 posts. Neil passed away 18 Sep 2015. You will be missed, Neil!
Posts: 19146
Location: bishop, ca | Interesting ploy; get John to commit to a price before he finalizes it, so that he 'now' comes up with a price that would be something
less than what the car would bring, at an open auction, after it is completed.
Private-prices are usually lower than are bidding-prices.
|
|
| |
|
Expert
Posts: 3889
Location: Northen Virginia | incredible transformation John, we discussed how much will cost to restore one of theses rusted ragtops over the years, specially when I saw people paying over 60k 70k for cars in the same shape of rusty, will be great to listen to you estimate to complete a nut and bolt resto like this one. |
|
| |
|
Expert
Posts: 2637
Location: Minor Hill, TN | Its looking good John. When you get it done why don't you put a before and after photo of the car |
|
| |
|
Expert
Posts: 2788
Location: USA - KY |
Rusty is looking Fabulous!
You are a miracle worker, John!
|
|
| |
|
Expert 5K+
Posts: 7808
Location: Williams California | I probably have close to 40 hours into straightening the lower valance, as it was mangled like nearly all I find. I painted it argent, along with the filler panel, and installed them on the car. Also, installed several stainless trim pieces, and the headlight buckets.
---John
 ('59 SF convertible 001.JPG) ('59 SF convertible 001.JPG)
Attachments
----------------
'59 SF convertible 001.JPG (126KB - 256 downloads)
|
|
| |
|
Expert
Posts: 3155
Location: NY & VT | This car will be Swede quality... even Jan F. would be proud of a job like this! |
|
| |
|
Expert
Posts: 2905
Location: little rock, AR | I would have thought you would have had a stash of '59 Valances. lol Did I miss the info on your engine build??? Your quite a surgeon!!! |
|
| |
|
Expert 5K+
Posts: 7808
Location: Williams California | Dorsey, the engine was not rebuilt- I removed it from a good running [but rusty] low mileage coupe fifteen years ago. I replaced the timing set, head gaskets and all other gaskets, checked the valves and bearings. Hopefully all is still good after setting all this time.
---John |
|
| |
|
Expert
Posts: 2905
Location: little rock, AR | Is it going to be a 2bbl car or are your going to liven it up a tad??? |
|
| |
|
Expert 5K+
Posts: 7808
Location: Williams California | It's the stock 361 Golden Commando 4-barrel AFB that I will be using. I won't be hopping it up, though |
|
| |
|
Expert
Posts: 2905
Location: little rock, AR | That 361 should do the job really well!! |
|
| |
|
Expert
Posts: 2596
Location: Upplands Väsby, Sweden | Should be fun to get together and see 59 when you come so far in the renovation (Maybe unscrew then?).
We will come to you on Saturday 18 October. Hope you are at home then. Agree before you're home.
Our Road Trip 2014 go LA, Big M, Las Vegas, Kingman, Phoenix, Tucson, LA Looking forward to it.
 (DSCN9732.JPG) (DSCN9732.JPG)
Attachments
----------------
DSCN9732.JPG (80KB - 254 downloads)
|
|
| |
|
Expert 5K+
Posts: 7808
Location: Williams California | I'm looking forward to seeing you again also, Joakim!!!
---John |
|
| |
|
Expert 5K+
Posts: 7808
Location: Williams California | Installed the firewall pad, then the underdash components. Much easier to do when the dash is out! I had already blasted the dash, and painted it with semi-flat black paint, and installed the defroster registers. I disassembled the cluster, and repainted the speedo needle, lubed and tested the speedo, and tested the gauges. All parts were thoroughly cleaned before reassembly. Next was to assemble the other components into the dash, followed by the dash pad, which was made for me by Dash Specialists in Oregon, nearly fifteen years ago.
---John
 ('59 SF convertible 004.JPG) ('59 SF convertible 004.JPG)
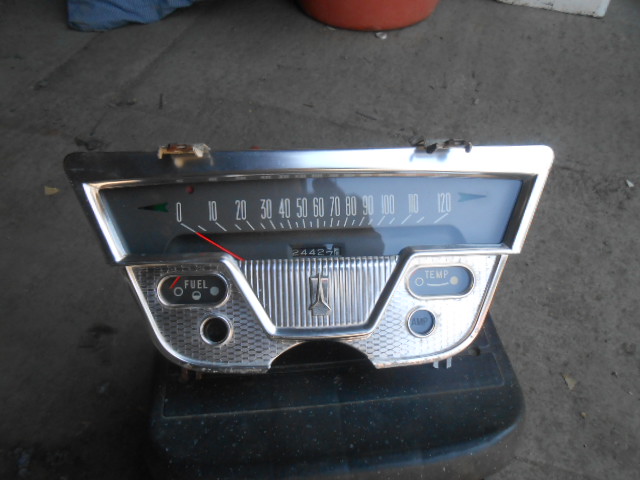 ('59 SF convertible 005.JPG) ('59 SF convertible 005.JPG)
 ('59 SF convertible 005.JPG) ('59 SF convertible 005.JPG)
 ('59 SF convertible 006.JPG) ('59 SF convertible 006.JPG)
 ('59 SF convertible 007.JPG) ('59 SF convertible 007.JPG)
 ('59 SF convertible 008.JPG) ('59 SF convertible 008.JPG)
Attachments
----------------
'59 SF convertible 004.JPG (126KB - 248 downloads)
'59 SF convertible 005.JPG (125KB - 254 downloads)
'59 SF convertible 005.JPG (126KB - 275 downloads)
'59 SF convertible 006.JPG (126KB - 254 downloads)
'59 SF convertible 007.JPG (125KB - 245 downloads)
'59 SF convertible 008.JPG (125KB - 273 downloads)
|
|
| |
|
Extreme Veteran
Posts: 537
Location: Upstate NY | Real sharp John! I know how long and tedious it is to polish the knobs and levers and the speedometer looks new. Is the company still in existence that did your dash? |
|
| |
|
Expert 5K+
Posts: 7808
Location: Williams California | Just checked, and they are still in business. I do remember the price quoted was quite a bit less than what Just Dashes quoted me, perhaps half the price.
It's Dash Specialists in Medford Oregon, [541) 776-0040 for anyone interested. I'd recommend them to anyone!
---John |
|
| |
|
Expert
Posts: 2637
Location: Minor Hill, TN | Do they have a web site also I would like to check it out |
|
| |
|
Expert 5K+
Posts: 8444
Location: Perth Australia | I assume your into facebook Steph
https://www.facebook.com/pages/Dash-Specialists/159987070690485
|
|
| |
|
Expert
Posts: 2637
Location: Minor Hill, TN | Yes I am on facebook.
|
|
| |
|
Location: North Australia | This thread just clocked 500 reply's, and I am not surprised. Inspiring stuff from the Maestro!
Steve. |
|
| |
|
Expert 5K+
Posts: 7808
Location: Williams California | Thanks, Steve! |
|
| |
|
Expert 5K+
Posts: 7808
Location: Williams California | The dashboard installation went easily, so yet another step done. Next was to install the windshield after readying the gasket for it. I had saved what I though was a good pliable original gasket about five years ago, but after spending a few hours cleaning it and applying bedding compound, that it was a couple inches too short. I decided to let it soak overnight in a bucket with Go-Jo, and see if it was just because it had shrunk. The next day I had no better luck, and was just getting frustrated, so I went back to the Desoto where I had the gasket stored. Seems someone had dumped several other gaskets there also, and upon comparison, found I had been trying to fit the wrong one. I found the one that I had thought was a good one all those years ago, but after spending several hours picking old sealant and cleaning it, there was a burned spot in one of the lower corners that would stick out like a sore thumb.
I ended up pulling the windshield on a '59 Chrysler coupe that had a pliable gasket. After cleaning and adding the bedding compound, it fit right on the glass. I didn't have anyone here to help, but was able to get the windshield installed in less than fifteen minutes, as if to make up for all the previous battles I had been having with it.
---John
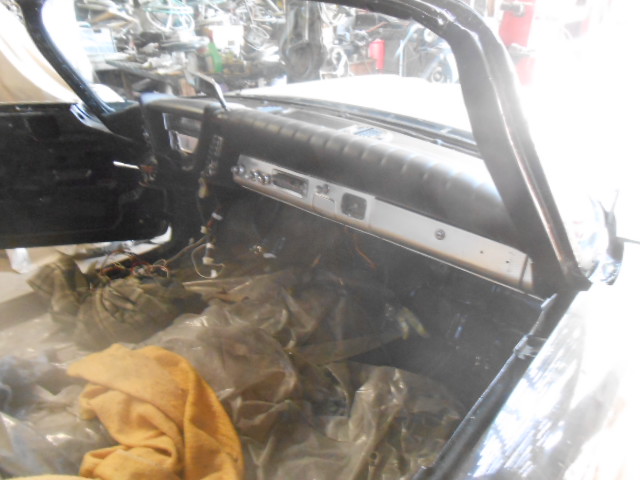 ('9 SF convertible 002.JPG) ('9 SF convertible 002.JPG)
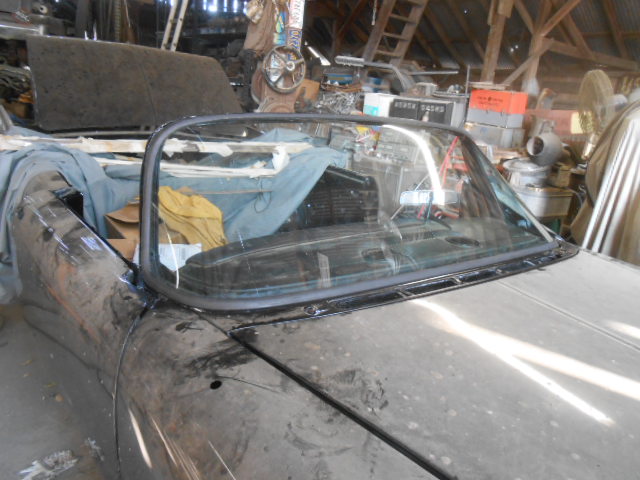 ('9 SF convertible 001.JPG) ('9 SF convertible 001.JPG)
Attachments
----------------
'9 SF convertible 002.JPG (126KB - 294 downloads)
'9 SF convertible 001.JPG (126KB - 278 downloads)
|
|
| |
|
Expert 5K+
Posts: 6502
Location: Newark, Texas (Fort Worth) | Whoo-Hoo! Good going there John! Marc. |
|
| |
|
Expert 5K+
Posts: 7808
Location: Williams California | Thanks, Marc! |
|
| |
|
Expert
Posts: 4043
Location: Connecticut | John - Looks to be a clear windshield. Better keep some sunglasses handy !
What are your plans for the door panels ? SMS ?
Ron |
|
| |
|
Expert 5K+
Posts: 7808
Location: Williams California | It's actually a tinted one, Ron, The sun was shining directly onto it which makes it appear clearer.
I haven't really decided on the door panels, or the rest of the upholstery for that matter, as my friend that did my other cars is no longer physically able to do the work. I still need to make seat frames and springs up, as the originals were rusted to nothing, as well as the quarter window interior panels.
---John |
|
| |
|
Elite Veteran
Posts: 1102
Location: Hayward, Calif | JOHN , Looking GOOD !!!! Jerry |
|
| |
|
Expert 5K+
Posts: 7808
Location: Williams California | Thanks, Jerry!! |
|
| |
|
Extreme Veteran
Posts: 451
| Was just up at johns today ....what a great day, roast pig, beer old cars and friends....couldn't ask for a nicer day too...sunny and hot.
Johns vert is coming along nicely...painted and put together....nice going john, it's looking awesome...even with the bat turds in it....lol...jk, it really does look good. |
|
| |
|
Expert
Posts: 2905
Location: little rock, AR | One would think you would be installing an electric swivel seat with your inventory!!! I guess you guys were really lite if your calling my # here in Arkansas at 9:20pm Friday Night. I guess ya'll broke out the MEDICAL Hootch!!!
|
|
| |
|
Expert 5K+
Posts: 7808
Location: Williams California | guyman - 2014-10-05 12:16 AM
Was just up at johns today ....what a great day, roast pig, beer old cars and friends....couldn't ask for a nicer day too...sunny and hot.
Johns vert is coming along nicely...painted and put together....nice going john, it's looking awesome...even with the bat turds in it....lol...jk, it really does look good.
Thanks, Guy, It was great seeing you again, and glad you enjoyed the party!!
|
|
| |
|
Expert
Posts: 2932
Location: Lemoore CA | John, that has really come along beautifully, I am looking forward to the finished product. |
|
| |
|
Expert 5K+
Posts: 7808
Location: Williams California | Thanks, James!
I installed the Booster Dewey rebuilt booster, the vacuum reservoir, and new master cylinder. Also got the wiring harness routed in the front. Had a minor setback, a windstorm kicked up and knocked over a table with freshly painted parts, now they will have to be all re-done.
---John
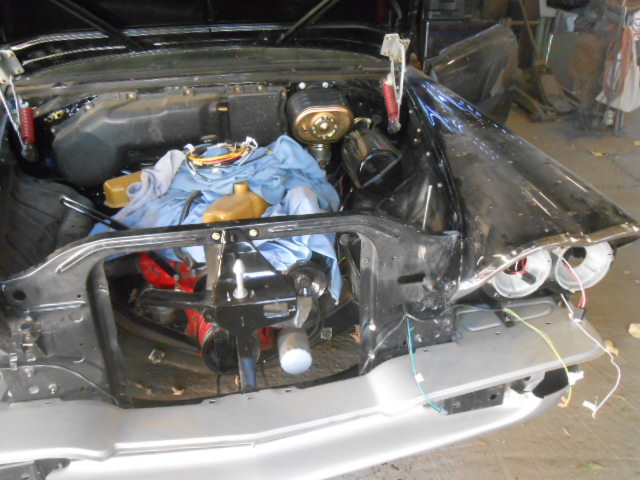 (003.JPG) (003.JPG)
Attachments
----------------
003.JPG (127KB - 288 downloads)
|
|
| |
|
Expert
Posts: 1906
Location: Ontario, Canada | John, did that wiring harness fit OK? Any suggestions to improve anything?
Greg |
|
| |
|
Expert
Posts: 2932
Location: Lemoore CA | big m - 2014-10-14 12:29 PM
Thanks, James!
I installed the Booster Dewey rebuilt booster, the vacuum reservoir, and new master cylinder. Also got the wiring harness routed in the front. Had a minor setback, a windstorm kicked up and knocked over a table with freshly painted parts, now they will have to be all re-done.
---John It seems to me that there is never any wind where I live until I have painted something or have an engine open.........something like that. |
|
| |
|
Expert 5K+
Posts: 7808
Location: Williams California | LD3 Greg - 2014-10-14 2:45 PM
John, did that wiring harness fit OK? Any suggestions to improve anything?
Greg
Greg,
So far, it has fit perfectly!!
Thanks for the good service also!!
---John |
|
| |
|
Expert
Posts: 1906
Location: Ontario, Canada | John,
I'm pleased to hear that. I haven't had a lot of feedback from 59 Ply. owners.
You are doing a wonderful job with your restoration. I was happy and honoured to help!
Greg |
|
| |
|
Expert 5K+
Posts: 7808
Location: Williams California | I got the majority of my aluminum trim back from the plater, everything looked good, except for the trunklid 'toilet seat' insert, which is pretty well destroyed. There's a chance they misunderstood what I was wanting, I have a couple spares, but may find someone else to doo it depending on what I am told.
I masked and painted the parking light bezels, and reassembled them to the lower grill strips and grills with all redone original hardware. Then I fitted the assemblies into the front filler panel, and bolted them in. Next, I acid dipped the park light sockets briefly to remove corrosion, then painted them silver for better reflection. Next, NOS lenses were installed.
---John
 ('59 SF convertible 001.JPG) ('59 SF convertible 001.JPG)
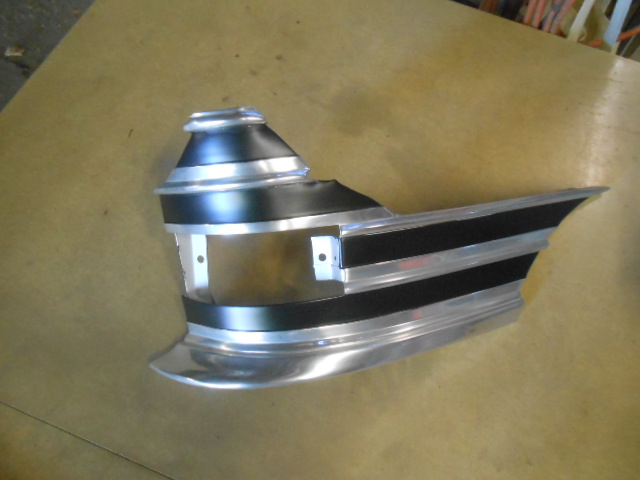 ('59 SF convertible 002.JPG) ('59 SF convertible 002.JPG)
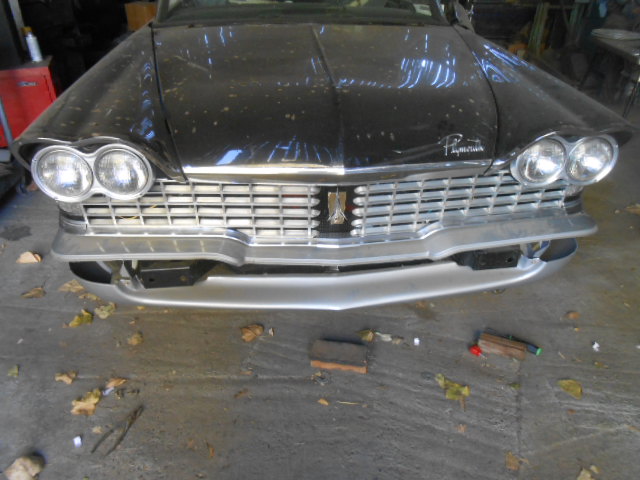 ('59 SF convertible 007.JPG) ('59 SF convertible 007.JPG)
Attachments
----------------
'59 SF convertible 001.JPG (126KB - 275 downloads)
'59 SF convertible 002.JPG (126KB - 271 downloads)
'59 SF convertible 007.JPG (125KB - 281 downloads)
|
|
| |
|
Board Moderator & Exner Expert 10K+
Posts: 13054
Location: Southern Sweden - Sturkö island | Keep it up John, looks really nice, bet you'd like a cruise in you car soon...... |
|
| |
|
Expert
Posts: 2996
Location: Sept. 1958 | Looking great John.
Also, I see your earlier photos of the under side of body shell with black paint before the out riggers are welded. Is that something you put on and can weld through when the other panel is mated to it???? Looks like it would work well so rust wouldn't form between. |
|
| |
|
Expert 5K+
Posts: 7808
Location: Williams California | wizard - 2014-10-29 2:28 PM
Keep it up John, looks really nice, bet you'd like a cruise in you car soon......
Thanks, Sven!!
|
|
| |
|
Expert 5K+
Posts: 7808
Location: Williams California | christine-lover - 2014-10-30 5:12 AM
Looking great John.
Also, I see your earlier photos of the under side of body shell with black paint before the out riggers are welded. Is that something you put on and can weld through when the other panel is mated to it???? Looks like it would work well so rust wouldn't form between.
Matt, it was just a protective coating with rust converter rather than a weld-through primer. Right where the rosette welds are, it will burn off, but the surrounding metal will be protected. When the underside was painted, it should have gotten any exposed metal.
---John |
|
| |
|
Expert
Posts: 2996
Location: Sept. 1958 | big m - 2014-10-31 12:21 PM
christine-lover - 2014-10-30 5:12 AM
Looking great John.
Also, I see your earlier photos of the under side of body shell with black paint before the out riggers are welded. Is that something you put on and can weld through when the other panel is mated to it???? Looks like it would work well so rust wouldn't form between.
Matt, it was just a protective coating with rust converter rather than a weld-through primer. Right where the rosette welds are, it will burn off, but the surrounding metal will be protected. When the underside was painted, it should have gotten any exposed metal.
---John
What is the product called John? Looks like something I should be using in those areas so the metal will be protected and no further rust will happen. |
|
| |
|
Expert 5K+
Posts: 7808
Location: Williams California | The product is called Over Rust, Matt. It is used on a lot of older farm equipment and bank-out wagons around here.
---John |
|
| |
|
Expert 5K+
Posts: 7808
Location: Williams California | More moldings installed, takes time to fit them properly.
 ('59 SF convertible 001.JPG) ('59 SF convertible 001.JPG)
 ('59 SF convertible 002.JPG) ('59 SF convertible 002.JPG)
 ('59 SF convertible 003.JPG) ('59 SF convertible 003.JPG)
Attachments
----------------
'59 SF convertible 001.JPG (126KB - 271 downloads)
'59 SF convertible 002.JPG (127KB - 281 downloads)
'59 SF convertible 003.JPG (126KB - 282 downloads)
|
|
| |
|
Expert
Posts: 2637
Location: Minor Hill, TN | Its getting close to being complete but there is more to do |
|
| |
|
Expert 5K+
Posts: 8444
Location: Perth Australia | Did you manage to find enough dent free trims John or did you have to repair them?
|
|
| |
|
Expert 5K+
Posts: 7808
Location: Williams California | Mick,
a friend of mine that polished faceplates for slot machines for a living dinged and polished a full set of trim for a 2-door hardtop for me about fifteen years ago, so I just need to do the convertible specific ones to match the rest. Most were in decent shape to begin with, if I recall correctly. Glen passed away a few years ago, so I will have to have someone else do the remainder, as I do not have the proper equipment to do as nice a job.
---John
|
|
| |
|
Expert 5K+
Posts: 8444
Location: Perth Australia | The polishings not hard, but getting the dents out or totally re shapeing is a skill I have not really gotten close to mastering yet
|
|
| |
|
Expert 5K+
Posts: 7808
Location: Williams California | I looked into buying a reproduction fuel tank and sender, as it would save a ton of work, but after weighing the fact of the cost, shipping, and that the tanks are not plated, but painted, I decided to refurbish an old one I had.
The tank I found was solid, but had a large, but light dent in the bottom, and did have a degree of surface rust on the inside. I removed the sending unit, and proceeded over to our garden hose, and pressurized the tank with just the pressure our well supplied, until I heard a deep 'Thunk'. It did a good job of popping the dent out without any damage. Next, I used a small propane torch to heat the remaining undercoating, and carefully scraped it off, to the original galvanizing. Note of caution- never try this on a tank that hasn't had at least a month to fully dry out, if you can smell ANYTHING, it can explode.
Next, I used some used lacquer thinner mixed with fresh fuel, poured it into the tank, then dropped a few three foot long chains inside. After swishing the contents around for a half hour, I inspected the results. The chains had scrubbed 90% or better of the surface rust from the bottom of the tank. I repeated this with the tank upside down, then all four sides. The liquid that came out was very thick with rust. I then rinsed the tank multiple times using Super Clean to remove leftover residue.
Next, after the rust had settled to the bottom of the drain pan, I soaked a rag in the fuel/lacquer thinner mixture, and wiped the tank down to remove the undercoat remains. Looks a whole lot better now!
I cleaned and painted the two straps, replaced the neck O-ring, and did a solder repair on the sending unit. I then installed it in the car, and fitted the fuel filler door.
---John
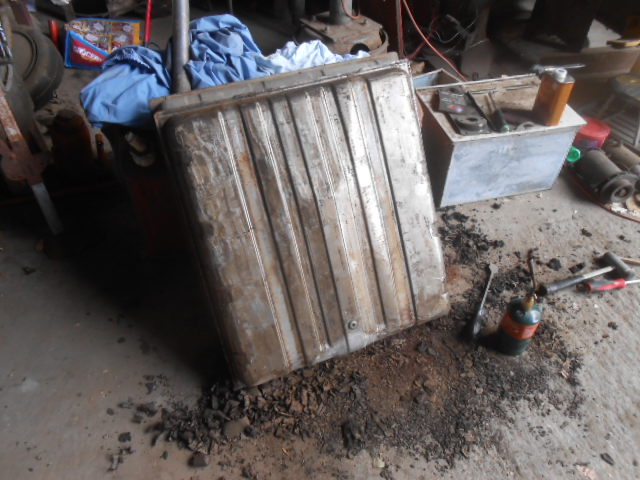 (001.JPG) (001.JPG)
 ('59 SF convertible 001.JPG) ('59 SF convertible 001.JPG)
 ('59 SF convertible 002.JPG) ('59 SF convertible 002.JPG)
Attachments
----------------
001.JPG (125KB - 273 downloads)
'59 SF convertible 001.JPG (126KB - 269 downloads)
'59 SF convertible 002.JPG (124KB - 273 downloads)
|
|
| |
|
Expert
Posts: 2905
Location: little rock, AR | I cleaned my '59 Ply. with muriatic acid and pressure washed it. I then poured in 1/4 gal. of WD 40 and swished it around to prevent flashing. Best 20-25 dollars that I've spent lately. Looking great John. What are your plans for the FL Carlisle show in July??? |
|
| |
|
Expert 5K+
Posts: 7808
Location: Williams California | oldwood - 2014-11-17 1:56 PM
I cleaned my '59 Ply. with muriatic acid and pressure washed it. I then poured in 1/4 gal. of WD 40 and swished it around to prevent flashing. Best 20-25 dollars that I've spent lately. Looking great John. What are your plans for the FL Carlisle show in July???
Thanks, Dorsey!
There is a possibility of us coming to Carlisle, but nothing is set in stone yet.
---John |
|
| |
|
Expert
Posts: 2905
Location: little rock, AR | Well you will have to come through Arkansas. Since you are the "chosen one" they will follow you. Then we will have us a convoy. Then we get into TN and we might have us a VW micro but full of dem dar Hippies. Then you know what the hills of Virginia will bring ya??? Something about a clear liquid in a jar. Is your mouth watering yet. Tulsa is loooooooonnnnnng GONE but we can make this OUR Tulsa. I have a vision(no I'm not on the mountain top) of 200+ FL cars rolling into Carlisle at 1 time. We will make our own reality show. Since life is shorter on this end I'm going to this one. Does it sound like I need to hide the key to the good stuff or can we ALL quit TALKING and put out some ACTION??? |
|
| |
|
Expert
Posts: 2788
Location: USA - KY |
Your Fury is coming along very nicely! Amazing work on your part, big m...as always!
Hope you can make it to Carlisle - we might actually make it there this year, and it would be great to meet the entire big m family.
|
|
| |
|
Expert 5K+
Posts: 7808
Location: Williams California | oldwood - 2014-11-17 5:40 PM
Well you will have to come through Arkansas. Since you are the "chosen one" they will follow you. Then we will have us a convoy. Then we get into TN and we might have us a VW micro but full of dem dar Hippies. Then you know what the hills of Virginia will bring ya??? Something about a clear liquid in a jar. Is your mouth watering yet. Tulsa is loooooooonnnnnng GONE but we can make this OUR Tulsa. I have a vision(no I'm not on the mountain top) of 200+ FL cars rolling into Carlisle at 1 time. We will make our own reality show. Since life is shorter on this end I'm going to this one. Does it sound like I need to hide the key to the good stuff or can we ALL quit TALKING and put out some ACTION???
Sure sounds like a good time, Dorsey!! |
|
| |
|
Expert 5K+
Posts: 7808
Location: Williams California | FIN ME - 2014-11-18 5:38 AM
Your Fury is coming along very nicely! Amazing work on your part, big m...as always!
Hope you can make it to Carlisle - we might actually make it there this year, and it would be great to meet the entire big m family.
:cool:
Thanks, Rosy!! |
|
| |
|
Expert 5K+
Posts: 7808
Location: Williams California | I rebuilt and detailed the distributor, then installed it. Tech showed up to ensure that I was doing it correctly.
 ('59 SF convertible 001.JPG) ('59 SF convertible 001.JPG)
 ('59 SF convertible 004.JPG) ('59 SF convertible 004.JPG)
 ('59 SF convertible 005.JPG) ('59 SF convertible 005.JPG)
Attachments
----------------
'59 SF convertible 001.JPG (126KB - 268 downloads)
'59 SF convertible 004.JPG (131KB - 272 downloads)
'59 SF convertible 005.JPG (131KB - 271 downloads)
|
|
| |
|
Expert
Posts: 2264
Location: McComb, Mississippi | Where did you get tech ? I'd love to find one. |
|
| |
|
Expert 5K+
Posts: 7808
Location: Williams California | plymouth - 2014-11-24 2:53 PM
Where did you get tech ? I'd love to find one.
A very talented gal in Michigan made him for me. I can ask if she is willing to sell another, if you wish.
---John |
|
| |
|
Expert 5K+
Posts: 7808
Location: Williams California | Carburetor is overhauled, and linkages replated-
 ('59 SF convertible 001.JPG) ('59 SF convertible 001.JPG)
 ('59 SF convertible 002.JPG) ('59 SF convertible 002.JPG)
Attachments
----------------
'59 SF convertible 001.JPG (126KB - 267 downloads)
'59 SF convertible 002.JPG (126KB - 256 downloads)
|
|
| |
|
Elite Veteran
Posts: 781
Location: Montreal, Canada | big m - 2014-11-24 7:23 PM
plymouth - 2014-11-24 2:53 PM
Where did you get tech ? I'd love to find one.
A very talented gal in Michigan made him for me. I can ask if she is willing to sell another, if you wish.
---John
I am wondering how much he would go for.
I'd love to have "Tech" with me at home!!!!!
Edited by catman 2014-11-24 8:28 PM
|
|
| |
|
Expert
Posts: 2637
Location: Minor Hill, TN | I was wondering have you thought about converting to electronic ignition ? |
|
| |
|
Expert
Posts: 2637
Location: Minor Hill, TN | I was wondering have you thought about converting to electronic ignition ? |
|
| |
|
Expert 5K+
Posts: 7808
Location: Williams California | 1961plymouthfury - 2014-11-24 7:07 PM
I was wondering have you thought about converting to electronic ignition ?
Honestly, no. I've always ran breaker point ignitions as I rarely ever have any trouble, and if I do, a test light is all I need to diagnose it.
Most folks that have ignition troubles either have too much voltage going to the coil, or the bushings in the distributor are worn, allowing a change in dwell angle.
---John |
|
| |
|
Elite Veteran
Posts: 1155
Location: somerville mass | i am blown away by the progress! a car that broke in two pieces to anyone else barely salvagable for a few
parts and now this - wow! |
|
| |
|
Expert
Posts: 2264
Location: McComb, Mississippi | big m - 2014-11-24 6:23 PM
plymouth - 2014-11-24 2:53 PM
Where did you get tech ? I'd love to find one.
A very talented gal in Michigan made him for me. I can ask if she is willing to sell another, if you wish.
---John
Sure! That'd be great.
Thanks |
|
| |
|
Expert 5K+
Posts: 7808
Location: Williams California | Christian, She'll get back to me if she decides to make more 'Techs'.
---John |
|
| |
|
Elite Veteran
Posts: 1150
Location: Southern California | John you've done an incredible job on this restoration, been following this thread for years behind the scenes :D
very inspiring! |
|
| |
|
Expert 5K+
Posts: 7808
Location: Williams California | Thanks, Mike!! |
|
| |
|
Expert 5K+
Posts: 7808
Location: Williams California | Time to refurbish more rusty parts- the interior windshield header and the two quarter window garnish moldings were very rusty, if I can't save these, I'll have to make duplicates, which will be a lot of work.
I used reverse electrolysis on all three pieces, until every last bit of rust was gone. There was still some peeling chrome remaining. The pitting was heavy but evenly so, and no large pits or weak spots. I spent about six hours carefully removing material until the pits were just miniscule 'Pin p***ks in the surface. The chrome plater can plate these copper once or twice to fill the pits, then refinish before plating now.
---John
 (022.JPG) (022.JPG)
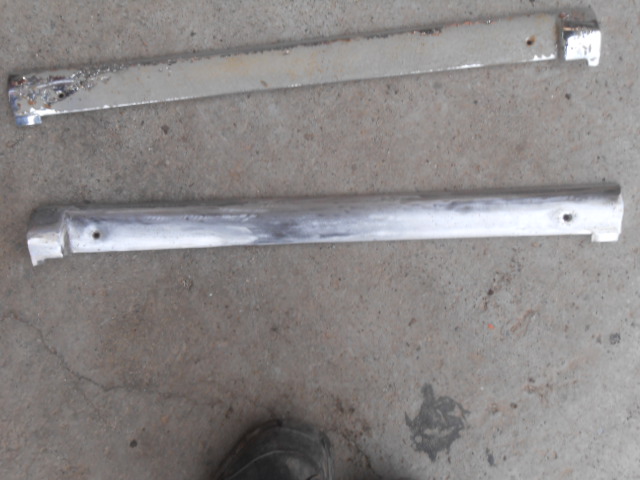 (023.JPG) (023.JPG)
 (024.JPG) (024.JPG)
Attachments
----------------
022.JPG (140KB - 284 downloads)
023.JPG (135KB - 272 downloads)
024.JPG (124KB - 282 downloads)
|
|
| |
|
Expert 5K+
Posts: 8444
Location: Perth Australia | Did the reverse electrolisis get rid of the chrome John?
|
|
| |
|
Expert 5K+
Posts: 8947
Location: WHEELING,WV.>>>HOME OF WWVA | can't wait to see it 100% done . it's goin to be a knock out ---------------------------------------------later |
|
| |
|
Expert 5K+
Posts: 7808
Location: Williams California | ttotired - 2014-12-19 12:48 AM
Did the reverse electrolisis get rid of the chrome John?
It took care of the rust beneath the chrome where it was peeling, but only discolored the plating slightly. The chrome has to be stripped anyways, so I wasn't too concerned, Mick. |
|
| |
|
Expert 5K+
Posts: 7808
Location: Williams California | 60 dart - 2014-12-19 1:07 AM
can't wait to see it 100% done . it's goin to be a knock out ---------------------------------------------later
Thanks, Chuck!
If a miracle happens and I have it done in time, We'll drive it to Carlisle this year. If not, one of the other cars will have to do.
---John |
|
| |
|
Expert 5K+
Posts: 7808
Location: Williams California | The rear seat inside panels were pretty corroded, especially the lower sections. I measured these sections against the ones in a coupe, and there were only a few differences. I drilled the spot welds holding the upper to lower sections, and found a good set of panels from a coupe. These I modified and made into sections identical to the convertible lowers. I de-rusted all four pieces, and rosette welded the better top section to its new lower section.
The second one was not so easy, as the upper section had rusted through in multiple places. I cut out and welded these areas up, and smoothed the welds out. a few pits will not matter as long as the pieces are solid, as they are upholstered.
 (001.JPG) (001.JPG)
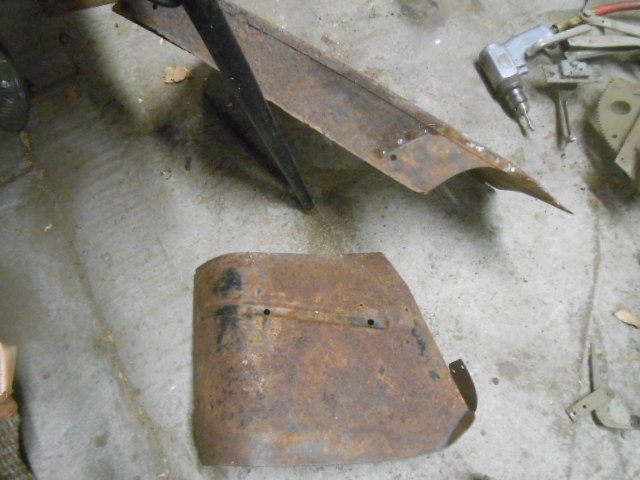 (002.JPG) (002.JPG)
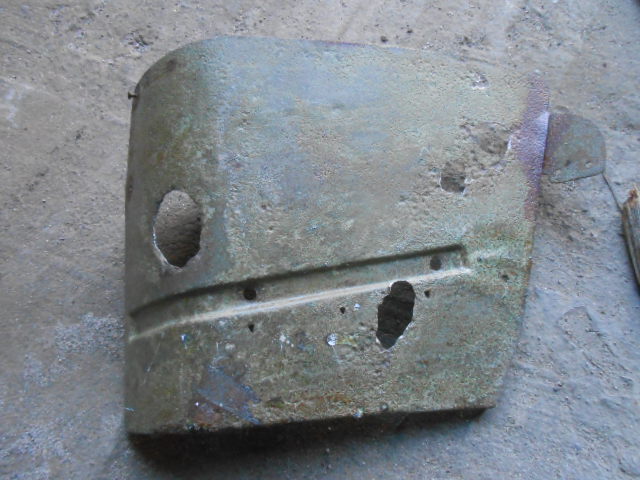 ('59 SF convertible 001.JPG) ('59 SF convertible 001.JPG)
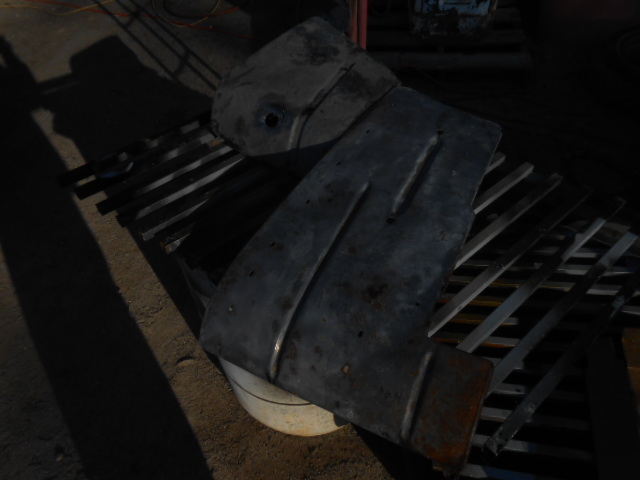 ('59 SF convertible 004.JPG) ('59 SF convertible 004.JPG)
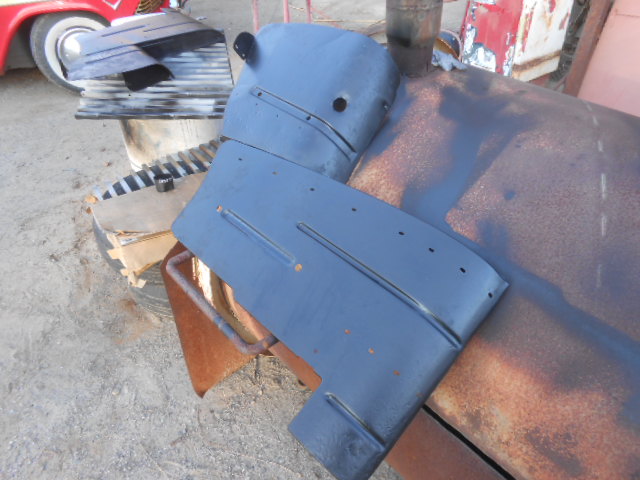 ('59 SF convertible 008.JPG) ('59 SF convertible 008.JPG)
 ('59 SF convertible 009.JPG) ('59 SF convertible 009.JPG)
Attachments
----------------
001.JPG (124KB - 267 downloads)
002.JPG (124KB - 280 downloads)
'59 SF convertible 001.JPG (124KB - 271 downloads)
'59 SF convertible 004.JPG (123KB - 278 downloads)
'59 SF convertible 008.JPG (126KB - 280 downloads)
'59 SF convertible 009.JPG (126KB - 274 downloads)
|
|
| |
|
Location: Parts Unknown | Years ago, I was told there was a "car just like mine" (58 Belvedere convertible) sitting in a
yard in the White Center area. Some scouring of the street grid followed and what I found
was a 59 like Rusty. It appeared to have melted into the ground , the bottom 10" of the car
simply GONE ! Even the top bows were melted off at the side frames. Before I would venture
into anyone's property, I'd go the front door and ask permission to be there. To my surprise,
I was met at the door by a shotgun leveled at my face and the words "IT'S NOT FOR SALE !!!".
It was an odd sight, as the house and neighborhood were pretty nice, with this one odd car
just sort of melting into the grass in the side yard. When I explained I wasn't interested in
owning the car and just wanted to ask permission to look at it, the guy warmed up a bit and
we went out and looked it over and I got a few photos of it.
That was probably around 1989 ??? and I suspect the grumpy old guy has since lost interest.
He said he was gonna restore it, like they all do. Anyway, since you obviously have more than
one screw loose to bring Rusty back from the scrap heap, I think I've got a "next project" in
mind for you John ! If I can only remember where exactly that car was ....
|
|
| |
|
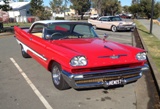
Elite Veteran
Posts: 1120
Location: Brisbane, Australia | big m - 2014-12-20 3:28 AM
60 dart - 2014-12-19 1:07 AM
can't wait to see it 100% done . it's goin to be a knock out ---------------------------------------------later
Thanks, Chuck!
If a miracle happens and I have it done in time, We'll drive it to Carlisle this year. If not, one of the other cars will have to do.
---John
Boy what a bonus it would be to see 'Rusty' in the flesh at the Nationals. Get the lead out John! |
|
| |
|
Expert 5K+
Posts: 7808
Location: Williams California | Doctor DeSoto - 2015-01-03 10:59 AM
Years ago, I was told there was a "car just like mine" (58 Belvedere convertible ) sitting in a
yard in the White Center area. Some scouring of the street grid followed and what I found
was a 59 like Rusty. It appeared to have melted into the ground , the bottom 10" of the car
simply GONE ! Even the top bows were melted off at the side frames. Before I would venture
into anyone's property, I'd go the front door and ask permission to be there. To my surprise,
I was met at the door by a shotgun leveled at my face and the words "IT'S NOT FOR SALE !!!".
It was an odd sight, as the house and neighborhood were pretty nice, with this one odd car
just sort of melting into the grass in the side yard. When I explained I wasn't interested in
owning the car and just wanted to ask permission to look at it, the guy warmed up a bit and
we went out and looked it over and I got a few photos of it.
That was probably around 1989 ??? and I suspect the grumpy old guy has since lost interest.
He said he was gonna restore it, like they all do. Anyway, since you obviously have more than
one screw loose to bring Rusty back from the scrap heap, I think I've got a "next project" in
mind for you John ! If I can only remember where exactly that car was ....
That's funny, Brent!!
Back in the mid eighties I was helping my sister move from Elko Nevada to Winnemucca, so I rented a big moving truck. After helping her, I had to return the truck to Reno, so I took a county road south from Interstate 80 to highway fifty. There were no towns along this road, just a scattering of ranches.
I did spot an old foundation and concreted area with some charred wood not too far from the roadway, and setting up high in the cab of the truck I could see a few car bodies off in the distance, so I stopped to have a look. Apparently it was an old gas station, and they would drag their junk cars and trash back a quarter mile to a ravine, and push everything down. There were probably 25 cars there, from the late forties to early sixties, including a '57-8 Chrysler convertible. These car bodies were all full of bullet holes, and some suffered the indignity of being burned with the trash years ago. BUT- they were not rusty!
I didn't have much time to pilfer, as the truck needed to be returned that day, but I did get a chance to return several years later. Unfortunately, BLM had done a clean-up on the site, and the cars were all gone. Most Nevada junkpiles on public property suffered the same demise, I found out later.
---John |
|
| |
|
Expert
Posts: 1207
Location: Ponder, TX | Doctor DeSoto - 2015-01-03 12:59 PM
Years ago, I was told there was a "car just like mine" (58 Belvedere convertible ) sitting in a
yard in the White Center area. Some scouring of the street grid followed and what I found
was a 59 like Rusty. It appeared to have melted into the ground , the bottom 10" of the car
simply GONE ! Even the top bows were melted off at the side frames. Before I would venture
into anyone's property, I'd go the front door and ask permission to be there. To my surprise,
I was met at the door by a shotgun leveled at my face and the words "IT'S NOT FOR SALE !!!".
It was an odd sight, as the house and neighborhood were pretty nice, with this one odd car
just sort of melting into the grass in the side yard. When I explained I wasn't interested in
owning the car and just wanted to ask permission to look at it, the guy warmed up a bit and
we went out and looked it over and I got a few photos of it.
That was probably around 1989 ??? and I suspect the grumpy old guy has since lost interest.
He said he was gonna restore it, like they all do. Anyway, since you obviously have more than
one screw loose to bring Rusty back from the scrap heap, I think I've got a "next project" in
mind for you John ! If I can only remember where exactly that car was ....
This one made me laugh! I worked with the guy for many years and he's a nice guy, an engineer, and mentally very sharp when I last saw him, but knowing him, he might indeed greet unknown folks with a shotgun, or something else from his extensive firearm collection. He asked me to come out in the mid-eighties and tell him what could be done to restore it, but as you said, it sort of melted into the wet Western Washington soil. He didn't like to hear that it had become a parts car for trim only. I seem to recall he said he had bought the car new, or almost new, and it's a shame he let it sit outside.
To really make your day, I invited him to one of our Mopar shows where the raffle prize was a complete, freshly rebuilt 360. Naturally, he won it and I'll bet it still sits in his basement getting rusty. That was also in the mid-eighties.
If he's still alive, I'm sure the car is still sitting there...a little deeper in the mud...since he would never sell it or part it out. He has no need for the money, and it is his memory machine.
Addendum: Just for kicks, I did a web search to see if he's still alive, and he is not. He died in 2004. I also checked Google Earth to see if the car was visible, and it appears to be gone in both the satellite and street views. His wife is still alive, but if she still lives in the same house, she would be well into her eighties and probably disposed of the car some years ago.
Edited by GaryS 2015-01-04 1:20 PM
|
|
| |
|
Location: Parts Unknown | Gary ~ are we talking about the same guy and car ??? !!!
Man ! ..... small world !
------------------------------------------------------------------------
You know, after he settled down, he seemed like a pretty nice guy, ... although one of those
roll-your-eyes guys who's gonna restore it someday. If memory serves, I was with my brother,
friend Terry, and a 4th person. It was me who told them to wait in the car while I went to the
door to ask permission to look at it. I've been around firearms my whole life, but a guy on the
other side of an aluminum storm door with a big ol' 3/4" black hole pointed right at my face was
not something I was used to seeing. Since he was only barking out "IT'S NOT FOR SALE !", I kept
my cool, stuck with the mission, and assured him that I was not there to harass him to sell, and
that in fact, I had a similar car and just wanted to "talk shop" and look at it. We probably spent
a half hour with him, talking and taking pictures. He was extremely bothered by people asking to
buy the car for whatever reason. Moreso than the car rotting away. But that was his game and
we let it rest at that.
We all knew he was a crazy and were pretty bummed on him for trashing that poor car like that,
but we were nice toward him and recognized this was going to be one of those "oh boy !" stories
of the crazy with the top shelf car rotting in the grass, complete with shotgun, and took that away
as a "next best thing".
Not far over the hill toward West Seattle, we discovered a trove of similarly exotic GM cars. This
crew was equally crazy, but also interested in beer money. So, that one worked out a little differently.
|
|
| |
|
Expert
Posts: 1207
Location: Ponder, TX | He wasn't crazy, but he was a very independent conservative and in certain ways I guess he did march to a different tune than most folks. I remember him telling me that someone was always trying to buy the car and he said that if it was for sale, he'd hang a sign on it. I don't know what his emotional attachment was to the car, but it was pretty strong, as he talked about it often. Unfortunately it wasn't strong enough to make the commitment to restore it, but it wasn't due to a lack of funds as he had inherited a lot of money from his parents estate.
His wife was really the one that had a screw or two loose. In winter, she would stack brush on the front porch and put bird seed around it so the birds would have a place to eat and get out of the rain. She had serious health problems and much of his time was spent taking care of her, so I'm amazed she outlived him.
BTW, he also owned another Mopar that I would have liked to have. It was a '61 or '62 Dodge D100 that he actually kept in good running order and drove to work every day.
Edited by GaryS 2015-01-05 7:31 AM
|
|
| |
|
Location: Parts Unknown | Gary ~ as one crazy to another, your buddy was a first class whack job, just like me !
In the USMC, one comes to see being called a "maggot" as a term of endearment, of having
made the grade. Everyone else would find it offensive.
Same goes for "crazy" and similar with any of this eccentric hoarding of old stuff. Anyone who
greets me at the door with a shotgun gets an extra slice of raisin pie for being double-extra crazy !
Nothing wrong with being a little "different". Who wants to be NORMAL ??? 
=====================================================
On another old car/crazy encounter, I was reading meters for the gas company ....
I'd park my vehicle at the end of a street and read all the meters up one side and down
the other. Oft-times it made sense to cut across backyards, etc. to get to the next meter,
rather than go out to the street each time. In one such case, I had been back yard hopping
and came to the last meter to read on the street before going out to my car.
As I came out of the side yard I ran straight into a 1957 Olds 98 convertible and a distracting
crazy woman in a bathrobe, fluffy slippers, and her hair in a big wad of curlers. Paper plates
were strewn all over the driveway and she was doing this crazy motion, as if serving the ball
in a tennis match. In the serving hand was a paper plate. Under the other arm was a large
stacked bag of paper plates !
She was yelling something in a rather incoherent manner, as if angry, her swats at the sky
looked as if she was trying to knock something out of the air.
I stopped dead in my tracks, just out of sight and watched. It was just plain bizarre. After a
while, I could make out something about "gawdammed baby butterflies", but it was pretty
mumbled, and shouted as she made each swipe, making it hard to make out what she was
saying. Occasionally she would lose hold of a plate, and rather than pick it up, she'd pull a
fresh one out from the stack under her other arm, leaving this blizzard of white discs all over
the drive and yard.
I finally revealed my presence as best I could without scaring her to death, and tried to ask
about the car. All she wanted to discuss was the problems of the baby butterflies. I left her
there to continue the battle and got back to reading meters.
Now, if that lady had been "normal", there really would be no story and I doubt she'd have
had an old car or that I'd remember anything about that yard, street, or otherwise today.
Character is good.
|
|
| |
|
Expert 5K+
Posts: 7808
Location: Williams California | On to the rear seat cushions.
Even though the original seats were decimated by rust, they still worked for patterns. I had always been told that the rear seat cushions were convertible specific, but found it to be part true. I removed the hog rings on a coupe seat lower cushion, and placed it next to the remains of the convertible one. They were the same! This was encouraging, as I was not looking forward to making a new one up.
The upper seat back was a different story. It shared nothing with either a coupe or sedan seat.
I was able to salvage the rear backing by welding sections in from another seat cushion, and repairing any rust through. Next, I gathered up enough good springs from a selection of seat cushions, and secured them to the repaired backing. The front frame was pretty much gone, but I used one from a coupe, and modified it to match the rusted sample. Next, all the small springs and securing bands were added, and Voila! Now I have good seat cushions!
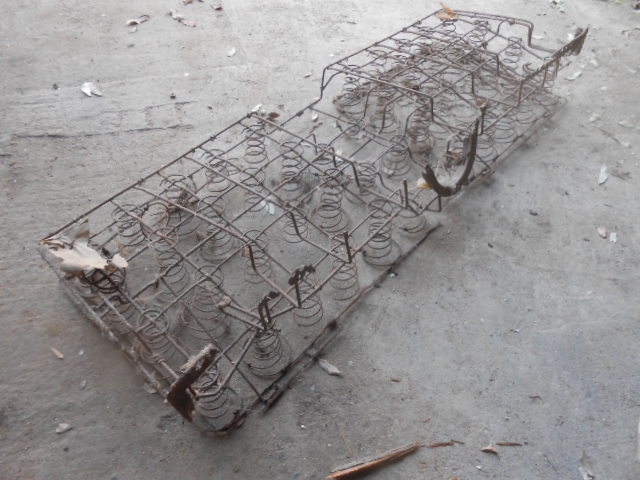 ('59 SF convertible 001.JPG) ('59 SF convertible 001.JPG)
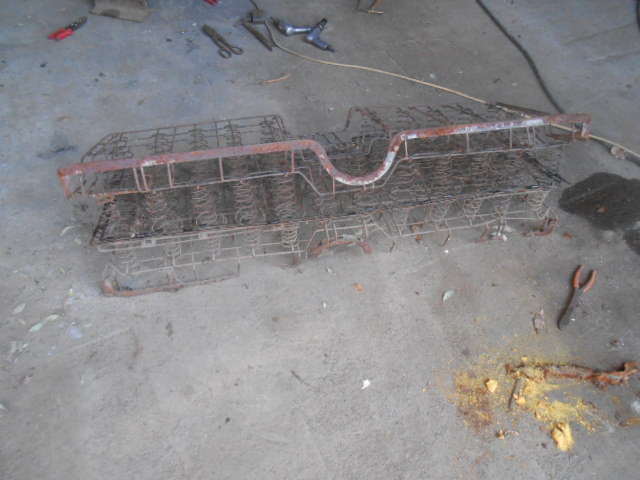 ('59 SF convertible 002.JPG) ('59 SF convertible 002.JPG)
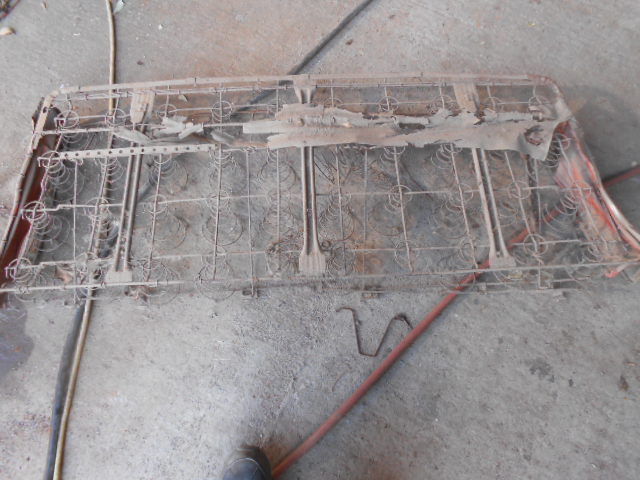 ('59 SF convertible 003.JPG) ('59 SF convertible 003.JPG)
 ('59 SF convertible 008.JPG) ('59 SF convertible 008.JPG)
 ('59 SF convertible 009.JPG) ('59 SF convertible 009.JPG)
 ('59 SF convertible 006.JPG) ('59 SF convertible 006.JPG)
Attachments
----------------
'59 SF convertible 001.JPG (125KB - 273 downloads)
'59 SF convertible 002.JPG (124KB - 293 downloads)
'59 SF convertible 003.JPG (125KB - 284 downloads)
'59 SF convertible 008.JPG (124KB - 272 downloads)
'59 SF convertible 009.JPG (125KB - 279 downloads)
'59 SF convertible 006.JPG (125KB - 272 downloads)
|
|
| |
|
Expert
Posts: 4043
Location: Connecticut | John - For my 59 Dodge convert, my rear seats were in the same rusty shape as yours. I also discovered that the rear seats were the same for a 2dr HT, while the seat backs were unique. When I parted out a 59 Sport Fury convert in the early 90s to obtain all the convertible-only parts, I saved the rear seat back for my convert. The dimensions for the Dodge vs. Plymouth seat backs were identical. But the construction was different, with the Dodge having two long bars that slotted into retainers behind the rear seat back, while the Plymouth had 2 or 3 latches that bolt into the body. I removed the retainers and went with the Plymouth setup. Ron |
|
| |
|
Elite Veteran
Posts: 982
Location: Upper Hunter NSW Australia | ............
You are a man of many talents there John !!!!
............ |
|
| |
|
Expert 5K+
Posts: 7808
Location: Williams California | I fitted the quarter windows and their associated parts, and everything seems to fit well. They will need adjustment, naturally, after installing the top and door glass. Also, put the sport deck together and mounted it, and drilled the holes for the trunk V. Next, installed the recored radiator, and the re-wound larger Chrysler generator, as well as their belts and hoses, trimmed and flared the trans cooler lines.
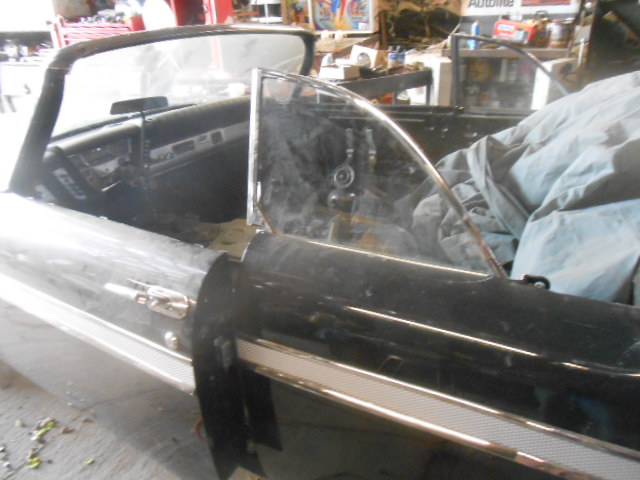 ('59 SF convertible 002.JPG) ('59 SF convertible 002.JPG)
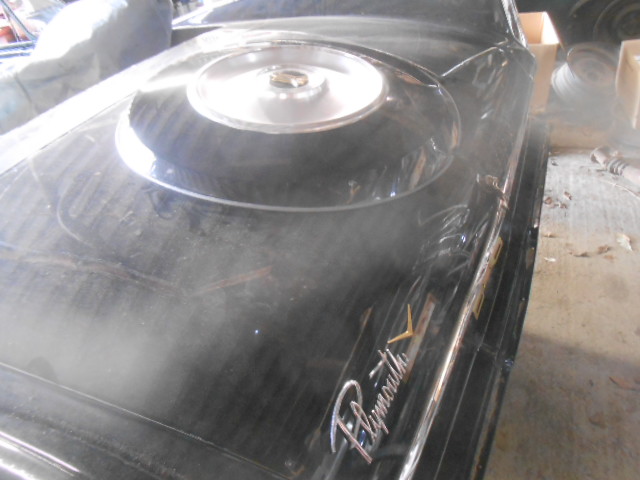 ('59 SF convertible 001.JPG) ('59 SF convertible 001.JPG)
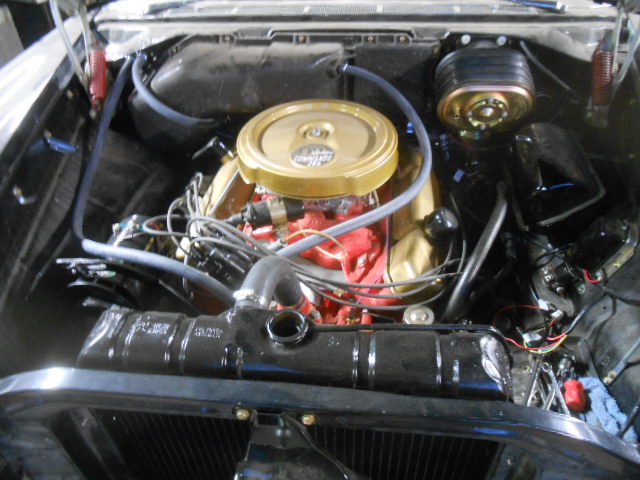 ('59 SF convertible 001.JPG) ('59 SF convertible 001.JPG)
Attachments
----------------
'59 SF convertible 002.JPG (126KB - 277 downloads)
'59 SF convertible 001.JPG (125KB - 272 downloads)
'59 SF convertible 001.JPG (126KB - 279 downloads)
|
|
| |
|
Expert
Posts: 1324
Location: Hickory, NC | Very nice! Engine bay looks real good. |
|
| |
|
Regular
Posts: 63
| john
I am absolutely AMAZED at the skills that you have to restore rusty!! I wish that I had 1/10 of the talent that you have!! I look forward to progress reports and to see the finished product!
jim pring |
|
| |
|
Extreme Veteran
Posts: 481
Location: The Netherlands | Great work John! Can't wait to see it at Carlisle.
Before you go, switch the hoses on the heater valve.
They are connected wrong |
|
| |
|
Expert
Posts: 2788
Location: USA - KY |
WOW, John! Lookin' gooooooooooood!
I agree; you're one talented dude.
|
|
| |
|
Expert 5K+
Posts: 7808
Location: Williams California | The header bow was next-
Took a year and a half to find a good one, Thanks, Johnny G!
After sandblasting all the convertible top parts, discovered a section was weak and full of rust pinholes. This I cut out, fabricated a repair patch, welded and metal-finished it. Now ready for primer!
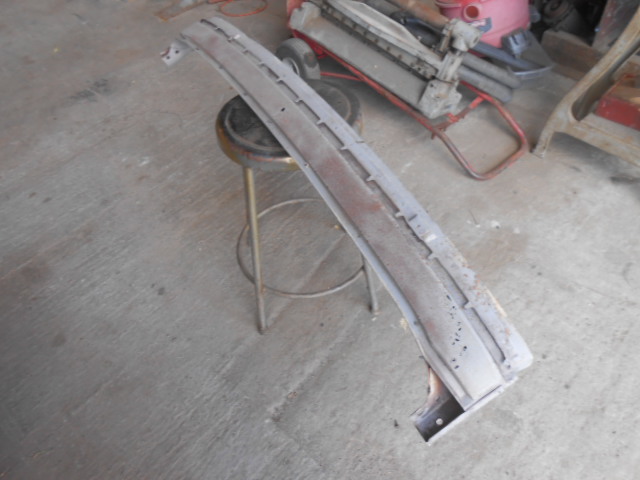 ('59 SF convertible 002.JPG) ('59 SF convertible 002.JPG)
 ('59 SF convertible 003.JPG) ('59 SF convertible 003.JPG)
 ('59 SF convertible 004.JPG) ('59 SF convertible 004.JPG)
Attachments
----------------
'59 SF convertible 002.JPG (125KB - 262 downloads)
'59 SF convertible 003.JPG (126KB - 270 downloads)
'59 SF convertible 004.JPG (124KB - 283 downloads)
|
|
| |
|
Expert 5K+
Posts: 7808
Location: Williams California | Next was the rearward main top bow. I never could find a replacement, so I cut out the badly rusted areas, welded in new metal. areas that weren't bad enough to replace, I brazed to regain a solid structure. There are still lots of pits, but after blasting, no live rust. Multiple coats of primer and sanding will fill most of the remaining pits.
Next, the readied parts are shot with primer, the pitted ones got multiple coats.
 ('59 SF convertible 001.JPG) ('59 SF convertible 001.JPG)
 ('59 SF convertible 002.JPG) ('59 SF convertible 002.JPG)
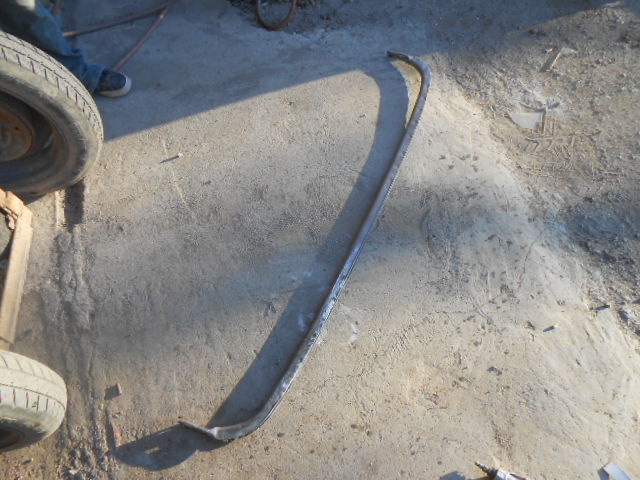 ('59 SF convertible 003.JPG) ('59 SF convertible 003.JPG)
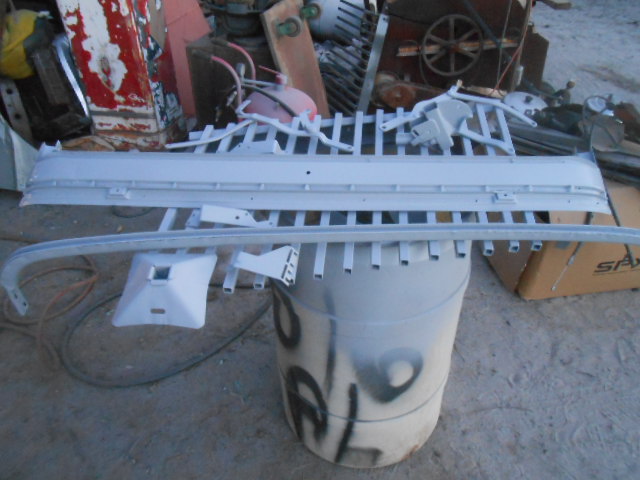 ('59 SF convertible 004.JPG) ('59 SF convertible 004.JPG)
Attachments
----------------
'59 SF convertible 001.JPG (125KB - 264 downloads)
'59 SF convertible 002.JPG (125KB - 273 downloads)
'59 SF convertible 003.JPG (125KB - 283 downloads)
'59 SF convertible 004.JPG (126KB - 275 downloads)
|
|
| |
|
Expert 5K+
Posts: 8947
Location: WHEELING,WV.>>>HOME OF WWVA | hey big john , por-15 in a tube is great fill for those pin holes . long ago i liked to braze fill clean pin hole/pitted metal ------------------------------------------------later |
|
| |
|
Expert 5K+
Posts: 7808
Location: Williams California | Thanks for the tip, Chuck!
Hoping to have this gal road ready to drive to Carlisle in July!!
---John |
|
| |
|
Expert
Posts: 1906
Location: Ontario, Canada | Good job John! Those folding top parts border on mission impossible! I parted out 3 folding tops to do my car and it still took me an embarrassing number of hours to get the job done ---- and that was many, many years ago!
Greg |
|
| |
|
Expert
Posts: 2905
Location: little rock, AR | big m - 2015-03-03 8:21 PM
Thanks for the tip, Chuck!
Hoping to have this gal road ready to drive to Carlisle in July!! No, not another '59 in Carlisle. Houston? We are ready for lift off!!! LMAO
---John
Edited by oldwood 2015-03-04 12:12 AM
 (007.JPG) (007.JPG)
Attachments
----------------
007.JPG (249KB - 267 downloads)
|
|
| |
|
Expert
Posts: 3889
Location: Northen Virginia | Amazing job John, can you ballpark the restoration cost? Is a long time discussion on here how much a restoration really cost?
Thanks |
|
| |
|
Expert 5K+
Posts: 7808
Location: Williams California | Denis,
I haven't really kept track of money spent, but a guess would be about $15,000 so far, not including my labor.
---John |
|
| |
|
Veteran
Posts: 113
| John, Have you fired it up yet? Everything looks great....love the color combo,even better that those are the original colors to the car! |
|
| |
|
Extreme Veteran
Posts: 537
Location: Upstate NY | Really a great job! You have improved every detail of the car. I have really enjoyed and learned from your work. |
|
| |
|
Expert
Posts: 2905
Location: little rock, AR | Once you start spending you can't stop. |
|
| |
|
Expert 5K+
Posts: 7808
Location: Williams California | jeff b - 2015-03-05 1:59 PM
John, Have you fired it up yet? Everything looks great....love the color combo,even better that those are the original colors to the car!
Jeff, I still have some things to tie up before starting the car. Hopefully soon, though! |
|
| |
|
Expert 5K+
Posts: 7808
Location: Williams California | bbrasse1 - 2015-03-05 2:56 PM
Really a great job! You have improved every detail of the car. I have really enjoyed and learned from your work.
Thanks, Bob! |
|
| |
|
Expert 5K+
Posts: 7808
Location: Williams California | oldwood - 2015-03-05 7:07 PM
Once you start spending you can't stop.
Speaking of which, how's your engine work coming along? Hopefully you'll be on the road soon, Dorsey. |
|
| |
|
Board Moderator & Exner Expert 10K+
Posts: 13054
Location: Southern Sweden - Sturkö island | big m - 2015-03-05 9:56 PM
Denis,
I haven't really kept track of money spent, but a guess would be about $15,000 so far, not including my labor.
---John
Thats a greate price John, but as you wrote; uncounted amounts of sweat, blood, swearing and just painful work
Perhaps you should call her Phoinix as she raises from the crumbling rust to fid her prior glory again |
|
| |
|
Expert
Posts: 2905
Location: little rock, AR | I have a '60 Plymouth sitting in front of my house that I'm thinking of swapping the motor to the '59. It is showing 72k miles and and don't think its 172k miles. Money is tight this winter so I might as well pull it and have a look see. If its a good motor I will update on my '59 thread. You are like me trying to save every old stray that we find. You surely saved that Vert from being another washing machine. |
|
| |
|
Expert 5K+
Posts: 7808
Location: Williams California | oldwood - 2015-03-07 9:06 AM
I have a '60 Plymouth sitting in front of my house that I'm thinking of swapping the motor to the '59. It is showing 72k miles and and don't think its 172k miles. Money is tight this winter so I might as well pull it and have a look see. If its a good motor I will update on my '59 thread. You are like me trying to save every old stray that we find. You surely saved that Vert from being another washing machine.
If it seems good, reseal it and replace the timing set, and while you have the pan off, inspect a few bearings.
---John |
|
| |
|
Expert 5K+
Posts: 7808
Location: Williams California | wizard - 2015-03-07 9:02 AM
big m - 2015-03-05 9:56 PM
Denis,
I haven't really kept track of money spent, but a guess would be about $15,000 so far, not including my labor.
---John
Thats a greate price John, but as you wrote; uncounted amounts of sweat, blood, swearing and just painful work
Perhaps you should call her Phoinix as she raises from the crumbling rust to fid her prior glory again
I refuse to try to keep track of hours spent, it would be rather depressing.
---John |
|
| |
|
Board Moderator & Exner Expert 10K+
Posts: 13054
Location: Southern Sweden - Sturkö island | I just went back to the first pages John - I can understand you, but don't forget that you have inspired many on the forum by showing that almost anything could be restored.
I have followed this thread with great interest and I know that many others also did. It will be totally awsome to see the pictures of the finished car. |
|
| |
|
Expert
Posts: 2905
Location: little rock, AR | big m - 2015-03-08 12:14 PM
oldwood - 2015-03-07 9:06 AM
I have a '60 Plymouth sitting in front of my house that I'm thinking of swapping the motor to the '59. It is showing 72k miles and and don't think its 172k miles. Money is tight this winter so I might as well pull it and have a look see. If its a good motor I will update on my '59 thread. You are like me trying to save every old stray that we find. You surely saved that Vert from being another washing machine.
If it seems good, reseal it and replace the timing set, and while you have the pan off, inspect a few bearings.
---John |
|
| |
|
Expert 5K+
Posts: 7808
Location: Williams California | The nice summery weather here lately allowed me to finish sandblasting the swivel seat parts, also the paint its frame and five wheels argent. Painted all the top components and some other items black as well.
 ('59 SF convertible 003.JPG) ('59 SF convertible 003.JPG)
 ('59 SF convertible 004.JPG) ('59 SF convertible 004.JPG)
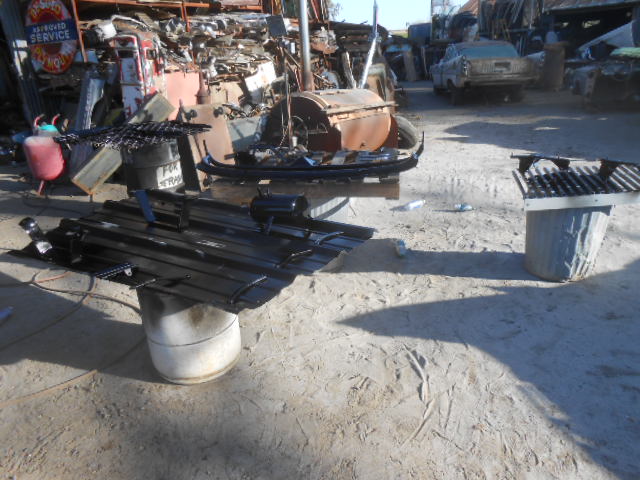 ('59 SF convertible 005.JPG) ('59 SF convertible 005.JPG)
Attachments
----------------
'59 SF convertible 003.JPG (126KB - 243 downloads)
'59 SF convertible 004.JPG (126KB - 230 downloads)
'59 SF convertible 005.JPG (126KB - 261 downloads)
|
|
| |
|
Expert 5K+
Posts: 7808
Location: Williams California | Finally have all the top frame components assembled. Next will be the lift cylinders and pump motor.
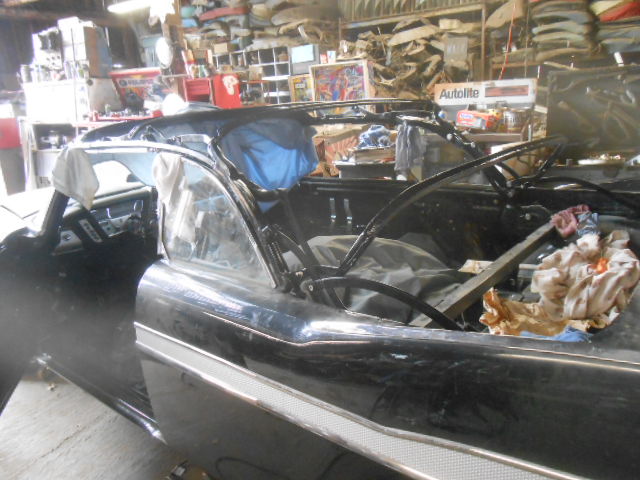 ('59 SF convertible 001.JPG) ('59 SF convertible 001.JPG)
 ('59 SF convertible 002.JPG) ('59 SF convertible 002.JPG)
Attachments
----------------
'59 SF convertible 001.JPG (126KB - 248 downloads)
'59 SF convertible 002.JPG (126KB - 257 downloads)
|
|
| |
|
Elite Veteran
Posts: 755
Location: Big M Automotive's Yard | Here is Rusty (toothless) running today! |
|
| |
|
Elite Veteran
Posts: 755
Location: Big M Automotive's Yard | Here is Rusty (toothless) running today! ok i will try to upload thru you tube
Edited by deloverly 2015-03-28 11:09 PM
|
|
| |
|
Expert
Posts: 2905
Location: little rock, AR | Like most women: A tease!!!
|
|
| |
|
Expert
Posts: 2637
Location: Minor Hill, TN | A white convertible top would look excellent on a black car |
|
| |
|
Expert 5K+
Posts: 8947
Location: WHEELING,WV.>>>HOME OF WWVA | i seen the short video over on F book . is there a longer version , i hope . even short , it was totally amazing --------------------------------------------------later
|
|
| |
|
Expert 5K+
Posts: 8947
Location: WHEELING,WV.>>>HOME OF WWVA | from where it was and where it is now , i vote any color top -------------------------------------------------later |
|
| |
|
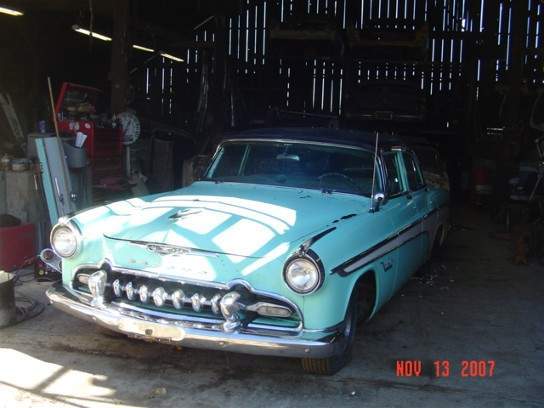
Expert
Posts: 1918
Location: Hell's Outhouse - a.k.a. Buckeye, Arizona | Black top and throw A/C in there if it were my car.
At last, she has a pulse - a heartbeat with which to fuel the soul.
Congrats, John - that has to be gratifying as hell. |
|
| |
|
Exner Expert 19,174 posts. Neil passed away 18 Sep 2015. You will be missed, Neil!
Posts: 19146
Location: bishop, ca | Technically, and as this is a restoration...the convertible top's color is supposed to match its top-bows'
color (black, in this instance.)
The convertible boot's color is supposed to match its main-interior color of the car.
|
|
| |
|
Expert 5K+
Posts: 7808
Location: Williams California | Got the Goodyear Super cushions mounted and balanced, a major improvement over the 'rollers' I had on previously. The car started and ran well, only problems were from defective parts- Starter solenoid, oil sending unit, and voltage regulator. After adjusting the trans selector cable and hooking the shift keyboard up, I installed the driveline, and took a short putt around the property, using a milk crate as a seat. Also got the top hydraulics all bled out, so the top frame goes up and down.
M'lisa did take a few videos, but we couldn't figure how to upload them here, so the pics will have to do.
---John
 (005.JPG) (005.JPG)
 ('59 SF convertible 001.JPG) ('59 SF convertible 001.JPG)
 ('59 SF convertible 002.JPG) ('59 SF convertible 002.JPG)
 ('59 SF convertible 003.JPG) ('59 SF convertible 003.JPG)
Attachments
----------------
005.JPG (125KB - 290 downloads)
'59 SF convertible 001.JPG (126KB - 323 downloads)
'59 SF convertible 002.JPG (133KB - 309 downloads)
'59 SF convertible 003.JPG (131KB - 303 downloads)
|
|
| |
|
User has resigned from board
| "big M" your a genius!!, looks beautiful!!! |
|
| |
|
Elite Veteran
Posts: 705
Location: California | Big YAY! Looking great John. |
|
| |
|
Expert
Posts: 1906
Location: Ontario, Canada | Well done John! That milk crate ride makes one feel Great!!
As I recall it also finds a rattle or two!
Greg |
|
| |
|
Expert
Posts: 2637
Location: Minor Hill, TN | I hope you bring it to the PACE car show at Martin College in Pulaski, TN this coming September 26th |
|
| |
|
Member
Posts: 41
Location: Cognac , S-W of France | big m - 2015-03-31 11:11 PM
M'lisa did take a few videos, but we couldn't figure how to upload them here, so the pics will have to do.
---John
Don't have FB , so please , could you put here the Utube link John ?
Thanks !
|
|
| |
|
Elite Veteran
Posts: 705
Location: California | You should have your seats soon! |
|
| |
|
Expert
Posts: 2637
Location: Minor Hill, TN | Up load the video on you tube then copy and paste the link that takes you to the video I will give you an example
https://youtu.be/XRoPgRYPb9g |
|
| |
|
Expert
Posts: 2788
Location: USA - KY |
Wow! Methinks that Big M, stands for Big Magician!
Just a reminder what Big M started with:
.
 (bigm.jpg) (bigm.jpg)
Attachments
----------------
bigm.jpg (91KB - 290 downloads)
|
|
| |
|
Expert 5K+
Posts: 7808
Location: Williams California | Reassembled the one medallion as well as the re-chromed taillight parts. I should have the other chrome items back today if all goes well.
---John
 ('59 SF convertible 005.JPG) ('59 SF convertible 005.JPG)
 ('59 SF convertible 006.JPG) ('59 SF convertible 006.JPG)
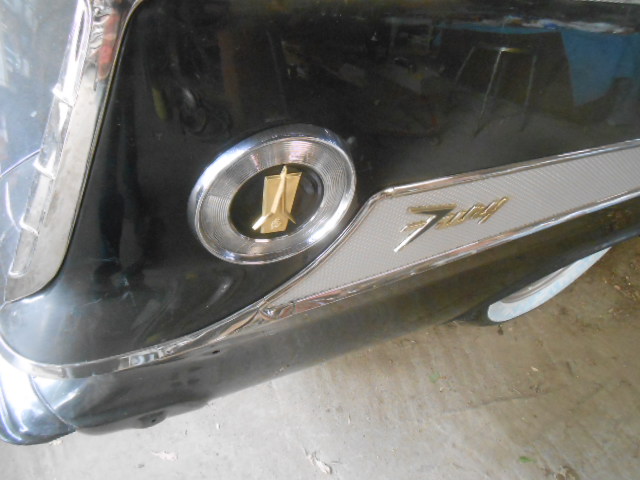 ('59 SF convertible 007.JPG) ('59 SF convertible 007.JPG)
Attachments
----------------
'59 SF convertible 005.JPG (126KB - 323 downloads)
'59 SF convertible 006.JPG (126KB - 324 downloads)
'59 SF convertible 007.JPG (125KB - 293 downloads)
|
|
| |
|
Expert
Posts: 1530
Location: ZH, Switzerland | Wow John - astonishing your project looks wonderful. I'm almost jealous. I wish good luck with the further work and hope you'll finish the wonderful Sport Fury soon. Take care, Dieter |
|
| |
|
Expert 5K+
Posts: 7808
Location: Williams California | Thanks, Dieter!! |
|
| |
|
Extreme Veteran
Posts: 451
| Looking good john...see ya in sac on Sunday....Guyman |
|
| |
|
Expert 5K+
Posts: 7808
Location: Williams California | Installed the taillight assemblies, and hooked up the rear electrical, now all lighting and signals are working. Next, since my order from Goers arrived, installed the tail panel gravel shield, then assembled the rear bumper and fitted it. Next, the front bumper with the bumper wings.
---John
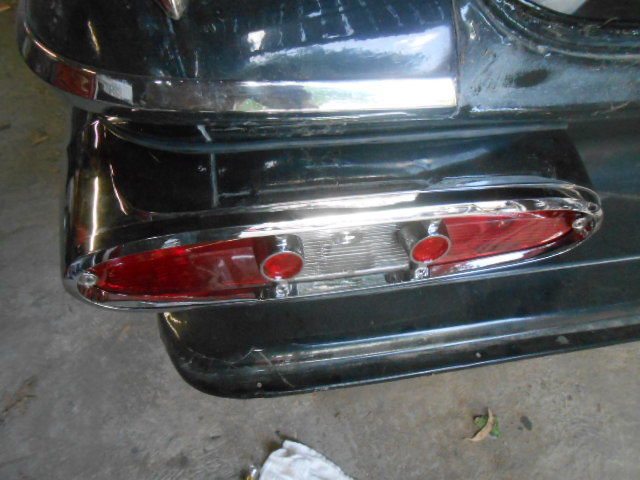 ('57 Ford tailgate 002.JPG) ('57 Ford tailgate 002.JPG)
 ('57 Ford tailgate 003.JPG) ('57 Ford tailgate 003.JPG)
 ('59 SF convertible 007.JPG) ('59 SF convertible 007.JPG)
 ('59 SF convertible 005.JPG) ('59 SF convertible 005.JPG)
 ('59 SF convertible 006.JPG) ('59 SF convertible 006.JPG)
Attachments
----------------
'57 Ford tailgate 002.JPG (126KB - 317 downloads)
'57 Ford tailgate 003.JPG (126KB - 322 downloads)
'59 SF convertible 007.JPG (126KB - 318 downloads)
'59 SF convertible 005.JPG (126KB - 321 downloads)
'59 SF convertible 006.JPG (125KB - 294 downloads)
|
|
| |
|
Regular
Posts: 84
Location: Northern sweden above the arctic circle!! | Amazing work!!
//Mikael |
|
| |
|
Board Moderator & Exner Expert 10K+
Posts: 13054
Location: Southern Sweden - Sturkö island | Yeah, those quilted bedspreads are difficult to make - nice car as well.
Joke asides - she looks fantastic John, I'm eager to see some roadside pictures soon!!!!
Edited by wizard 2015-04-30 1:44 AM
|
|
| |
|
Expert
Posts: 3155
Location: NY & VT | There was a movie about John made once upon a time ... it was called "The Miracle Worker"! |
|
| |
|
Expert
Posts: 1295
Location: Nasco , SWEDEN | Awesome work John , can`t wait until it´s completed and washed , polished and professionaly photographed in front of your Business!!!!
|
|
| |
|
Expert 5K+
Posts: 7808
Location: Williams California | A bit more progress this weekend. I also have all the upholstery done now, but want to get the top installed first to avoid the possibility of the interior getting damaged. I gave the car a good cleaning of the inside to remove the accumulated dust, sand, etc.
---John
 ('59 SF convertible 001.JPG) ('59 SF convertible 001.JPG)
 ('59 SF convertible 002.JPG) ('59 SF convertible 002.JPG)
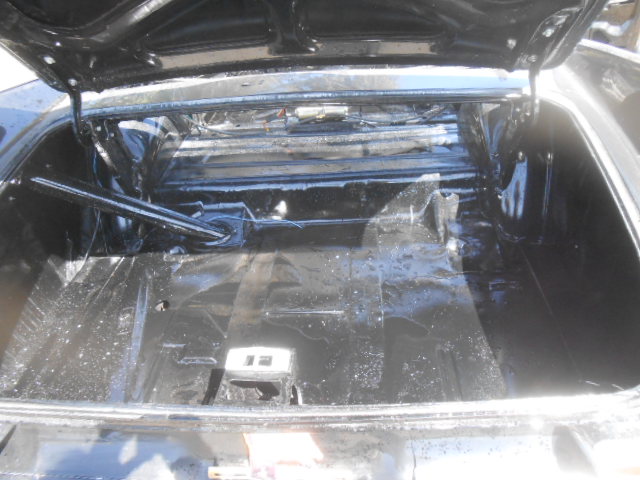 ('59 SF convertible 003.JPG) ('59 SF convertible 003.JPG)
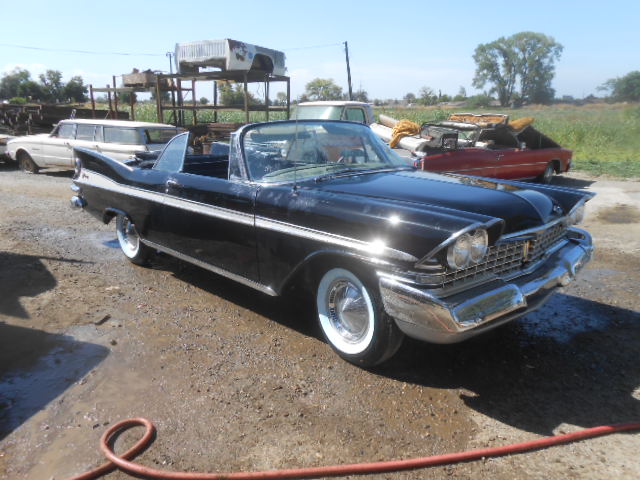 ('59 SF convertible 004.JPG) ('59 SF convertible 004.JPG)
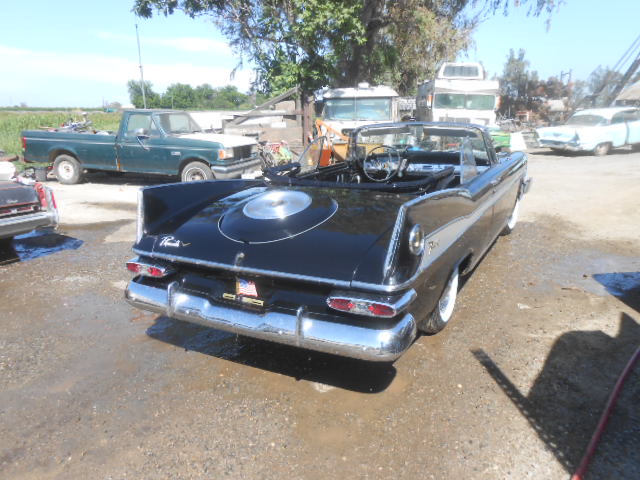 ('59 SF convertible 005.JPG) ('59 SF convertible 005.JPG)
 ('59 SF convertible 006.JPG) ('59 SF convertible 006.JPG)
Attachments
----------------
'59 SF convertible 001.JPG (126KB - 270 downloads)
'59 SF convertible 002.JPG (126KB - 304 downloads)
'59 SF convertible 003.JPG (124KB - 298 downloads)
'59 SF convertible 004.JPG (126KB - 305 downloads)
'59 SF convertible 005.JPG (125KB - 269 downloads)
'59 SF convertible 006.JPG (125KB - 310 downloads)
|
|
| |
|
Expert
Posts: 2905
Location: little rock, AR | I'm really digging the "BLUE walls. I like the AMERICAN FLAG also!!!
|
|
| |
|
Expert 5K+
Posts: 7808
Location: Williams California | oldwood - 2015-05-26 9:33 AM
I'm really digging the "BLUE walls. I like the AMERICAN FLAG also!!!
The flag is an old tag topper from the fifties, as it shows 48 stars only, Dorsey.
---John |
|
| |
|
Elite Veteran
Posts: 705
Location: California | Almost done! Wanna see that red interior! |
|
| |
|
Expert
Posts: 2905
Location: little rock, AR | big m - 2015-05-26 3:34 PM
oldwood - 2015-05-26 9:33 AM
I'm really digging the "BLUE walls. I like the AMERICAN FLAG also!!!
The flag is an old tag topper from the fifties, as it shows 48 stars only, Dorsey.
---John
Edited by oldwood 2015-05-29 12:11 AM
|
|
| |
|
Elite Veteran
Posts: 705
Location: California | Our poor country is crumbling rapidly. |
|
| |
|
Expert
Posts: 2788
Location: USA - KY |
Wow, John, it won't be long now!
Incredible work, and sure worth every minute of it!
|
|
| |
|
Exner Expert 19,174 posts. Neil passed away 18 Sep 2015. You will be missed, Neil!
Posts: 19146
Location: bishop, ca | John, which is the proper protocol:
Get the windows all properly aligned (in/out/ and up/down) to the body, and doors operational and
aligned to the body...
and THEN: get the top mechanism(s) to operate, 'against/with' the top-structure....
OR: vice-versa: get the TOP to work properly, and then worry about its alignments with the
glass, and doors AND....with its roof rail weatherstrips???
It would seem to me that I'd rather have perfectly operating and aligned glass, so that, with the top being
DOWN....I could RAISE all of the windows, and (hopefully) have ALL of the window 'frames' slide up-into their door-weatherstrips,
easily and perfectly...
OR....have the window assemblies be so-CLOSE to being perfectly aligned, with the raised-top, that only a minor
hand-or-power adjustment of the window frame(s) would be necessary to gain a perfect window/door alignment.
But, to me, the perfect alignments would all seem to come down to having perfectly
working and aligning 'glass', which would, then, NOT conflict with the movement and operation of the top
mechanism.
ALSO, after I would attain the perfect door:glass operational-alignments, I would apply a SHIP-load
of "thread locker" to all of the internal moving-mechanisms....so that the doors and windows would
NOT loosen-up from repeated usage, and start to shake and rattle.
Edited by d500neil 2015-06-06 11:26 PM
|
|
| |
|
Expert
Posts: 1906
Location: Ontario, Canada | Good question, Neil! I tried the "glass" route first. That didn't fit with the top so I tried to make the "glass" fit the "top"! I got so mad I don't remember whether the top or the glass won! I know I had to do a lot of "unkind" things to the top frames as well as the glass channels. Patience----is what it takes. It doesn't sound like I had much patience, but that is what it took.
I remember taking a ride, many years ago, in an original 300D convert. The top/glass fit in that car was so bad I think the driver could have hand signalled a turn without even lowering the glass at all!!!
I'm looking forward to John's reply.
Greg |
|
| |
|
Expert 5K+
Posts: 7808
Location: Williams California | LD3 Greg - 2015-06-06 8:04 PM
Good question, Neil! I tried the "glass" route first. That didn't fit with the top so I tried to make the "glass" fit the "top"! I got so mad I don't remember whether the top or the glass won! I know I had to do a lot of "unkind" things to the top frames as well as the glass channels. Patience----is what it takes. It doesn't sound like I had much patience, but that is what it took.
I remember taking a ride, many years ago, in an original 300D convert. The top/glass fit in that car was so bad I think the driver could have hand signalled a turn without even lowering the glass at all!!!
I'm looking forward to John's reply.
Greg
I also had this issue-It must have been a design flaw, as I could find no easy way to correct it. It will have to do for now, though.
|
|
| |
|
Expert 5K+
Posts: 7808
Location: Williams California | I fitted the carpet, and assembled the front swivel seat. Then I installed the steering wheel with a re-done center pad. Then, off to have the ragtop installed.
---John
 (001.JPG) (001.JPG)
 (002.JPG) (002.JPG)
 (003.JPG) (003.JPG)
 (004.JPG) (004.JPG)
Attachments
----------------
001.JPG (124KB - 273 downloads)
002.JPG (125KB - 265 downloads)
003.JPG (126KB - 264 downloads)
004.JPG (124KB - 293 downloads)
|
|
| |
|
Expert
Posts: 4043
Location: Connecticut | I would say get the top to align perfectly (pins going in slots, etc.) before aligning the glass. Pretend that it's a hardtop.
Note: The latches should be real tight against catches on a new top. Almost too tight. Things will loosen up after a while.
Ron |
|
| |
|
Expert
Posts: 2788
Location: USA - KY |
"topless" no longer?
Can't wait to see your car with its new lid!
Great work, as always, John!
|
|
| |
|
Expert
Posts: 2596
Location: Upplands Väsby, Sweden | Sports fury will be so nice. what job and what will you have from beginning to end. Like that. |
|
| |
|

Expert 5K+
Posts: 9681
Location: So. Cal | That's awesome John! Now you will get to enjoy the sweet fruits of your labor. Just be sure to get that top up after you wash it
 (Broom_Hilda_56Plym.gif) (Broom_Hilda_56Plym.gif)
Attachments
----------------
Broom_Hilda_56Plym.gif (84KB - 308 downloads)
|
|
| |
|
Expert
Posts: 2637
Location: Minor Hill, TN | The car painted black a white convertible top would look execellent on that car
Edited by 1961plymouthfury 2015-06-20 6:52 PM
|
|
| |
|
Member
Posts: 45
Location: Vacaville,Ca or Harbor springs,Mi | Dang john didnt know you were working on this thing that long. Ill have to stop by before you leave to get some pics of it. Maybe this weekend.
Edited by Chrysler Power 2015-06-24 6:33 PM
|
|
| |
|
Extreme Veteran
Posts: 429
Location: McCleary WA | Wow, John - I am very impressed. I have to confess that I had not seen this thread until now. Makes my project look like a total cakewalk. I've been restoring cars for over 50 years but don't think I would have tackled that one. Well done! |
|
| |
|
Expert 5K+
Posts: 7808
Location: Williams California | Chrysler Power - 2015-06-24 3:31 PM
Dang john didnt know you were working on this thing that long. Ill have to stop by before you leave to get some pics of it. Maybe this weekend.
I'll be away until Sunday, but feel free to drop by then, Luke!!
---John |
|
| |
|
Expert 5K+
Posts: 7808
Location: Williams California | Darryl T - 2015-06-26 11:09 AM
Wow, John - I am very impressed. I have to confess that I had not seen this thread until now. Makes my project look like a total cakewalk. I've been restoring cars for over 50 years but don't think I would have tackled that one. Well done!
Thanks, Darryl, I appreciate the comments!!
---John |
|
| |
|
| John! I was so impressed with you '59 when we saw it on Monday when we met up. But now after sitting here reading through this whole thread, WOW!!
Had no idea just how much work and time you had put into that car!!!
What I would call a real labor of love!
My hat is off to you on this restoration!
Well done my friend, well done!
Got to have Phil read this thread when he gets back from their vacation. Maybe it will be an inspiration to him on his 55!
Johnny |
|
| |
|
Expert 5K+
Posts: 7808
Location: Williams California | Phils55 - 2015-07-08 12:07 PM
John! I was so impressed with you '59 when we saw it on Monday when we met up. But now after sitting here reading through this whole thread, WOW!!
Had no idea just how much work and time you had put into that car!!!
What I would call a real labor of love!
My hat is off to you on this restoration!
Well done my friend, well done!
Got to have Phil read this thread when he gets back from their vacation. Maybe it will be an inspiration to him on his 55!
Johnny
Thanks, Johnny, I appreciate it!
I figured I'd add some pics of the [mostly] completed interior, just before heading out on our trip.
---John
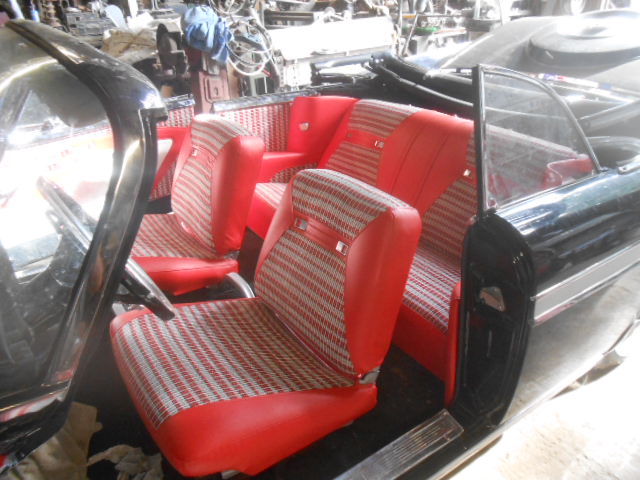 (Carlisle 2015 001.JPG) (Carlisle 2015 001.JPG)
 (Carlisle 2015 002.JPG) (Carlisle 2015 002.JPG)
Attachments
----------------
Carlisle 2015 001.JPG (126KB - 262 downloads)
Carlisle 2015 002.JPG (126KB - 247 downloads)
|
|
| |
|
Expert
Posts: 2637
Location: Minor Hill, TN | I hope you bring it to the PACE car show in Pulaski, TN I mailed you a flyer . |
|
| |
|
Veteran
Posts: 188
| What a great final of what a tough project!
Remarkable and unbelievable!
I wish you to decide to rescue some more Forward looks. You definitely can do it!
Respect!
Hope to become your customer soon. |
|
| |
|
Expert
Posts: 1384
Location: Ocala, Florida | It was great seeing it in person! Flawless! |
|
| |
|
Expert
Posts: 2637
Location: Minor Hill, TN | I hope you can bring it to the PACE car show in Pulaski, TN on the 26th of this month. My '61 wont be there its currently under restoration |
|
| |
|
Extreme Veteran
Posts: 537
Location: Upstate NY | John,
I have enjoyed the step by step rebuild, which by the way was comparable to the guy in Italy building the 57 Adventurer convertible. You have helped a number of novices like myself learn the way to attack rust and and patch pieces the right way. Your recap of taking your pride and joy east to the nationals was very enjoyable. In my mind it took a lot of courage to drive your car you just got together that far. you are such a great example for the rest of us learning and loving our forward look cars and I might ad a good source for parts at a fair price. Thanks for the ride and sharing your years of knowledge. |
|
| |
|
Expert 5K+
Posts: 8947
Location: WHEELING,WV.>>>HOME OF WWVA | big john , when ya gonna start the 59 desoto ---------------------------------------------------later |
|
| |
|
Expert 5K+
Posts: 7808
Location: Williams California | I've now put 11,000 miles on this car since completion.
Just south of us there is a big car show just before Halloween every year, it usually draws 300 hot rods and classics, but this year rain was forecast and many stayed home. It was clear on the drive there, and rain didn't hit until a couple hours into the show, so people had time to look the cars over. Small crowd, just 60 or so cars. A few even left when the rain started!
I was surprised to be awarded People's choice award, meaning that the '59 will be on all next year's T-shirts at the show.
 (DSCN5442.JPG) (DSCN5442.JPG)
 (DSCN5443.JPG) (DSCN5443.JPG)
Attachments
----------------
DSCN5442.JPG (124KB - 193 downloads)
DSCN5443.JPG (123KB - 186 downloads)
|
|
| |
|
Expert
Posts: 1207
Location: Ponder, TX | Congratulations! It's a beautiful and deserving car. |
|
| |
|
Expert 5K+
Posts: 6502
Location: Newark, Texas (Fort Worth) | And to think it started out as a P.O.C body...
 (big m rear 59.jpg) (big m rear 59.jpg)
Attachments
----------------
big m rear 59.jpg (48KB - 322 downloads)
|
|
| |
|
Expert 5K+
Posts: 9681
Location: So. Cal | That's pretty cool John, you definitely would have received my vote! But even better is the fact that you are using it and enjoying it.
You should come out to the flings in LA sometime. Dave (DepsilonD) and I scored some pretty nice parts at fall fling on Saturday. |
|
| |
|
Expert 5K+
Posts: 7808
Location: Williams California | Powerflite - 2016-10-31 9:52 AM
That's pretty cool John, you definitely would have received my vote! But even better is the fact that you are using it and enjoying it.
You should come out to the flings in LA sometime. Dave (DepsilonD ) and I scored some pretty nice parts at fall fling on Saturday.
I definitely need to do that. Sounds like lots of fun! |
|
| |
|
Expert
Posts: 2788
Location: USA - KY |
Congratulations on your People's Choice Award, John!
You sure deserve it...if those folks only knew what you started out with, they'd experience true shock and awe!
Amazing results, as always, from our pal John.
. |
|
| |
|
Expert 5K+
Posts: 7808
Location: Williams California | FIN ME - 2016-11-01 1:17 PM
Congratulations on your People's Choice Award, John!
You sure deserve it...if those folks only knew what you started out with, they'd experience true shock and awe!
Amazing results, as always, from our pal John.
.
Thanks, Rosy! M'lisa had a picture book made up so anyone interested can get a look to see what I started with. |
|
| |
|
Expert
Posts: 2788
Location: USA - KY |
Here's my favourite "before" photo of John's car. Yikes.
I'm now certain that John could build a car completely from scratch!
.
 (bigm.jpg) (bigm.jpg)
Attachments
----------------
bigm.jpg (156KB - 314 downloads)
|
|
| |