|
|

Expert
Posts: 3577
   
Location: Blythewood, SC | Just for reference:
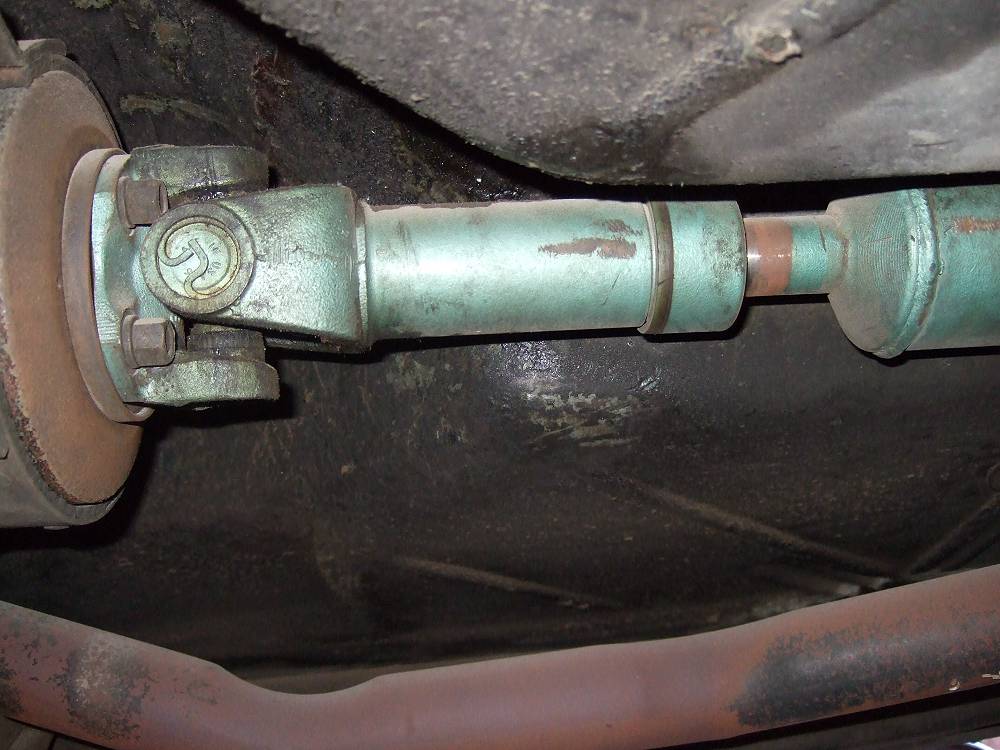
The Precision Univeral joint part number for a 1957 six cyl. car is 315G
If you tear your ball and trunion boot, it can be replaced with Dorman Quick Boot number 314-531. This boot may also work for V-8 cars.
This boot is cheap, less than $15 if I recall. It is a two piece unit that is very easy to assemble. It has to be cut to the correct length, but it works fine. I now have about 500 miles on these parts at interstate speeds and they are functioning perfectly. |
|
| |
|
Expert
Posts: 1302

Location: Skaneateles,NY(summer)/Port St.Lucie,FL(winter) | Where would one find a "Quick Boot"?... |
|
| |
|
Expert
Posts: 3577
Location: Blythewood, SC | I got that particular unit at O'Reilley's. Dorman is also sold at Disadvantadged Auto Parts and Auto Zone. |
|
| |
|
Exner Expert 19,174 posts. Neil passed away 18 Sep 2015. You will be missed, Neil!
Posts: 19146

Location: bishop, ca | Brain; why don't you buy me one of them things, & I'll mail you whatever your investment is, in it; my car's trunion-joint dust cover is toast(ed), after Tulsa-trip.
And, BTW, that rubber boot IS only a dust-cover, not any sort of "grease" seal.
but, I should replace my car's guy.
Hey, Brian; can that 2-piece boot be installed with the driveshaft still installed?????
|
|
| |
|
Expert
Posts: 3577
Location: Blythewood, SC | I'm telling you that it can be found at O'Reilley's. No need to ship one across the country.
The way the boot is installed is that you glue one side together after your test fit. Then you let it dry an hour. Then you install it on the driveshaft and glue the other side. Then let it dry an hour before you install the clamps. I'm sure it can be installed on the bench, but I installed mine on the car. |
|
| |
|
Expert
Posts: 1218
Location: Warren, Michigan | Neil, if you can't find it let me know. I'll be picking one up the next time I'm in Autozone, its just as easy to buy two. Besides I want to get the extra rewards points from there 
Can you grease your trunion joint without pulling it apart? Is there a place you can drill and tap a fitting? |
|
| |
|
Expert
Posts: 3577
Location: Blythewood, SC | I guess you could drill and tap the rear section. I took mine apart to grease it. If you are careful and don't break the tabs on the cover plate you can take it apart and re-use the cover. When you have the boot off the back, you can push the hose of a grease gun in the body and inject the grease.
If you were very careful you could drill and tap the end, but I would be concerned about possible making a weak area. It may be far fetched, but it could lead to a crack in the main body. I am certain I wouldn't try to do it on the car. I would want to take it apart to clean the inside after drilling and tapping.
I am pretty sure that I will be upgrading to a spicer style in the front sometime in the future. I know you don't need to service a ball and trunion often, but it is a hassle to find parts when you do. |
|
| |
|
Expert
Posts: 3577
Location: Blythewood, SC | Well over one year with zero issues with this repair. |
|
| |
|
Inactive by user's request
Location: Las Vegas, Nevada | 57plymouth - 2007-09-27 5:53 AM
I am pretty sure that I will be upgrading to a spicer style in the front sometime in the future. I know you don't need to service a ball and trunion often, but it is a hassle to find parts when you do.
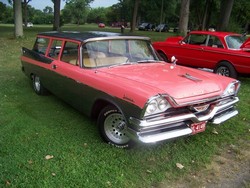
The main body of my '59's front u-joint was worn out. The route I took can be seen in the attached image.
Not only will it be easier for me find a front a u-joint when the time comes, but it also saves the remaining N.O.S. main bodies for the serious restorers.
K.
 (frontujoiunt.jpg) (frontujoiunt.jpg)
Attachments
----------------
 frontujoiunt.jpg (92KB - 329 downloads) frontujoiunt.jpg (92KB - 329 downloads)
|
|
| |
|
Walter passed away on Jul 29, 2014. We will miss you, Walt!
Posts: 5358
Location: Heaven Above (Formerly Oklahoma City,OK) | Dorman also makes a one peice 'quick boot' for current CV joints on front wheel drivers. The ones I used are in the Dorman catalogue at O'Reilly's. They have big and little. I believe that I used the bigger ones on the d/shaft of my '55. They go on just like the original factory boots. You disassemble the joint, ie take the balls and needle bearings off. work the boot over the cross shaft, small end first, and the after everything is good and greasy, using a very blunt tool, you stuff the boot through the small end of the outer housing . Once the stuffing operation is finished, you use either a strong tie-wrap, or the original clamping straps to secure the small end on the shaft and, if needed, trim the big end to the required length and securre it on the outer housing. Reassemble the balls and put the correct amount of grease in the joint, and reattach the sheetmetal dust cover. I took about an hour to do including cleaning up the joint and finding all of the needle bearings that fell on the floor when taken out of the parts washer..................LOL:) Walt |
|
| |
|
Expert
Posts: 3577
Location: Blythewood, SC | bump |
|
| |
|
Veteran
Posts: 166
Location: Massillon, Ohio USA | wbower3 - 2009-01-30 4:31 PM
Dorman also makes a one peice 'quick boot' for current CV joints on front wheel drivers. The ones I used are in the Dorman catalogue at O'Reilly's. They have big and little. I believe that I used the bigger ones on the d/shaft of my '55. They go on just like the original factory boots. You disassemble the joint, ie take the balls and needle bearings off. work the boot over the cross shaft, small end first, and the after everything is good and greasy, using a very blunt tool, you stuff the boot through the small end of the outer housing . Once the stuffing operation is finished, you use either a strong tie-wrap, or the original clamping straps to secure the small end on the shaft and, if needed, trim the big end to the required length and securre it on the outer housing. Reassemble the balls and put the correct amount of grease in the joint, and reattach the sheetmetal dust cover. I took about an hour to do including cleaning up the joint and finding all of the needle bearings that fell on the floor when taken out of the parts washer..................LOL:) Walt
Yep...I did mine last summer, used the boot for an 01 NEON,(1 pc) did all of the above, have driven it at leats 500miles since with no probs. |
|
| |
|
Expert
Posts: 3577
Location: Blythewood, SC | Bump for those too lazy to search... |
|
| |
|
Exner Expert 19,174 posts. Neil passed away 18 Sep 2015. You will be missed, Neil!
Posts: 19146
Location: bishop, ca | THIS should be a Sticky message.
2001 Neon CV joint cover (boot).
Or; Dorman brand (large-) "Quick Boot"
Right?
|
|
| |
|
Expert
Posts: 3577
Location: Blythewood, SC | Or you could just do a five second search instead of asking over and over again, Neil. |
|
| |
|
Member
Posts: 12
Location: Southern Ohio | That is what I want to do. What is the source for the new drive shaft and slip joint?
Larry S.
Kenny J. - 2009-01-30 11:42 AM
The main body of my '59's front u-joint was worn out. The route I took can be seen in the attached image.
Not only will it be easier for me find a front a u-joint when the time comes, but it also saves the remaining N.O.S. main bodies for the serious restorers.
K.
|
|
| |
|
Expert
Posts: 1295
Location: Nasco , SWEDEN | Kenny J. - 2009-01-30 5:42 PM
57plymouth - 2007-09-27 5:53 AM
I am pretty sure that I will be upgrading to a spicer style in the front sometime in the future. I know you don't need to service a ball and trunion often, but it is a hassle to find parts when you do.
The main body of my '59's front u-joint was worn out. The route I took can be seen in the attached image.
Not only will it be easier for me find a front a u-joint when the time comes, but it also saves the remaining N.O.S. main bodies for the serious restorers.
K.
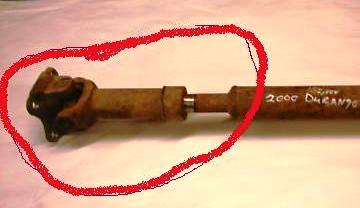
could this part be used?
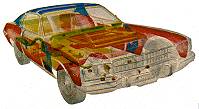
98 - 2000 DODGE DURANGO 4X4 FRONT DRIVESHAFT 
Edited by mogge65 2010-08-23 9:27 PM
 (Durango.jpg) (Durango.jpg)
Attachments
----------------
Durango.jpg (12KB - 307 downloads)
|
|
| |
|
Expert
Posts: 3577
Location: Blythewood, SC | Still no issues with this repair. The Dorman CV boot is working just fine. |
|
| |
|
Expert
Posts: 3400
Location: Chestertown, NY ( near Lake George) | 57plymouth - 2011-08-31 7:04 AM
Still no issues with this repair. The Dorman CV boot is working just fine. So is mine. |
|
| |
|

Expert 5K+
Posts: 8947
Location: WHEELING,WV.>>>HOME OF WWVA | just found a local to do a slip joint for @ 300$ , complete setup ----------------------------------------------------------------------later |
|
| |
|
Expert
Posts: 3577
Location: Blythewood, SC | Bumping again.
Still no issues. I checked it again while I had the car up in the air last week.
Edited by 57plymouth 2012-07-05 4:00 PM
|
|
| |
|

Extreme Veteran
Posts: 337
Location: UK | Thanks for the Bumps. It might have helped if I put "boot" in the search instead of "Gaiter". Don't you guys speak english?
I might go for the chrysler neon one. There is a few of them scattered around the UK. Cheers!
|
|
| |
|

Veteran
Posts: 234
Location: Chambersburg,PA | I need to replace the boot on my 60 Des,low mi car just cracked from age and sitting still in a barn for 24 yrs,will use the Neon boot. |
|
| |
|
Extreme Veteran
Posts: 337
Location: UK | Quick question. Inner or outer boot? |
|
| |
|
Expert
Posts: 3400
Location: Chestertown, NY ( near Lake George) | outer. |
|
| |
|

Expert
Posts: 3889
Location: Northen Virginia | Autozone part Part Number:
614-001 |
|
| |
|

Veteran
Posts: 241
Location: Southern CA | REDRAM - 2010-03-10 6:31 AM
wbower3 - 2009-01-30 4:31 PM
Dorman also makes a one peice 'quick boot' for current CV joints on front wheel drivers. The ones I used are in the Dorman catalogue at O'Reilly's. They have big and little. I believe that I used the bigger ones on the d/shaft of my '55. They go on just like the original factory boots. You disassemble the joint, ie take the balls and needle bearings off. work the boot over the cross shaft, small end first, and the after everything is good and greasy, using a very blunt tool, you stuff the boot through the small end of the outer housing . Once the stuffing operation is finished, you use either a strong tie-wrap, or the original clamping straps to secure the small end on the shaft and, if needed, trim the big end to the required length and securre it on the outer housing. Reassemble the balls and put the correct amount of grease in the joint, and reattach the sheetmetal dust cover. I took about an hour to do including cleaning up the joint and finding all of the needle bearings that fell on the floor when taken out of the parts washer..................LOL:) Walt
Yep...I did mine last summer, used the boot for an 01 NEON, (1 pc ) did all of the above, have driven it at leats 500miles since with no probs.
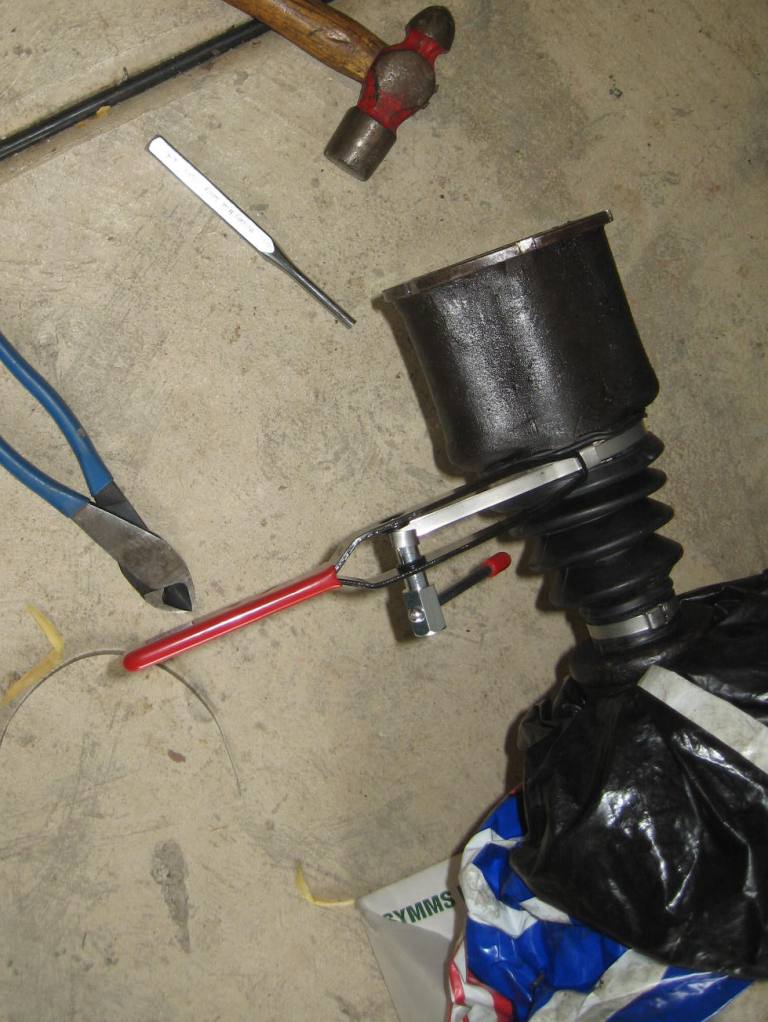
The info on this site is awesome, sure saves a lot of time and trouble. I just finished servicing mine and installing the Dorman Boot 614-001 (01 Neon), Autozone part number is also 614-001 & cost $15.99. Took about 1.5 hours on the bench, that includes cleaning each needle bearing with a paper towel. I didn't use the thin grease that comes in the kit, I used semi-synthetic u-joint/wheel bearing grease, thicker bodied like original. My 57 shop manual says not to use more than 2.5 ounces of grease in the assembly or you could risk throwing it out of balance. But 2.5 ounces is more than plenty. I also sprung $14 for a CV boot banding tool (epay) to get the band tightened to the right tension...
Edited by Leadfoot1000 2012-09-23 11:21 PM
 (003.JPG) (003.JPG)
Attachments
----------------
003.JPG (103KB - 244 downloads)
|
|
| |
|
Expert
Posts: 3889
Location: Northen Virginia | Thanks for the pictures, awesome results! |
|
| |
|
Expert
Posts: 1530
Location: ZH, Switzerland | Big thank you for all thread members who gave big hints. I assume I'll disassemble the trunnion sooner or later - Lord only knows when I'll find some time -and I'll install a 2001 Neon outer CV boot from RockAuto. I hope there is only old and hard grease inside and not too severely worn parts. At the same time or earlier I would disassemble the U-Joint at the rear to look after the needles. If the U-Joint is okay I'll regrease it and assemble it again.
Happy Motoring!
Dieter
|
|
| |
|

Expert 5K+
Posts: 7410
Location: northern germany | di_ch_NY56 - 2012-09-28 9:51 AM
I assume I'll disassemble the trunnion sooner or later - Lord only knows when I'll find some time -and I'll install a 2001 Neon outer CV boot from RockAuto. I hope there is only old and hard grease inside and not too severely worn parts.
Happy Motoring!
Dieter
you mean you drive around with a u joint that has been serviced who knows when, maybe never and the grease is 50+ years old? it takes only 1-2 hours to clean, repack, and install a new boot. i don't get it. |
|
| |
|
Expert 5K+
Posts: 7410
Location: northern germany | Leadfoot1000 - 2012-09-23 11:15 PM
The info on this site is awesome, sure saves a lot of time and trouble. I just finished servicing mine and installing the Dorman Boot 614-001 (01 Neon), Autozone part number is also 614-001 & cost $15.99. Took about 1.5 hours on the bench, that includes cleaning each needle bearing with a paper towel. I didn't use the thin grease that comes in the kit, I used semi-synthetic u-joint/wheel bearing grease, thicker bodied like original. My 57 shop manual says not to use more than 2.5 ounces of grease in the assembly or you could risk throwing it out of balance. But 2.5 ounces is more than plenty. I also sprung $14 for a CV boot banding tool (epay) to get the band tightened to the right tension...
looks great leadfoot! do not forget to use some sort of breather. felt works great. |
|
| |
|
Expert
Posts: 1530
Location: ZH, Switzerland | 1960fury - 2012-09-30 11:05 PM
di_ch_NY56 - 2012-09-28 9:51 AM
I assume I'll disassemble the trunnion sooner or later - Lord only knows when I'll find some time -and I'll install a 2001 Neon outer CV boot from RockAuto. I hope there is only old and hard grease inside and not too severely worn parts.
Happy Motoring!
Dieter
you mean you drive around with a u joint that has been serviced who knows when, maybe never and the grease is 50+ years old? it takes only 1-2 hours to clean, repack, and install a new boot. i don't get it.
I just ordered a CV boot and a Lisle CV joint boot banding tool to tighten the straps. I hope I could do the job within two or three weeks.
Happy Motoring!
Dieter
BTW: I'm not riding my Chrysli that much. Last time - when it was rather hot around - I drove about one to two hours (visit of Cedric at Lörrach) and I felt like noticing the propeller shaft after a while. Then I thought it's time to do the job. |
|
| |
|
Veteran
Posts: 241
Location: Southern CA | 1960fury - 2012-10-01 2:07 PM
looks great leadfoot! do not forget to use some sort of breather. felt works great.
Thanks, it's easier than it looks in the shop manual. I don't understand where I would need a felt breather?
|
|
| |
|
Expert 5K+
Posts: 7410
Location: northern germany | Leadfoot1000 - 2012-10-03 11:28 PM
1960fury - 2012-10-01 2:07 PM
looks great leadfoot! do not forget to use some sort of breather. felt works great.
Thanks, it's easier than it looks in the shop manual. I don't understand where I would need a felt breather?
sorry this is so late. use a strip of thick (around 1/16") felt between the boot and shaft and do not overtighten strap. |
|
| |
|
Expert
Posts: 3577
Location: Blythewood, SC | Bump for Austin
|
|
| |
|
Veteran
Posts: 295
| Hi, new to the forum, first post. I know this is a slightly old thread but I need some information.
I have a 57 Surburban and need to know what series the rear u joint is. The ball and trunion is good and tight. I see a kit on moparmall.com for 150 bux with the u joint, ball and trunion, boot etc but all I want is the rear u joint. I don't have it up in the air to measure it. I've got a hand full of minor things to do when I get it up on the hoist but I want to have all the parts I need before raising it. The pain in the arse about it is, with my hoist it's a little too close to the back wall so for most cars I back them in but for long vehicles like trucks, vans and 1957 Dodge Surburbans have pull them in forwards and switch the legs of the hoist around. Not that big of a deal but a pain in the arse. So when I'm ready to do it, again, I want to have all I need and do it all while it's up in the air. The auto parts stores so far have all told me their info only goes back to 58. I'm sure it's a common series joint but don't know which and they can't tell me.
Thanks in advance,
Wayne |
|
| |
|

Expert 5K+
Posts: 6502
Location: Newark, Texas (Fort Worth) | Mostly the same back to 1950's
"The info on this site is awesome, sure saves a lot of time and trouble. I just finished servicing mine and installing the Dorman Boot 614-001 (01 Neon), Autozone part number is also 614-001 & cost $15.99. Took about 1.5 hours on the bench, that includes cleaning each needle bearing with a paper towel. I didn't use the thin grease that comes in the kit, I used semi-synthetic u-joint/wheel bearing grease, thicker bodied like original. My 57 shop manual says not to use more than 2.5 ounces of grease in the assembly or you could risk throwing it out of balance. But 2.5 ounces is more than plenty. I also sprung $14 for a CV boot banding tool (epay) to get the band tightened to the right tension..."
"Just for reference:
The Precision Univeral joint part number for a 1957 six cyl. car is 315G
If you tear your ball and trunion boot, it can be replaced with Dorman Quick Boot number 314-531. This boot may also work for V-8 cars.
This boot is cheap, less than $15 if I recall. It is a two piece unit that is very easy to assemble. It has to be cut to the correct length, but it works fine. I now have about 500 miles on these parts at interstate speeds and they are functioning perfectly.
-----"
|
|
| |
|
Veteran
Posts: 295
| Sorry, I forgot to mention that it has the 325 poly v-8.
|
|
| |
|
Veteran
Posts: 295
| mstrug, could you please look and see if the v8 had a different u joint series than the v6? I noticed there was a difference in the kits for them, I have a feeling the rear ujoint is different.
Thanks,
Wayne |
|
| |
|

Expert
Posts: 3779
Location: NorCal |
The V8 and six u-joints are different and so are the rubber boots. |
|
| |
|
Expert 5K+
Posts: 8444
Location: Perth Australia | Jaded, you must be a younger feller, as I know a lot of younger fellers do this
There were no V6 engines installed in early mopars, they are a strait 6 or inline 6
Up until 1960 they used a flat head engine, then it went to a slant 6 (engine leans to one side), but they are all inline 6 engines
Its a habit that I have seen a bit that all 6 cyl engines are now called v 6's just because there are very few cars produced today with inline 6's and people think that all 6 cyl engines are called v6
The first time a saw a strait 8 was weird for me, I thought all 8s were v8's
Anyway, not picking on you, just a pet pieve for me 
|
|
| |
|
Veteran
Posts: 295
| ttotired - 2015-05-20 6:30 PM
Jaded, you must be a younger feller, as I know a lot of younger fellers do this
There were no V6 engines installed in early mopars, they are a strait 6 or inline 6
Up until 1960 they used a flat head engine, then it went to a slant 6 (engine leans to one side ), but they are all inline 6 engines
Its a habit that I have seen a bit that all 6 cyl engines are now called v 6's just because there are very few cars produced today with inline 6's and people think that all 6 cyl engines are called v6
The first time a saw a strait 8 was weird for me, I thought all 8s were v8's
Anyway, not picking on you, just a pet pieve for me
Actually I'm 49, I just misspoke. I meant to say 6, not V6 because I really wasn't sure if the 57 6 was a v motor or an inline. I do know the difference between a v-6, inline 6 and slant 6.
So, since you know that the 57 six cylinder engines were flat heads and definitely not a v-6 I assume you know what the U-joint series is? That is my question and why I replied to this thread.
Fine, you're not picking on me...but it seems like if someone replies to someones comment they would at least have the answer to the question they're asking, right?
Thanks,
Wayne |
|
| |
|

Expert
Posts: 1740
Location: Alaska | Look here
http://www.driveshaftspecialist.com/HTML%20Measure/UJ%20ID%20Guide....
I am pretty sure it is the 7260 series. |
|
| |
|
Expert 5K+
Posts: 6502
Location: Newark, Texas (Fort Worth) | for future ref.:
Outside Lock U-Joints by Series
Series Width Cap
1210 2.438 1.062 All 4 caps
1310 3.219 1.062 All 4 caps
1330 3.622 1.062 All 4 caps
1310 BC (Ford) 3.219 2 @ 1.062 (shaft) 2 @ 1.125 (pinion)
1330 BC (Ford) 3.622 2 @ 1.062 (shaft) 2 @ 1.125 (pinion)
1350 3.622 1.188 All 4 caps
1410 4.188 1.188 All 4 caps
Handy Measurement Conversion
1.062 = 1 1/16 2.438 = 2 7/16
1.125 = 1 1/8 3.219 = 3 7/32 (3 1/4 is OK)
1.188 = 1 3/16 3.688 = 3 5/8
4.188 = 4 3/16 (4 1/4 is OK) |
|
| |
|
Veteran
Posts: 295
| The plan was to know what series it was and have the part before I put it up on the hoist. The car's so long it won't fit in the spot most will and has to be turned around which means I have to swap the legs of the hoist around in order to do it. I didn't want to go to all the hassle of switching them just to measure the joint, switch them back so I can work on other stuff and when the part comes in switch them again. I've got a few things to do under there. I wanted to kill a few birds with one stone while it's up in the air. I was hoping someone had some reference material available to them that would definitively say what series or part number the rear joint is so I can order it but I guess that's not the case. The parts stores all have said their info only goes back to 58 for some reason and that I'll have to measure them to order them by series. Since I didn't want to go that route, I came here. Oh well, on to the next issue, the fuel pump seems to be going to hell. Gasket material is finding it's way into the needle and seat. My buddy has 4 other polys sitting there and not a darn one of them had the same fuel pump. Nor do any have the same carb so I rebuilt the one I had and now the accelerator pump is sticking. Pulled it back apart yesterday and honed the bore with a dremel with a piece of scotchbrite on it. Worked great but it's still sticking. It could be partly because of the pump issue and once it get's full fuel it'll operate correctly.
Edited by jaded13640 2015-05-22 9:45 AM
|
|
| |
|
Veteran
Posts: 295
| I really need the part number for the oil filter, a recommendation on oil grade to used on a well worn motor, (I'm thinking straight 30 weight becuase of it being a summer only car), the air filter and the rear U-joint. I also need a new headlight switch or at least the reostat dial part if it's seperateable
This car has no fuse box anywhere in it that I can find.
1957 Dodge Surburban 325 polyspheric V-8.
PLEASE!
Edited by jaded13640 2015-05-22 11:32 PM
|
|
| |
|
Expert
Posts: 2312
Location: Arizona | <p>You might even consider 40 weight oil in the summer if you are in a warmer area. Or a 20W-40 so it's not so thick when you first start it up but gains weight when it is fully warmed. Anothoer thing you could consider is the use of 30 wieght oil and a can of STP. STP contains a good amount of the zinc (I think it's zinc, it's the stuff they "took out" of the new oils). It's less expensive to use the STP and it's zinc additive, which helps protect flat tappet engines and it also makes the oil a bit more multi-viscosity, then to pay for the high dollar specialty oils that have extra zinc in them.</p>
Edited by jimntempe 2015-05-23 1:16 PM
|
|
| |
|
Veteran
Posts: 295
| Ok, this is a little weird... The straps that go into the rear end yoke ARE the caps. The rear end yoke has two knotches that the strap/cap goes into on the diameter of the cap. The picture I'm seeing on moparmall.com shows regular round caps in the kit that includes the ball and trunion and boot. The replacement may very well be a standard round cap and new straps. This sucks!
Edited by jaded13640 2015-05-23 1:34 PM
|
|
| |
|
Expert
Posts: 2312
Location: Arizona | jaded13640 - 2015-05-17 7:05 AM Hi, new to the forum, first post. I know this is a slightly old thread but I need some information. I have a 57 Surburban and need to know what series the rear u joint is. The ball and trunion is good and tight. I see a kit on moparmall.com for 150 bux with the u joint, ball and trunion, boot etc but all I want is the rear u joint. I don't have it up in the air to measure it. I've got a hand full of minor things to do when I get it up on the hoist but I want to have all the parts I need before raising it. The pain in the arse about it is, with my hoist it's a little too close to the back wall so for most cars I back them in but for long vehicles like trucks, vans and 1957 Dodge Surburbans have pull them in forwards and switch the legs of the hoist around. Not that big of a deal but a pain in the arse. So when I'm ready to do it, again, I want to have all I need and do it all while it's up in the air. The auto parts stores so far have all told me their info only goes back to 58. I'm sure it's a common series joint but don't know which and they can't tell me. Thanks in advance, Wayne Look here http://www2.dana.com/pdf/K350-1-DSSP.pdf on page 53. Maybe there is something useful there, they seem to list quite a few options. |
|
| |
|
Expert
Posts: 1740
Location: Alaska | I have a 57 Chrysler windsor parts car that has that style of rear u-joint, but since I'm not going to use it, have never researched the number, sorry. |
|
| |
|
Expert
Posts: 1740
Location: Alaska | I looked at that Spicer list and they show the cap style u-joint 5-1304X as a discontinued number. If it was my car, I would change the rear yoke to use the 7260 style of u-joint. |
|
| |
|
Veteran
Posts: 295
| Good idea, I was actually considering something like that myself. That yoke actually looks like a round cap would fit in if the diameters matched. I've got the car ready to go on the hoist tomorrow. I jacked it up to get a look at and do some measuring on the u joint but I was having a really hard time getting a good view in the cramped quarters. It'll be a breeze on the hoist.
Once I have the numbers I'll see what series matches and try it.
My only concern about changing the yoke on the rear end is that it match the drive shaft. The yoke would obviously have to match the U joint style on the drive shaft AND would have come out the same distance, or close to it, from the rear end so that the drive shaft length would work.
I've got a couple of yokes for 8 3/4 but it seems to me the old ones were a different diameter pinion than the new ones. 489 vs. 741/742. While I have it up I'll see what number is on the pig. I don't know if they were 489's all the way back then or not.
Either way I'll need to measure the u joint that's on it and determine what series will fit the drive shaft and if it'll work in the existing yoke. If not, if I've got a yoke and it will work on that rear end...
All this over a worn u joint.
Again, the picture on the "kit" from moparmall shows four round caps. The kit does NOT show a set of straps which leads me to believe it's either a generic picture or they assume you're changing out the yoke. Of course tomorrow's a holiday so I won't find anything out from them on that till Tuesday at the soonest.
If anyone has any knowledge about those rear ends, they're series, what's interchangeable and what the best way of going about this is, I'm all ears. I'm really kind of surprised something as common as a U joint would be discontinued. You see a billion 57 chevys out there. I'm guessing the u joints for them are in stock at autozone. |
|
| |
|
Expert
Posts: 1740
Location: Alaska | Wayne, even Mopar discontinued that style after 57, IIRC. The 489 diffs. weren't used until the mid to late 60s. I believe the 741/742 yokes will interchange but not sure. Any difference in length would be negligible. I have a spare yoke but check with John at BigM, he is closer. |
|
| |
|
Expert
Posts: 3779
Location: NorCal |
All yokes prior to '69 were 10-spline but, with the introduction of the 489 in '69 they could be either 10 or 29-spline. Ditto for the 741, after '68 the could be either. |
|
| |
|
Veteran
Posts: 295
| Stopped at Autozone for a u joint...big mistake. An overweight, 18 year old hispanic girl with a tattoo of her baby daddy's name on her neck looked at me like I had lobsters crawling out of my ears when I said I didn't have an application, and that I just needed a 7620 series U joint. LOL
Finally the smartest guy in the place walked up and started pulling up possible applications and pulling parts until one matched my dimensions. The existing yoke will not accept a 7620 series joint which is what has to be used on the shaft. I supposed a bas***d joint could be used if you didn't have another yoke but I had one. The one I had that worked was off a 7 1/4 out of a 67 Baracuda. At least that's what my buddy said he thought it must have come from. My only concern is the new yoke has a thicker area under the nut. With it on the pinion the nut doesn't go nearly as far down. But I'm sure it'll be fine as long as it's tight. Some locktight probably would have been a good idea but I didn't think about it till just now.
I also had a leaky pinion seal, of course Autozone gave me the wrong one but I got lucky, I dug through my old gaskets and seals and actually found one.
I typically don't deal with Autozone but my normal source was closed today. It's a good old fashioned store where the people selling parts actually know parts. The Advance Auto near me is just about as bad as A zone unless I know the part number and can tell them what to look up or one guy is there who really knows his stuff. I have no clue why he works there, he could literally be running a service department at a dealership.
I also found another Stromberg WW that my buddy had since God knows when but it's throttle shaft is just as sloppy as mine. I can't seem to win there. Those have a very long amount of the shaft protruding from the base plate and the throttle lever is kind of big. On top of that they seem to all have pretty beefy return springs on them. At idle the spring that holds the accelerator pump down will hold the throttle part way open so I assume that's why they used such strong springs. I'm assuming that those reasons are why it's common for the throttle shafts to be sloppy on the WW's. It looks like I'll end up buying an NOS one off ebay unless I get lucky and find one with a good base plate.
Anyway, thank everyone for all your help on the u joint issue.
Been a long day, off to bed.
Wayne
Edited by jaded13640 2015-05-26 12:25 AM
|
|
| |
|
Elite Veteran
Posts: 705
Location: California | the numbers no good. Anybody know of a different number for a two piece quick boot? working on a v8 powerflite car |
|
| |
|
Elite Veteran
Posts: 705
Location: California | Bought an outer boot for a 2001 neon. Its way too big and can't be trimmed. The number ending in 001 does not come up. |
|
| |
|
Expert
Posts: 2312
Location: Arizona | I saved the below info from an earlier thread..
install a 2001 Neon outer CV boot from RockAuto.
use a strip of thick (around 1/16") felt between the boot and shaft and do not overtighten strap. (that's to allow the air inside to breathe) |
|
| |
|
Expert
Posts: 3577
Location: Blythewood, SC | Well, now we know.
That two piece CV joint boot left the building this weekend. Coming back from a cruise in about 1.5 hours away from home it flew apart. So if anyone wonders how long this will last, about 8 years. |
|
| |
|
Expert
Posts: 2312
Location: Arizona | Interesting. Rear end ratio's are about 3 to 1. So when those boots are used on a CV joint they only spin about 1000 rpm at highway speeds. On a drive shaft it would spin 3000 rpm. Many "spinning thing" forces go up as the square of speed. So three times the speed could be as much as 9 times the centrifugal force trying to separate the two halves of the split boot. Amazing it stays on at all in that application. |
|
| |
|
Expert
Posts: 3577
Location: Blythewood, SC | You know I'm going to toss another one on. 8 years is a long time, and the part is pretty cheap. |
|
| |