
|
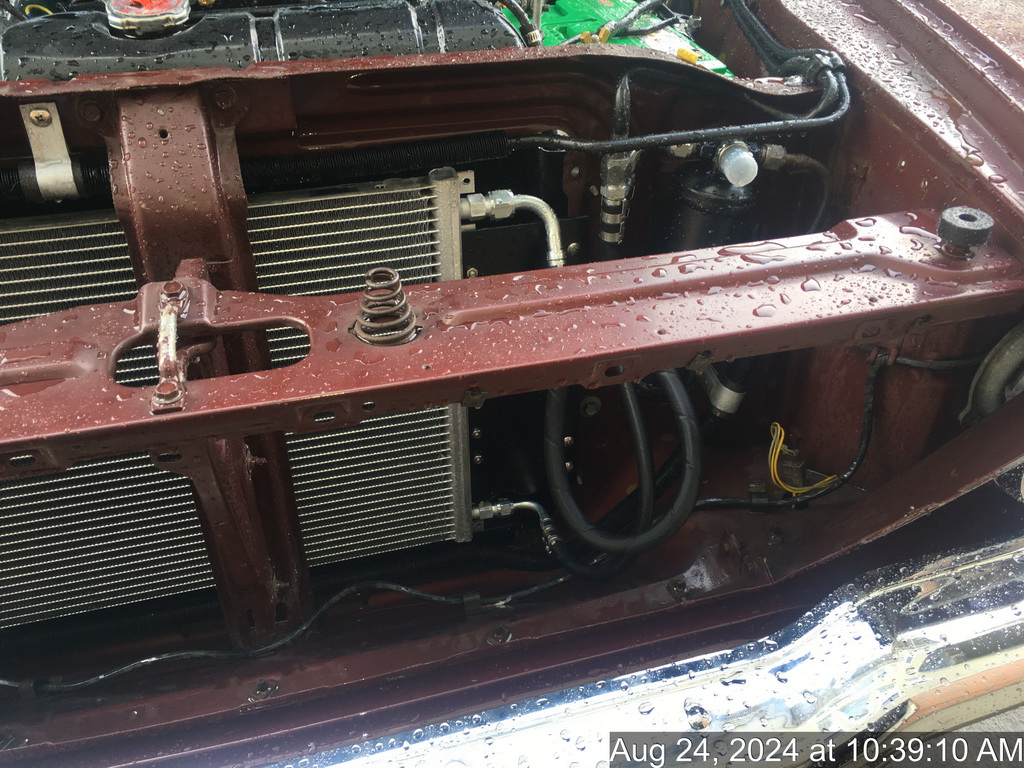
Before I forget the details, here is a little write up on air conditioning condensers for a 300K. I assume it would be the same for the 300J. James Removal of old condenser: There is no way to get to the bolts that hold the condenser in place without removing the radiator. I came up with another way. This method destroys the old condenser,
although if careful, one could do it and save it. First you need to have the grill out. Second you need to pull the 10 bolts that hold the center post. This is the brace that holds the hood latch bottom bar and
keeps the crossbar stuff. Be careful, once you pull it do not lean on that center bar as it will bend. You will NOT be able to pull it out. The sheet metal cut out on the bottom pan will not allow for it to some up. The pre-cooler and the condenser make it
so that it will not slip past. Next, cut the tubes that come out of the right side of the condenser. You need to do this to get access to the condenser mounting nuts. Once out of the way take
a Dremel Tool and cut the spring nuts and studs flush with the condenser frame. The bolts will drop away behind it. Fish them out later. Make sure you take the fittings from not only the condenser but the pre cooler. Then lift on the condenser and pre cooler to make enough room to pull the center
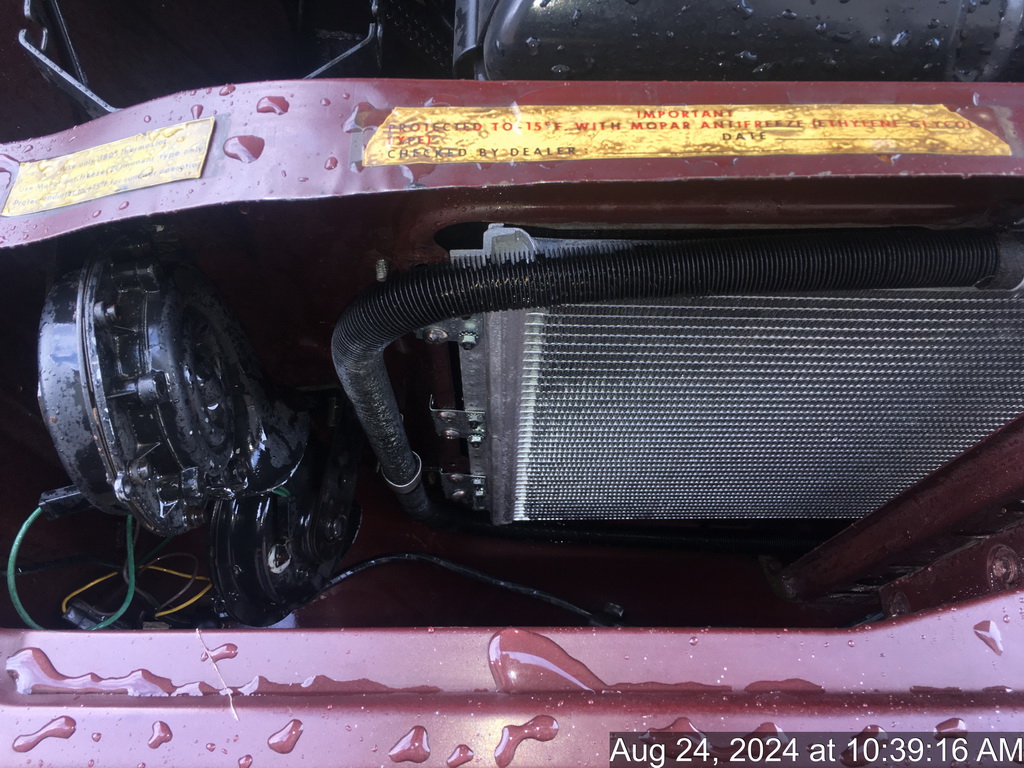
bar out. Then remove the condenser and the pre cooler. New Condenser. I used an Old Air Products SuperCool condenser. Part number 11-1621 with mounting kit Part Number 49-0042.
I took the mounting kit brackets and cut them just past the 3rd hole. I bent over the third hold to give it a little more rigidity. I used three of
them. I used the supplied nuts and bolts to secure the brackets to the condenser. I then drilled holes to mount it to the lip of the radiator support. **** Warning *** Use a little block of wood then drilling and or use a ½ long out of the chuck
drill bit. If you are not backed or using a short bit and push through you can go right into the radiator. Use a number 21 drill bit and use some #12 stainless-steel Truss Head Sheet metal screws ½ inch long. These left side brackets will flex and that is a good thing. Not I have the condenser frame right up against the radiator support. With this set up, you can flex
the right side out away from the radiator to get to the back side and hold some machine screws.
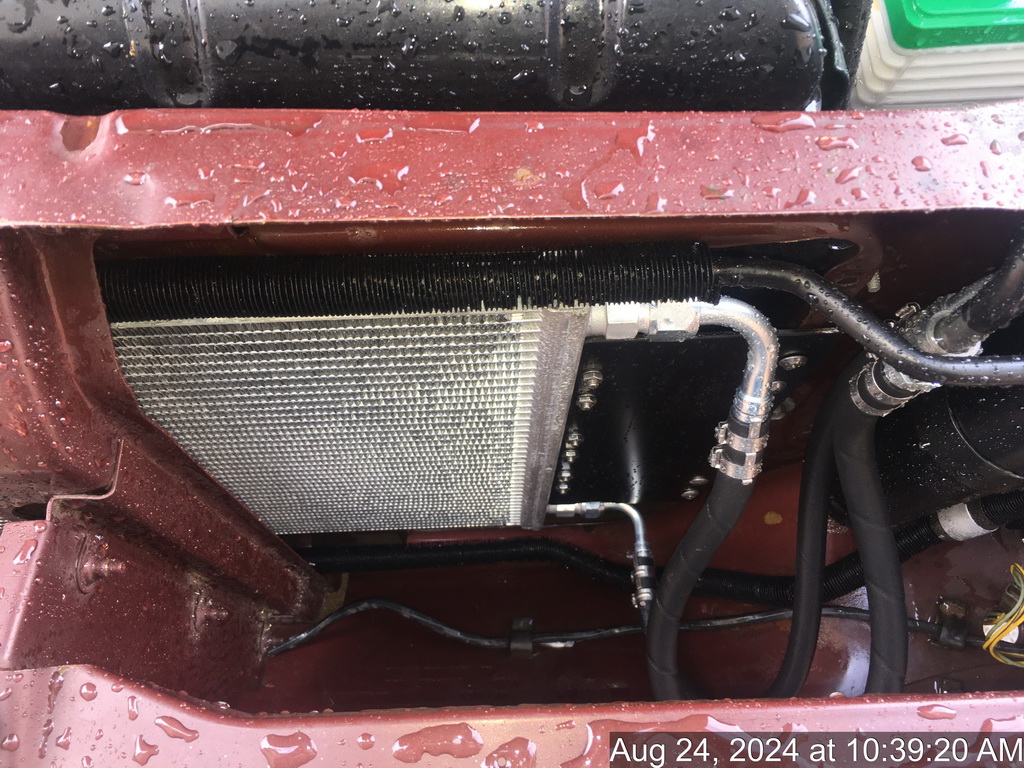
For the right side I made up a 1/8-inch aluminum plate that was 12 inches long and I cut it to 4.5 inches wide. I made a mistake that took me 45 minutes with a
Dremel Tool to fit. The plate was too long and / or I should have ground a big curve at the ends for the wrench heads. So either make the plate about 11 inches and center it, or make it 12 inches and cut a good clearance notch for the wrench heads. You want
the place to cover most of that area, so the idle air drawn from the fan pulls through the condenser and not around it. If I should in time see a radiator issue, I could drill four holes in the plate for some air to bypass the condenser. Time will tell for that. I used some 10-32 screws ½ long to mount the plate to the right side of the condenser. I was out of the nuts that have star washers in them, so I used regular
star washers and a nut. Once that is in place you push it to the radiator support and mark and drill the holes. Again number 21 drill but. {I did predrill the aluminum plate for the screws to slip thought and then use those holes to mark the radiator surround
for drilling. Make the holes in the plate a little big to give you wiggle room. Once done then screw the plate to the radiator support. One can place the pre-cooler in place with the new condenser and now there is enough clearance to slip the
center radiator support back into place. Given that the new condenser is a little shorter and thinner. Look over carefully my photos to make sure you mount it in the same spot so that you have the bottom clearance to get that brace back in with the condenser
and pre-cooler bolted down. You do NOT want the pre-cooler fins touching the condenser.
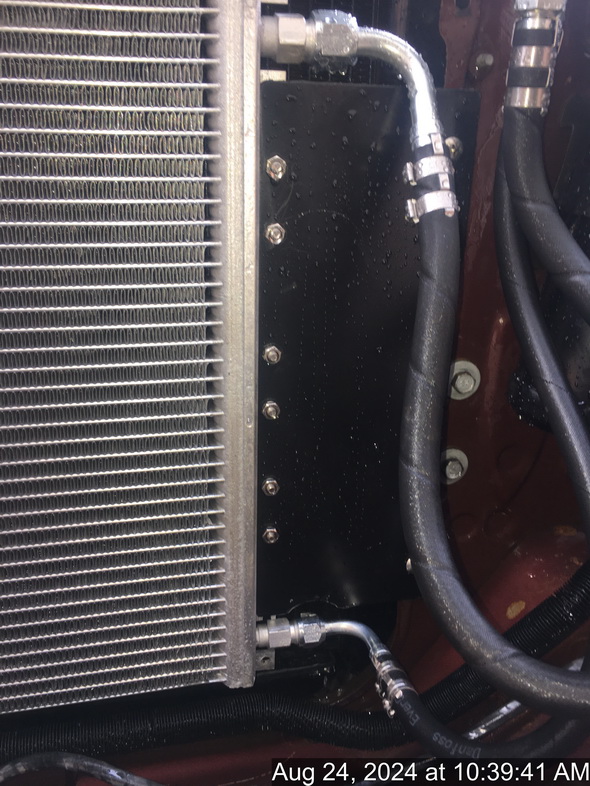
For the lines connection: I used the E-Z-Clip system for the hoses. You need: Two Number Six (#6) 90-degree female fittings. One Number Eight (#8) male straight fitting.
(#8 Male Insert Oring Straight) One Number Eight (#8) 90-degree female fitting. Two feet of each #6 and #8 A/C hose SPECIFICALLY for the E-Z-Fit fittings. All the fittings you can get from Cold Hose in Florida. Get an O-ring gasket set and
some O-ring mineral oil to lubricate the rings and the threads well before you screw them down. Make sure that you place all the clamping rings on the hose before you put on the fittings. Also, you will need to buy a special wrench for the fittings. Good luck to the next poor soul that needs to do this. I hope this helped. For archives go to http://www.forwardlook.net/300-archive/search.htm#querylang --- You received this message because you are subscribed to the Google Groups "Chrysler 300 Club International" group. To unsubscribe from this group and stop receiving emails from it, send an email to chrysler-300-club-international+unsubscribe@xxxxxxxxxxxxxxxx. To view this discussion on the web visit https://groups.google.com/d/msgid/chrysler-300-club-international/CY5PR19MB6171DBC78704A5F943911980938A2%40CY5PR19MB6171.namprd19.prod.outlook.com. |
Attachment:
IMG_8017_resize.JPG
Description: IMG_8017_resize.JPG
Attachment:
IMG_8018_resize.JPG
Description: IMG_8018_resize.JPG
Attachment:
IMG_8019_resize.JPG
Description: IMG_8019_resize.JPG
Attachment:
IMG_8021_resize.JPG
Description: IMG_8021_resize.JPG